.NET MAUI ComboBox Commands
The .NET MAUI ComboBox provides commands that let you manipulate its selection.
SelectAll Command
SelectAllCommand (ICommand)—Selects all items from the source.
To use the SelectAll command, set the selection mode to Multiple. If you invoke the command in Single selection mode, the ComboBox throws an exception.
ClearSelection Command
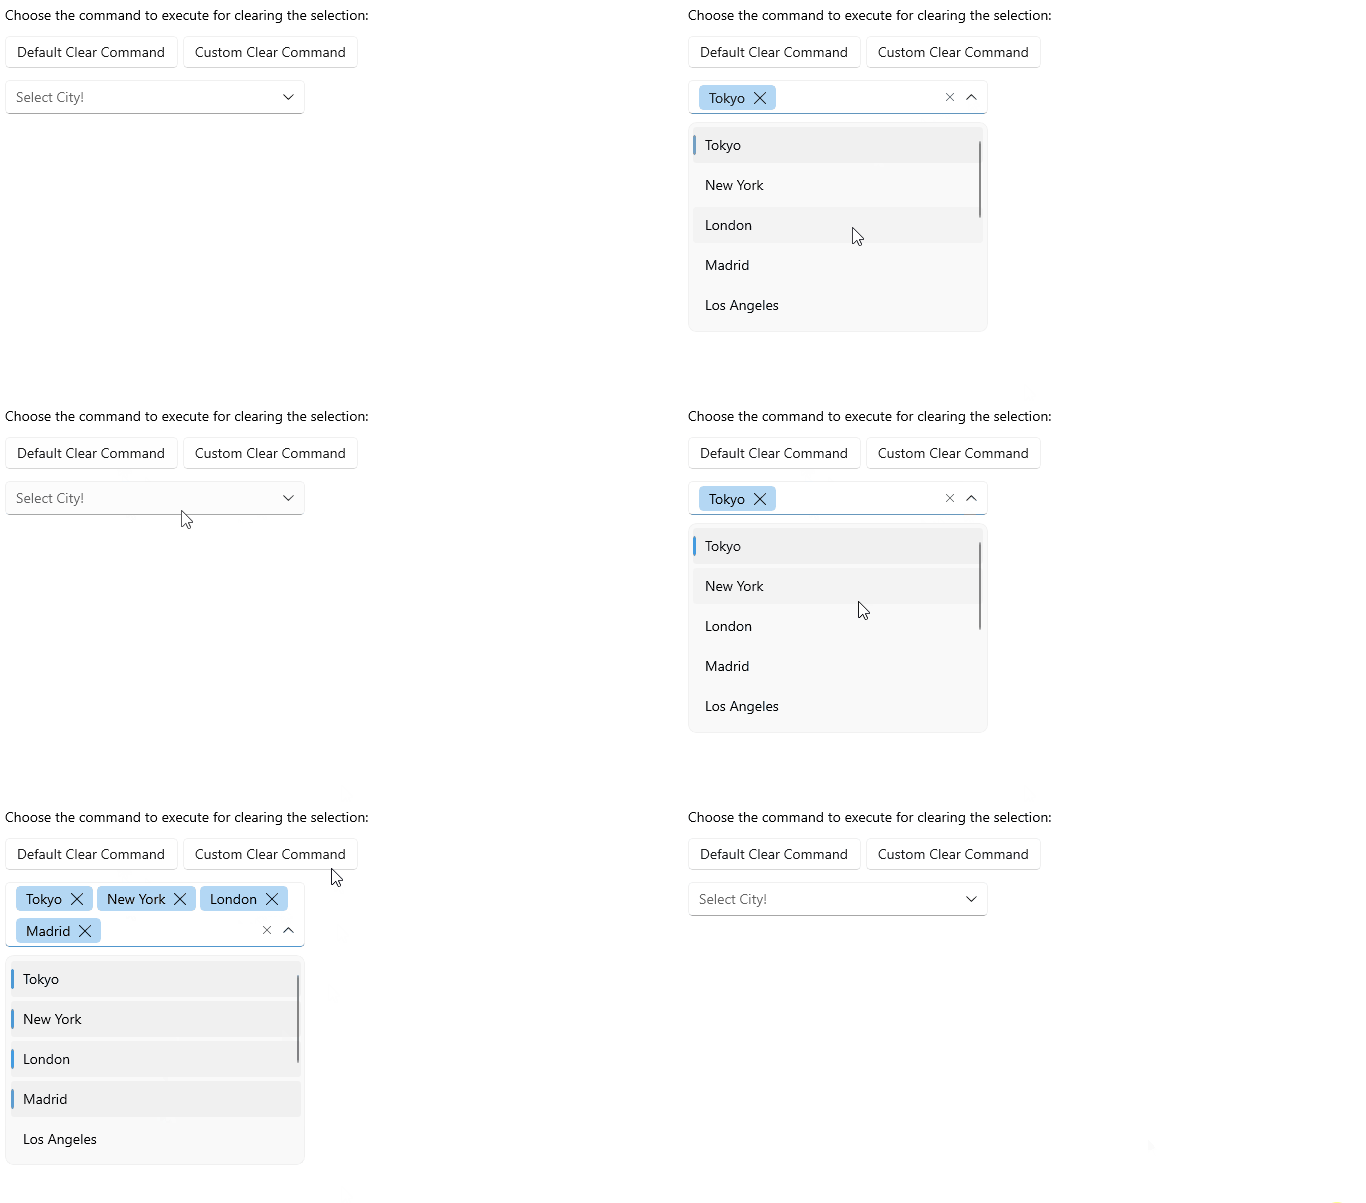
ClearSelectionCommand (ICommand)—Sets the selection to null. If you use the Multiple selection mode, this command will clear all selected items. You can override the default behavior and create a custom command.
The example below shows both cases, the default ClearSelectionCommand execution and custom ClearSelectionCommand implementation:
<HorizontalStackLayout Spacing="5"
                       Margin="0, 0, 0, 12">
    <Button Text="Default Clear Command"
            Command="{Binding Source={x:Reference comboBox}, Path=ClearSelectionCommand}"
            AutomationId="customClearButton"/>
    <Button Text="Custom Clear Command"
            Clicked="ExecuteCustomCommanClicked"
            AutomationId="defaultClearButton"/>
</HorizontalStackLayout>

<telerik:RadComboBox x:Name="comboBox"
                     Placeholder="Select City!"
                     SelectionMode="Multiple"
                     IsDropDownClosedOnSelection="False"
                     WidthRequest="{OnPlatform MacCatalyst=300, WinUI=300}"
                     HorizontalOptions="{OnIdiom Default=Fill, Desktop=Start}"
                     ItemsSource="{Binding Items}"
                     DisplayMemberPath="Name"
AutomationId="comboBox"/>class CustomClearSelectionCommand : ComboBoxClearSelectionCommand
{
public override async void Execute(object parameter)
{
bool executeDefault = await App.Current.Windows[0].Page.DisplayAlert("Command", "Execute command?", "Yes", "No");
if (executeDefault)
{
base.Execute(parameter);
}
}
}
private void ExecuteCustomCommanClicked(object sender, EventArgs e)
{
this.comboBox.ClearSelectionCommand = new CustomClearSelectionCommand();
this.comboBox.ClearSelectionCommand.Execute(true);
}
RemoveToken Command
RemoveTokenCommand(ICommand)—Removes a token from the ComboBox selection inMultipleselection mode. This command is called from the token'sDataTemplatewhen the user taps the label for clearing the token.
Example with the default
RemoveTokenCommand
The example below shows how you can call the default RemoveTokenCommand from a custom TokenTemplate implementation:
<telerik:RadComboBox ItemsSource="{Binding Items}"
Placeholder="Select a city"
SelectionMode="Multiple"
DisplayMemberPath="Name"
WidthRequest="{OnPlatform MacCatalyst=300, WinUI=300}"
HorizontalOptions="{OnPlatform MacCatalyst=Start, WinUI=Start}">
<telerik:RadComboBox.TokenTemplate>
<DataTemplate>
<telerik:RadBorder BackgroundColor="#80CBC4"
CornerRadius="{OnPlatform Default=4, Android=16, iOS=8}"
Margin="{OnPlatform Default='2, 4', WinUI='2, 3'}"
VerticalOptions="Center">
<HorizontalStackLayout Padding="{OnPlatform Android='16, 6', iOS='8, 6, 8, 7', MacCatalyst='5, 2.5', WinUI='10, 3, 8, 2'}"
Spacing="4">
<Label Text="{Binding Name}"
TextColor="Black"
FontSize="{OnPlatform iOS=13, MacCatalyst=13}"
VerticalTextAlignment="Center" />
<Label FontFamily="TelerikFontExamples"
Text=""
FontSize="{OnPlatform Default=12, Android=14, iOS=14}"
TextColor="#198679"
Margin="{OnPlatform Android='0, 3, 0, 0'}"
VerticalTextAlignment="Center">
<Label.GestureRecognizers>
<TapGestureRecognizer Command="{Binding RemoveTokenCommand, Source={RelativeSource AncestorType={x:Type telerik:RadComboBox}}}"
CommandParameter="{Binding BindingContext, Source={RelativeSource Self}}" />
</Label.GestureRecognizers>
</Label>
</HorizontalStackLayout>
</telerik:RadBorder>
</DataTemplate>
</telerik:RadComboBox.TokenTemplate>
</telerik:RadComboBox>
Example with a custom
RemoveTokenCommand
The example demonstrates a custom RemoveTokenCommand implementation - there is a confirmation dialog before the default command to be executed.
- Create a custom command class that inherits from
ComboBoxRemoveTokenCommandand override, for example, itsExecutemethod:
public class CustomComboBoxRemoveTokenCommand : ComboBoxRemoveTokenCommand
{
    public override async void Execute(object parameter)
    {
        bool executeDefault = await App.Current.Windows[0].Page.DisplayAlert("Confirm", "Remove token?", "Yes", "No");
        if (executeDefault)
        {
            base.Execute(parameter);
        }
    }
}- Apply the newly created command class to the
RadComboBox'sRemoveTokenCommand:
<telerik:RadComboBox ItemsSource="{Binding Items}"
                     Placeholder="Select a city"
                     SelectionMode="Multiple"
                     DisplayMemberPath="Name"
                     WidthRequest="{OnPlatform MacCatalyst=300, WinUI=300}"
                     HorizontalOptions="{OnPlatform MacCatalyst=Start, WinUI=Start}">
    <telerik:RadComboBox.RemoveTokenCommand>
        <local:CustomComboBoxRemoveTokenCommand />
    </telerik:RadComboBox.RemoveTokenCommand>
</telerik:RadComboBox>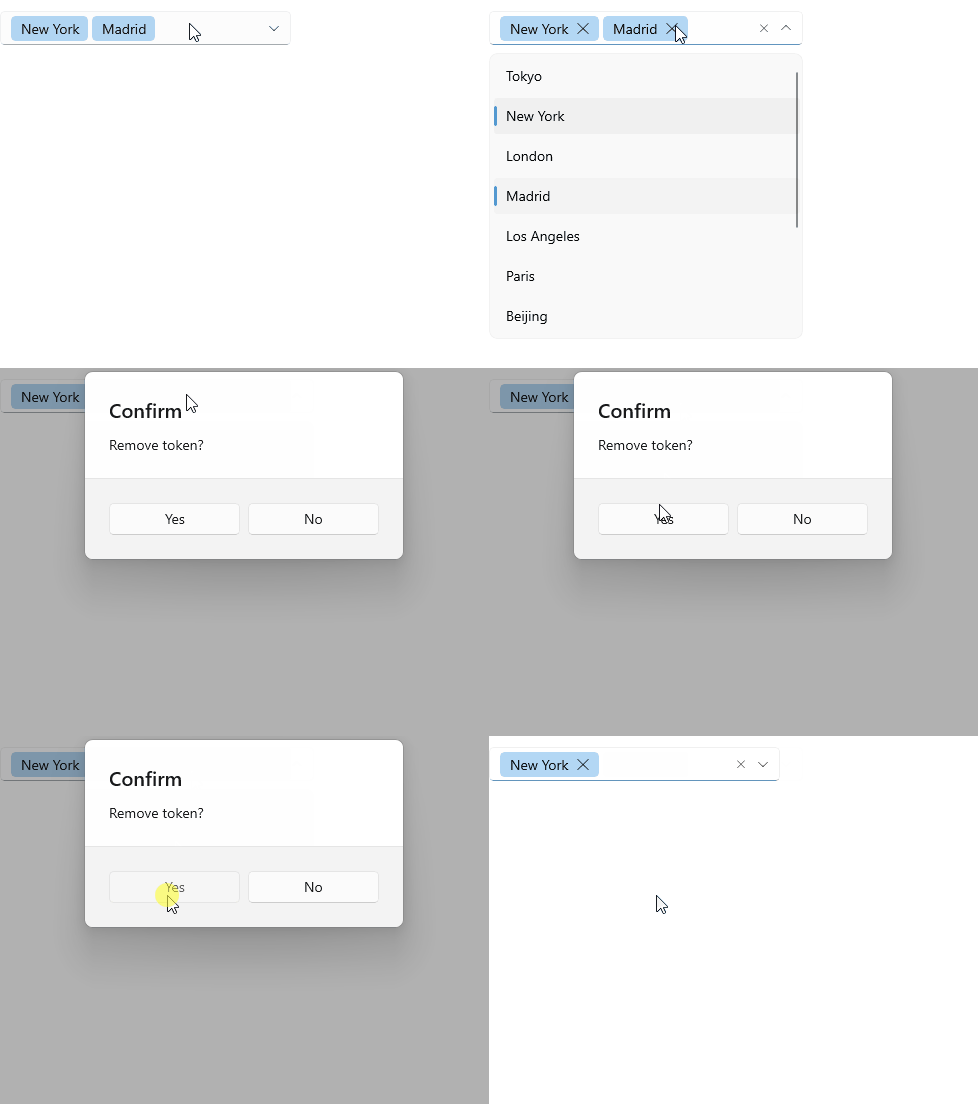
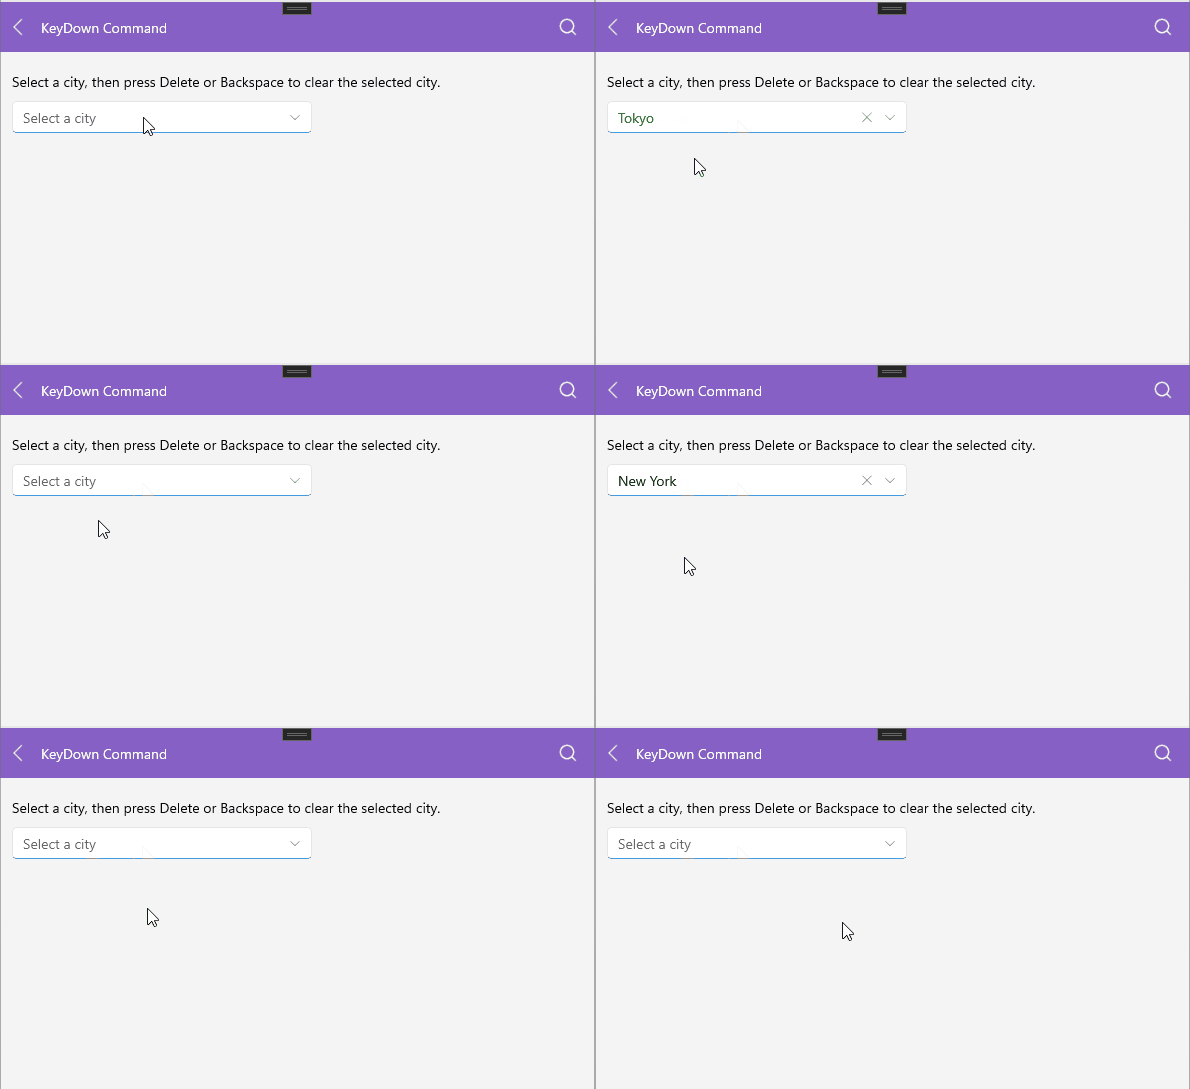
KeyDown Command Desktop
The ComboBox allows you to handle key press events through the KeyDownCommand(ICommand). This command is useful for implementing custom logic when a key is pressed. The parameter of the command is of type Telerik.Maui.KeyboardInfo and provides information about the key that is pressed.
The example below demonstrates a custom KeyDownCommand implementation:
- Define a custom
KeyDownCommandthat inherits fromComboBoxKeyDownCommandand override itsExecutemethod:
public class CustomComboBoxKeyDownCommand : ComboBoxKeyDownCommand
{
    public override void Execute(object parameter)
    {
        var keyboardInfo = (KeyboardInfo)parameter;
        var comboBox = this.ComboBox;

        if (comboBox != null && !comboBox.IsDropDownOpen &&
            (keyboardInfo.key == RadKeyboardKey.Delete || keyboardInfo.key == RadKeyboardKey.Back))
        {
            var clearSelectionCommand = comboBox.ClearSelectionCommand;
            if (clearSelectionCommand != null && clearSelectionCommand.CanExecute(null))
            {
                clearSelectionCommand.Execute(null);
            }

            keyboardInfo.Cancel = true;
            return;
        }

        base.Execute(parameter);
    }
}- Apply the newly created command class to the
KeyDownCommandof the ComboBox:
<telerik:RadComboBox ItemsSource="{Binding Items}"
                     Placeholder="Select a city"
                     DisplayMemberPath="Name"
                     WidthRequest="300"
                     HorizontalOptions="Start">
    <telerik:RadComboBox.KeyDownCommand>
        <local:CustomComboBoxKeyDownCommand />
    </telerik:RadComboBox.KeyDownCommand>
</telerik:RadComboBox>- Add the telerik namespace to the XAML page:
xmlns:telerik="http://schemas.telerik.com/2022/xaml/maui"- Define sample data model:
public class City
{
    public string Name { get; set; }
    public int Population { get; set; }
}- Define the
ViewModel:
public class ViewModel
{
    public ViewModel()
    {
        this.Items = new ObservableCollection<City>
        {
            new City { Name = "Tokyo", Population = 13929286 },
            new City { Name = "New York", Population = 8623000 },
            new City { Name = "London", Population = 8908081 },
            new City { Name = "Madrid", Population = 3223334 },
            new City { Name = "Los Angeles", Population = 4000000},
            new City { Name = "Paris", Population = 2141000 },
            new City { Name = "Beijing", Population = 21540000 },
            new City { Name = "Singapore", Population = 5612000 },
            new City { Name = "New Delhi", Population = 18980000 },
            new City { Name = "Bangkok", Population = 8305218 },
            new City { Name = "Berlin", Population = 3748000 },
        };
    }

    public ObservableCollection<City> Items { get; set; }
}
This is the result of the custom KeyDownCommand implementation: