Consuming Data from Azure Functions
This tutorial demonstrates how to configure Azure Functions to serve data to a KendoReact Grid.
Prerequisites
- Basic knowledge on the organization of Azure Portal
Creating Azure Functions Applications
- Follow the Create your first function in the Azure portal > Create a function app quickstart guide.
- Provide
kendo-grid-functionsas a name to the application and set the name of the storage account tokendogridfunctions. - In Azure Portal, go to the newly created kendo-grid-functions application.
Creating HTTP-Triggered Functions for CRUD Operations
To set the read, create, destroy, and update functions, apply the following steps individually to each of them.
-
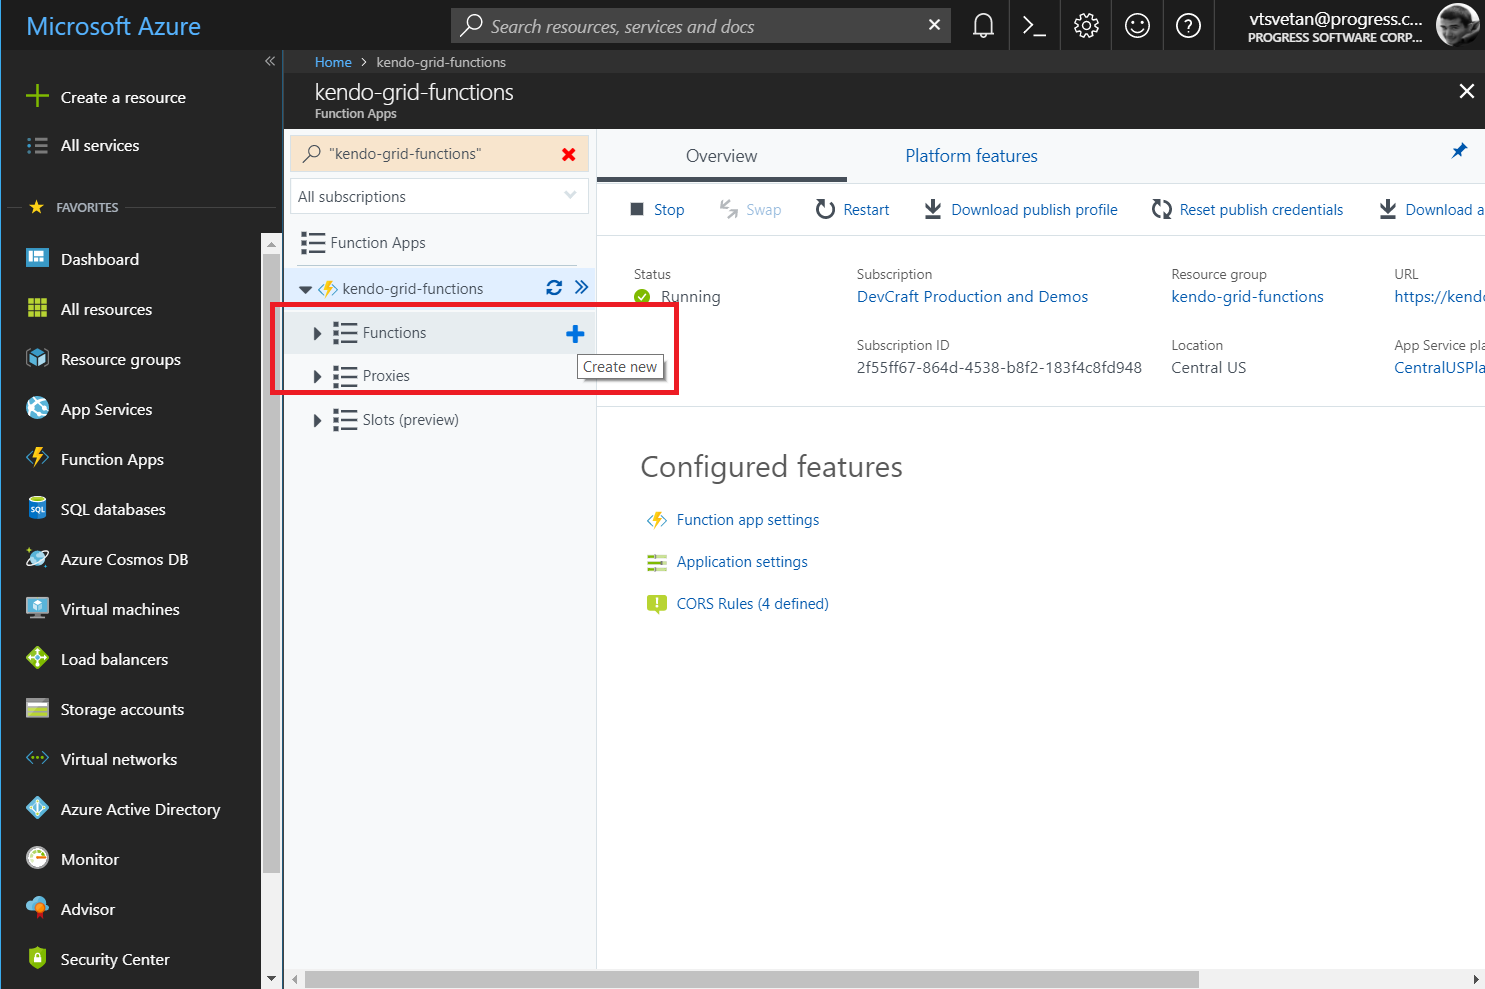
On the left-side panel and under the application name, click the + (plus) symbol. When the Functions section is hovered, the symbol appears to the right.
-
Implement the four actions in the
ItemControllerwhich will be called by the Grid on performing CRUD operations. Provide names for the actions—for example,KendoRead,KendoCreate,KendoUpdate, andKendoDestroy.Figure 1: Overview of the application functions
-
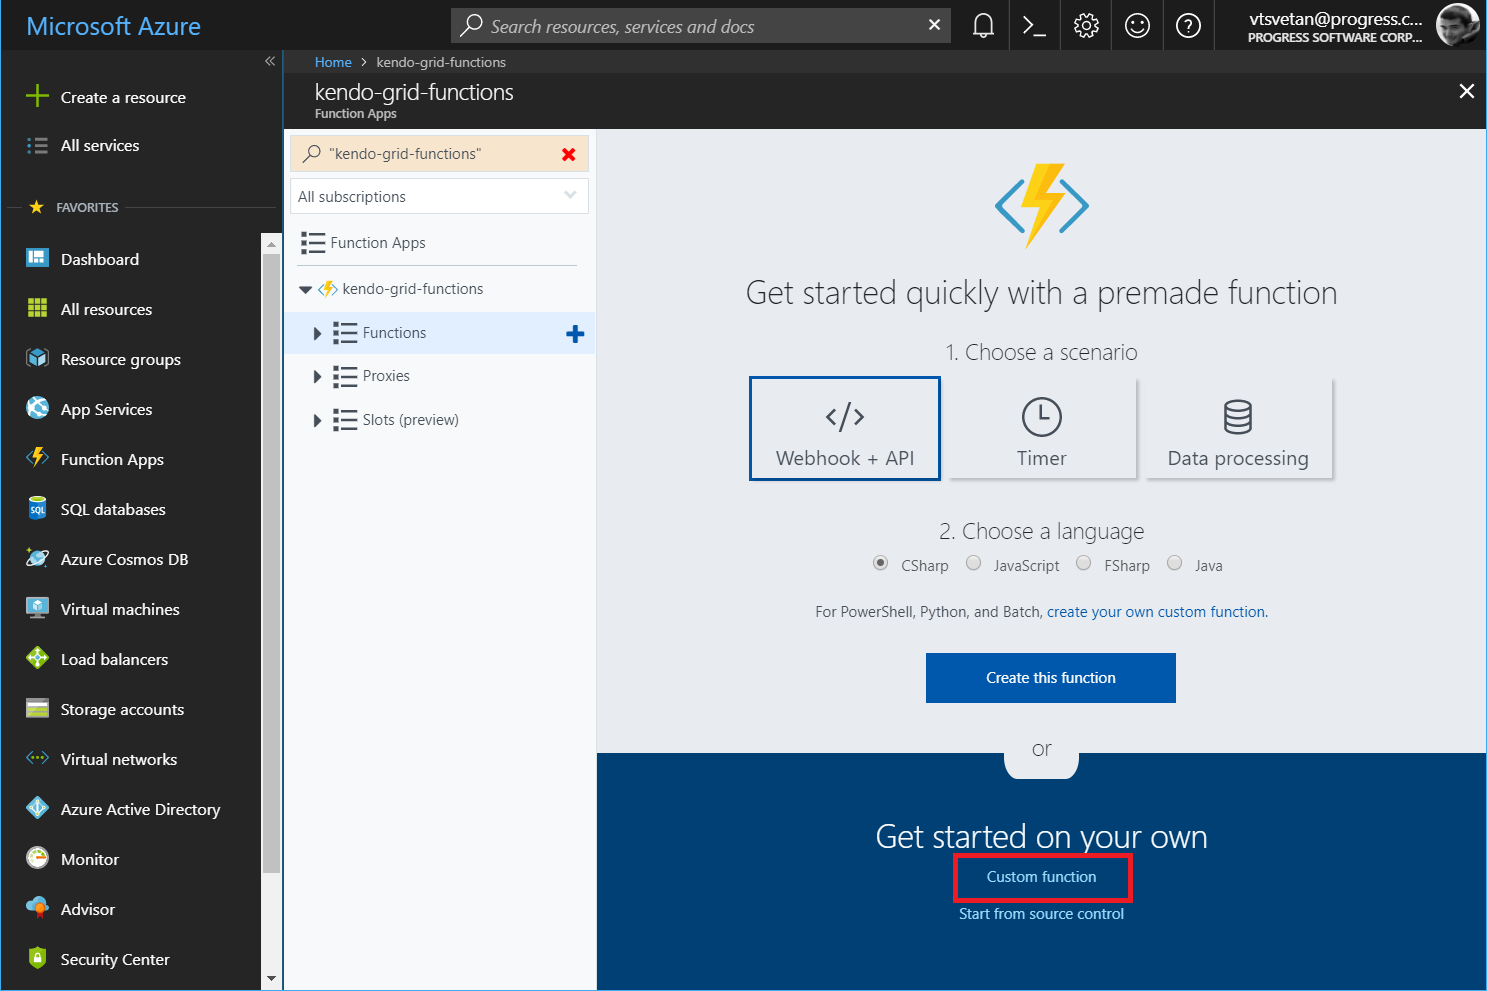
If the Get started quickly with a premade function screen appears, click the Custom function link at the bottom.
Figure 2: The Get started quickly with a premade function window
-
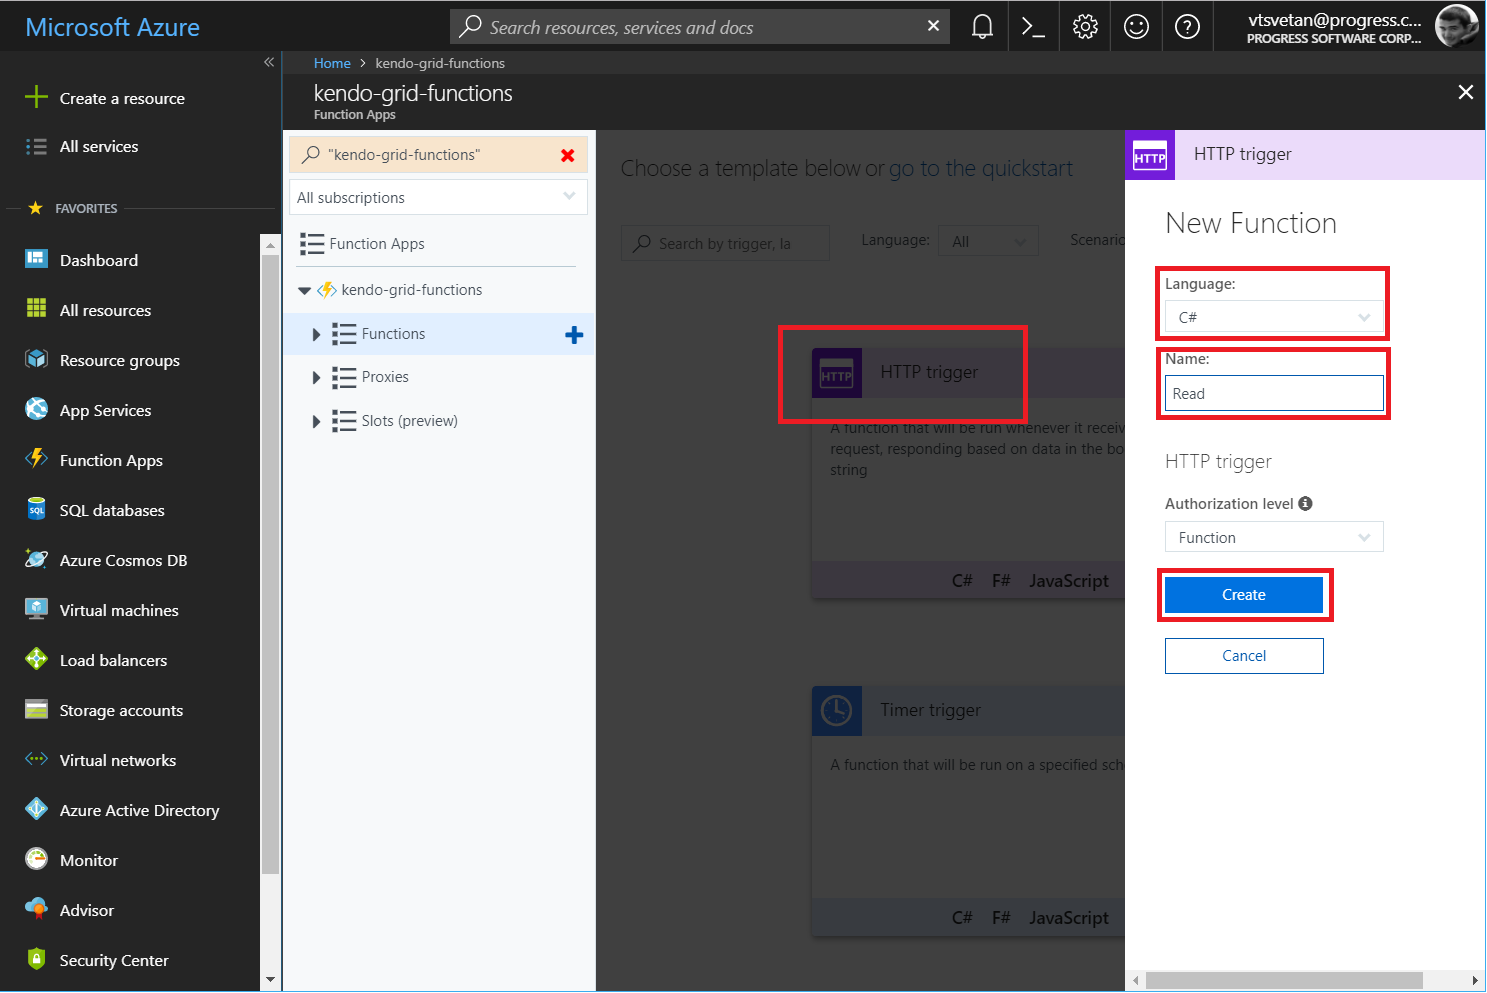
Click the HTTP trigger option. On the panel that appears to the right, select the language and fill in a meaningful name for each function. As this tutorial will later on use the Read, Create, Update, and Destroy names for the four functions and will implement the Azure Functions in C#, select the
C#language.Figure 3: Configuring a new HTTP trigger function
Integrating Input for the Read Function
-
Expand the
Readfunction and, under the function name on the left navigation panel, click the Integrate section. -
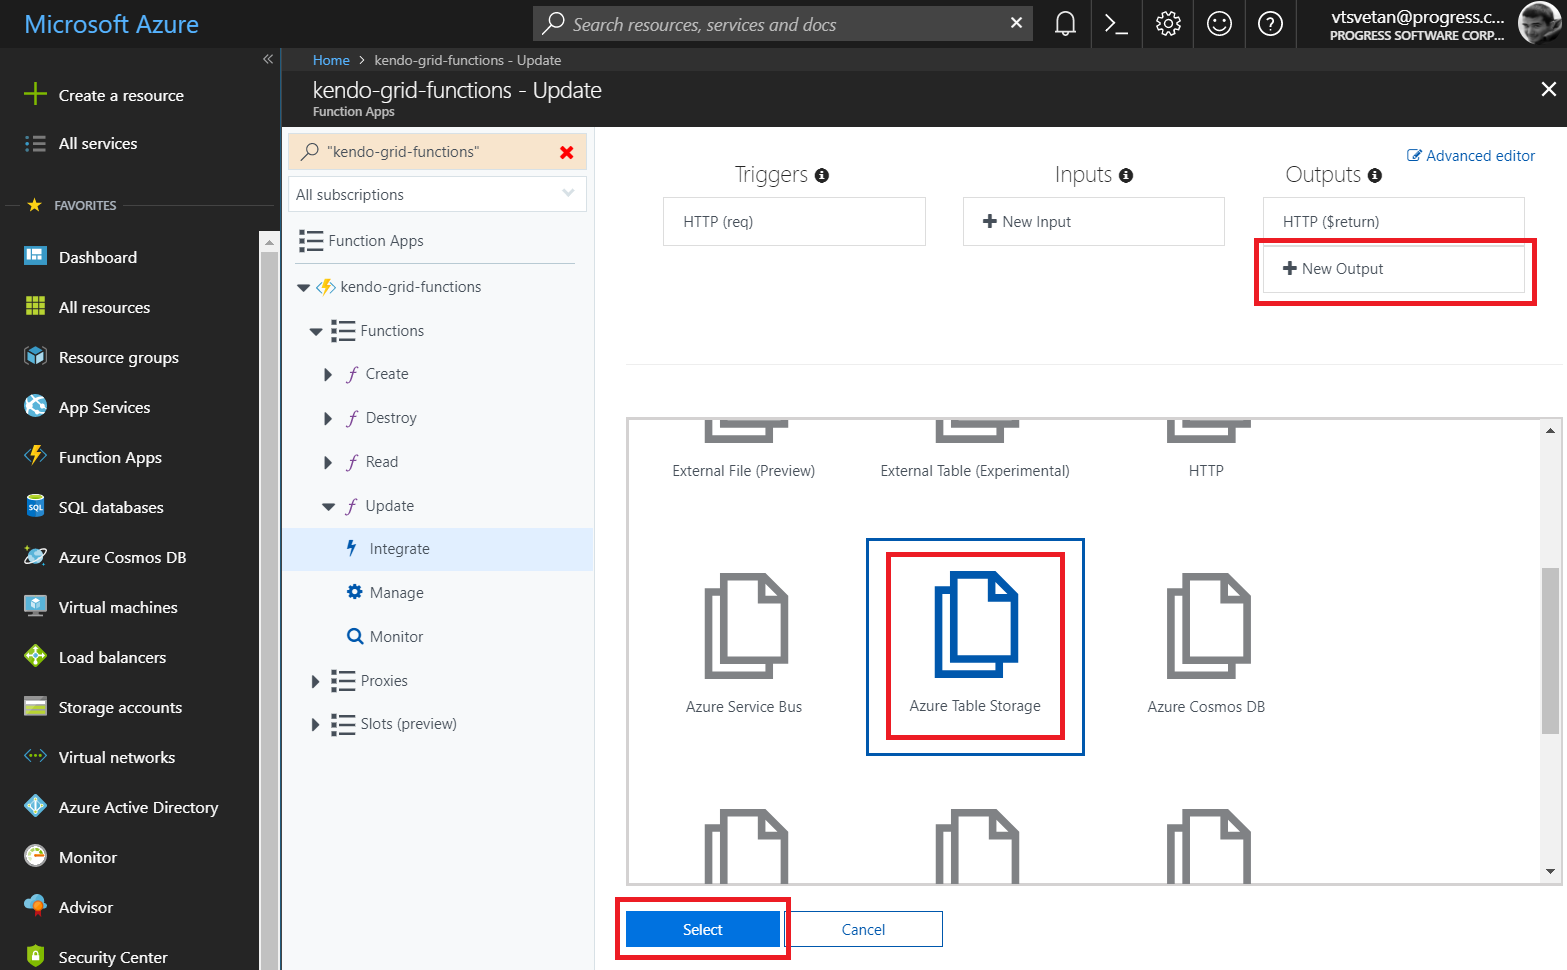
In the Inputs section, click the New Input button.
-
Select Azure Table Storage as the input storage that will be integrated. Click Select.
Figure 4: Integrating the new input for the function

-
Type
Productfor the partition key of the table. -
Choose the maximum number of records to read. In this case, the default value of 50 will be preserved.
-
In Storage account connection to the right of the field, click the new link.
-
Select the kendogridfunctions connection that was created during the initial setup of the application.
-
Change Table name to Products.
-
Click Save to save the newly integrated input table.
Figure 5: Configuring the new input

Integrating Output for the Create, Destroy, and Update Functions
Configure an output integration for each of the other three functions (create, destroy, and update):
-
Click New Output.
-
Select Azure Table Storage and click Select.
Figure 6: Integrating the new output for the function
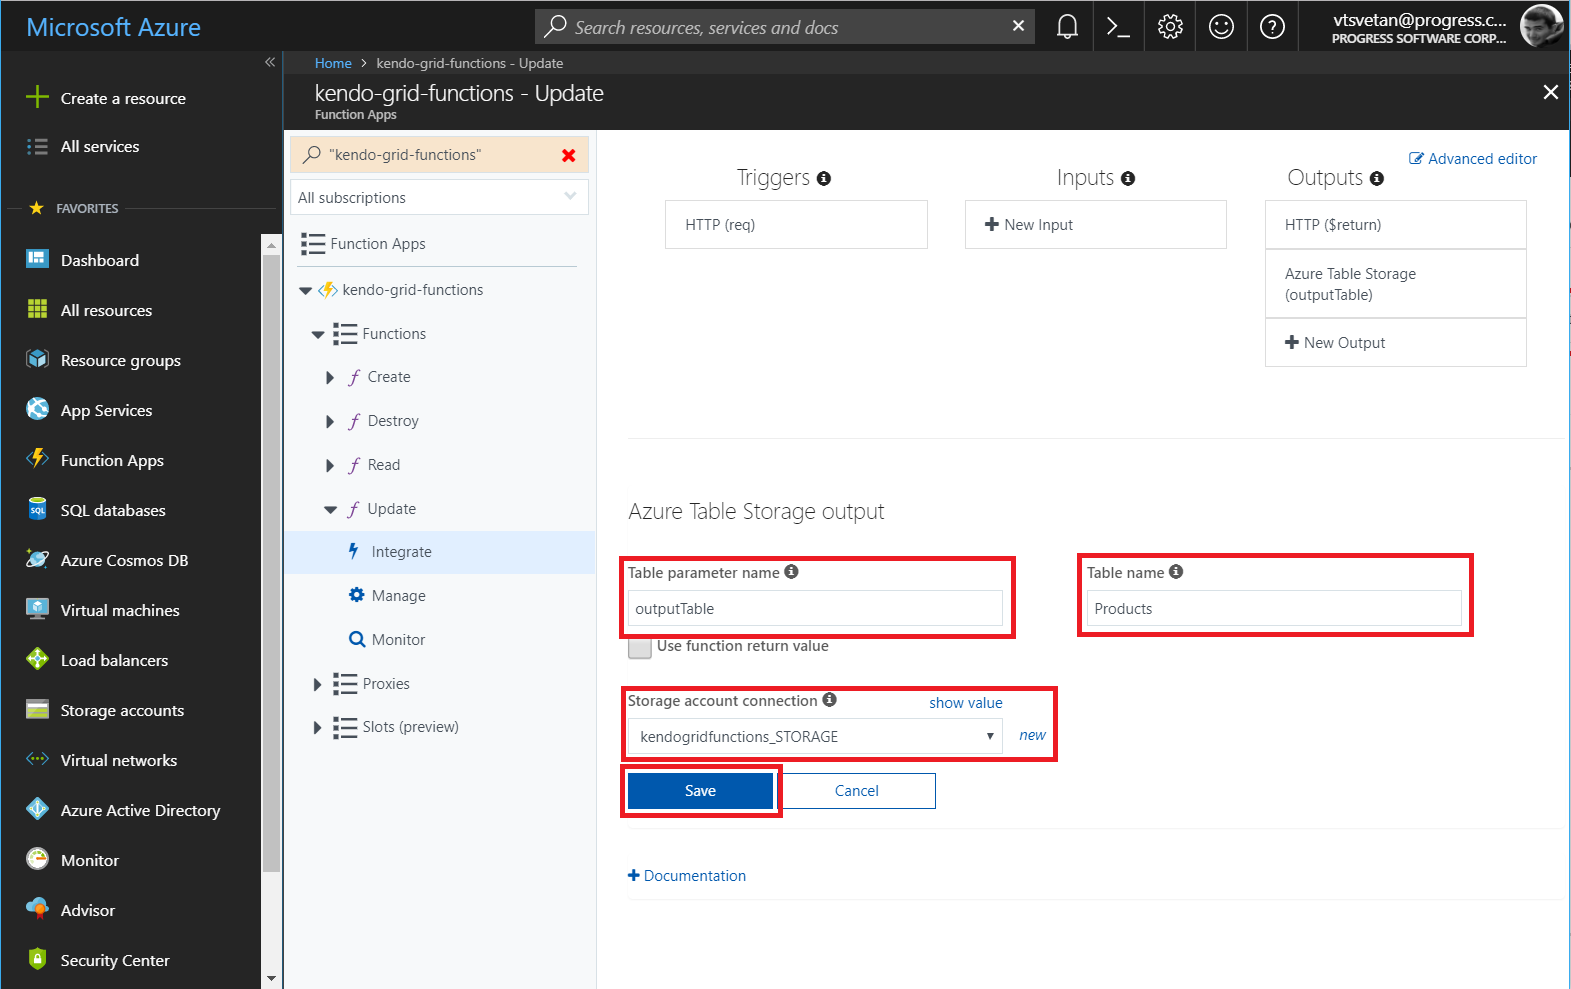
-
Select kendogridfunctions_STORAGE for the storage account connection.
-
Change Table name to Products.
-
Click Save to save the newly integrated output table.
Figure 7: Configuring the new output
Implementing the Model
The actual implementation requires you to first create a definition for the Product class:
-
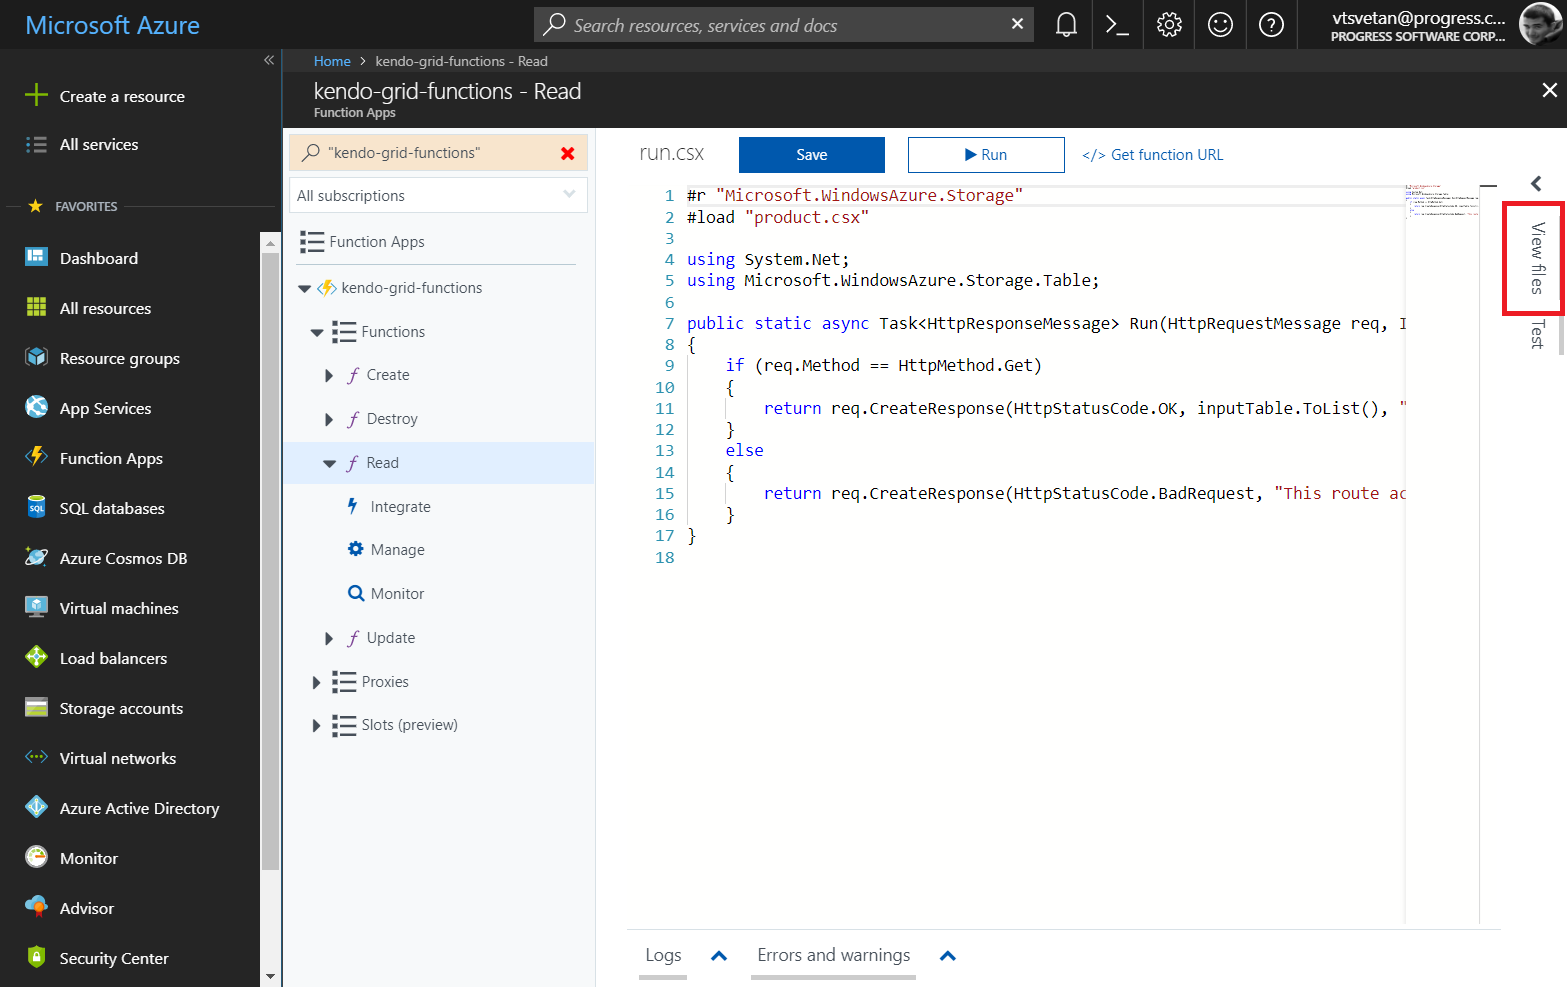
Select the
Readfunction. -
On the right side, click View files.
Figure 8: Opening the function files
-
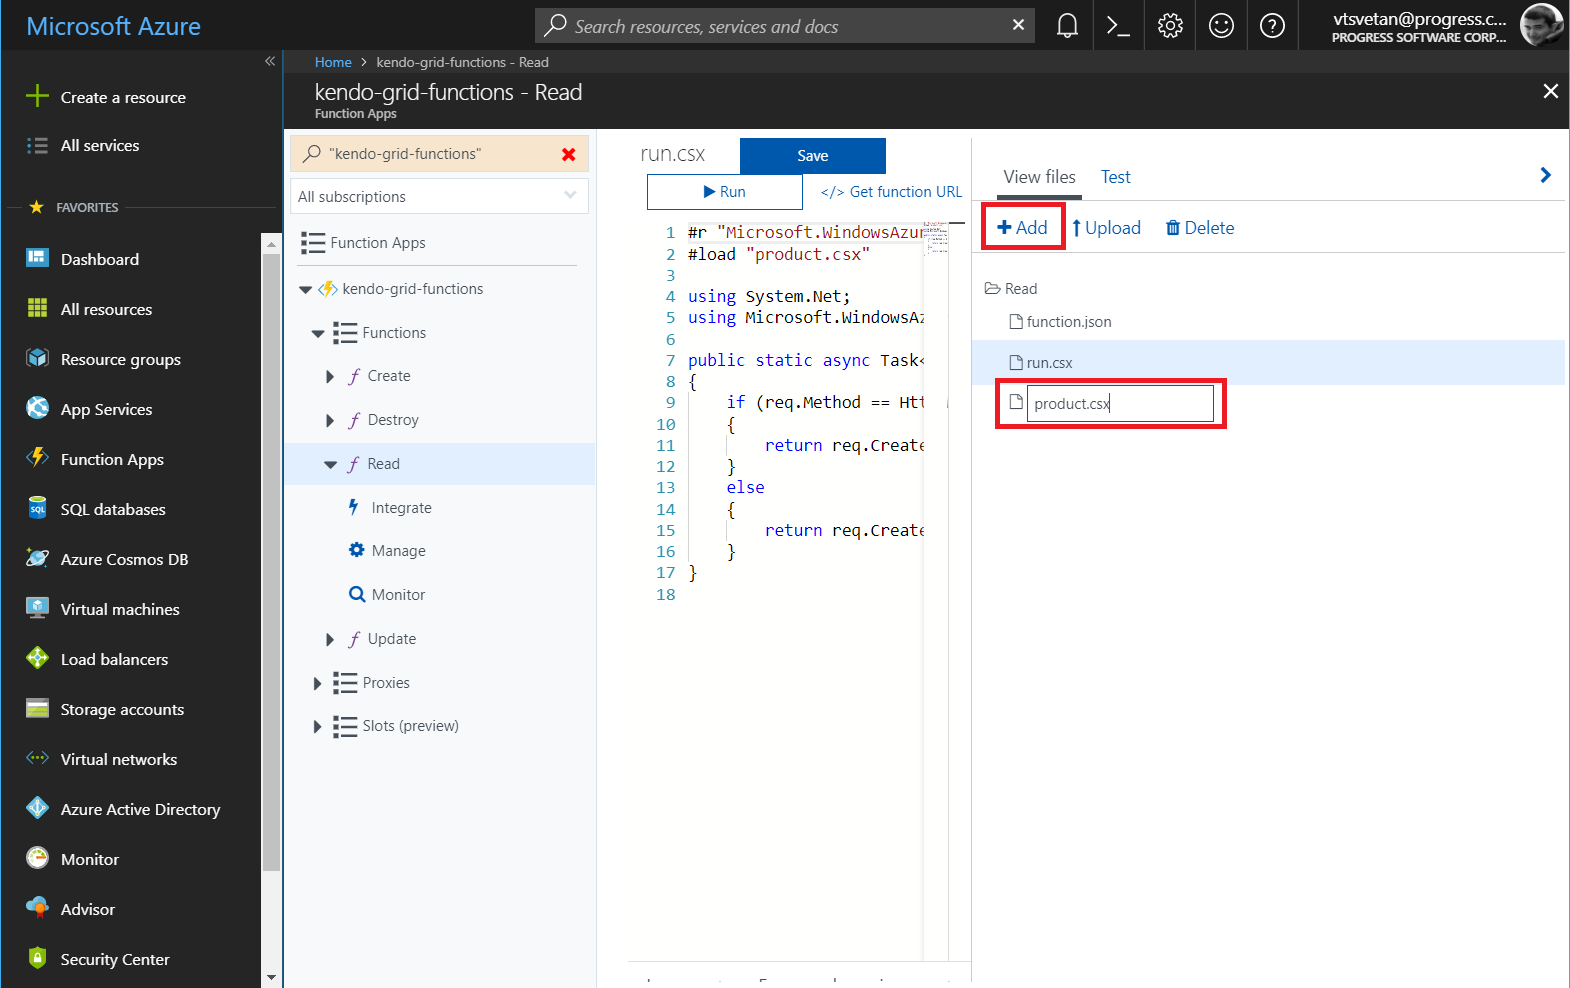
Click the Add button and provide the
product.csxname to the new file.Figure 9: Creating a new function file
-
Place the following class definition in the file.
csusing Microsoft.WindowsAzure.Storage.Table; public class Product :TableEntity { public string ProductName { get; set; } public double UnitPrice { get; set; } public int UnitsInStock { get; set; } public bool Discontinued { get; set; } public Product ToEntity() { return new Product { PartitionKey = "Product", RowKey = this?.RowKey, ProductName = this?.ProductName, UnitPrice = this.UnitPrice, UnitsInStock = this.UnitsInStock, Discontinued = this.Discontinued, ETag = "*" }; } }
Implementing the Read Function
-
Under the
Readfunction, open therun.csxfile. -
Before the initial use, include the following
loaddirective that allows you to use theModelclass definition in the actual function.cs#load "product.csx" -
Include a reference to the
Microsoft.WindowsAzure.Storageand ausingconfiguration for theTablelibrary.cs#r "Microsoft.WindowsAzure.Storage" … using Microsoft.WindowsAzure.Storage.Table; -
Modify the definition of the
Runfunction method. The newly addedinputTableparameter allows you to get and return the products that are stored in the integrated table storage.cspublic static async Task<HttpResponseMessage> Run(HttpRequestMessage req, IQueryable<Product> inputTable, TraceWriter log) { if (req.Method == HttpMethod.Get) { // Return the Products table as a list return req.CreateResponse(HttpStatusCode.OK, inputTable.ToList(), "application/json"); } else { return req.CreateResponse(HttpStatusCode.BadRequest, "This route accepts only GET requests."); } }
Implementing the Create, Destroy, and Update Functions
Now you can proceed with the implementation of the other three functions.
-
Make all three of them load the
Productclass and refer theMicrosoft.WindowsAzure.StorageandNewtonsoft.Jsonassemblies. -
Add the respective
usingconfigurations. As a result, theRunmethods for each function differ.cs#r "Newtonsoft.Json" #r "Microsoft.WindowsAzure.Storage" #load "..\Read\product.csx" using System.Net; using Microsoft.WindowsAzure.Storage.Table; using Newtonsoft.Json;
The following example demonstrates the Run method for the Create function.
public static async Task<HttpResponseMessage> Run(HttpRequestMessage req, CloudTable outputTable, TraceWriter log)
{
    dynamic body = await req.Content.ReadAsStringAsync();
    Product data = JsonConvert.DeserializeObject<Product>(body as string);
    Product entity = data.ToEntity();
    string newKey = Guid.NewGuid().ToString();

    entity.RowKey = newKey;
    var operation = TableOperation.Insert(entity);
    await outputTable.ExecuteAsync(operation);

    return req.CreateResponse(HttpStatusCode.OK, entity, "application/json");
}
The following example demonstrates the Run method for the Destroy function.
public static async Task<HttpResponseMessage> Run(HttpRequestMessage req, CloudTable outputTable, TraceWriter log)
{
    dynamic body = await req.Content.ReadAsStringAsync();
    Product data = JsonConvert.DeserializeObject<Product>(body as string);
    Product entity = data.ToEntity();

    var operation = TableOperation.Delete(entity);
    await outputTable.ExecuteAsync(operation);

    return req.CreateResponse(HttpStatusCode.OK, entity, "application/json");
}
The following example demonstrates the Run method for the Update function.
public static async Task<HttpResponseMessage> Run(HttpRequestMessage req, CloudTable outputTable, TraceWriter log)
{
    dynamic body = await req.Content.ReadAsStringAsync();
    Product data = JsonConvert.DeserializeObject<Product>(body as string);
    Product entity = data.ToEntity();

    var operation = TableOperation.Replace(entity);
    await outputTable.ExecuteAsync(operation);

    return req.CreateResponse(HttpStatusCode.OK, entity, "application/json");
}
Configuring the Application
As the implementation is already in place, now you need to add specific configurations to the application and for each of the four functions.
-
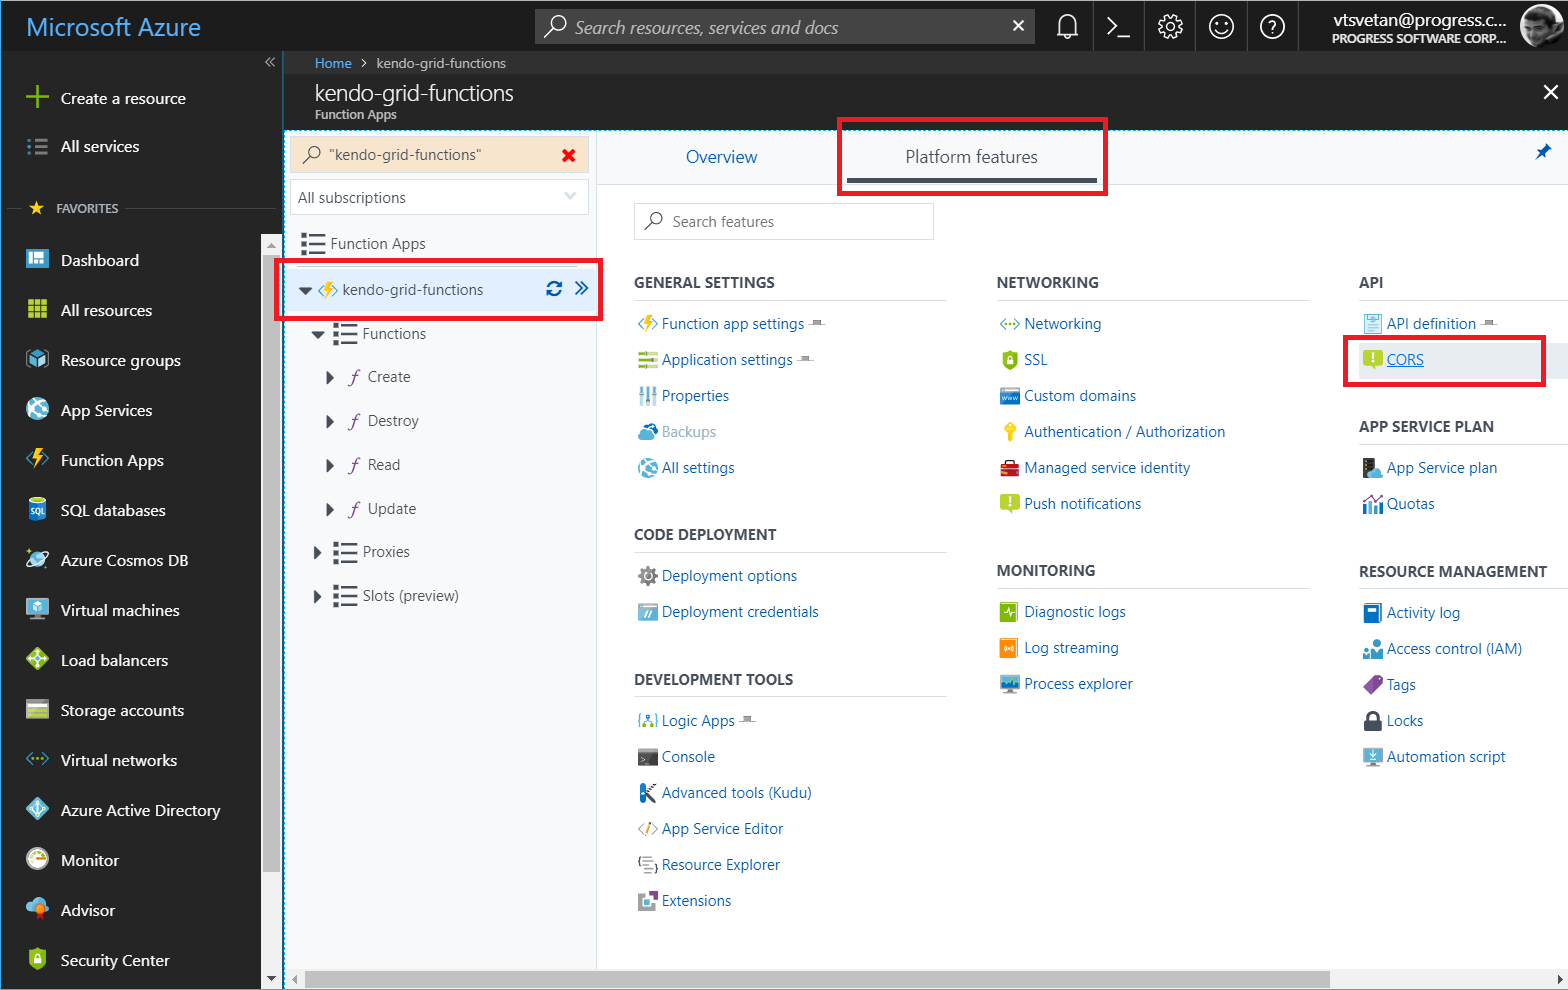
Click the application name and select Platform features.
-
Under the API section, click CORS.
Figure 10: The platform features of the application
-
Add the domain origin of the client-side application that will consume the functions data. Click Save.
-
Go to the
Readfunction and open thefunction.jsonfile. -
In the bindings / methods section, remove post as an option.
-
Open the same file for the other three functions. Remove the
getmethod.
Consuming the Implemented CRUD Endpoints on the Client
Based on the application logic, you can call all functions for loading, creating, updating, and deleting items by using the buttons inside and outside the Grid.
-
Set
functionUlrand the function code.jsx// Change https://your-application-name.azurewebsites.net/ to the base function URL of your application this.functionUrl = "https://your-application-name.azurewebsites.net/api/?code:XXX"; this.code = "XXXX"; -
Bind the Grid to a
statevalue.jsx<Grid data={this.state.gridData}></Grid> -
Load data by making a
getrequest to theReadfunction.jsxloadData = () => { let that = this fetch(`${that.functionUrl}READ?code=/${that.code}`) .then(function(response) { return response.json(); }) .then(function(myJson) { that.setState({ gridData: myJson }) }); } -
Create new items by making a request to the
Createfunction.jsxloadData = () => { let that = this fetch(`${that.functionUrl}READ?code=/${that.code}`) .then(function(response) { return response.json(); }) .then(function(myJson) { that.setState({ gridData: myJson }) }); } -
Create new items by making a request to the Create function.
jsxaddRecord = (newItem) => { let that = this; fetch(`${that.functionUrl}CREATE?code=/${that.code}`, { method: 'post', body: JSON.stringify(newItem) }).then(function(response) { return response.json(); }).then(function(createdRecord) { let gridCurrentData = that.state.gridData gridCurrentData.shift(createdRecord) that.setState({ gridData: gridCurrentData // Set the new data to the Grid if CREATE is successful }) }); } -
Update items by making a request to the
Updatefunction.jsxupdateRecord = (updatedItem) => { let that = this; fetch(`${that.functionUrl}UPDATE?code=/${that.code}`, { method: 'post', body: JSON.stringify(updatedItem) }).then(function(response) { return response.json(); }).then(function(updatedRecord) { let gridCurrentData = that.state.gridData let index = gridCurrentData.findIndex(p => p === updatedRecord || updatedRecord.id && p.id === updatedRecord.id); gridCurrentData[index] = updatedRecord; that.setState({ gridData: gridCurrentData // Set the new data to the Grid if UPDATE is successful }) }); } -
Delete items by making a request to the
Destroyaction.jsxdeleteRecord = (deletedItem) => { let that = this; fetch(`${that.functionUrl}DESTROY?code=/${that.code}`, { method: 'post', body: JSON.stringify(deletedItem) }).then(function(response) { return response.json(); }).then(function(deletedRecord) { let gridCurrentData = that.state.gridData let index = gridCurrentData.findIndex(p => p === deletedRecord || deletedRecord.id && p.id === deletedRecord.id); gridCurrentData = gridCurrentData.splice(index, 1); that.setState({ gridData: gridCurrentData // Set the new data to the Grid if DESTROY is successful }) }); }