
Vue Basics: Mastering the Vue Lifecycle Hooks

Summarize with AI:
Understand each stage of the Vue 3 component lifecycle using the Composition API—creation, mounting, updating and unmounting—and the corresponding hook.
If you’ve been working with Vue or are new to it, understanding how your Vue components are created, updated and eventually destroyed is very important, and one of the most powerful concepts you’ll encounter is lifecycle hooks. These hooks give precise control over what your component does at each phase of its life, from setup and rendering to updates and cleanup.
Whether you’re spinning up a simple component or architecting a complex application, getting a handle on lifecycle hooks will save you from hours of confusion down the road. In this guide, we’ll walk through each stage of the Vue 3 component lifecycle using the Composition API, the modern and scalable approach to building Vue apps.
Prerequisites
- To follow along, you’ll need Node.js installed on your machine. If you’re new to Vue, feel free to check out this setup guide for getting a fresh Vue project up and running.
- Alternatively, you can fork this Vue 3 CodeSandbox boilerplate, which I’ll be using throughout the tutorial.
- A basic knowledge of Vue.js.
Cool? Let’s dive in.
What Are Vue.js Lifecycle Hooks?
When a Vue component instance is created, it follows a series of initialization steps: setting up data observation, compiling the template, mounting to the DOM, updating the DOM as data changes and unmounting the DOM. During this process, Vue invokes lifecycle hooks, allowing developers to run custom code at specific stages.
Lifecycle hooks are crucial in Vue.js because they offer insight into the framework’s inner workings. They enable you to perform actions during different stages of the Vue component lifecycle. These stages include creation, mounting, updating and unmounting.
Understanding these stages and the hooks associated with each is key to grasping the Vue reactivity system and managing component behavior effectively.
The Vue Composition API
Vue components can be authored in two different API styles: Options API and the Composition API introduced in Vue 3.
The Composition API is a set of APIs that allows us to author Vue components using imported functions instead of declaring options. One of the primary advantages of Composition API is that it enables efficient logic reuse in the form of composable functions. It solves the drawbacks of mixins, the primary logic reuse mechanism of the Options API. It helps developers organize complex logic and separate concerns into modular, testable units, making their codebases easier to maintain and scale.
Vue 3 maintains backward compatibility with Vue 2, so both versions share similar lifecycle hooks. However, when you use the Composition API, you access these hooks a bit differently. We will look at the lifecycle hooks using the Composition API style.
Moving forward, we will categorize all the various types of lifecycle hooks according to their functionality: creation, mounting, updating and unmounting hooks. We will explore each hook and showcase actions that are allowed at each stage of the instance lifecycle.
Below is the diagram for the instance lifecycle hook:

Reference: https://vuejs.org/guide/essentials/lifecycle.html
Open your Vue starter application or use the codesandbox boilerplate to follow along. Open the HelloWorld.vue file in your component folder and edit the code with this below:
<template>
  <h1>{{ msg }}</h1>

  <div class="card">
     <button type="button" @click="increment">Count is {{ count }}</button>
 </div>
</template>

<script >
// import the lifecycle hooks from vue
import { ref, onBeforeMount, onMounted, onBeforeUpdate, onUpdated, onBeforeUnmount, onUnmounted } from "vue";

export default {
 setup() {
   // use ref to create a reactive state
   const msg = ref("Hello Vue 3");
   const count = ref(0);

   // define a method to increment the counter
   const increment = () => {
     count.value++;
   };

   // return the state and methods to the template
   return {
     msg,
     count,
     increment
   };
 }
};
</script>

<style scoped>
.read-the-docs {
 color: #888;
}
</style>
This code above is a counter component that updates the state of the count when the button is clicked. We will use only the script section to explain the subsequent part of this article. Also, in Composition API, you need to import lifecycle hooks in your project before you can use them, just as shown in the code snippet above.
Creation Phase (setup() Hook)
The creation phase is the initial stage of a Vue component lifecycle. This phase is critical because it lays the groundwork for everything that follows in the component’s existence. During this phase, Vue begins constructing the component instance before it is added to the DOM. At this point, Vue sets up reactivity by observing the component’s reactive state. This phase includes the beforeCreate and created lifecycle hooks in the Options API, while in the Composition API, this is where the setup() hook is called.
The setup() Hook
The setup() hook serves as the entry point for Composition API usage in your component. It is the first lifecycle hook called in Vue, triggered immediately after the application instance is initialized. In the Composition API, the setup() hook replaces the beforeCreate() and created() hooks previously used in the Options API.
The setup() hook is ideal for tasks that should run once the component is fully set up, such as configuring event listeners or fetching data from an API.
Add the following code below within your setup hook:
alert("The creation phase has been initialized")
The code above will display this:
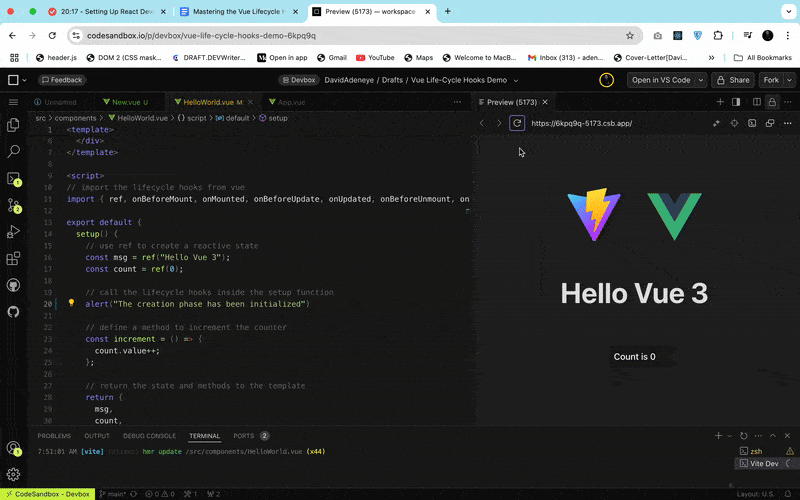
You’ll notice the alert statement runs before the component is loaded. This occurs because the function is executed before the Vue engine creates and mounts the app component.
Mounting Phase (Mounting Hooks)
The mounting phase marks the moment your Vue component renders for the first time and is inserted into the DOM, making it visible in the browser. This phase begins after the component has been fully created and reactive systems have been initialized (in the creation phase).
The associated lifecycle hooks in this phase give you precise control over what to do before and after the initial render, making them powerful tools for managing the component’s dynamic behavior. Keep in mind that these hooks don’t run during server-side rendering since the server doesn’t have access to a real DOM.
In the Options API, the mounting phase includes two hooks: beforeMount() and mounted(). The equivalent hooks in Composition API are onBeforeMount() and onMounted().
onBeforeMount()
After Vue runs the setup() hook, it immediately calls the onBeforeMount() lifecycle hook. By this time, Vue has already initialized the component’s reactive state, but it hasn’t created the DOM yet. Since the component is about to render for the first time, you still can’t access or manipulate the DOM—the element property (which points to the root DOM element) isn’t available yet.
It’s an ideal place for setup logic that needs to run before the initial render but doesn’t depend on the DOM being available:
 onBeforeMount(() => {
   alert('onBeforeMount has been initialized')
 });
onMounted()
After Vue calls the onBeforeMount() hook and prepares the component for rendering, it proceeds to mount the component by rendering its template and inserting the resulting DOM element into the page. Once Vue completes this process, it immediately calls the onMounted() lifecycle hook.
At this point, the component is fully available in the DOM. Now you can safely perform operations that depend on DOM access, such as interacting with DOM elements, setting up event listeners or making API calls that require the DOM to be available.
In the Composition API, onMounted() is registered inside the setup() function and is called once after the first render:
 onMounted(() => {
    // You can now access the DOM or perform other side effects
    console.log('Component is mounted and the DOM is now accessible.');
 });
Unlike onBeforeMount(), which runs before the DOM is ready, onMounted() runs after the DOM is fully constructed, making it an ideal hook for any logic that needs the component to be fully rendered and interactive in the DOM.
Updating Phase (Updating Hooks)
The updating phase is that phase of the Vue lifecycle that is triggered whenever the component reactive data changes. Whenever a reactive value changes, Vue automatically rerenders the affected parts of the DOM using its virtual DOM diffing algorithm. These two hooks below let you tap into the update process before and after a DOM rerender occurs:
onBeforeUpdate()
After the mounting hooks, onBeforeUpdate() is called right before a component is about to update its DOM tree due to a reactive state change. It gives you access to interact with or inspect the DOM state before Vue updates the DOM based on the new reactive values.
It’s helpful when you want to capture the DOM state before changes, debug rendering issues by comparing old vs new state, perform cleanup or prep work before the DOM is updated etc. It’s the equivalent of the beforeMount() hook in the Options API.
Here is the basic usage in our counter app:
 onBeforeUpdate(() => {
     // DOM is still in its previous state
     alert('onBeforeUpdate has been called');
 });

 onMounted(() => {
    console.log('onMounted hook');
    console.log(count.value);
 });
onUpdated()
In the Composition API, the onUpdated() hook is called after the component has rerendered due to a change in its reactive state. It gives you access to the updated DOM, making it ideal for performing post-render DOM-dependent operations. It’s advisable not to mutate components in the updated hook, as it will likely lead to an infinite update loop.
It pairs well with onBeforeUpdate() as it allows you to access the old DOM and the new DOM. For instance, this pairing is powerful for comparing before-and-after states or restoring scroll and focus behavior. It’s the equivalent of the updated() hook in the Options API.
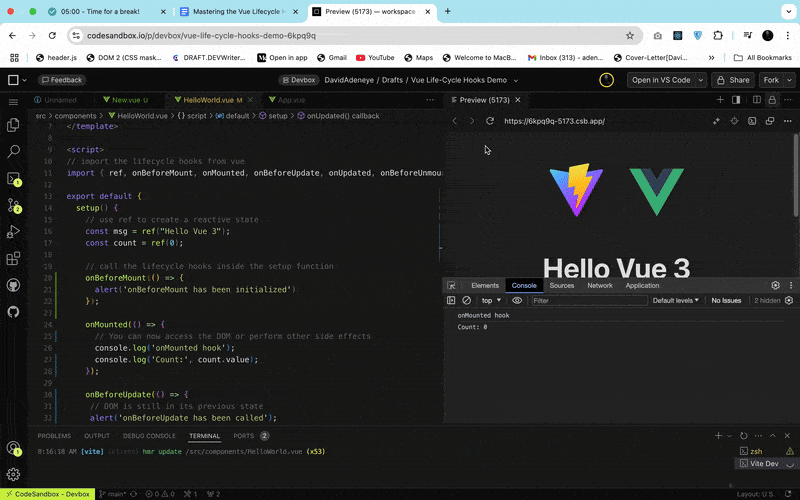
Pair it with the previous demo in the onBeforeUpdate() example:
  onBeforeUpdate(() => {
     // DOM is still in its previous state
     alert('onBeforeUpdate hook');
     console.log('About to update the current value:', count.value);
  });

  onUpdated(() => {
     console.log("onUpdated hook");
     console.log(count.value);
     // You can now interact with updated DOM elements here
  });
Click on the counter button and look into the console to see the flow of the lifecycle hooks:
Unmounting Phase (Unmounting Hooks)
The unmounting phase marks the final stage in a Vue component’s lifecycle. It begins when Vue decides to remove the component from the DOM. During this phase, Vue actively cleans up the component to free memory, prevent memory leaks, and stop any reactive effects or event listeners from running after the component is no longer needed.
In the Options API, this phase includes two hooks: beforeUnmount() and unmounted(). In the Composition API, you’ll use onBeforeUnmount() and onUnmounted() instead. The unmounting phase in Vue 3 focuses entirely on cleaning up side effects before Vue removes the component from the DOM.
onBeforeUnmount()
In Vue 3’s Composition API, Vue calls the onBeforeUnmount() hook right before it unmounts and removes the component from the DOM. This hook gives you a final opportunity to run cleanup logic while the component instance and its DOM elements are still fully accessible and functional.
 onBeforeUnmount(() => {
    console.log('Component is about to be unmounted.');
 });
This hook is ideal for removing event listeners, cancelling timers, deleting variables and destroying third-party tools especially if they depend on the current DOM or component state.
onUnmounted()
The onUnmounted() hook is called after a component has been fully removed from the DOM and its reactive effects have been cleaned up. Think of onUnmounted() as the last opportunity to clean up any side effects that do not require access to the DOM or to the component’s internal state (since the DOM and reactive context are now gone or inactive). It is suitable for cleaning up global side effects that could cause memory leaks or unexpected behavior if left running after the component is gone.
onUnmounted(() => {
    console.log('Component has been unmounted.');
});
It is your final cleanup hook perfect for shutting down anything that continues running outside the component’s DOM.
Additional Life Cycle Hooks
Vue 3 introduced several additional lifecycle hooks beyond those in Vue 2, particularly in the Composition API to support more advanced use cases, improve flexibility and enhance support for features like Suspense, teleport and asynchronous setup.
Below is a breakdown of these additional lifecycle hooks and how you can use them:
onRenderTracked() and onRenderTriggered()
These hooks help you debug your component’s reactivity behavior during development. Vue calls onRenderTracked() during development when the component’s render effect tracks a reactive dependency. This hook helps you debug reactivity by showing which reactive properties the component tracks while rendering.
The onRenderTriggered() hook runs during development when a reactive dependency triggers a rerender. It helps debug performance issues and shows you which reactive value caused the component to rerender. Both onRenderTracked() and onRenderTriggered() are only active in development mode, not in production builds. They are equivalent to the renderTracked() and renderTriggered() in the Option API.
Here is a syntax demo structure:
import { onRenderTracked, onRenderTriggered} from 'vue'

onRenderTracked((event) => {
   console.log('Tracked:', event)
 })

onRenderTriggered((event) => {
   console.log('Triggered by:', event)
 })
onActivated() and onDeactivated()
Vue calls these hooks only when the component is inside a <KeepAlive> wrapper. It calls onActivated() after inserting the component instance back into the DOM from the cached tree managed by KeepAlive. Use this hook to restore state, restart timers or refetch data when the component becomes active again.
The onDeactivated() hook is called after the component instance is removed from the DOM as part of a tree cached by KeepAlive>. It’s ideal for pausing timers, cancelling API polling or temporarily stopping reactive effects while the component is inactive. They are equivalent to the activated() and deactivated() in Option API.
onErrorCaptured()
Vue calls this hook when it captures an error in the component or any of its child components. This hook works like an error boundary: It lets you handle or suppress errors from children component to prevent them from crashing the entire app. In the Options API, this hook is equivalent to errorCaptured().
Here is a syntax demo structure:
import { onErrorCaptured } from 'vue'

 onErrorCaptured((err, instance, info) => {
   console.error('Captured error:', err)
   return false // prevent further propagation
 })
onServerPrefetch()
This hook is a special lifecycle hook used exclusively for server-side rendering (SSR) in Vue. It runs on the server before the component is rendered, allowing you to perform asynchronous data fetching ahead of time. This allows the component to be rendered with all the necessary data already available.
Here is a syntax demo structure:
import { onServerPrefetch } from 'vue'

setup() {
  onServerPrefetch(async () => {
    // Fetch your async data here
  })
}
The additional lifecycle hooks provide fine-grained control over component behavior in complex use cases such as debugging, error handling, server-side rendering and component activation/deactivation for improved performance and UX.
Wrapping Up
That’s a long read. Lifecycle hooks are your window into how Vue operates behind the scenes. Whether you’re building a simple component or architecting complex dynamic interfaces, understanding the functionalities of these hooks will help you write cleaner, more maintainable components.
That said, the true power of lifecycle hooks lies in how well you organize, optimize and clean up your logic within them. The way you handle this will directly impact the performance and maintainability of your components.
Below are a few best practices I recommend when working with lifecycle hooks:
- Organize your lifecycle hooks clearly and logically: Group related hooks together and follow a consistent order within your component. Doing this makes your code easier to follow and helps you (and your teammates) understand how the component behaves at each stage. For example, if you add an event listener in
onMounted(), clean it up inonUnmounted()right afterward to keep related logic easy to trace. - Avoid heavy operations inside lifecycle hooks: Avoid executing heavy tasks like large computations, complex DOM manipulations or intense loops directly within hooks such as
onMounted()oronUpdated(). These operations can block the browser’s main thread, leading to performance issues. - Always perform cleanup in
onBeforeUnmount()oronUnmounted: Clean up side effects like intervals, timeouts, event listeners, subscriptions and third-party libraries when your component is unmounted. - Keep logic declarative and reactive: Instead of managing DOM or state imperatively, lean into Vue’s reactivity system. Use
computed()for derived values andwatch()to react to changes. Avoid recalculating or updating state manually in lifecycle hooks when you can rely on Vue’s built-in tools.
To learn more deeply about lifecycle hooks in Option API, check out this link: Lifecycle Hooks with Options API.
Happy coding!

David Adeneye Abiodun
David Adeneye is a software developer and a technical writer passionate about making the web accessible for everyone. When he is not writing code or creating technical content, he spends time researching about how to design and develop good software products.
Related Posts
Comments
All articles
Topics
Web MobileMobile
Desktop
Design
Productivity
People
