How to Build a RESTful API with Deno

Summarize with AI:
In this post we are going to build a full-fledged contact API with Deno—a simple, modern, and secure runtime for JavaScript and TypeScript that uses V8 and is built with Rust.
In the first part of this series, we touched on the fundamentals of Deno, and also covered things like features, standard library, installation, and much more. In this post, we will build a RESTful API. If you are a total newbie to server-side programming, this post will make you comfortable with the runtime.
Here is a list of some REST microframeworks for Deno:
We are going to use the abc framework to build the contact API.
The Contact API
The API we are going to build will be able to:
- Create a contact and store it in a MongoDB database
- Retrieve one or more contact from the database depending on the request
- Update an existing contact in the database
- Delete any contact in the database upon request
We’ll do this in TypeScript, but nothing stops you from building the API in JavaScript—you can remove the types, and you are good to go.
PS: In the previous post, I have already gone through how to install Deno, so feel free to check that out, or follow the official denoland installation on githhub.
Set up MongoDB Atlas
To be able to use MongoDB’s cloud services, you’ll need a MongoDB Atlas account. To create one, go to its home page and sign up or log in if you have an account.

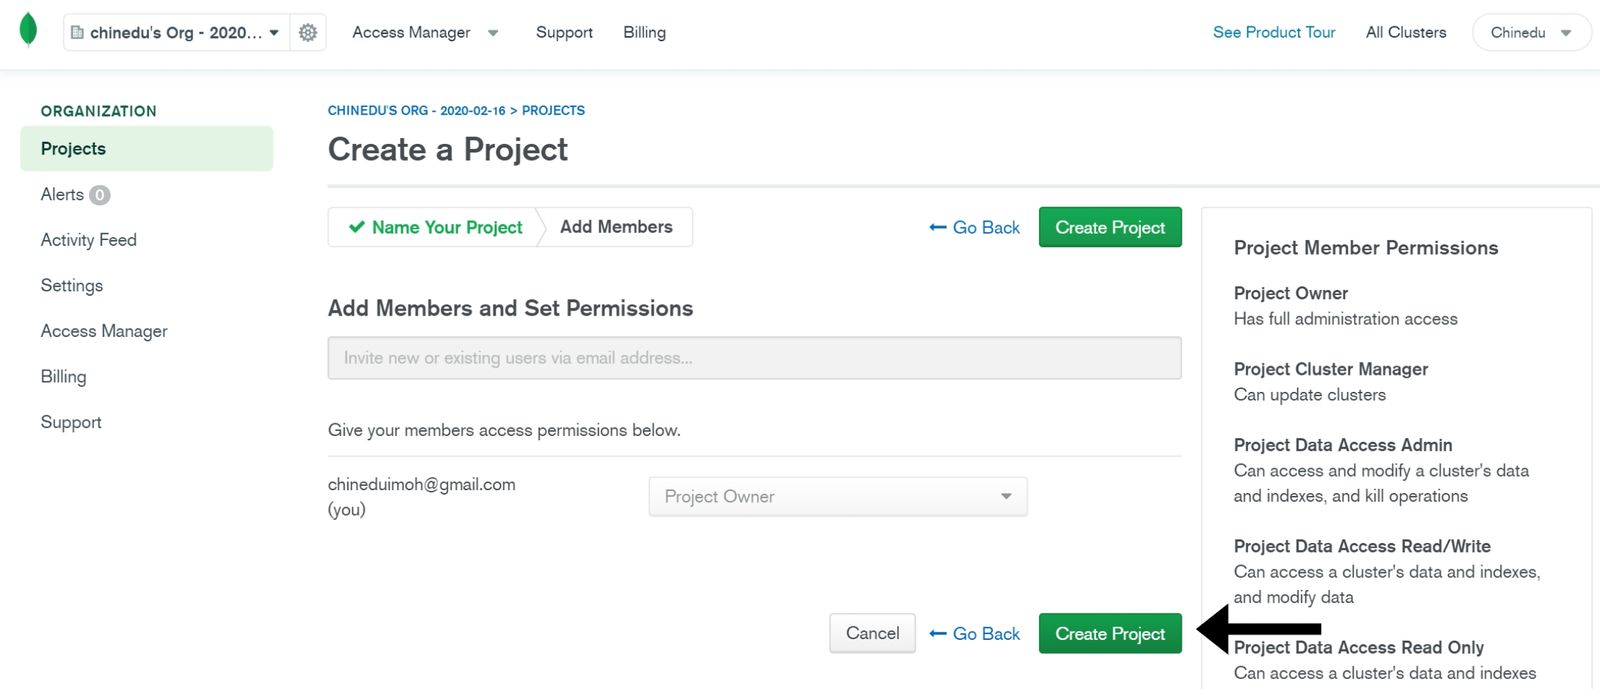
After successful authentication, you’ll need to create a project. Name the project and click on the Next button.

Next, click on the Create Project button.
NOTE: A MongoDB cluster is the word usually used for sharded cluster in MongoDB. The main purposes of a sharded MongoDB are:
- Scale reads and writes along several nodes of the cluster
- Each node does not handle all of the data, so you can separate data along all the nodes of the shard—each node is a member of a shard, and the data are separated on all shards
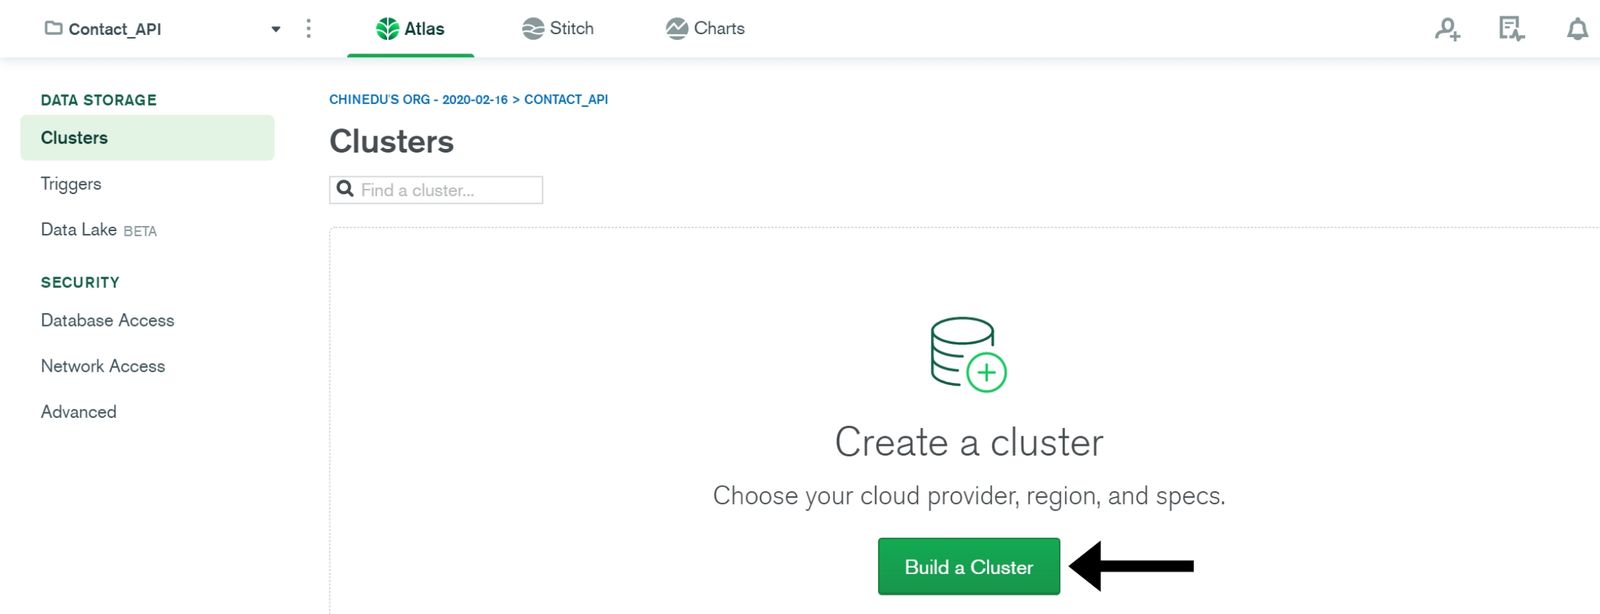
For more information, read the official docs. Now, we need to create a cluster for our project, so click on Build a Cluster.
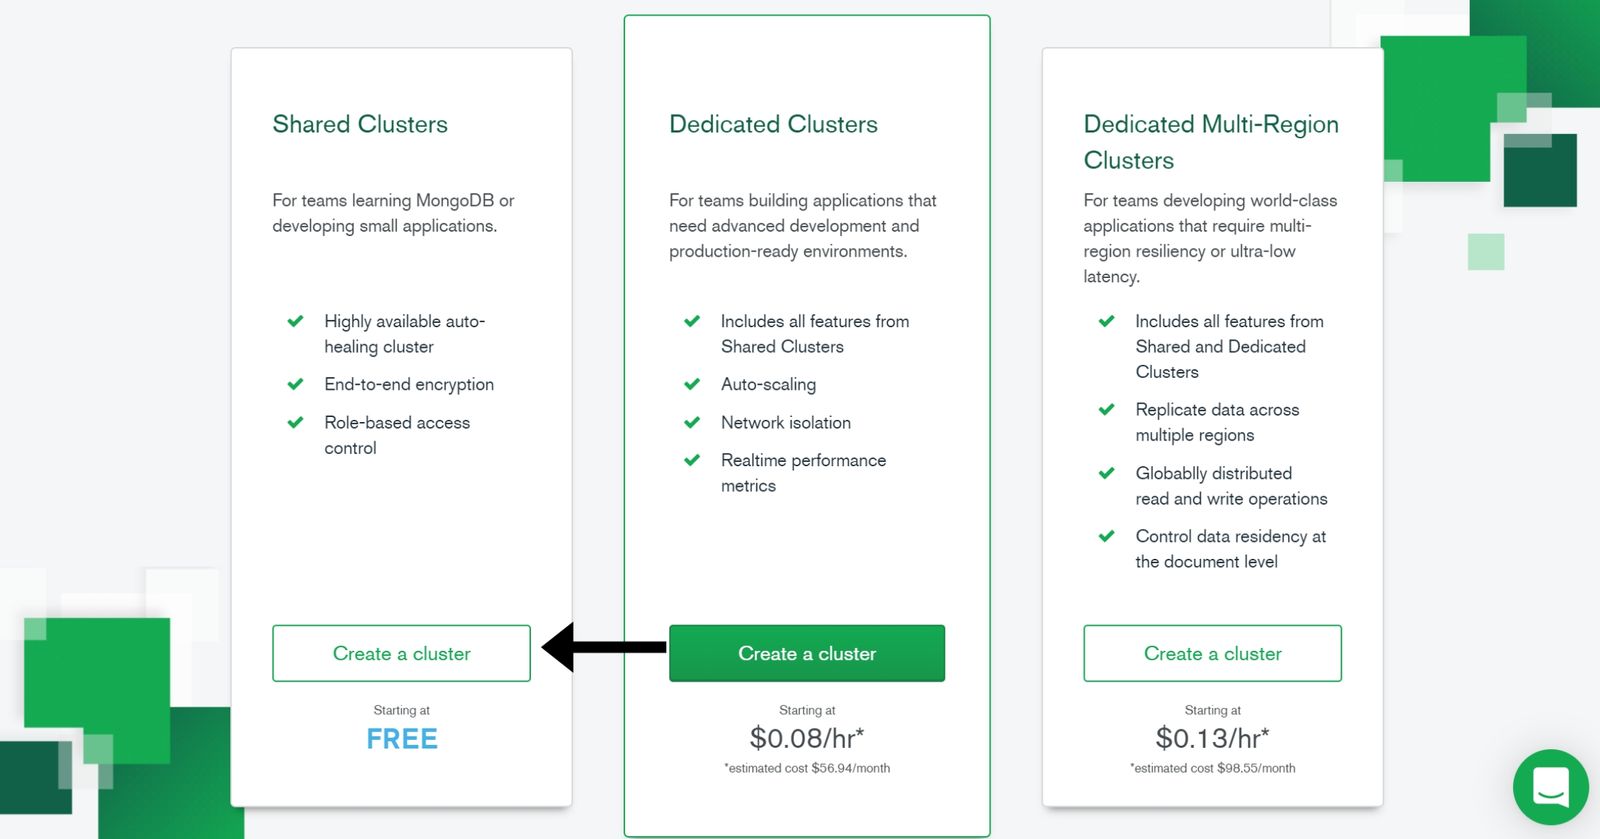
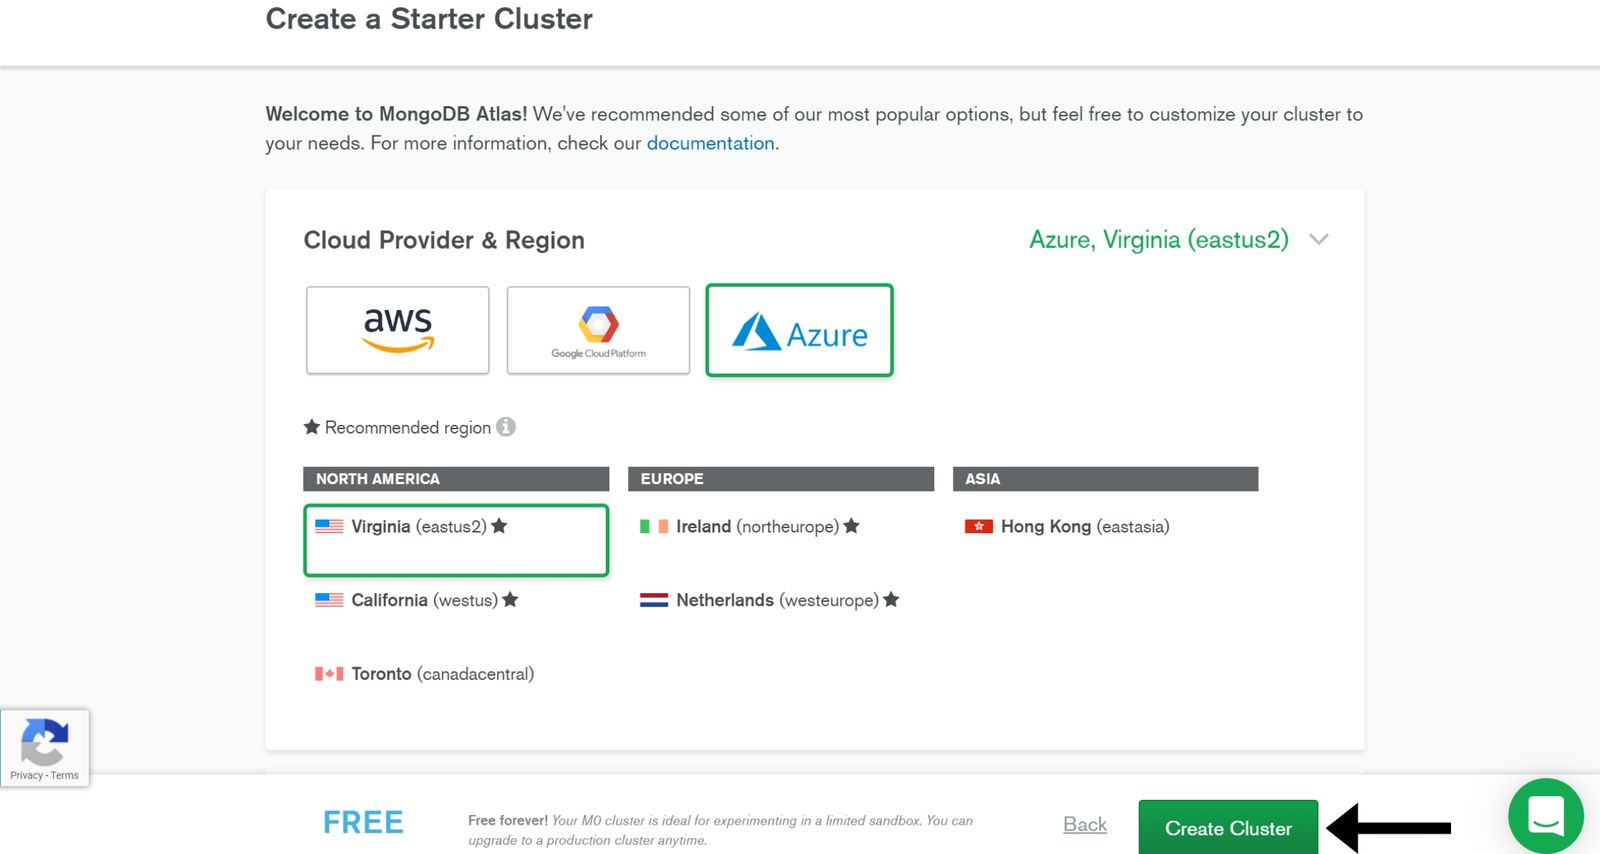
Click on the Create Cluster button in the Cluster Tier section and select the Shared Cluster option to create your free tier cluster.
To minimize network latency, you’d ideally pick a close region. Click on the Create Cluster button.
NOTE: If you are developing on the cloud, choose the corresponding cloud provider.
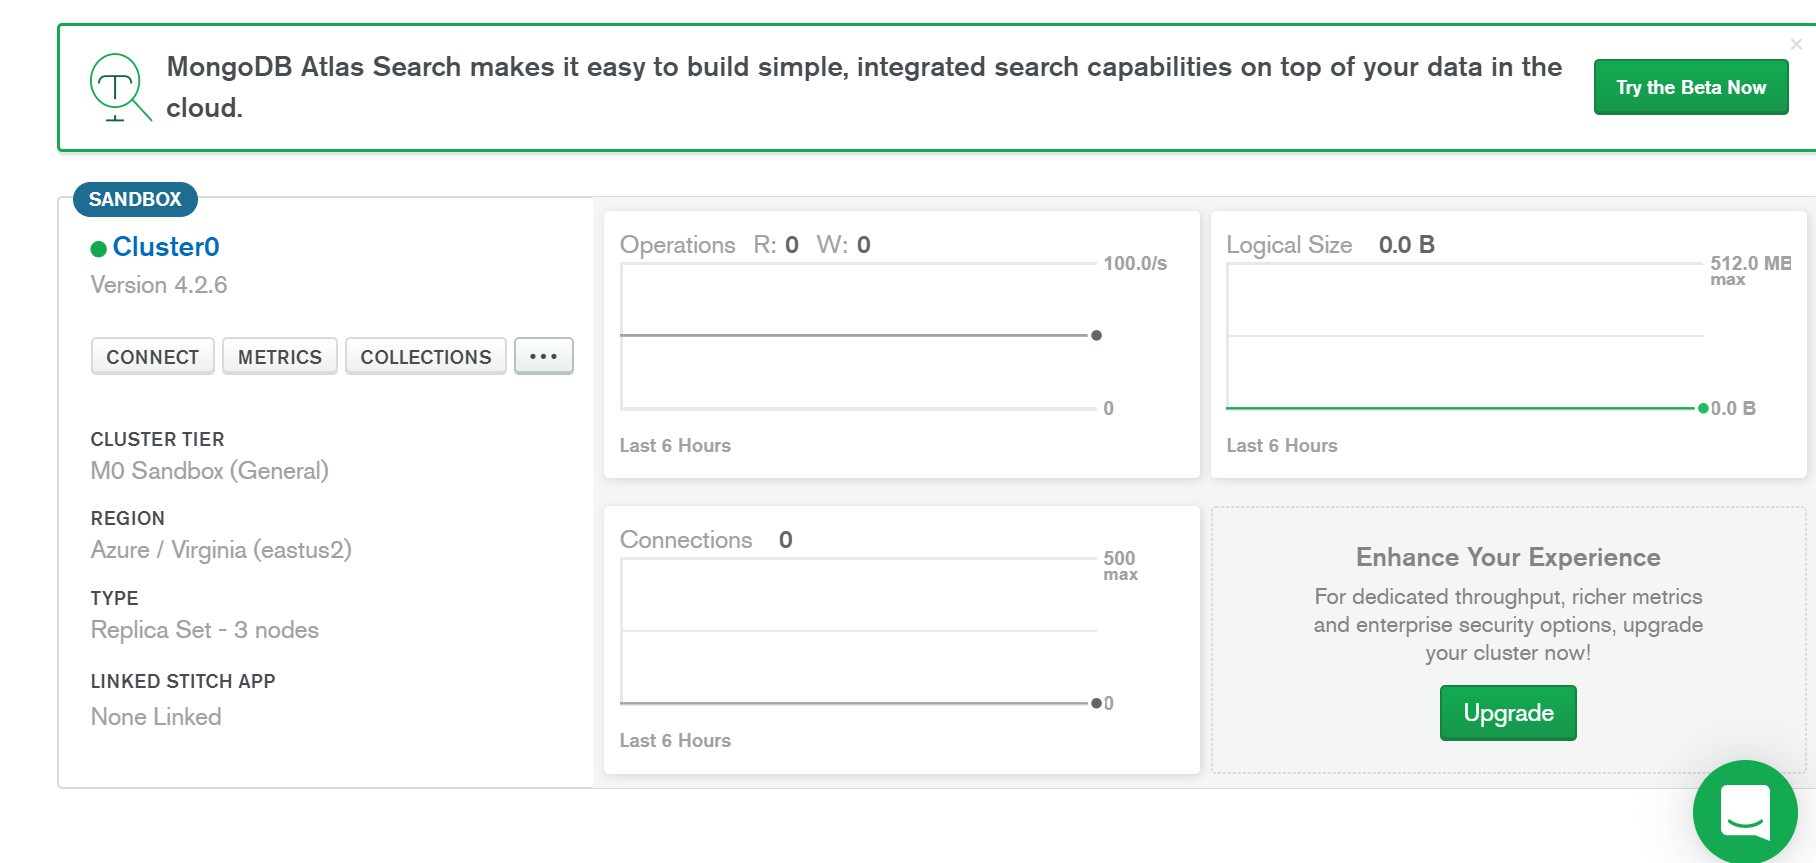
MongoDB Atlas will now take about three to five minutes to set up your cluster.
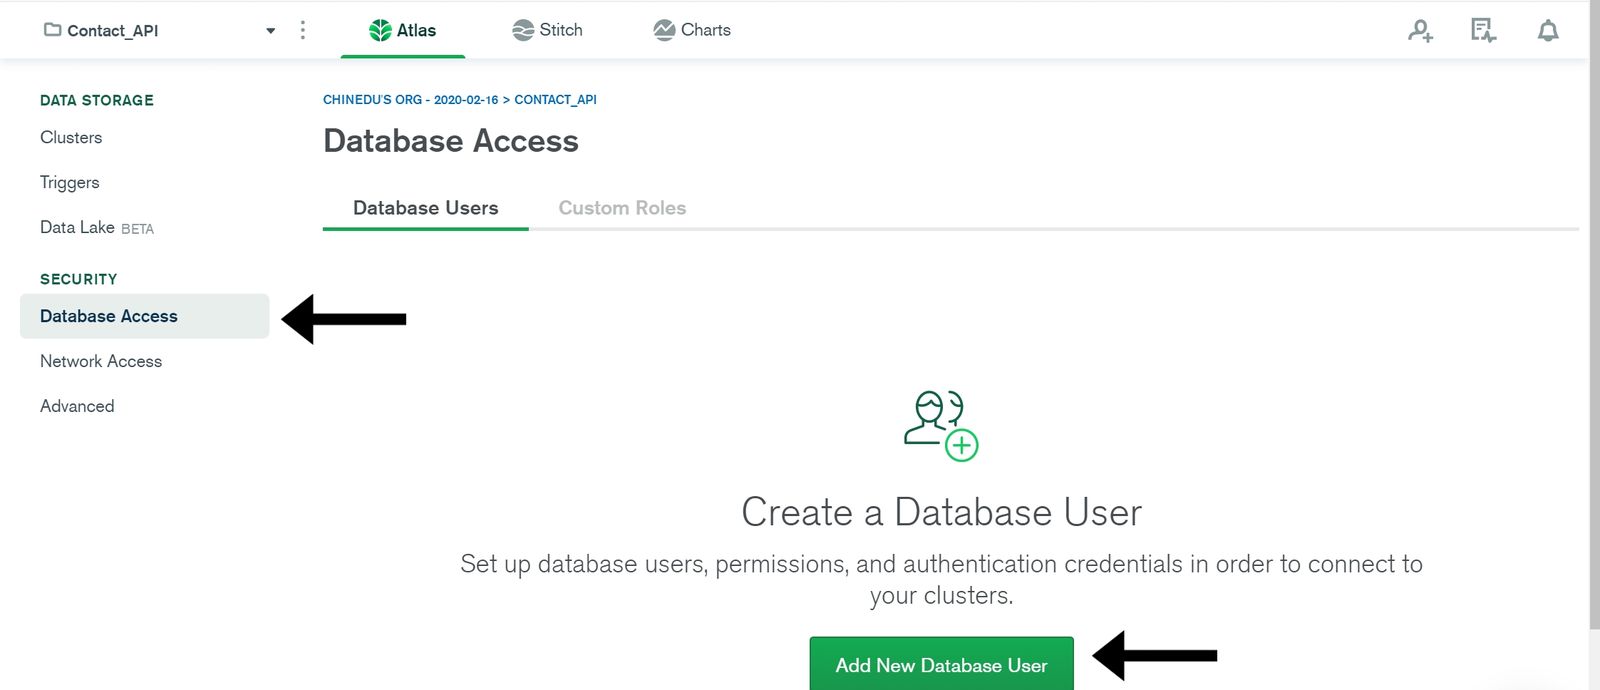
Before you start using the cluster, you’ll have to provide a few security-related details. Switch to the Database Access tab, and then click on Add New Database User.
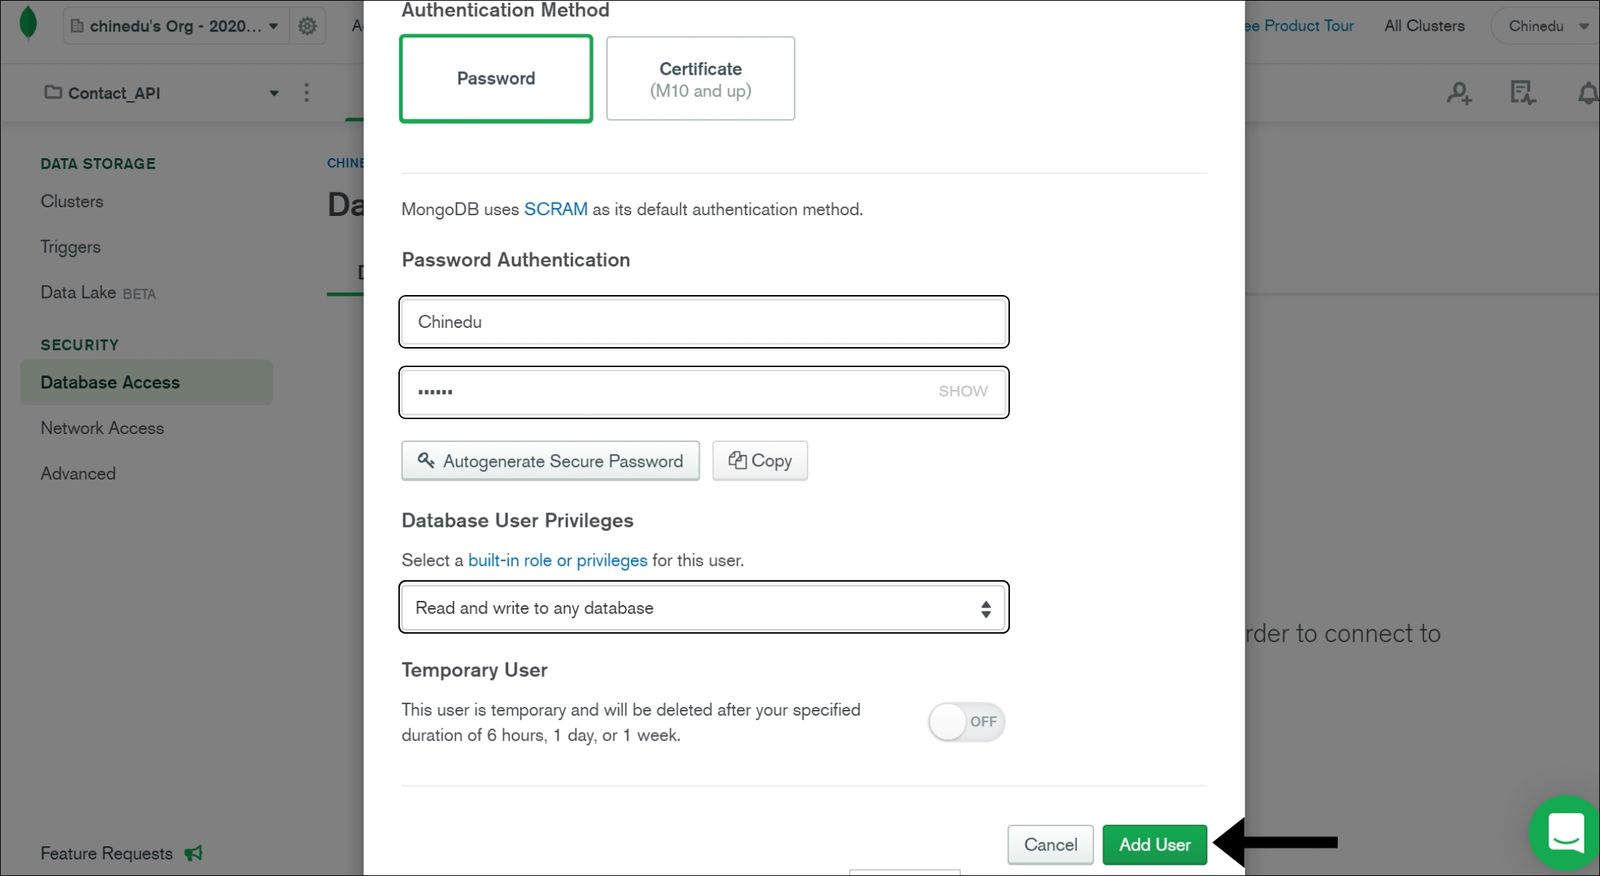
In the dialog that pops up, type in your desired Username and Password, select the Read and write to any database privilege, and click the Add User button.
Next, in the Network Access section, you must provide a list of IP addresses from which you’ll be accessing the cluster. Click on the Network Access tab and select Add IP Address.
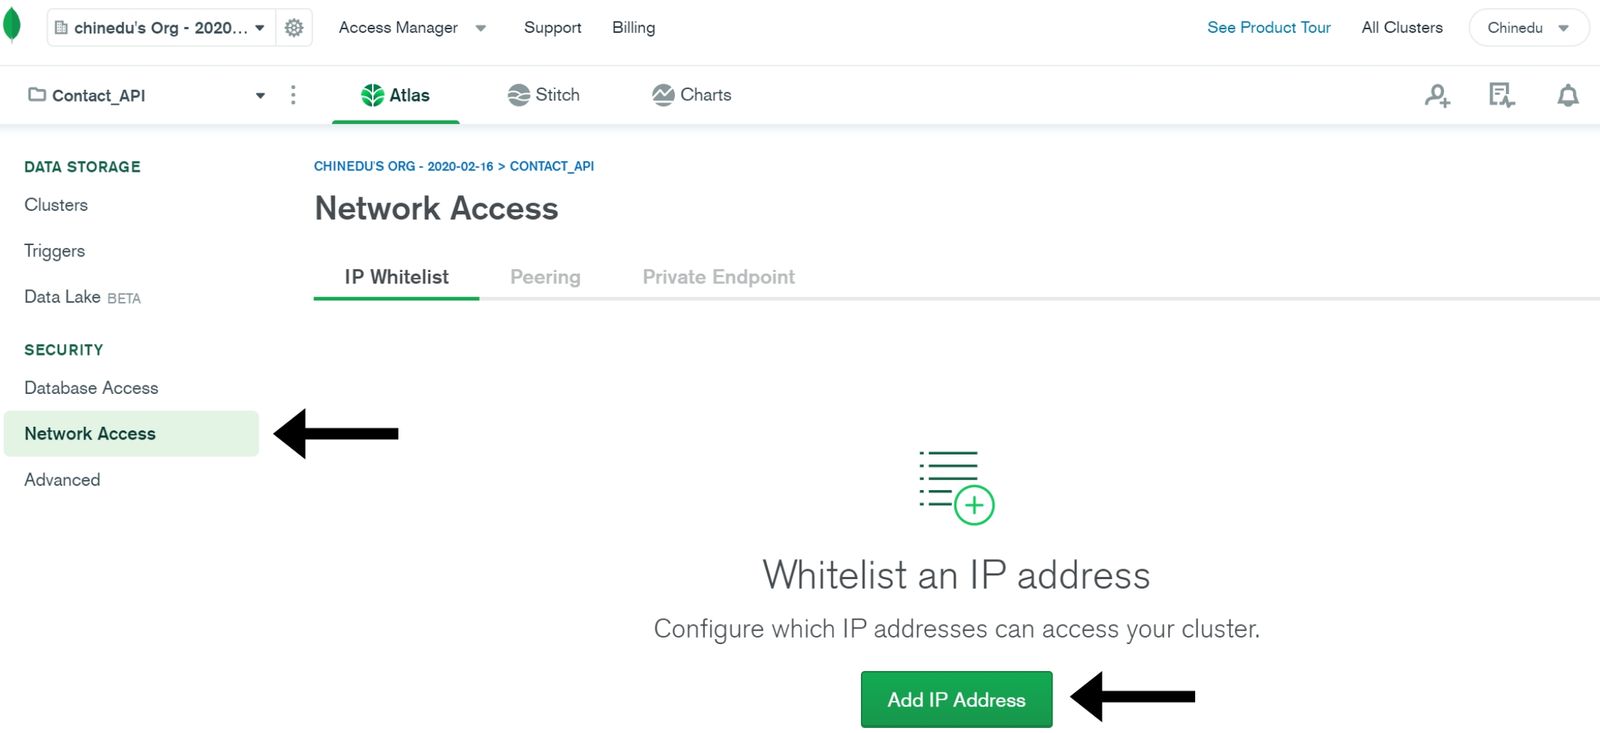
For the sake of this demo, click on the Allow Access From Anywhere to autofill the Whitelist Entry field, then click on the Confirm button.
NOTE: This is just for development; in a production environment, you will need to input the static IP of the server that will be accessing the database.

Lastly, you will need a valid connection string to connect to your cluster from your application. To get it, go back to the Cluster tab and click on Connect.
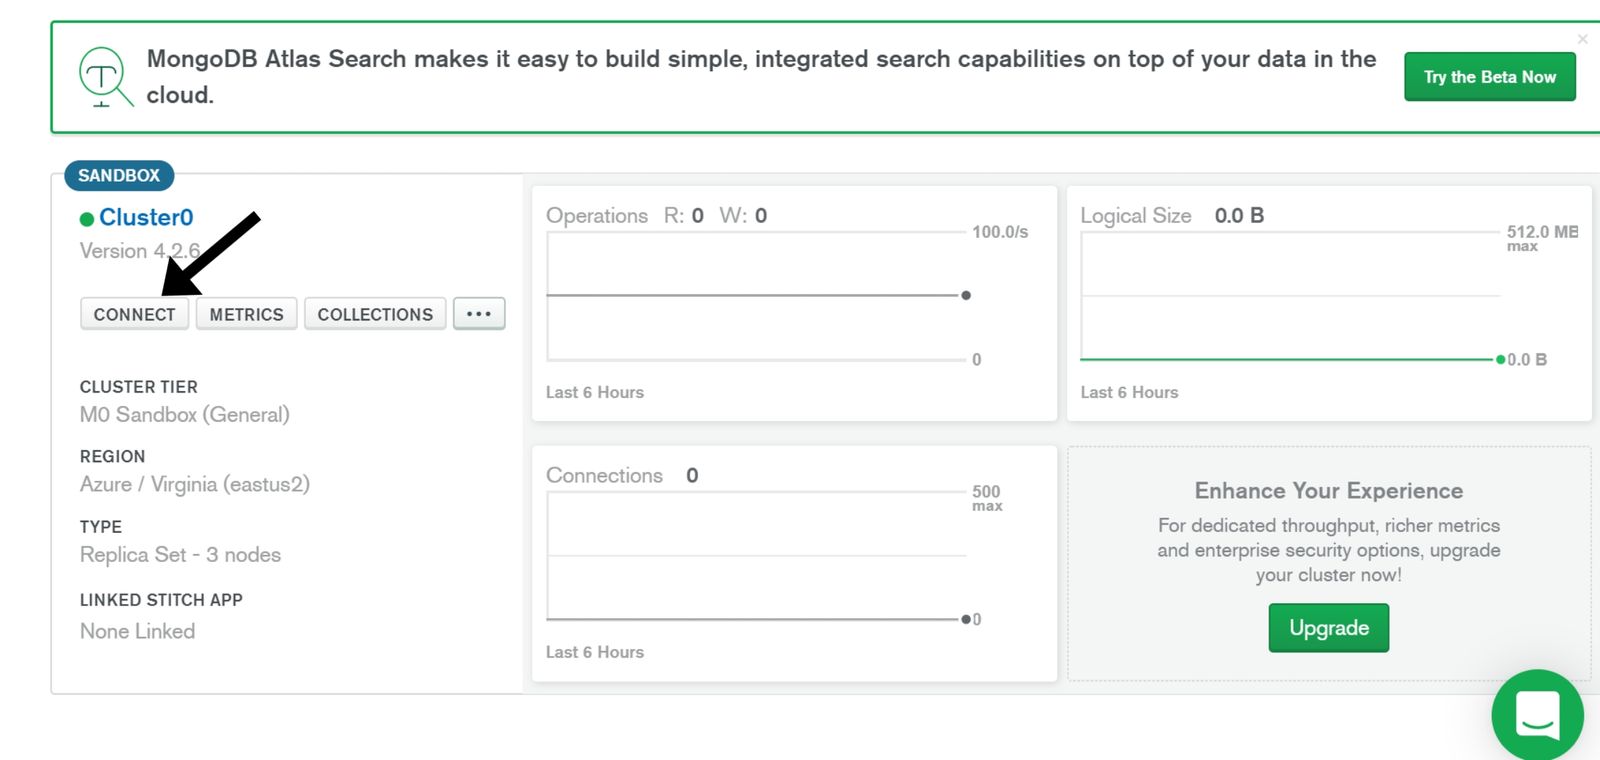
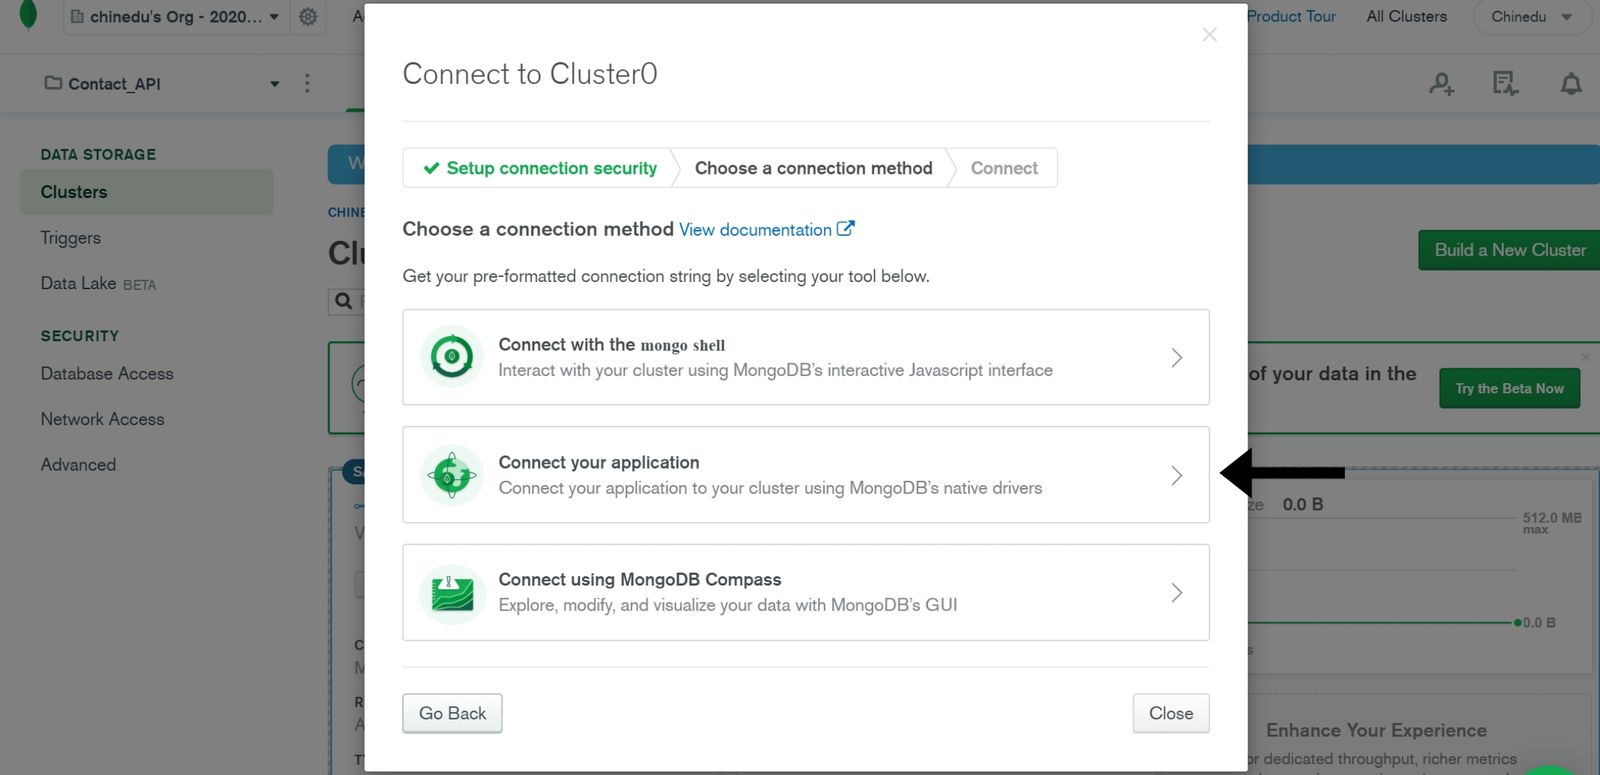
Now, click on Connect Your Application.
So currently, there is no official Deno connection string yet, but we will use the Node.js connection string. Select Node.js in the DRIVER dropdown, VERSION 2.2.12 or later. Click on Copy.
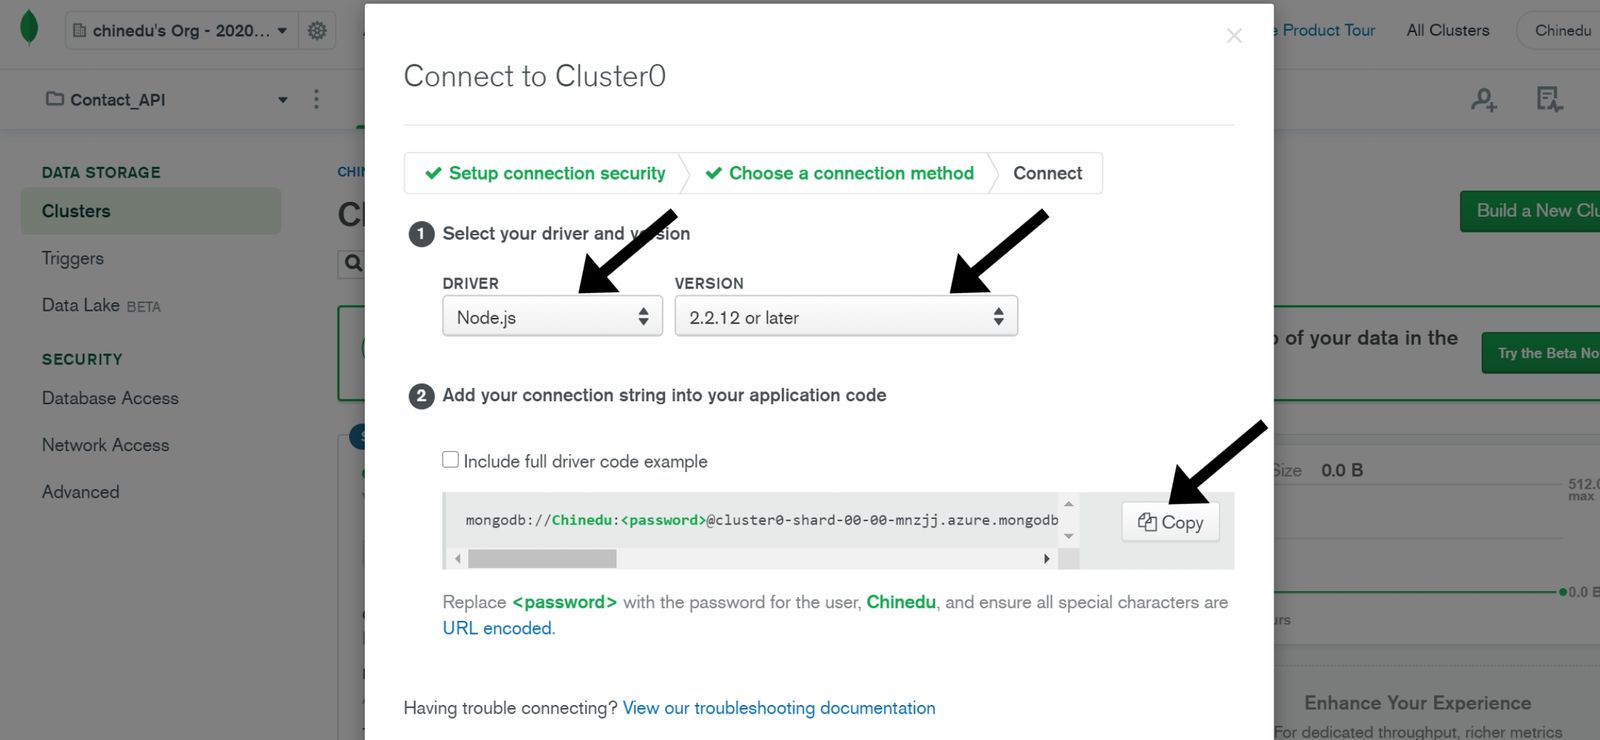
NOTE: The connection string won’t have your password, so you’ll have to fill it in the placeholder manually.
Set up Server
Create a project directory:
mkdir contactAPI
Create a .env file:
touch .env
Inside the .env file, create a database name and paste the connection string we copied earlier from MongoDB:
DB_NAME=<database name>
DB_HOST_URL=<connection string>
Next, create a folder called utils, and inside it create a file middleware.ts:
mkdir utils
touch middlewares.ts
Below we have two middlewares set up, for logging every request and to handle errors caught in the controllers:
// middlewares.ts
import { MiddlewareFunc, Context } from "https://deno.land/x/abc@v1.0.0-rc2/mod.ts";
export class ErrorHandler extends Error {
status: number;
constructor(message: string, status: number) {
super(message);
this.status = status;
}
}
// LogHandler - Middleware
export const LogMiddleware: MiddlewareFunc = (next) =>
async (c) => {
const start = Date.now()
const { method, url, proto } = c.request
await next(c);
console.log(JSON.stringify({
time: Date(),
method,
url,
proto,
response_time: Date.now() - start + " millisecond",
response_status: c.response.status
}, null, "\t"))
}

// ErrorHandler - Middleware
export const ErrorMiddleware: MiddlewareFunc = (next) =>
async (c) => {
try {
await next(c);
} catch (err) {
const error = err as ErrorHandler;
c.response.status = error.status || 500;
c.response.body = error.message;
}
};
Now, it’s time to write our server code. Let’s start by creating a main.ts file in the project directory:
touch main.ts
// main.ts
import { Application } from "https://deno.land/x/abc@v1.0.0-rc2/mod.ts";
import "https://deno.land/x/dotenv/load.ts";
import {
getAllContact,
createContact,
getOneContact,
updateContact,
deleteContact,
} from "./controllers/contacts.ts";
import {
ErrorMiddleware,
LogMiddleware
} from "./utils/middlewares.ts";
const app = new Application();
app.use(LogMiddleware)
.use(ErrorMiddleware)
app.get("/contacts", getAllContact)
.post("/contact", createContact)
.get("/contact/:id", getOneContact)
.put("/contact/:id", updateContact)
.delete("/contact/:id", deleteContact)
.start({ port: 5000 });
console.log(`server listening on http://localhost:5000`);
In the first line, notice how we import modules from the internet directly using the URL.
The second line imports the dotenv module to load the environment variables from the .env file. The rest of the code is similar to express, nothing special.
Now, we need to configure our database to interact with the server. We are going to use deno_mongo, a MongoDB database driver developed for Deno. It is under active development and does not contain the different methods of a full-fledged MongoDB driver for now.
mkdir models
touch db.ts
// db.ts
import { init, MongoClient } from "https://deno.land/x/mongo@v0.8.0/mod.ts";
class DB {
public client: MongoClient;
constructor(public dbName: string, public url: string) {
this.dbName = dbName;
this.url = url;
this.client = {} as MongoClient;
}
connect() {
const client = new MongoClient();
client.connectWithUri(this.url);
this.client = client;
}
get getDatabase() {
return this.client.database(this.dbName);
}
}
const dbName = Deno.env.get("DB_NAME") || "contactdb";
const dbHostUrl = Deno.env.get("DB_HOST_URL") || "mongodb://localhost:27017";
console.log(dbName, dbHostUrl)
const db = new DB(dbName, dbHostUrl);
db.connect();
export default db;
Here, I created a class DB; then, I instantiated the class with the DB_NAME and DB_HOST_URL parameter retrieved from the environment variable.
NOTE: Deno.env.get() is used to retrieve the environmental variable we set earlier.
Now, it’s time to set up our controllers.
mkdir controllers
touch contracts.ts
// contracts.ts
import { HandlerFunc, Context } from "https://deno.land/x/abc@v1.0.0-rc2/mod.ts";
import db from '../models/db.ts';
import { ErrorHandler } from "../utils/middlewares.ts"
const database = db.getDatabase;
const contacts = database.collection('contacts');
interface Contact {
_id: {
  $oid: string;
};
name: string;
age: number;
email: string;
address: string;
}
...
First of all, we imported the type HandlerFunc from the abc module. It will be the type assigned to all our handler functions. Then we used the getDatabase method we created earlier to retrieve our Database class. Next we used the collection method to set up our collection. The interface Contact is used when we want to fetch all the contacts in our collection.
createContact: Add the contact to the database.
// createContact
export const createContact: HandlerFunc = async (c: Context) => {
try {
if (c.request.headers.get("content-type") !== "application/json") {
throw new ErrorHandler("Invalid body", 422);
}
const body = await (c.body());
if (!Object.keys(body).length) {
throw new ErrorHandler("Request body can not be empty!", 400);
}
const { name, age, email, address } = body;
const insertedContact = await contacts.insertOne({
name,
age,
email,
address
});
return c.json(insertedContact, 201);
} catch (error) {
throw new ErrorHandler(error.message, error.status || 500);
}
};
...
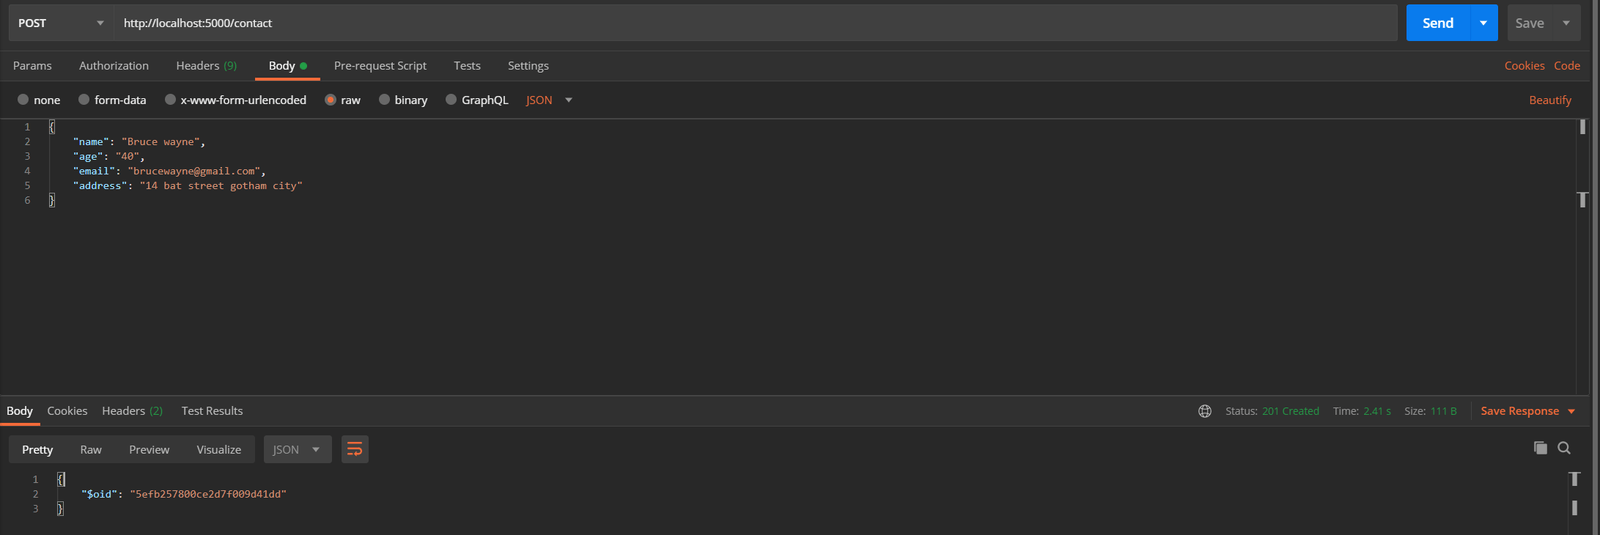
Testing on Postman: Making a POST request on /contact. Start the server, and make sure to use the appropriate flags of course:
deno run --allow-write --allow-read --allow-plugin --allow-net --allow-env --unstable ./main.ts
The first time you run the server, Deno will download and cache the dependencies. The next time should look something similar to this in your terminal.
INFO load deno plugin "deno_mongo" from local "~/.deno_plugins/deno_mongo_40ee79e739a57022e3984775fe5fd0ff.dll"
server listening on http://localhost:5000
getAllContact: This retrieves all the contact in the database.
// getAllContact
export const getOneContact: HandlerFunc = async (c: Context) => {
try {
const { id } = c.params as { id: string };
const getContact = await contacts.findOne({ _id: { "$oid": id } });
if (getContact) {
const { _id: { $oid }, name, age, email, address } = getContact;
return c.json({ id: $oid, name, age, email, address }, 200);
}
throw new ErrorHandler("Contact not found", 404);
} catch (error) {
throw new ErrorHandler(error.message, error.status || 500);
}
};
...
Testing on Postman: Making a GET request on /contacts.

getOneContact: Retrieve one contact in the database by id.
// getOneContact
export const getOneContact: HandlerFunc = async (c: Context) => {
try {
const { id } = c.params as { id: string };
const getContact = await contacts.findOne({ _id: { "$oid": id } });
if (getContact) {
const { _id: { $oid }, name, age, email, address } = getContact;
return c.json({ id: $oid, name, age, email, address }, 200);
}
throw new ErrorHandler("Contact not found", 404);
} catch (error) {
throw new ErrorHandler(error.message, error.status || 500);
}
};
...
Testing on Postman: Making a GET request on /contact/:id.

updateContact: It will update the contact with the specified id in the database.
// updateContact
export const updateContact: HandlerFunc = async (c: Context) => {
try {
const { id } = c.params as { id: string };
if (c.request.headers.get("content-type") !== "application/json") {
throw new ErrorHandler("Invalid body", 422);
}
const body = await (c.body()) as {
name?: string;
age?: number;
email?: string;
address?: string;
};
if (!Object.keys(body).length) {
throw new ErrorHandler("Request body can not be empty!", 400);
}
const getContact = await contacts.findOne({ _id: { "$oid": id } });
if (getContact) {
const { matchedCount } = await contacts.updateOne(
{ _id: { "$oid": id } },
{ $set: body },
);
if (matchedCount) {
return c.string("Contact updated successfully!", 204);
}
return c.string("Unable to update contact");
}
throw new ErrorHandler("Contact not found", 404);
} catch (error) {
throw new ErrorHandler(error.message, error.status || 500);
}
};
...
Testing on Postman: Making a PUT request on /contact/:id.

deleteContact: This deletes the contact with the specified id in the database.
export const deleteContact: HandlerFunc = async (c: Context) => {
try {
const { id } = c.params as { id: string };
const getContact = await contacts.findOne({ _id: { "$oid": id } });
if (getContact) {
const deleteCount = await contacts.deleteOne({ _id: { "$oid": id } });
if (deleteCount) {
return c.string("Contact deleted successfully!", 204);
}
throw new ErrorHandler("Unable to delete employee", 400);
}
throw new ErrorHandler("Contact not found", 404);
} catch (error) {
throw new ErrorHandler(error.message, error.status || 500);
}
};
Testing on Postman: Making a DELETE request on /contact/:id.

You can find the full source code on Github.

Chinedu Imoh
Chinedu is a tech enthusiast focused on full-stack JavaScript and Infrastructure engineering.
