Forcing Myself to Write Unit Tests

Summarize with AI:
Unit tests have a ton of benefits. But first you have to write them. Here's how I forced myself to do it and improved my React development.
"Tests are like vegetables. They’re really good for other people."
I know that unit tests have a ton of benefits. They act as a safety net so that you can make changes to your codebase and be confident that you are not breaking existing functionality. They force you to think about the design of your modules and how they’re going to be used. They document how your system is supposed to work.
But, still, I find myself procrastinating and not writing those unit tests. EVERY. TIME.
So, for my last few projects, I’ve started configuring things so that I can’t procrastinate any more. In this article, I’ll explain how I’ve set up my projects to enforce code coverage thresholds, produce useful reports, and run unit tests before committing and pushing to a remote.
Unit Testing with Jest and Create React App
When creating new projects with Create React App, everything will already be set up to use Jest as our testing library. Try this:
npx create-react-app my-app
cd my-app
npm test
You’ll see something like this:
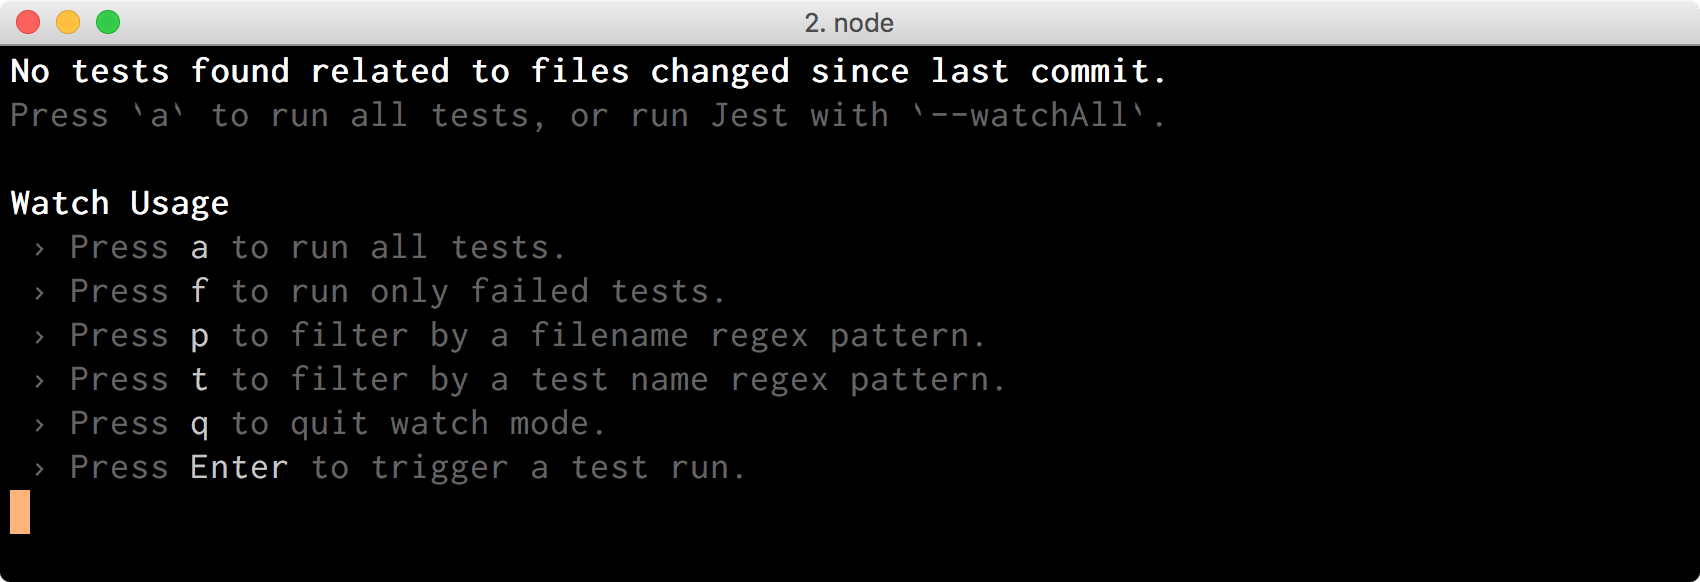
By default, Jest will only run tests for files that have changed since the last commit. We just created the project, so nothing has changed yet, and that’s why Jest didn’t run anything. We can press the key a to force Jest to run all unit tests:
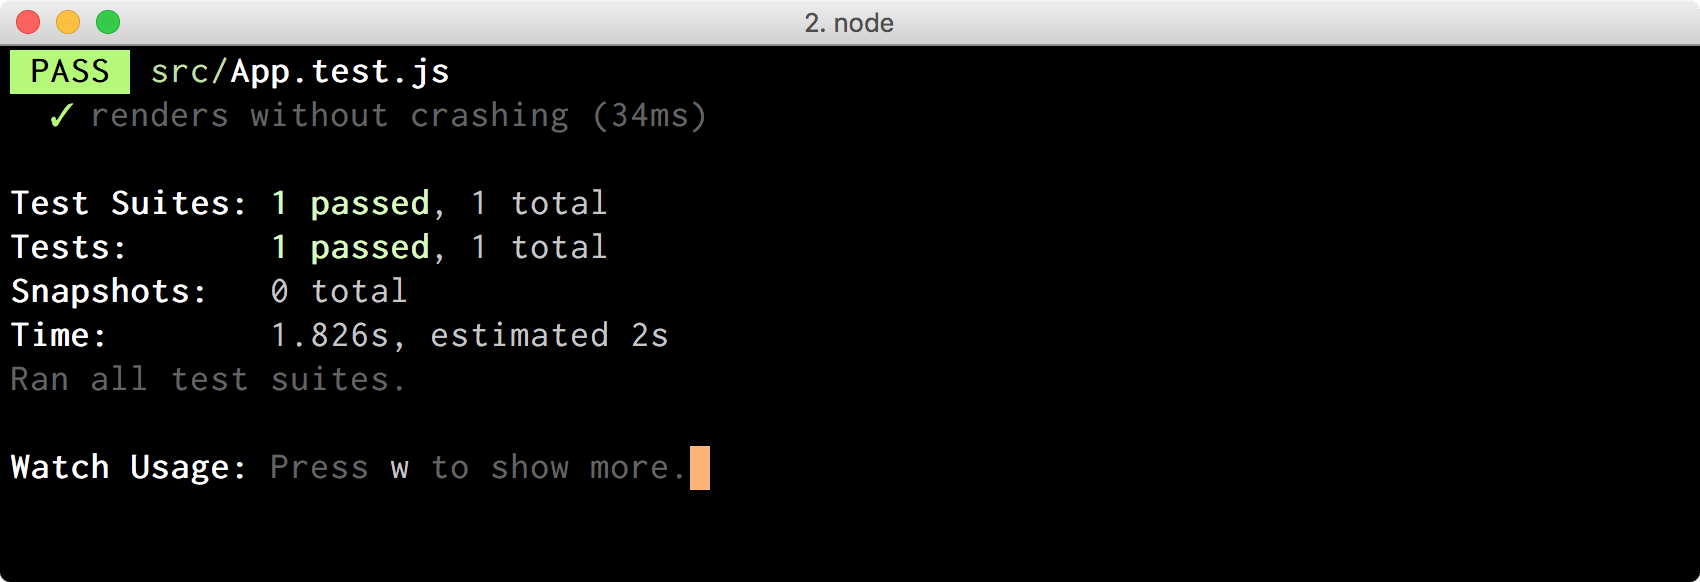
We can also force this behavior by passing the --watchAll flag:
npm test -- --watchAllIf we now introduce a breaking change like this one:
class App extends Component {
  render() {
    throw new Error('OOPS');
    // ...
  }
}
Jest will immediately rerun the test and alert us:
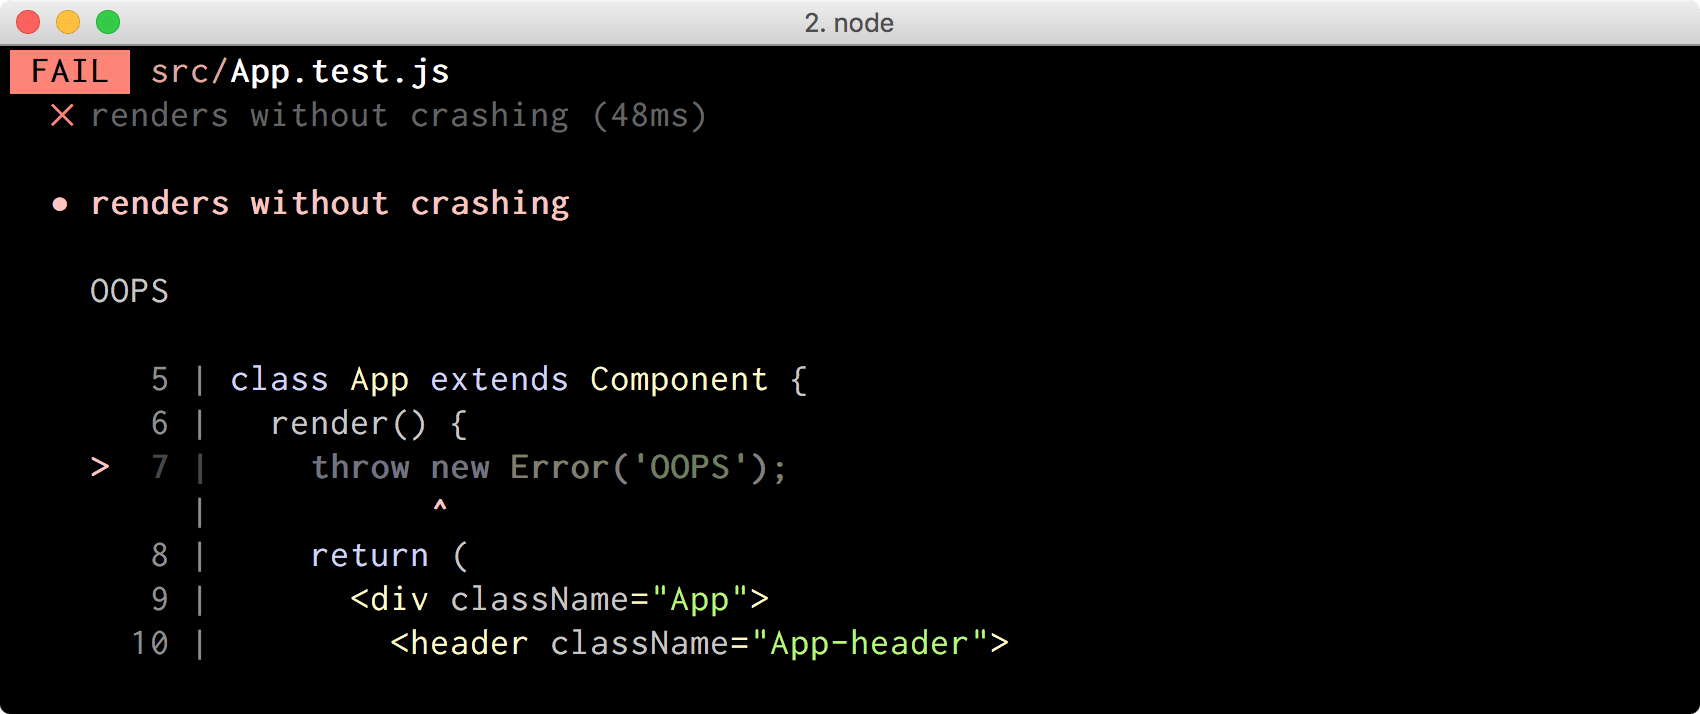
Cool, we have our basic testing flow all working!
Enabling Test Coverage in Our Project
The amount of code that is exercised by our unit tests is called test coverage. It’s very useful to know which parts of our code are not covered by unit tests. We can tell Jest to capture and output this information by passing the --coverage flag:
npm test -- --coverage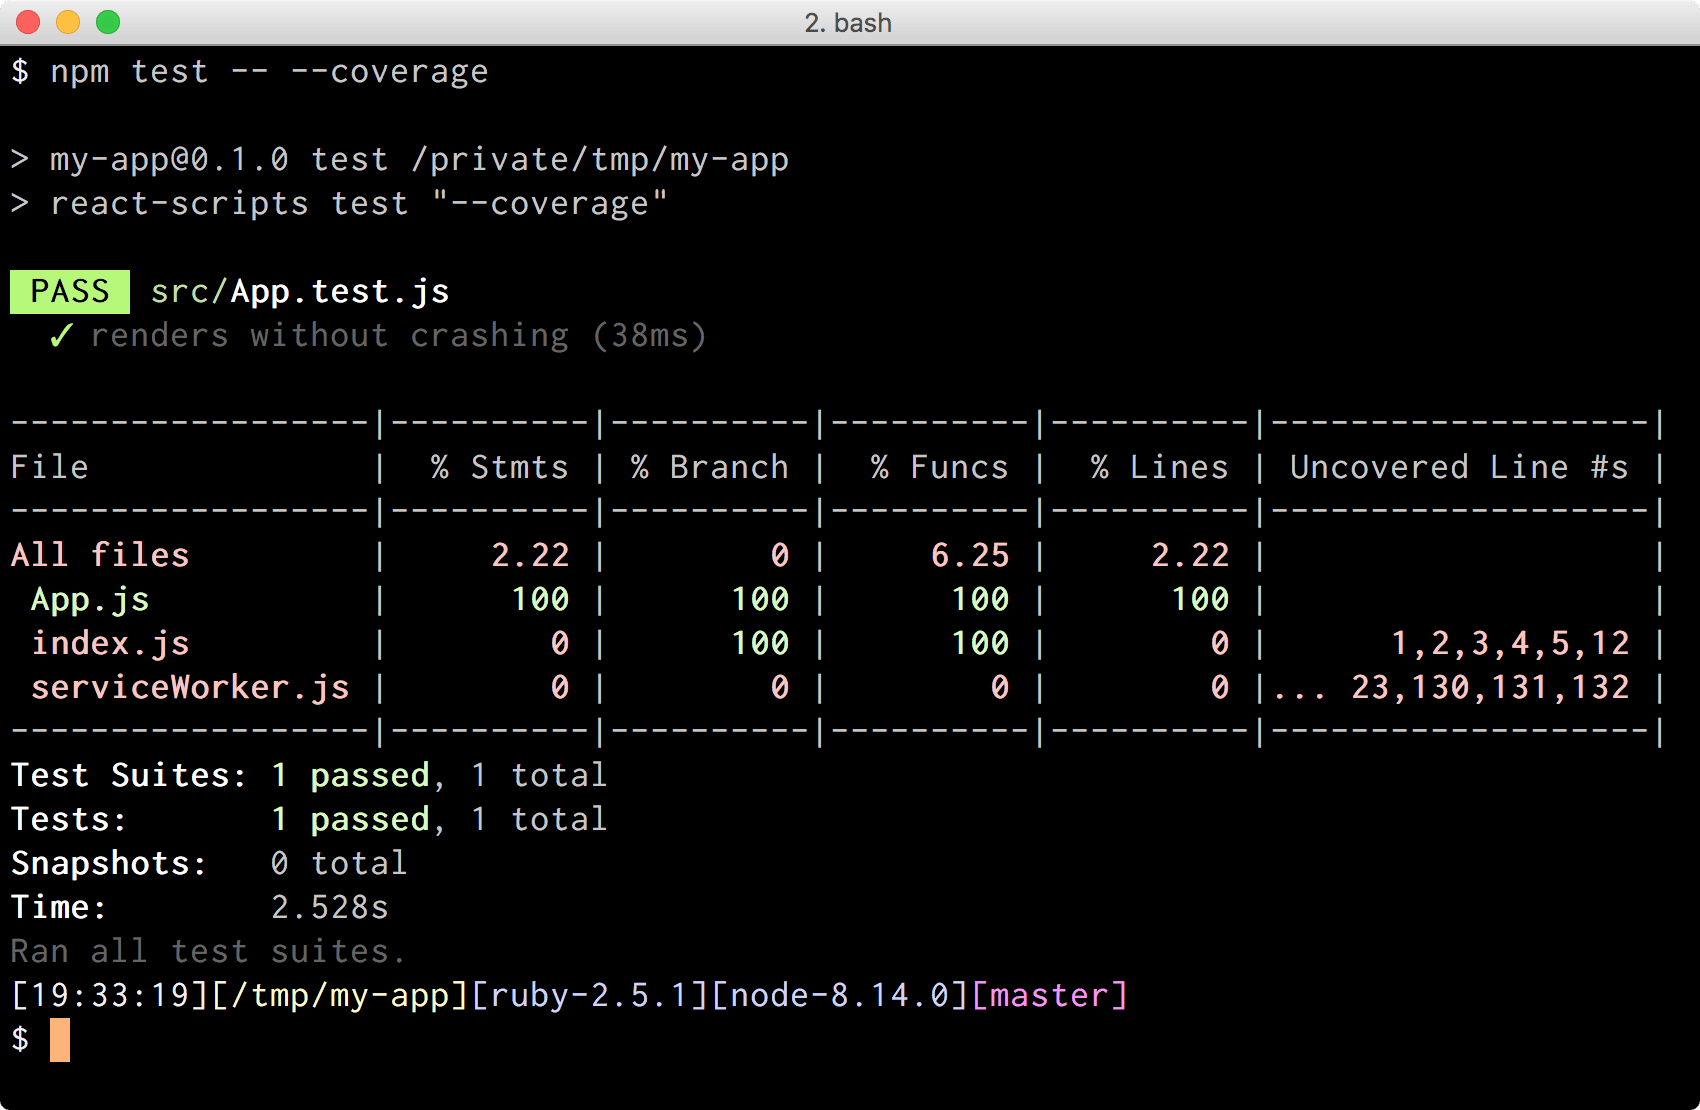
Jest is telling us that our App.js component is fully covered by unit tests, but index.js and serviceWorker.js are not, which is great information to have!
It’s also worth noting that Jest didn’t start in watch mode when we passed the --coverage flag. I don’t know why though. 🤷
I tend to modify the scripts section of my package.json to read like this:
{
  // ...
  "scripts": {
    "start": "react-scripts start",
    "build": "react-scripts build",
    "watch": "react-scripts test --coverage --watch",
    "test": "react-scripts test --coverage",
    "eject": "react-scripts eject"
  }
}
That way I can do npm test if I want to run my tests once, and npm run watch if I want to rerun them every time I make a change, but I get code coverage information in both cases.
Ok, let’s modify that App component to conditionally show the React logo based on the props that were passed to it:
class App extends Component {
  render() {
    const { showLogo } = this.props;

    return (
      <div className="App">
        <header className="App-header">
          {showLogo ? (
            <img src={logo} className="App-logo" alt="logo" />
          ) : (
            <h1>Learn React</h1>
          )}
        </header>
      </div>
    );
  }
}
If we rerun our tests with npm test, some numbers will change:
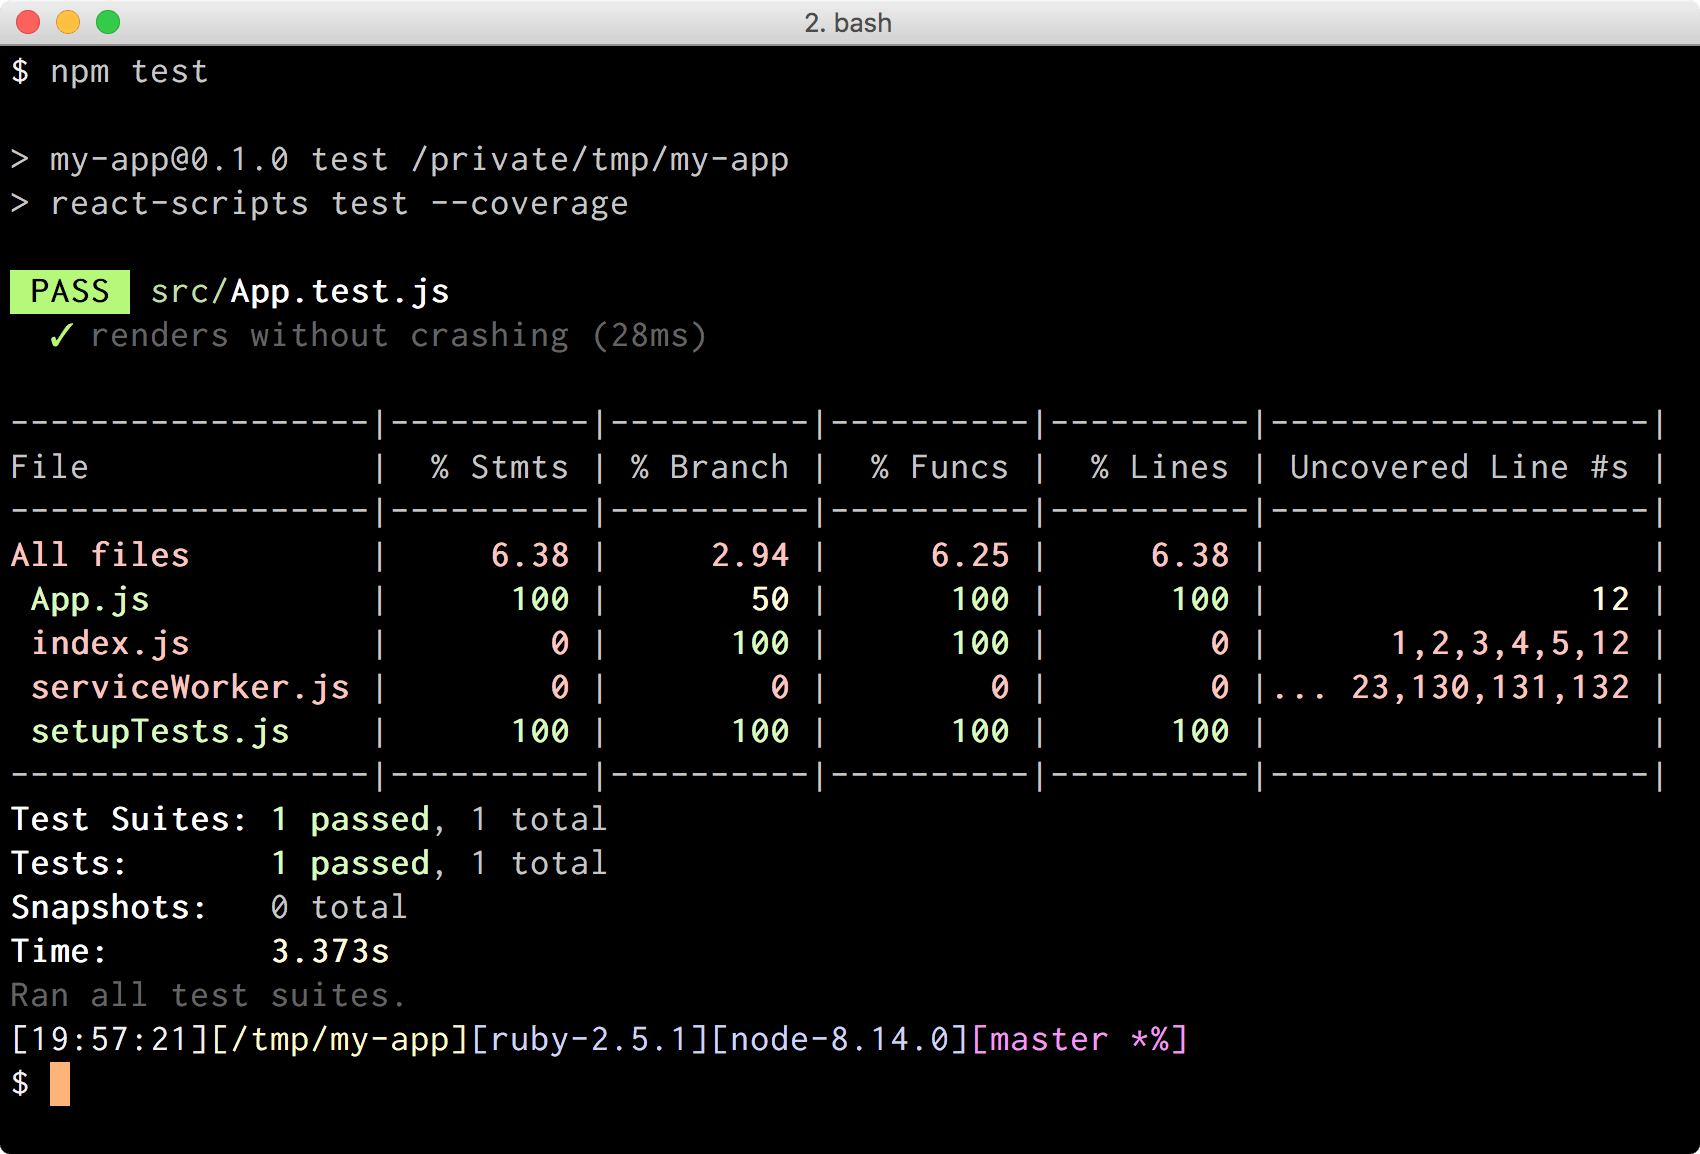
Did you see how % Branch went down to 50% for App.js? It’s because our existing unit test is only covering one branch of the ternary statement that we introduced, but not the other one. The Uncovered Line #s column points us to the lines that aren’t fully covered.
There’s a better way to view what’s covered and what’s not, however.
Showing Test Coverage as HTML
Jest relies on a project called Istanbul to generate its code coverage reports. By default, Jest outputs reports in a bunch of formats (json, lcov, text, clover), but we can configure it to use any valid Istanbul reporter through the coverageReporters option. We just need to add a new section “jest” to our package.json with the list of reporters:
{
  // ...
  "jest": {
    "coverageReporters": ["text", "html"]
  }
}
Now Jest is configured to produce code coverage reports as text and html. The former is the one that prints results to the console, while the latter generates an index.html file in a folder called coverage/ at the root of our project. If we open it in a browser we’ll see a summary of all files and their coverage values. We can click on each of those files, and see our code annotated in areas that weren’t fully covered. It makes it much easier to identify where we need to improve our testing.
Let’s try this by running our tests with npm test, and opening the file coverage/index.html:
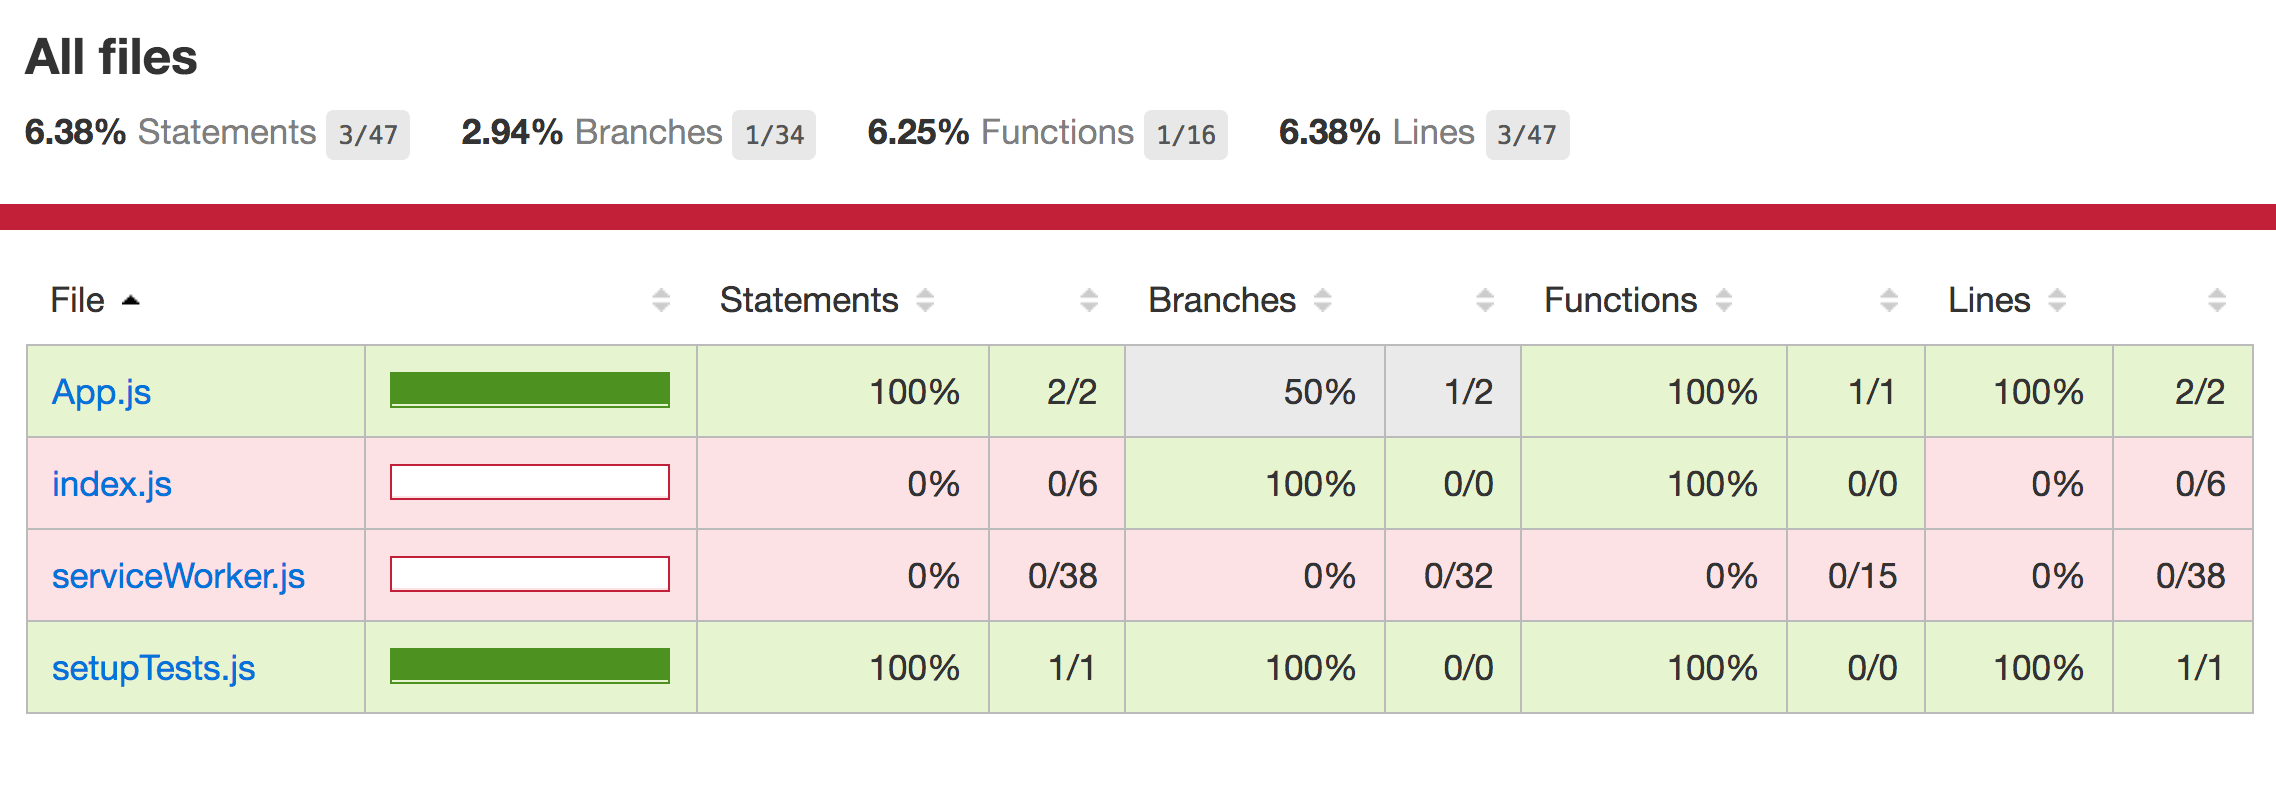
If we click App.js, we’ll see the file with coverage annotations:
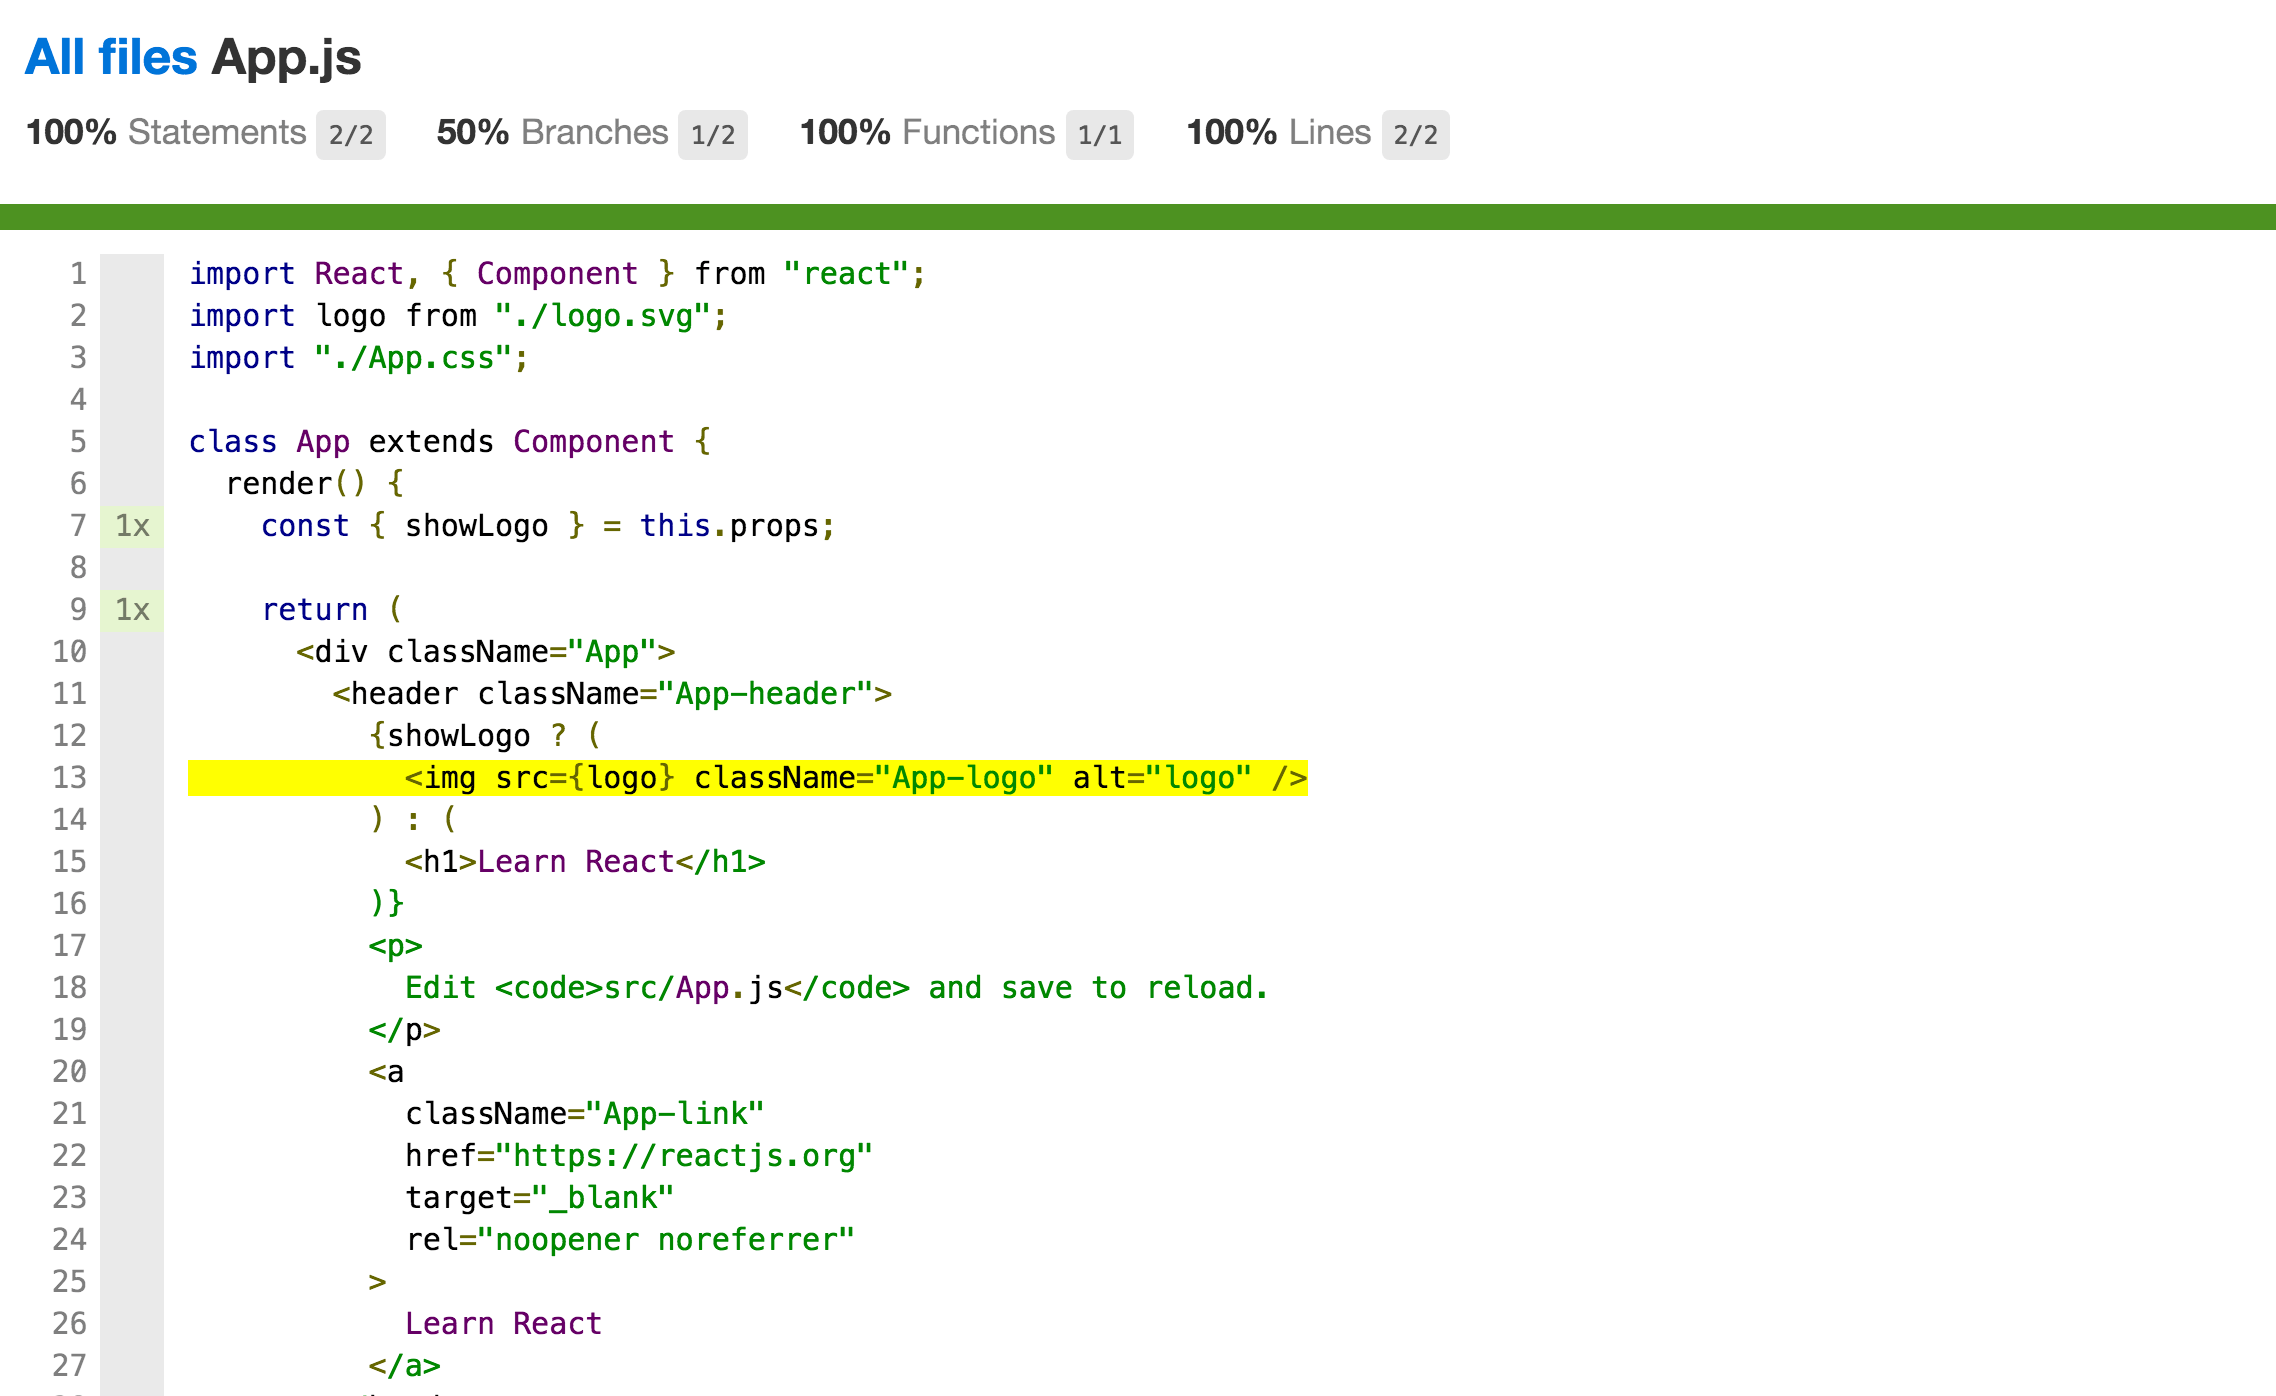
That yellow line is the one that isn’t getting exercised by our unit tests.
The npm test task finished successfully though, because 100% test coverage is not required for our unit tests to pass. But what if I wanted to force myself to achieve 100% test coverage in certain areas?
Ensuring Full Test Coverage
We can configure Jest to fail our tests if they don’t meet a certain coverage threshold through the coverageThreshold option. Thresholds can be specified as “global” if we want them to be applied to every file in our project, or as a path or glob if we only want to apply them to certain files.
For example, with the following configuration, Jest will fail if there is less than 100% branch, function, line, and statement coverage, but only for files living inside a folder called components/:
{
  // ...
  "jest": {
    "coverageReporters": ["text", "html"],
    "coverageThreshold": {
      "src/components/**": {
        "branches": 100,
        "functions": 100,
        "lines": 100,
        "statements": 100
      }
    }
  }
}
If we move our App.js component under a components/ folder, and then run npm test, we’ll get this:
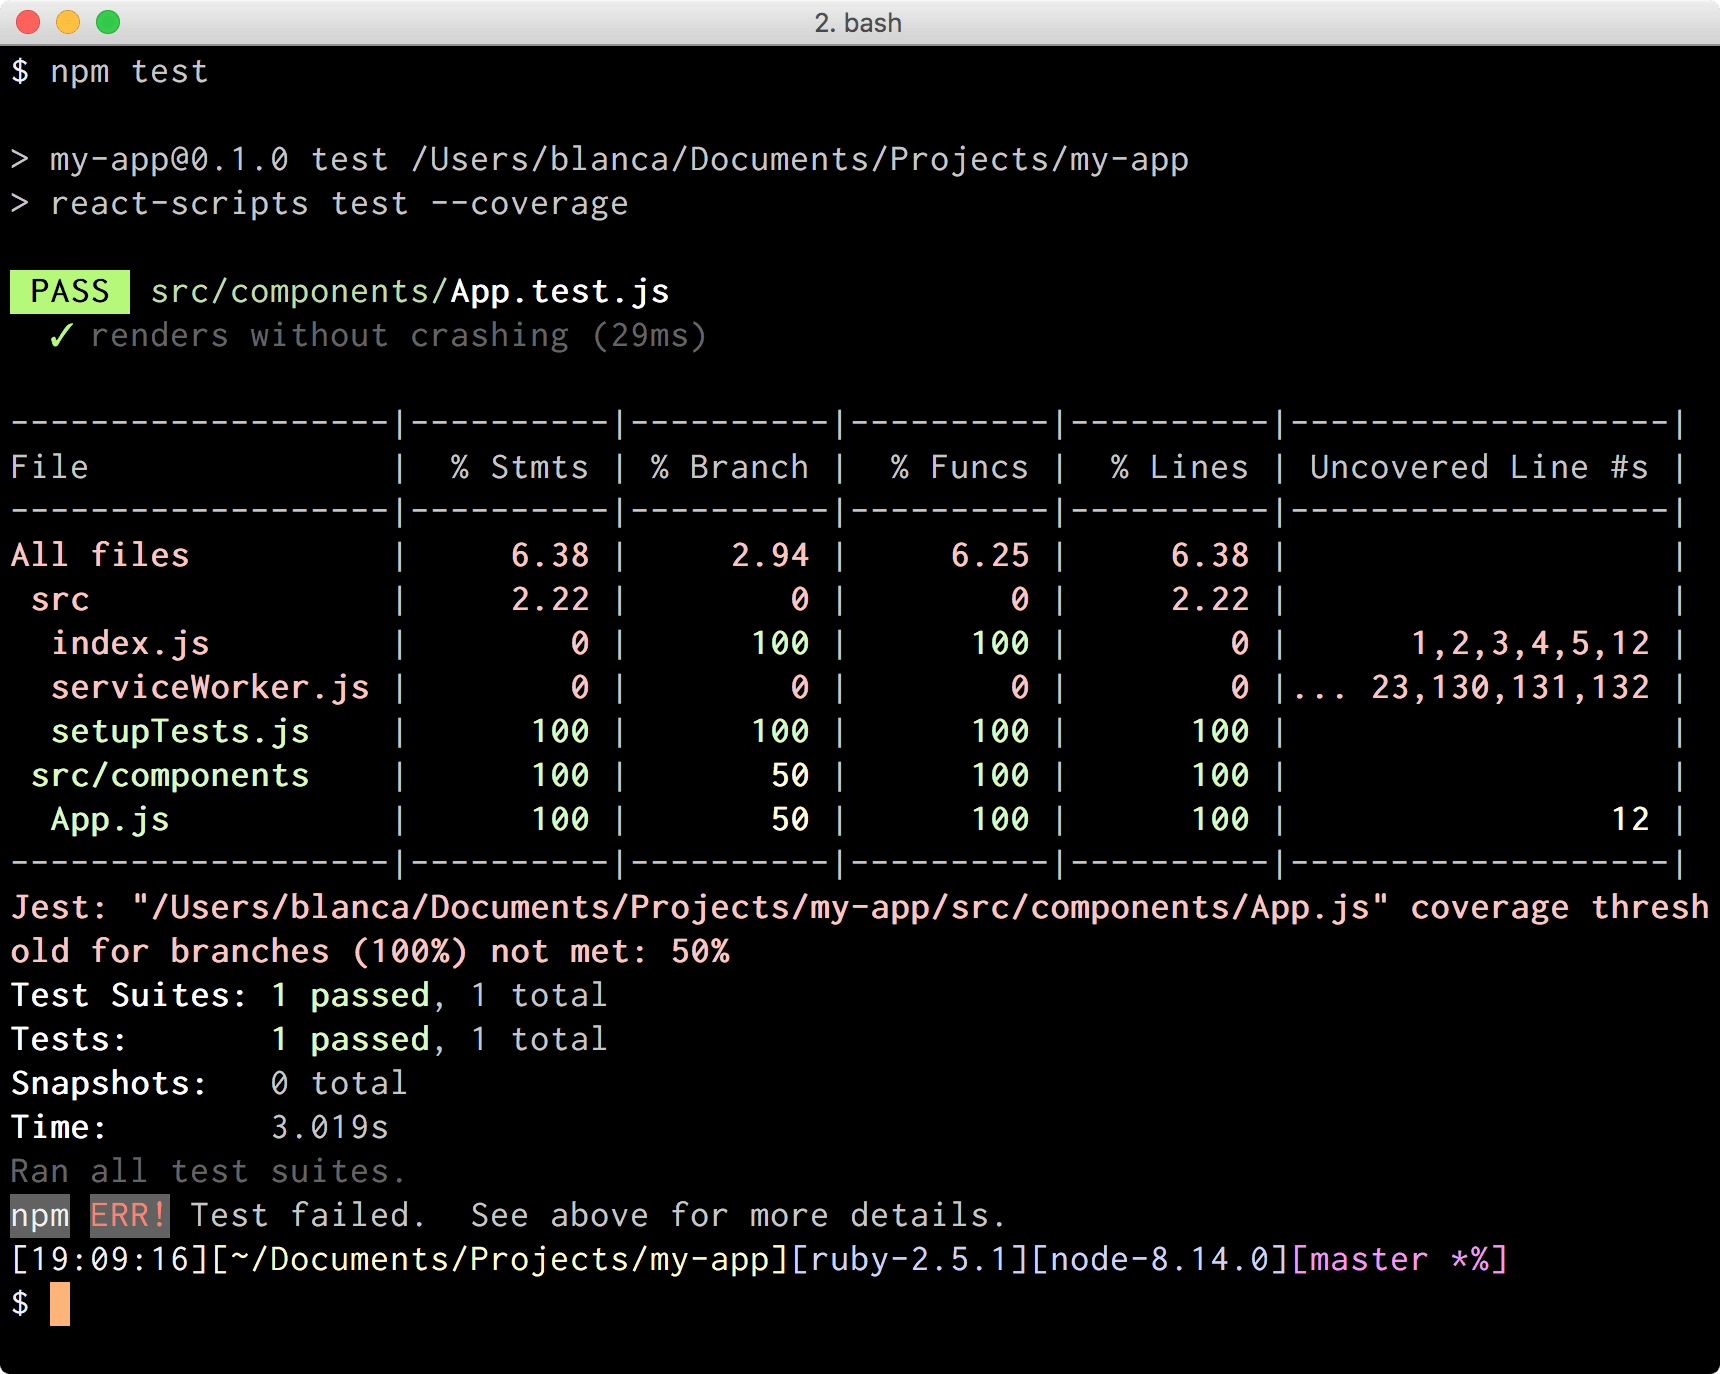
The task failed, and Jest explained why:
Jest: "my-app/src/components/App.js" coverage threshold for branches (100%) not met: 50%Nice, now I’m forced to fix this!
Achieving Full Test Coverage
We’ll have to modify the existing unit test to achieve full code coverage. I’m more used to writing tests with enzyme, so let’s install it real quick before doing anything else:
npm install --save-dev enzyme enzyme-adapter-react-16We’ll also have to create a setupTests.js file under src/ with the following contents:
import Enzyme from "enzyme";
import Adapter from "enzyme-adapter-react-16";

Enzyme.configure({ adapter: new Adapter() });
Ok, we’re good to go. Let’s replace the existing unit test with something like this:
import React from "react";
import { shallow } from "enzyme";
import App from "./App";

describe("App", () => {
  let wrapper;

  describe("when `showLogo` is true", () => {
    beforeEach(() => {
      wrapper = shallow(<App showLogo={true} />);
    });

    it("renders an image", () => {
      expect(wrapper.find("img")).toHaveLength(1);
    });
  });

  describe("when `showLogo` is false", () => {
    beforeEach(() => {
      wrapper = shallow(<App showLogo={false} />);
    });

    it('renders a header', () => {
      expect(wrapper.find("h1").text()).toEqual("Learn React");
    });
  });
});
If we rerun our tests with npm test we’ll see something like:
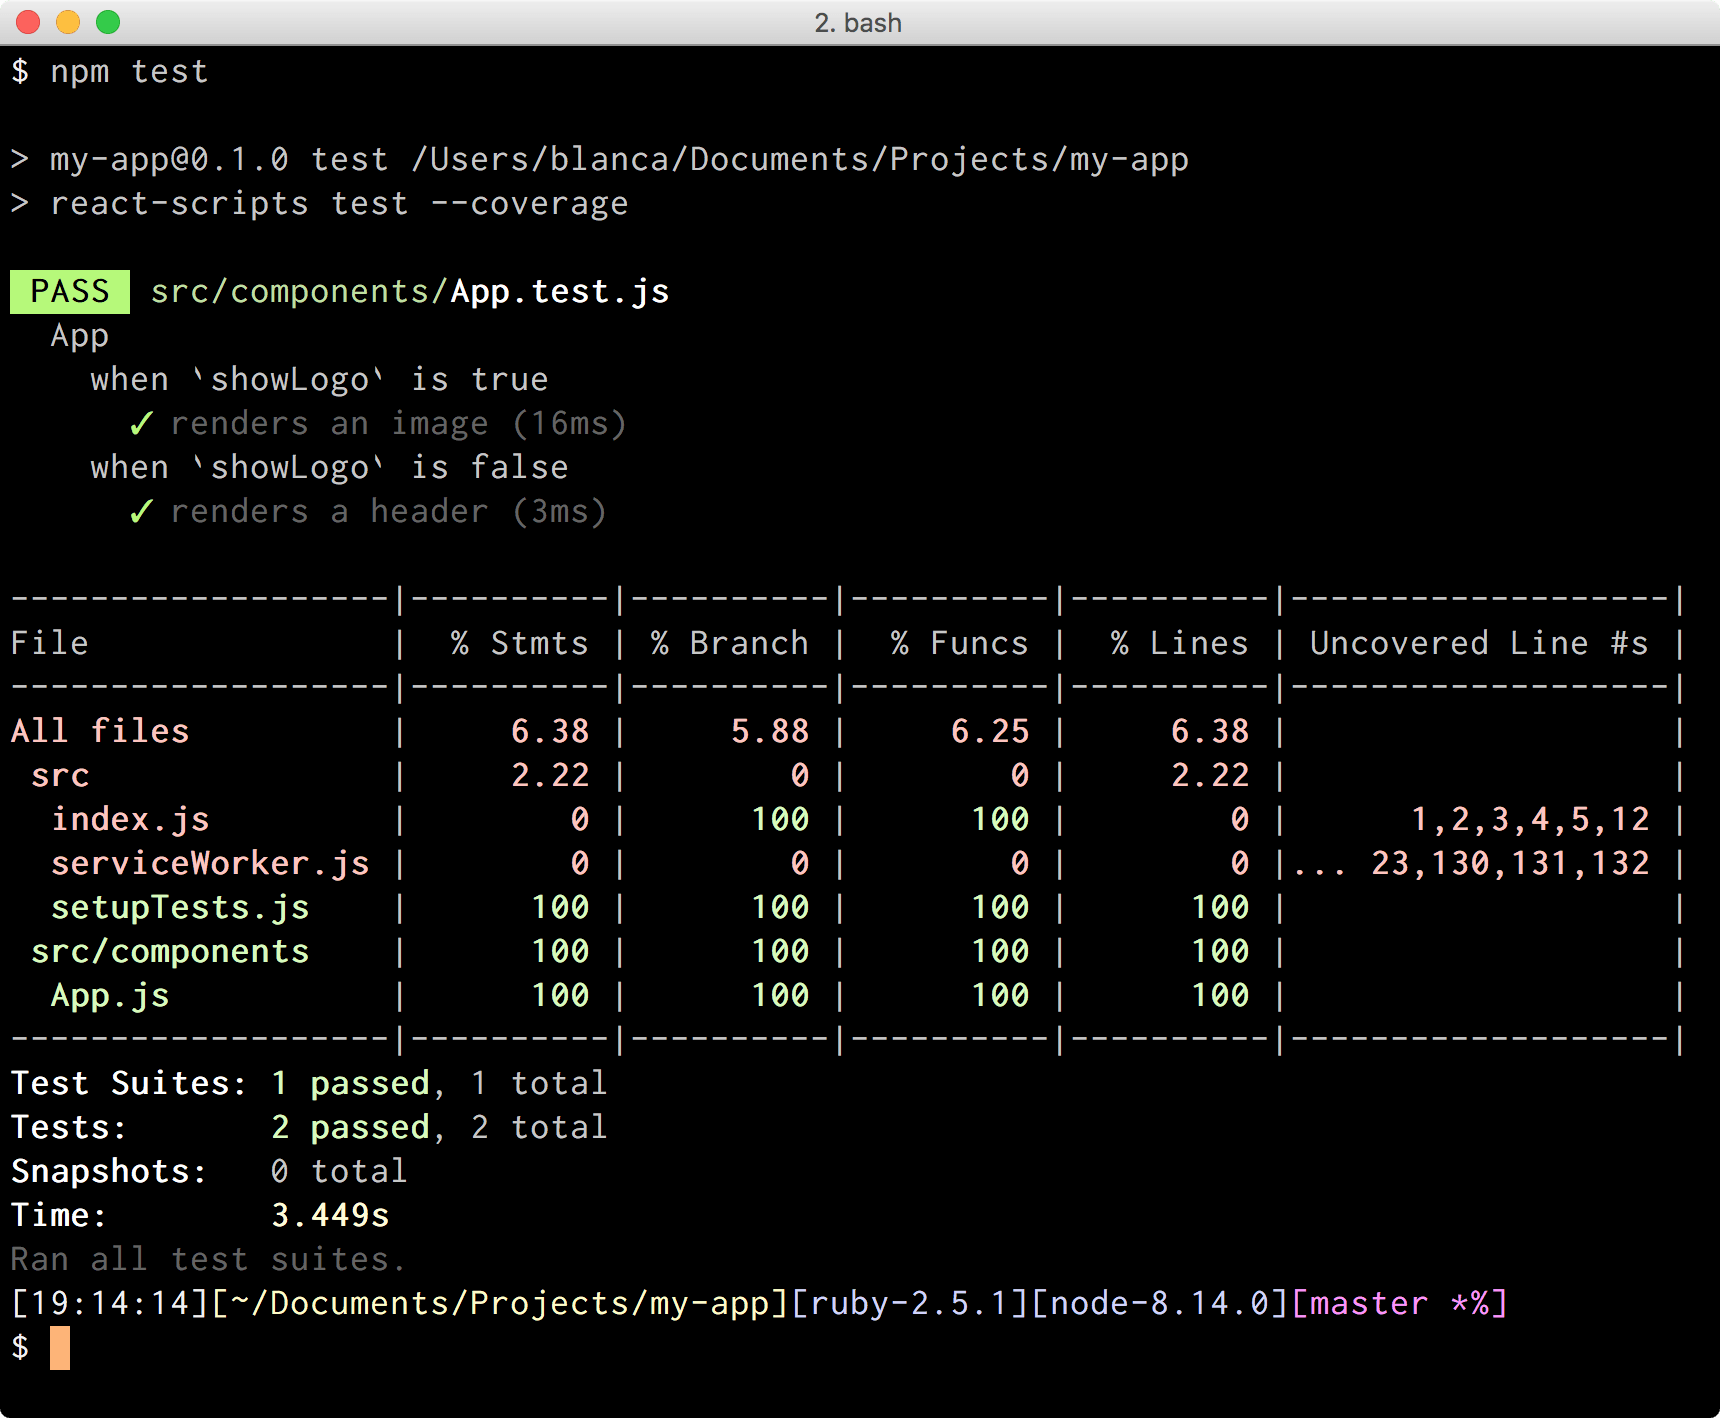
Hey, % Branch is back at 100%, and tests are passing! ✅
Preventing Untested Code from Being committed Using Husky
Now that we know how to ensure full test coverage in areas of our project, I want to go further and prevent myself from committing or pushing to my repository if tests aren’t passing, or if coverage thresholds aren’t met.
The way to do this is through Git hooks, which tie together Git actions, such as committing or pushing, with the execution of custom tasks (in our case, npm test). There’s a project called Husky that makes configuring hooks very easy.
First we’ll have to install the package:
npm install --save-dev huskyThen we’ll configure the hooks we want to use in our project. We’ll add a section called “husky” in our package.json, and describe in there how we’ll map hooks to tasks.
In our example app, we are going to use the hooks pre-commit and pre-push to ensure all our test are executed before committing and pushing code respectively:
{
  // ...
  "husky": {
    "hooks": {
      "pre-commit": "npm test",
      "pre-push": "npm test"
    }
  }
}
If we try committing now by doing git commit -m “Add showLogo prop to App”, we’ll see Husky running our tests before the commit gets created. If the tests were to fail, the commit wouldn’t get created. In this case, they passed, so we were able to commit fine:
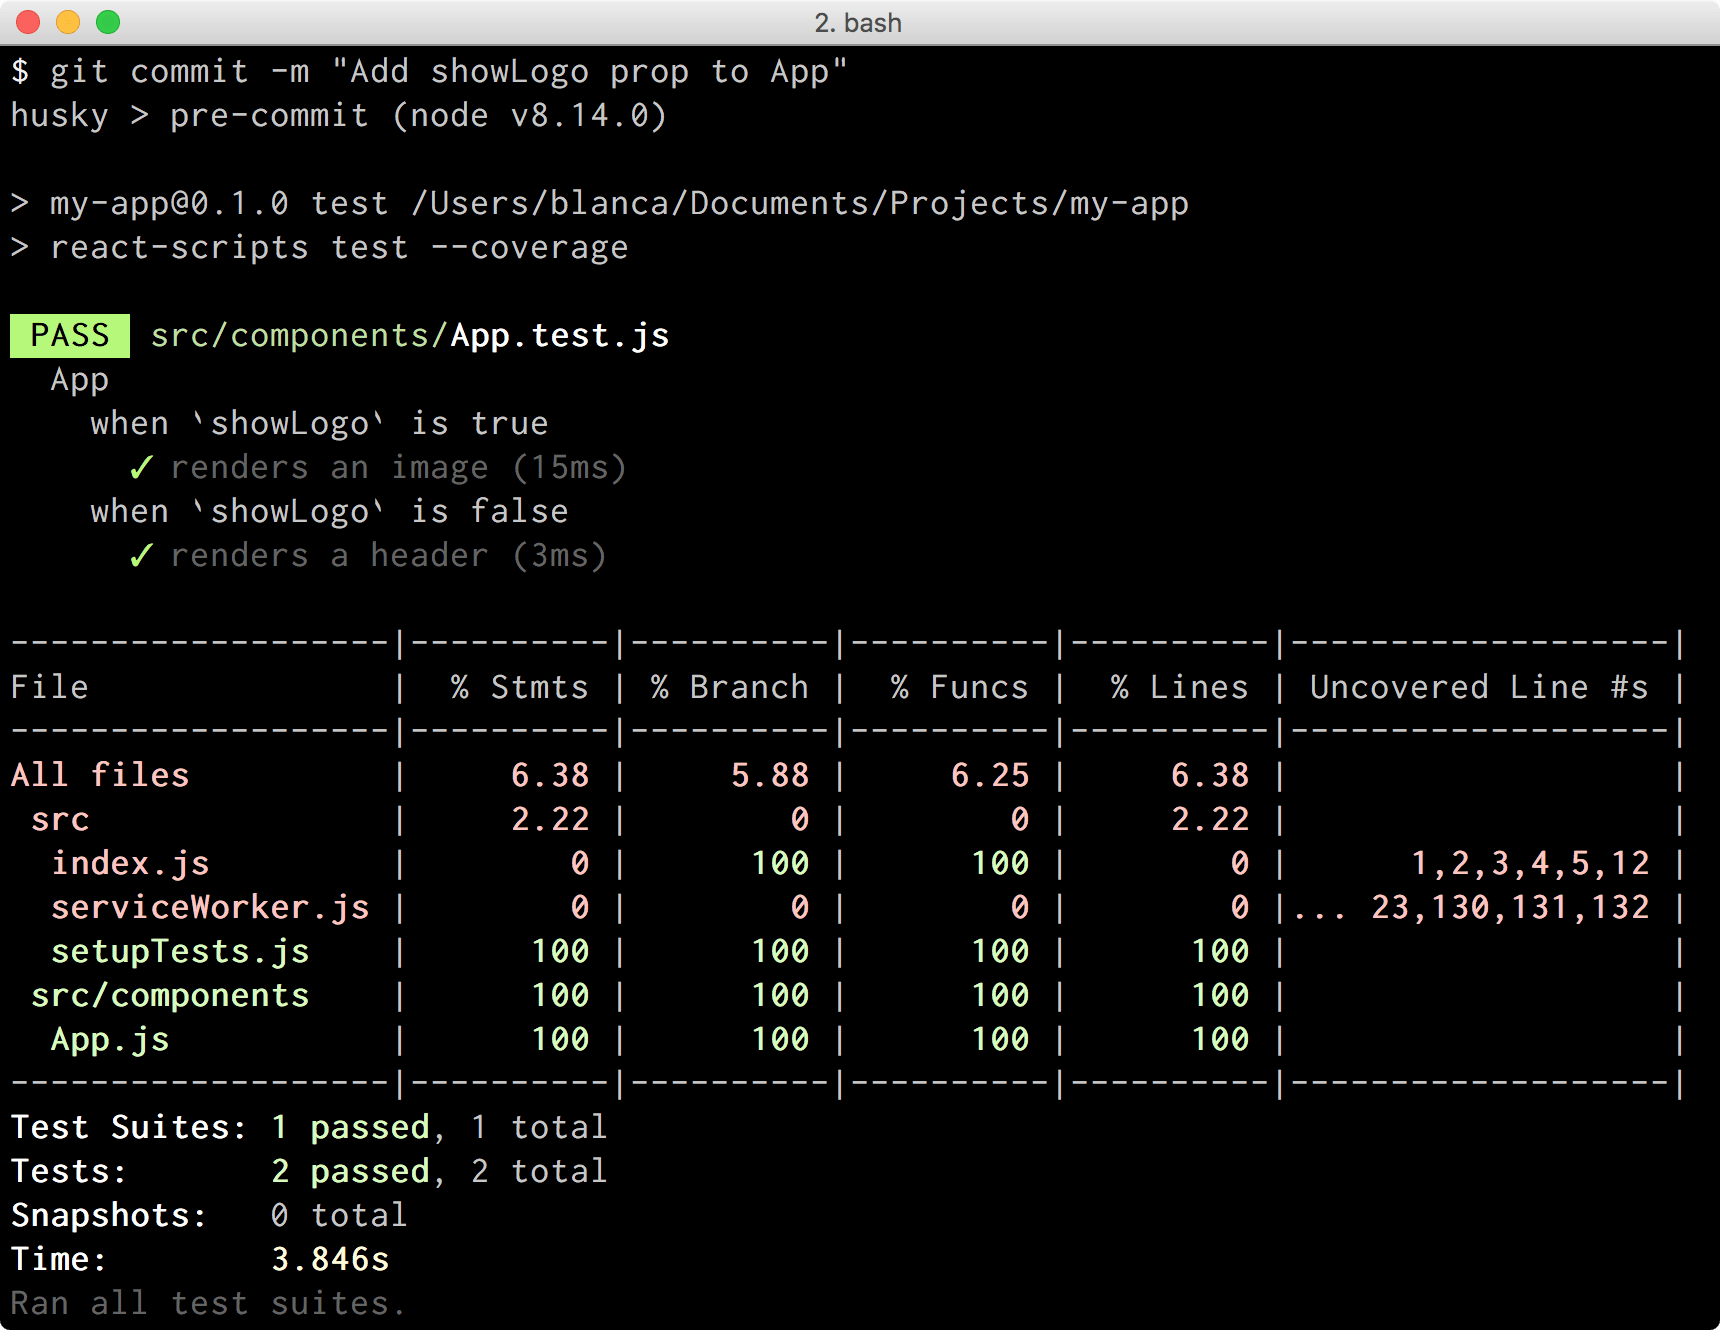
Awesome job Husky! 🐶
Conclusion
Testing our code is one of the best things we can do to ensure we don’t introduce regressions every time we make a change. With the tools and tips described here, we can enforce full test coverage in areas of our project, view code coverage reports in multiple formats, and use hooks to ensure everything is looking fine before committing and pushing any code to our repository. Now I’ll have no option but to eat my veggies! 🥗

Blanca Mendizábal Perelló
Blanca is a full-stack software developer, currently focused on JavaScript and modern frontend technologies such as React. Blanca can be reached at her blog https://groundberry.github.io/ or @blanca_mendi on Twitter.
