
Contain Your Excitement: Cross Platform Containers with Docker

Summarize with AI:
The cloud has transformed the way enterprise applications are developed, delivered, and hosted. A major catalyst of these recent transformations has been the widespread adoption of containers. A significant milestone occurred in early 2013 when the software containerization platform Docker was released as open source. As evidenced by the following diagram, interest has grown exponentially in just a few years.

The popularity of Docker, combined with the Open Container Initiative has led many major cloud providers to provide their own "out of box" support for Docker. Microsoft offers the Azure Container Service, Amazon allows you to run containers on their EC2 Container Service and Google enables container-management through their Kubernetes-based Container Engine. All of these services represent a major evolution for cloud-based applications.
What is a container?
Traditionally, the cloud has been viewed as an infrastructure-play. The easiest (but most expensive) method for moving a platform to the cloud is to use Infrastructure as a Service (IaaS) or cloud-hosted virtual machines. The problem is that virtual machines host the entire operating system, rely on large images, and require heavy patching and OS updates like traditional physical hosts.
Platform as a Service (PaaS) allows you to focus on the service you are provided and abstracts away management of the underlying platform and OS, but also forces an affinity because PaaS is not compatible across different cloud providers. Containers provide a compromise that is illustrated below:
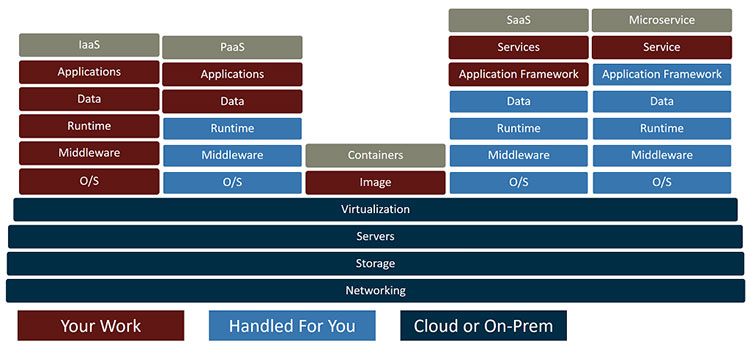
A container shares services with the host, so each container does not require a full copy of the entire operating system. In fact, some containers are as small as a few megabytes in size! This makes them easy to manage, share, and deploy. And, because the host operating system runs and manages the container, they are also extremely fast to start and don't require the lengthy boot cycles of full VMs.
Think of a container as a runtime, containing your components and any dependent libraries that are necessary to execute that component. Applications can be composed of multiple containers. Containers can be leveraged as part of the development process, moved from local machines to cloud hosts, and leveraged in production.
The easiest way to understand containers is to start working with one on your own.
Getting Started: Your First Container
The examples in this article require a few prerequisites that can be installed on any platform.
- Start with the Long Term Support (LTS) version of Node.js
- Install the .NET Core cross-platform runtime from here
- Download and run Docker for your platform
- From a Node.js command prompt, install the Yeoman generator tool:
npm install -g yo - Install the generator for ASP.NET Core apps:
npm install -g generator-aspnet
Up and Running
To grasp the power of containers, we'll start by leveraging an existing image that is available on the Docker Hub. The image will run an Apache web server on a linux host that displays a static "Hello, World" web page. It is called docker-hello-world.
First, take a look at the containers you have running by typing:
docker ps
You should not see anything, because you haven't started any containers.
Next, take a look at images. This may also be empty:
docker images
Think of a container image as a class definition. It describes the class, but your application cannot interact with the class until it creates a running instance. Images define a container, but they must be run before you can interact with the container. You can also run multiple instances of the same image for clustering, load-balancing, etc.
First, pull the image from the repository:
docker pull tutum/hello-world
It should now appear when you run docker images like this:
REPOSITORY            TAG                 IMAGE ID            CREATED             SIZE
tutum/hello-world     latest              31e17b0746e4        9 months ago        17.79 MB
To run the container, type:
docker run -d -p 80:80 tutum/hello-world
Navigate to http://localhost:80 and you should see something like this:
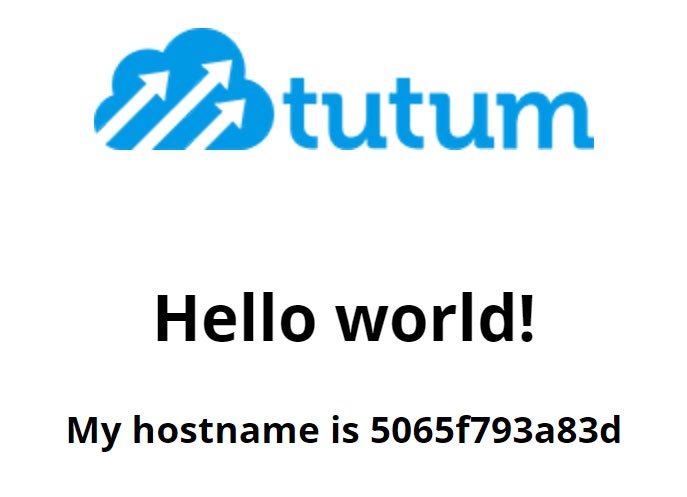
You can change the port if you already have a web server running on the default port. For example, to access the web page on port 4000 instead, you would change the parameter to -p 4000:80.
The -d simply instructs Docker to run the container in detached mode (in the background), while the -p command maps an external port to the container's internal port.
Now you can see the running image:
docker ps
To clean up, use the container id listed in the ps command, and execute the following commands:
docker stop 5065f793a83dwill stop the running instance, anddocker rm 5065f793a83dwill remove the container
You can stop and restart containers, and the container state will be preserved until you remove the container itself.
A Quick Web API App
Let's create a Web API app that we can use to build a container with. In a parent directory, generate the website with Yeoman:
yo aspnet
Yeoman will display a menu like this:
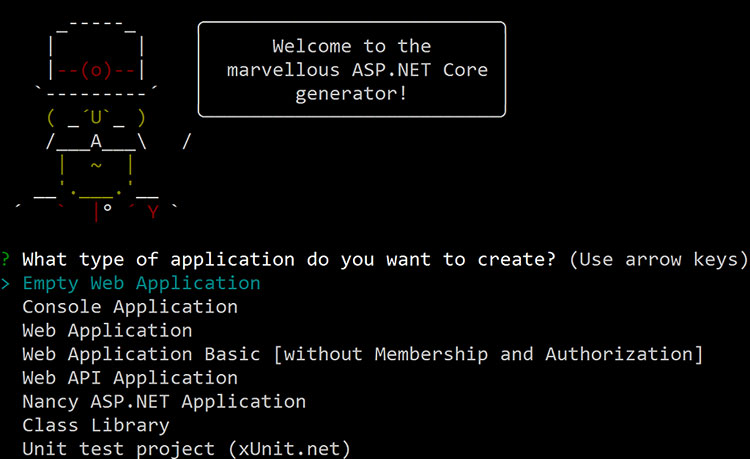
Use your cursor keys to navigate to "Web API Application" and hit the enter key.
Name your app ContainerApi.
When you hit enter a second time, the app is generated. Make a change to the project.json file with your favorite editor to set the platform to 1.0.0 instead of 1.0.1. This will avoid an issue with the current container image. The
top section should look like this (change the version to 1.0.0):
"dependencies": {
 "Microsoft.NETCore.App": {
     "version": "1.0.0",
    "type": "platform"
 },
Confirm it builds and runs by following these steps:
cd ContainerApidotnet restore(restores dependencies)dotnet build(builds the app)dotnet run(runs the webserver)
You should now be able to open a web browser and navigate to http://localhost:5000/api/values to see a return result with an array of strings value1 and value2. This may appear as XML or JSON depending on your browser.
Your First Container
Stop the web application and then build your first container by issuing the following command:
docker build -t containerapi .
You should see several lines representing various steps scroll through the console with a message "Successfully built..." near the end. To verify it built, issue the docker images command:
REPOSITORY            TAG                 IMAGE ID            CREATED             SIZE
containerapi          latest              94e43a209728        14 hours ago        571.9 MB
(You'll see other images, too. I will explain those in a moment).
Now run the container and map it to port 8888:
docker run -d -p 8888:5000 containerapi
Confirm it is working by navigating to http://localhost:8888/api/values in your web browser.
Hopefully, you've done it! You created your first container and ran it. But how did we make it so easily? Clean up your container by stopping and removing it, then read on.
Dockerfile
When Yeoman generated the ASP.NET app, it created a file named Dockerfile. This file contains the commands needed to build an image.
If you open the file, you will see several commands that each represent a single step. The steps each produce a temporary container that is run and modified and used as a snapshot for the next step until the final step is completed. Here is the breakdown:
FROM microsoft/dotnet:latestThis command allows you to start with an existing image as the foundation for your container. The format is
username/repository:tagand in this example themicrosoftuser'sdotnetrepo is being used, with the tag for thelatestversion. It will download the image for you the first time, then use a locally cached copy until a newer version exists.COPY . /appThis command copies the contents of the local directory into the container. The left side references the local or "host" file system, and the right side represents a location inside the container itself.
WORKDIR /appThis simply changes the context of the subsequent commands to run in the
appsubdirectory inside the container.RUN ["dotnet", "restore"]RUNexecutes inside the container. This will use thedotnetcommand to restore the dependent packages.RUN ["dotnet", "build"]The application is then built inside the container.
EXPOSE 5000/tcpContainers run in isolated sandboxes, so it is not possible to access their contents unless they are configured explicitly to do so. This command exposes port 5000, the default port the webserver runs on.
CMD ["dotnet", "run", "--server.urls", "http://*:5000"]This last command instructs the container what to do when it is started. In this case, it will run the local web server and bind to the local port 5000.
As mentioned earlier, each step in the Dockerfile will create a temporary image until the final image is ready. When you have the final image, you can publish it, share it, pull it down on other machines and in other environments, and even host it on a cloud platform.
You've Got the Power!
Now you've got the power to manage, build, and run containers. Where do you go from here? There are several next steps to explore that will help round out your knowledge of containers:
- Explore the Docker Hub. There are many trusted images there to help you get started. For example, if you've ever wanted to work with Redis, instead of installing and configuring it you can get up and running quickly with a pre-configured Redis image.
- Learn how to manage your Docker images.
- Create applications that depend on multiple containers with Docker Compose, a tool that allows you to define and run applications by describing multiple containers and how they interact.
- Learn more about the Yeoman generator for Docker that will create advanced configurations to enable debugging containers from Visual Studio or other IDEs and producing release containers loaded with only the necessary files for production.
- Check out the excellent article "Building Optimized Docker Images with ASP.NET Core" by Microsoft's Steve Lasker to gain advanced knowledge of configuring and streamlining containers.
Container adoption has grown by factors of thousands each year. They are quickly becoming a de facto component of DevOps processes that help with rapid development, testing, and provide both resiliency and elasticity for production applications. In this article, you learned about Docker containers and how they fit into the bigger cloud picture. You should now be able to run and build your own containers and are hopefully already thinking about how to leverage this amazing technology to streamline your own development processes.

Jeremy Likness
Jeremy is a senior cloud developer advocate for Azure at Microsoft and a former 8-year Microsoft MVP. Jeremy is an experienced entrepreneur and technology executive who has successfully helped ship commercial enterprise software for 20 years. You can read more from him at his blog or find him on GitHub.