
Bling Out Your Laptop with a Festive Web-connected Light Show

Summarize with AI:
When I have gone to talk at conferences and demoed my well-travelled PocketRave app, I get a lot of great questions about NativeScript, Angular 2, and the Angular Advanced Seed code that were used to build the mobile app. We have a cool dance party at these talks as people download the PocketRave app and watch the art creations that they built on the mobile app turn into a kaleidoscope with paired music on the web.
One thing that I built to compliment this app, however, also gets a lot of surprised attention: the hardware integration that "blings" out my laptop. Several people have come up after my PocketRave talks to ask how it is possible that pressing buttons on the web app can make my laptop light up like a Christmas tree. In this tutorial, I’ll reveal my secrets to making a beautiful wifi- and web-enabled LED light show so that you, too, can bling out your laptop in style.
The Hardware
First, you’ll need some hardware:
- A Photon by Particle.io - my goto microprocessor that seamlessly connects to your wifi or your phone so that you can send it API calls as well as flash code remotely to it over the cloud. For this project, buy a headerless Photon (without pins) available from Adafruit among other places.
- An LED light strip, also available from Adafruit.
- A soldering iron - you’re going to need to do a bit of soldering; check out my tutorial for tips and tricks on how to solder with a minimum of hassle.
- A USB-mini to USB cord to connect the light strip to your laptop - this is how you power the Photon. You could use a battery instead.
- Rubber bands and a laptop! After a lot of experimentation, I found that attaching the LED strip with plain rubber bands is actually the easiest installation. You won’t damage your laptop, and while it looks pretty strange up close, from a distance the rubber bands won’t show as the lights are so bright.
Getting mesmerised by @jenlooper's laptop light strip whilst I learn about NativeScript. #AngularConnect pic.twitter.com/n85H8J3tMd
— Phil Nash (@philnash) September 28, 2016
Step 1: Connect Your Hardware
The first thing you should do is trim the wires at one end of the LED strip. You won’t need them, so trim them and fold the ends under the strip’s plastic casing. Next, carefully solder the three wires from the LED strip to the Photon. The schematic is as follows:
![]()
The Ground and Voltage pins connect to their counterparts on the photon, and the Dout pin on the strip connects to the D2 pin on the Photon. On my devices, the installation looks like this:
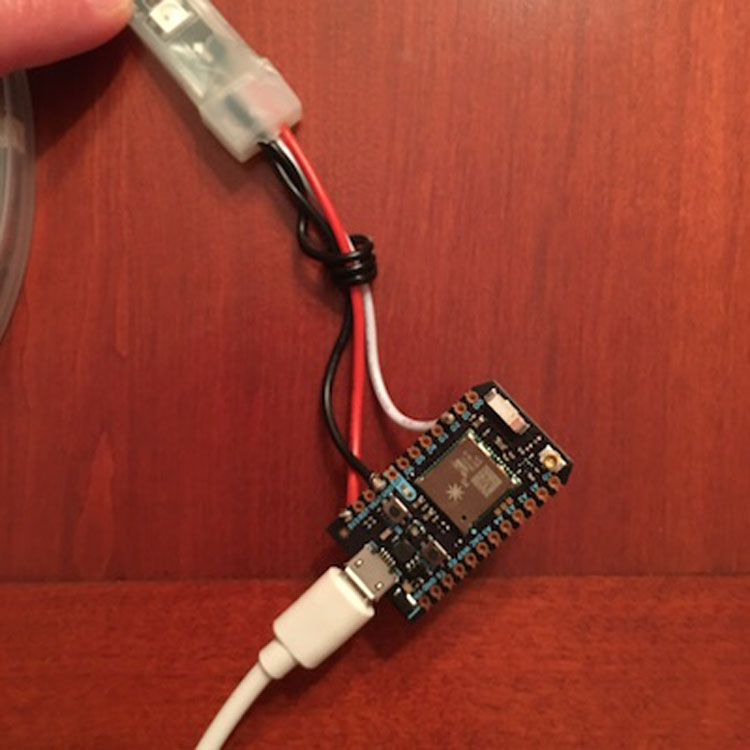
Once your have soldered the three necessary wires securely, you can connect the Photon via its mini USB port to your laptop and connect it to wifi. Once it’s connected, check its status in the Particle console via https://console.particle.io/devices. Both the light on the device and in the console will ‘breathe cyan’ - or pulse a light greenish blue color:

Note, you need a non-gated wifi connection to work with Photon devices on wifi - in conference venues, I consistently have to use my phone as a wifi hub.
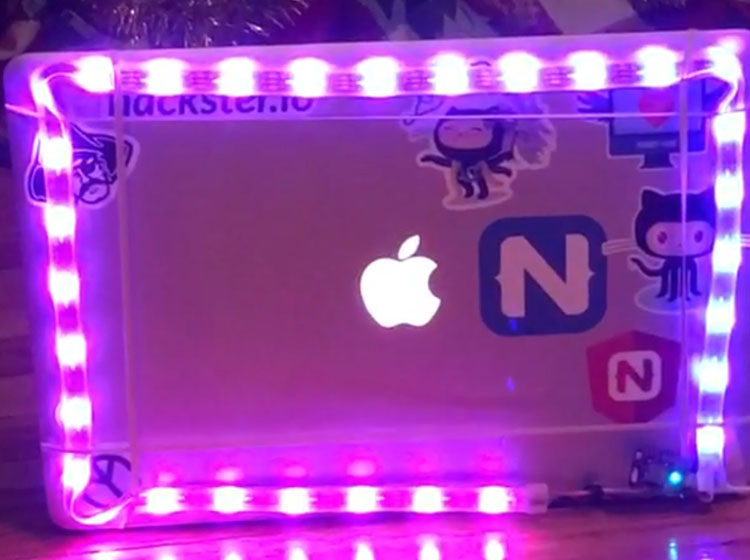
You can go ahead and attach the LED strip and the photon to your computer with the rubber bands, like this:
Step 2: Flash code to Your Photon
Once your Photon has successfully connected to wifi, you can flash the necessary code to make it respond to API calls. This is a very simple little program that you can load into the Photon ‘build’ cloud-based IDE, which looks like this:
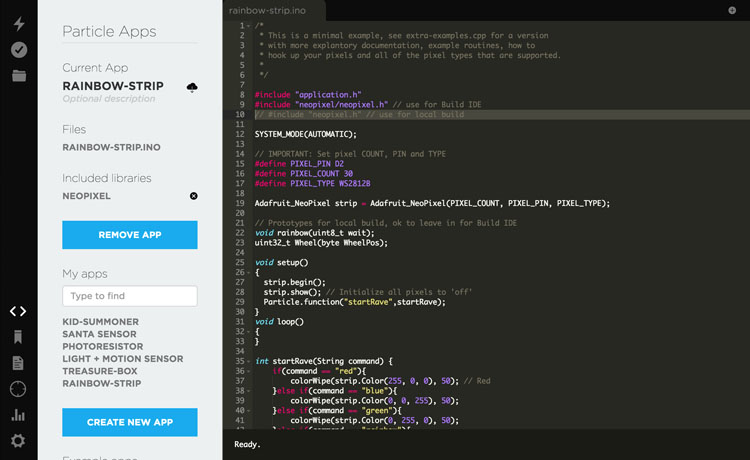
In the Particle Build IDE, create a new app with an .INO file named rainbow-strip.ino and paste the following code:
/*
 * This is a minimal example, see extra-examples.cpp for a version
 * with more explantory documentation, example routines, how to
 * hook up your pixels and all of the pixel types that are supported.
 *
 */

#include "application.h"
#include "neopixel/neopixel.h" // use for Build IDE
// #include "neopixel.h" // use for local build

SYSTEM_MODE(AUTOMATIC);

// IMPORTANT: Set pixel COUNT, PIN and TYPE
#define PIXEL_PIN D2
#define PIXEL_COUNT 30
#define PIXEL_TYPE WS2812B

Adafruit_NeoPixel strip = Adafruit_NeoPixel(PIXEL_COUNT, PIXEL_PIN, PIXEL_TYPE);

// Prototypes for local build, ok to leave in for Build IDE
void rainbow(uint8_t wait);
uint32_t Wheel(byte WheelPos);

void setup()
{
  strip.begin();
  strip.show(); // Initialize all pixels to 'off'
  Particle.function("startRave",startRave);
}
void loop()
{
}

int startRave(String command) {
    if(command == "red"){
        colorWipe(strip.Color(255, 0, 0), 50); // Red
    }else if(command == "blue"){
        colorWipe(strip.Color(0, 0, 255), 50);
    }else if(command == "green"){
        colorWipe(strip.Color(0, 255, 0), 50);
    }else if(command == "rainbow"){
        rainbow(20);
    }else if(command == "clear"){
         colorWipe(strip.Color(0, 0, 0), 50);
    }
}

// Set all pixels in the strip to a solid color, then wait (ms)
void colorAll(uint32_t c, uint8_t wait) {
  uint16_t i;

  for(i=0; i<strip.numPixels(); i++) {
    strip.setPixelColor(i, c);
  }
  strip.show();
  delay(wait);
}

// Fill the dots one after the other with a color, wait (ms) after each one
void colorWipe(uint32_t c, uint8_t wait) {


  for(uint16_t i=0; i<strip.numPixels(); i++) {
    strip.setPixelColor(i, c);
    strip.show();
    delay(wait);
  }
}

void rainbow(uint8_t wait) {
  uint16_t i, j;

  for(j=0; j<256; j++) {
    for(i=0; i<strip.numPixels(); i++) {
      strip.setPixelColor(i, Wheel((i+j) & 255));
    }
    strip.show();
    delay(wait);
  }
}

// Slightly different, this makes the rainbow equally distributed throughout, then wait (ms)
void rainbowCycle(uint8_t wait) {
  uint16_t i, j;

  for(j=0; j<256; j++) { // 1 cycle of all colors on wheel
    for(i=0; i< strip.numPixels(); i++) {
      strip.setPixelColor(i, Wheel(((i * 256 / strip.numPixels()) + j) & 255));
    }
    strip.show();
    delay(wait);
  }
}

// Input a value 0 to 255 to get a color value.
// The colours are a transition r - g - b - back to r.
uint32_t Wheel(byte WheelPos) {
  if(WheelPos < 85) {
   return strip.Color(WheelPos * 3, 255 - WheelPos * 3, 0);
  } else if(WheelPos < 170) {
   WheelPos -= 85;
   return strip.Color(255 - WheelPos * 3, 0, WheelPos * 3);
  } else {
   WheelPos -= 170;
   return strip.Color(0, WheelPos * 3, 255 - WheelPos * 3);
  }
}
Go ahead and ‘flash’, or copy, this code to your Photon. Instructions on how to do this are here. This code allows the Photon to listen for remote commands and change the display of the LEDs. We can now build out our website to make calls to the light strip via the Photon.
Step 3: Connect Your Website to the Photon via the Particle API
The code to change the Photon color is pretty straightforward. First, I created a service for the Angular 2 app:
import {Injectable} from '@angular/core';
import { Http, Response, Headers } from '@angular/http';
import {LogService} from '../../core/services/log.service';
import {Observable} from 'rxjs/Rx';
import 'rxjs/add/operator/map';


@Injectable()
export class PhotonService {
  private requestURl: string;
  private accessToken: string;

  constructor(
    private logger: LogService,
    private http: Http) {
      logger.debug(`Photon initializing...`);
      //device id
      this.requestURl = 'https://api.particle.io/v1/devices/<use your device id here>/startRave/';
      //access token
      this.accessToken = '<your access token>';
  }

public startLightShow(mode: string) {

  let params = 'command=' + mode + '&access_token=' + this.accessToken;

  let headers = new Headers();
  headers.append('Content-Type', 'application/x-www-form-urlencoded');

  this.http.post(this.requestURl, params, {headers: headers})
    .map(res => res.json())
    .subscribe(
      data => params,
      err => this.handleError(err),
      () => console.log('Post Complete')
    );
}

  private handleError(error: Response) {
      return Observable.throw(error);
  }

}
Here, I make an http call to the Photon, using the device id and access token that I copied from the Particle Build IDE. When a user clicks a button on the web app, the startLightShow function is invoked, passing through a parameter identifying the mode of the light show:
<ul class="actions">
    <li (click)="startLightShow('rainbow')"><a class="button special rainbow">Start a Rainbow light show!</a></li>
    <li (click)="startLightShow('red')"><a class="button special red">Start a Red light show!</a></li>
    <li (click)="startLightShow('blue')"><a class="button special blue">Start a Blue light show!</a></li>
    <li (click)="startLightShow('green')"><a class="button special green">Start a Green light show!</a></li>
    <li (click)="startLightShow('clear')"><a class="button special black ">End light show</a></li>
</ul>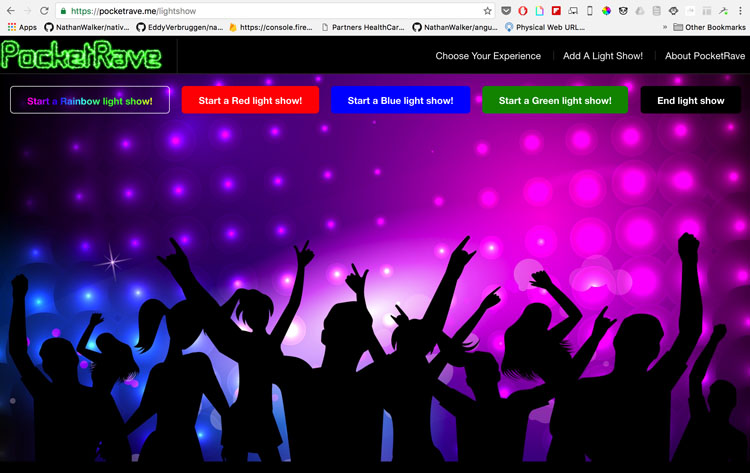
In PocketRave, you can see the way this is all set up to interface with my own Photon. Create a new integration with your own setup to put this code through its paces!
Step 4: Have Fun with Your Light Show!
Somehow, I have trouble creating a software demo without also creating a hardware integration. If you’re the same way, have fun creating a web site with a cool light show to match. Let me know in the comments what you decide to create!

Jen Looper
Jen Looper is a Developer Advocate for Telerik products at Progress. She is a web and mobile developer and founder of Ladeez First Media which is a small indie mobile development studio. In her spare time, she is a dancer, teacher and multiculturalist who is always learning.