Hiding the Row Indicator
By default the first cell of a row represents the row indicator area. The indicator appears when the row is set as current.
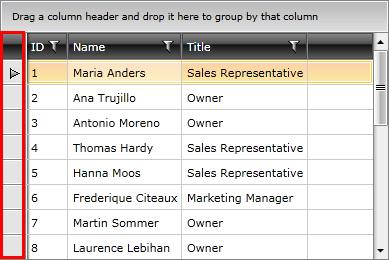
The row indicator visibility is controlled with the RowIndicatorVisibility property of RadGridView.
Example 1: Hiding the row indicator
<telerik:RadGridView RowIndicatorVisibility="Collapsed" />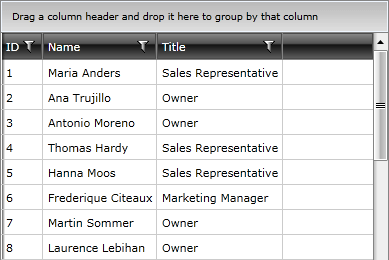
Changing Rows Height
To limit the height of the rows, set the RowHeight property of RadGridView. The property affects the rows only if their content is measured with a height smaller or equal to the RowHeight value. Otherwise, the measured size takes precedence.
Example 2: Setting RowHeight
<telerik:RadGridView RowHeight="50" />Additionally, the rows content size can be limited via the MinHeight and MaxHeight properties of the GridViewRow control. To set those, you can use the RowStyle property of RadGridView.
Example 3: Setting row's MaxHeight
<telerik:RadGridView>
	<telerik:RadGridView.RowStyle>
		<!-- If you use NoXaml dlls set the BasedOn property of the Style: BasedOn="{StaticResource GridViewRowStyle}" -->
		<Style TargetType="telerik:GridViewRow">
			<Setter Property="MaxHeight" Value="36" />
		</Style>
	</telerik:RadGridView.RowStyle>
</telerik:RadGridView>
RadGridView allows you to easily customize each of the row types by just assigning a style to it.
Styling Row and Alternating Row
To style rows or alternating rows you can use the RowStyle or the AlternateRowStyle properties. To learn how to do this take a look at the Styling Rows topic.
Styling the Group Row
To style the group row you can use the GroupRowStyle property. To learn how to do this take a look at the Styling Group Row topic.
Styling the Header Row
To style the header row you can use the HeaderRowStyle property. To learn how to do this take a look at the Styling Header Row topic.
Displaying a Header Value for Each Row
GridViewHeaderRow represents the single header row that contains the column headers. It does not create a separate header for each data row.
If you want to display a row-specific value at the left side of each data row, add a bound GridViewDataColumn as the first column. Set LeftFrozenColumnCount to 1 if the column should remain visible while the user scrolls horizontally.
Example 2: Adding a row-specific header column
	<telerik:RadGridView ItemsSource="{Binding Items}"
	                     AutoGenerateColumns="False"
	                     LeftFrozenColumnCount="1">
	    <telerik:RadGridView.Columns>
	        <telerik:GridViewDataColumn Header="Row Header"
	                                    DataMemberBinding="{Binding RowHeader}"
	                                    IsReadOnly="True" />
	        <telerik:GridViewDataColumn Header="Name"
	                                    DataMemberBinding="{Binding Name}" />
	    </telerik:RadGridView.Columns>
	</telerik:RadGridView>
This approach displays the RowHeader property as a regular, bound column. It is the recommended approach when the row header is data from the item.
If you need a separate visual gutter outside the data columns, RadGridView does not expose a documented RowHeader or GridViewRowHeader API. Customize the GridViewRow control template or the applicable theme template instead. Preserve all required template parts when modifying the template. For more information, see Modifying Default Styles and Styling Overview.