Getting Started with WinForms DataEntry
This tutorial demonstrates how bind RadDataEntry to business object and to a collection of objects.
Adding Telerik Assemblies Using NuGet
To use RadDataEntry when working with NuGet packages, install the Telerik.UI.for.WinForms.AllControls package. The package target framework version may vary.
Read more about NuGet installation in the Install using NuGet Packages article.
With the 2025 Q1 release, the Telerik UI for WinForms has a new licensing mechanism. You can learn more about it here.
Adding Assembly References Manually
When dragging and dropping a control from the Visual Studio (VS) Toolbox onto the Form Designer, VS automatically adds the necessary assemblies. However, if you're adding the control programmatically, you'll need to manually reference the following assemblies:
- Telerik.Licensing.Runtime
- Telerik.WinControls
- Telerik.WinControls.UI
- TelerikCommon
The Telerik UI for WinForms assemblies can be install by using one of the available installation approaches.
Defining the RadDataEntry
Binding RadDataEntry to a single object
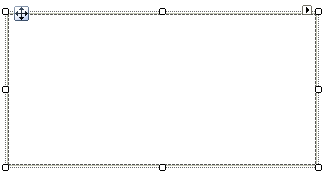
1. Place a RadDataEntry control on a form.
2. For the purpose of this tutorial, we will create a new class Employee with a couple of exposed properties
private class Employee
{
    public string FirstName
    {
        get;
        set;
    }
    public string LastName
    {
        get;
        set;
    }
    public string Occupation
    {
        get;
        set;
    }
    public DateTime StartingDate
    {
        get;
        set;
    }
    public bool IsMarried
    {
        get;
        set;
    }

    public int Salary
    {
        get;
        set;
    }
    public Gender Gender
    {
        get;
        set;
    }
}
private enum Gender
{
    Female,
    Male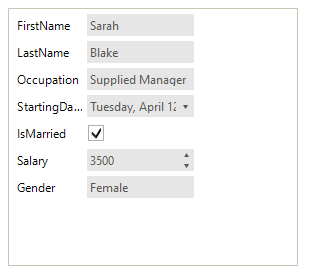
}3. Once the class Employee is defined, you may use it for creating an object of this type and bind it to the RadDataEntry control:
this.radDataEntry1.DataSource = new Employee()
{
    FirstName = "Sarah",
    LastName = "Blake",
    Occupation = "Supplied Manager",
    StartingDate = new DateTime(2005, 04, 12),
    IsMarried = true,
    Salary = 3500, Gender = Gender.Female
};4. Press F5 to run the project and you should see the following:
In case you want to be notified for changes made on the data item, the class Employee should implement INotifyPropertyChanged Interface and raise the PropertyChanged event every time a property value changes.
Binding RadDataEntry to collection from objects
The following tutorial will demonstrate how to bind RadDataEntry to a collection of objects and navigate through it. In order to navigate through the collection we will use RadBindingNavigator. RadBindingNavigator is designed to use as data source a BindingSource component.
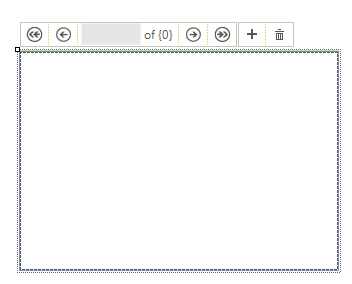
1. Place RadDataEntry, RadBindingNavigator and a BindingSource component on a form. Dock the navigator to Top and the data entry to Fill.
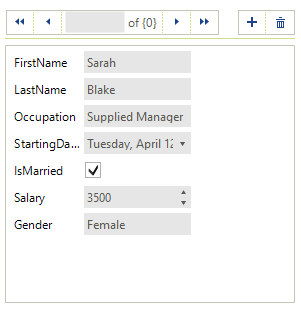
2. Create List of business objects and set it as data source of BindingSource.
List<Employee> employees = new List<Employee>();
employees.Add(new Employee() { FirstName = "Sarah", LastName = "Blake", Occupation = "Supplied Manager", StartingDate = new DateTime(2005, 04, 12), IsMarried = true, Salary = 3500, Gender = Gender.Female });
employees.Add(new Employee() { FirstName = "Jane", LastName = "Simpson", Occupation = "Security", StartingDate = new DateTime(2008, 12, 03), IsMarried = true, Salary = 2000, Gender = Gender.Female });
employees.Add(new Employee() { FirstName = "John", LastName = "Peterson", Occupation = "Consultant", StartingDate = new DateTime(2005, 04, 12), IsMarried = false, Salary = 2600, Gender = Gender.Male });
employees.Add(new Employee() { FirstName = "Peter", LastName = "Bush", Occupation = "Cashier", StartingDate = new DateTime(2005, 04, 12), IsMarried = true, Salary = 2300, Gender = Gender.Male });

this.bindingSource1.DataSource = employees;
3. Set this BindingSource to RadBindingNavigator and RadDataEntry.
this.radDataEntry1.DataSource = this.bindingSource1;
this.radBindingNavigator1.BindingSource = this.bindingSource1;
4. Press F5 to run the project and you should see the following:
RadDataEntry allows you to set the DataSource property at design time as well, e.g. to a BindingSource that is available. Thus, the respective editors will be generated inside RadDataEntry.
See Also
Telerik UI for WinForms Learning Resources
- Telerik UI for WinForms Dataentry Component
- Getting Started with Telerik UI for WinForms Components
- Telerik UI for WinForms Setup
- Telerik UI for WinForms Converter
- Telerik UI for WinForms Visual Studio Templates
- Deploy Telerik UI for WinForms Applications
- Telerik UI for WinForms Virtual Classroom(Training Courses for Registered Users)
- Telerik UI for WinForms License Agreement)