New to Telerik UI for WPF? Start a free 30-day trial
Create a TimeBar control in Code-behind
Updated on Sep 24, 2025
RadTimeBar supports lightweight batch initialization through the ISupportInitialize interface. You can use the methods of this interface in code behind to create and initialize a time bar before adding it in the visual tree. Here is an example:
-
Create RadAreaSparkLine to use it as Content for the TimeBar control:
You can use RadChart, RadSparkline or any other custom control as Content for the RadTimeBar.
C#InitializeComponent(); RadAreaSparkline sparkline = new RadAreaSparkline(); Random r = new Random(); List<int> data = new List<int>(); for (DateTime currentDate = DateTime.Today; currentDate < DateTime.Today.AddDays(100); currentDate = currentDate.AddDays(1)) { data.Add(r.Next(0, 60)); } sparkline.ItemsSource = data; -
Create new TimeBar and add the SparkLine as Content.
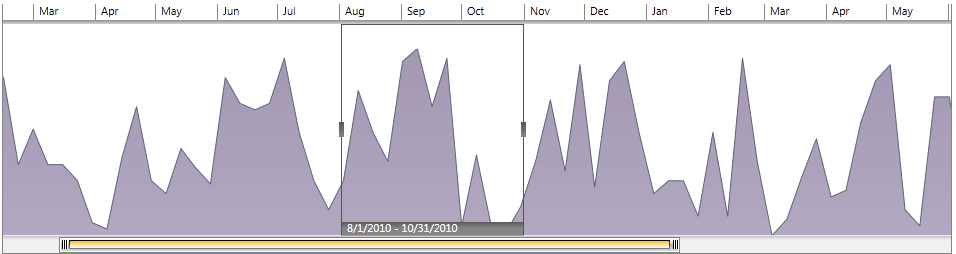
C#RadTimeBar timebar = new RadTimeBar(); timebar.BeginInit(); timebar.Width = 950; timebar.Height = 250; timebar.PeriodStart = new DateTime(2010, 1, 1); timebar.PeriodEnd = new DateTime(2012, 1, 1); timebar.VisiblePeriodStart = new DateTime(2010, 2, 14); timebar.VisiblePeriodEnd = new DateTime(2011, 6, 2); timebar.SelectionStart = new DateTime(2010, 5, 14); timebar.SelectionEnd = new DateTime(2010, 6, 14); timebar.Intervals.Add(new MonthInterval()); timebar.Intervals.Add(new WeekInterval()); timebar.Intervals.Add(new DayInterval()); timebar.EndInit(); timebar.Content = sparkline; this.Content = timebar;
The result: