Customize the Rotation Step
In RadDiagram each RadDiagramItem can be rotated. This operation is implemented by a RotationService.
In order to learn more about the different Diagramming Services, you can examine the Services article.
In this tutorial we will examine a solution that takes a user-defined value and uses it to define the step of a rotation operation in a RadDiagram instance.
First, let's create a sample RadDiagram definition that has two RadDiagramShape objects.
	<telerik:RadDiagram x:Name="diagram" IsSnapToGridEnabled="False">
		<telerik:RadDiagramShape Geometry="{telerik:FlowChartShape ShapeType=BeginLoopShape}"
								 Position="400 300" />
		<telerik:RadDiagramShape Geometry="{telerik:FlowChartShape ShapeType=ExternalDataShape}"
								 Position="500 400" />
	</telerik:RadDiagram>
Please note that in the RadDiagram definition, the SnapToGrid feature is disabled. If you enable it, you don't have to create a new RotationService to customize the rotation step. Instead you can take advantage of the RotationAngleSnap constant. It allows you to set the snapping angle when rotating items in a grid-snapping enabled RadDiagram. The default value of this constant is 5 degrees. And it can be easily changed by setting DiagramConstants.RotationAngleSnap = 55, but you will have to add a using statement for the Telerik.Windows.Diagrams.Core namespace.
Next we can add a TextBox control to let the user define the rotation step:
	<StackPanel Width="200" HorizontalAlignment="Left">
		<TextBlock FontSize="16"
				   FontWeight="Bold"
				   Text="Rotating: " />
		<TextBox x:Name="rotationStep"
				 MaxWidth="160"
				 Text="" />
	</StackPanel>
Now that our view is ready, we can configure the default rotation mechanism to take into account the rotation step defined by a user. In order to do so, we will have to create a custom RotationService and use it within our diagramming instance.
The first step is to define a new class, let's call it MyRotation, that derives from the RotationService. As the RotationService has a virtual method that calculates the angle of each rotation operation, we will override this method and implement logic that takes a user-defined value and uses it to calculate the rotation angle. This means that we need to define an int property and use it in the CalculateRotationAngle method implementation:
	public class MyRotation : RotationService
	{
	    private int rotationStep;

	    public MyRotation(RadDiagram owner)
	        : base(owner as IGraphInternal)
	    {
	        //initialize the RotationStep property
	        this.RotationStep = 1;
	    }

	    public int RotationStep
	    {
	        get
	        {
	            return this.rotationStep;
	        }
	        set
	        {
	            this.rotationStep = value;
	        }
	    }

	    protected override double CalculateRotationAngle(Point newPoint)
	    {
	        //take the angle calculated by the default rotation mechanism
	        var angle = base.CalculateRotationAngle(newPoint);
	        //change that angle based on the user-defined value of the RotationStep property
	        return angle = Math.Floor(angle / this.RotationStep) * this.RotationStep;
	    }
}Finally, we need to configure the diagram to use our custom rotation implementation instead of the default RotationService. This is why we need to create a new instance of the MyRotation class in the code-behind file of our view. Then we need to make sure that the RotationStep property is used as a binding path for the Text property of the rotationStep:
	private MyRotation newRotationService;
	private void InitializeNewServices()
	{
	    //initialize the newRotationService and define a default RotationStep
	    this.newRotationService = new MyRotation(this.diagram) { RotationStep = 45 };
	    //create a binding with Path=RotationStep
	    Binding binding = new Binding("RotationStep");
	    //use the newRotationService as a source of the binding
	    binding.Source = this.newRotationService;
	    binding.Mode = BindingMode.TwoWay;
	    //apply the binding on the rotationStep TextBox
	    this.rotationStep.SetBinding(TextBox.TextProperty, binding);
}And now we can use the newRotationService instance and register it through the ServiceLocator:
	private MyRotation newRotationService;
	public Example()
	{
		InitializeComponent();

		this.InitializeNewServices();
	    this.diagram.ServiceLocator.Register<IRotationService>(this.newRotationService);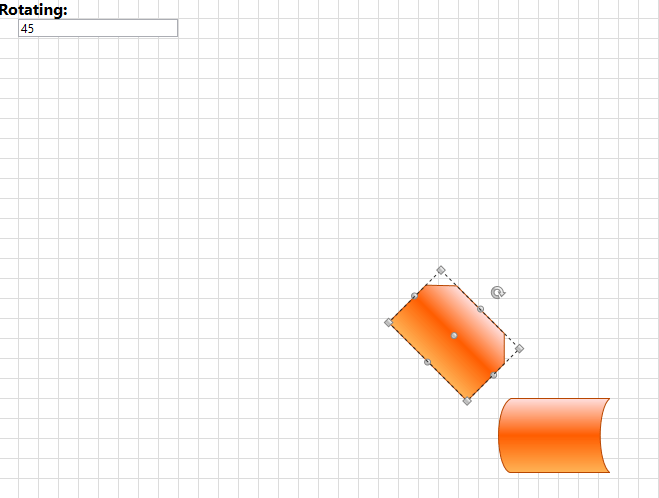
}If you run the solution now, the rotationStep will display a value of 45. This is why you will be able to rotate the RadDiagramShapes with 45° on every step.
And if you enter a RotationStep of 90, you will be able to rotate the RadDiagramShapes with 90° on every step.

Find a runnable project of the previous example in the WPF Samples GitHub repository.