Customize RadPrintDocument
The RadPrintDocument class can be easily customized through inheritance. The following methods are virtual and they can be overridden with a custom implementation:
- PrintHeader: Defines how the header will be printed.
- PrintFooter: Responsible for painting the footer.
- PrintWatermark: Paints the watermark.
- PrintLogo: Paints the logo.
Fig. 1 Custom Header
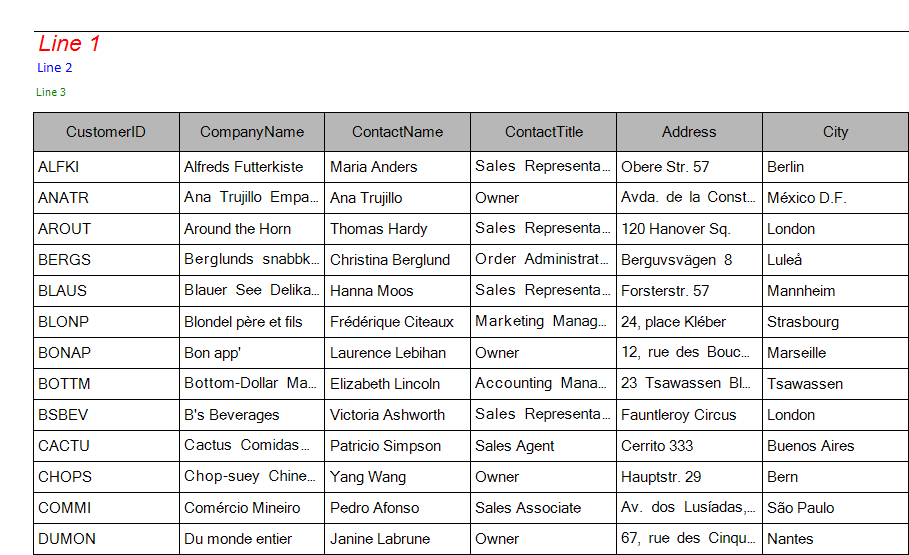
In this example we will modify the header of the print document by introducing new properties, defining fonts, color and a new layout. The control which we will be printing is going to be RadGridView bound to the Categories table of the Northwind database. An example is available here.
Let us first create a class extending RadPrintDocument and define six new properties which will be used for painting a text with a specific font and size. We are also going to override the PrintHeader method and draw the contents of the newly introduced properties at specific locations:
Inheriting RadPrintDocument
public class MyPrintDocument : RadPrintDocument
{
    public string LeftUpperText { get; set; }
    public Font LeftUpperFont { get; set; }
    public string LeftMiddleText { get; set; }
    public Font LeftMiddleFont { get; set; }
    public string LeftLowerText { get; set; }
    public Font LeftLowerFont { get; set; }
    protected override void PrintHeader(System.Drawing.Printing.PrintPageEventArgs args)
    {
        base.PrintHeader(args);
        Rectangle headerRect = new Rectangle(args.MarginBounds.Location, new Size(args.MarginBounds.Width, this.HeaderHeight));
        StringFormat stringFormat = new StringFormat();
        stringFormat.Alignment = StringAlignment.Near;
        args.Graphics.DrawString(this.LeftUpperText, this.LeftUpperFont, Brushes.Red, new Rectangle(headerRect.X, headerRect.Y, headerRect.Width / 3, headerRect.Height / 3), stringFormat);
        args.Graphics.DrawString(this.LeftMiddleText, this.LeftMiddleFont, Brushes.Blue, new Rectangle(headerRect.X, headerRect.Y + headerRect.Height / 3, headerRect.Width / 3, headerRect.Height / 3), stringFormat);
        args.Graphics.DrawString(this.LeftLowerText, this.LeftLowerFont, Brushes.Green, new Rectangle(headerRect.X, headerRect.Y + (headerRect.Height) * 2 / 3, headerRect.Width / 3, headerRect.Height / 3), stringFormat);
        args.Graphics.DrawLine(new Pen(Brushes.Black), headerRect.Location, new Point(headerRect.Location.X + headerRect.Width, headerRect.Location.Y));
    }
}
After creating our custom class we can use it this way:
A Sample Usage
MyPrintDocument doc = new MyPrintDocument();
doc.HeaderHeight = 60;
doc.Landscape = true;
doc.AssociatedObject = this.radGridView1;
doc.LeftUpperText = "Line 1";
doc.LeftUpperFont = new Font("Arial", 12, FontStyle.Italic);
doc.LeftMiddleText = "Line 2";
doc.LeftMiddleFont = new Font("Calibri", 8);
doc.LeftLowerText = "Line 3";
doc.LeftLowerFont = new Font("Tahoma", 6);
RadPrintPreviewDialog dialog = new RadPrintPreviewDialog(doc);
dialog.Show();