Tutorial - Create a Custom Theme Component
Environment
| Product Version | Product | Author |
|---|---|---|
| 2022.3.913 | UI for WinForms | Desislava Yordanova |
Description
This tutorial demonstrates a step by step tutorial on how to create a theme component and integrate your custom theme inside the project. Thus, the theme will be available at design time as well.
Solution
Follow the steps:
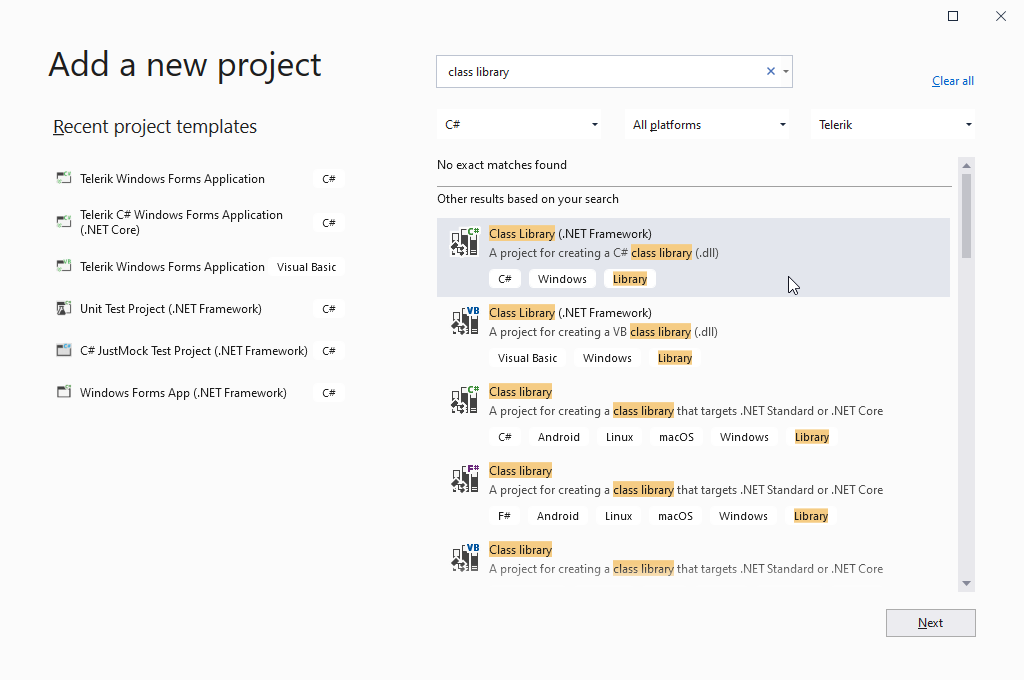
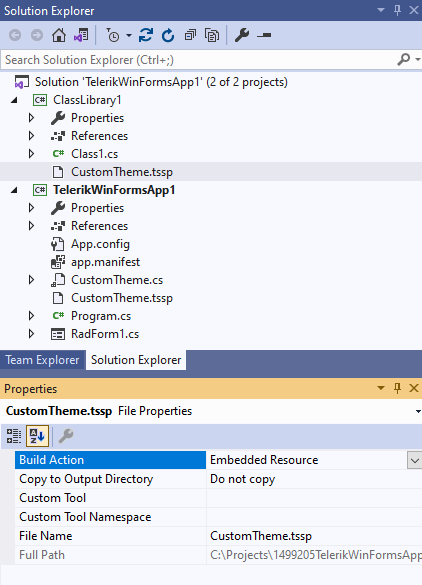
1. Add a new Class Library project to your current solution.

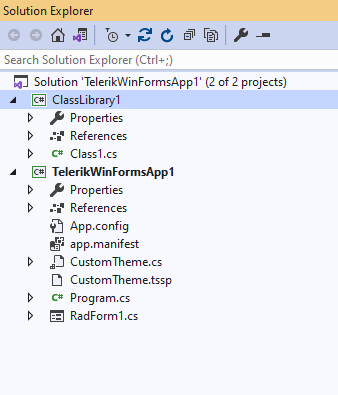
2. Then, the custom .tssp file should be added to the Class Library.
The custom .tssp file should be added with Build Action - Embedded Resource.
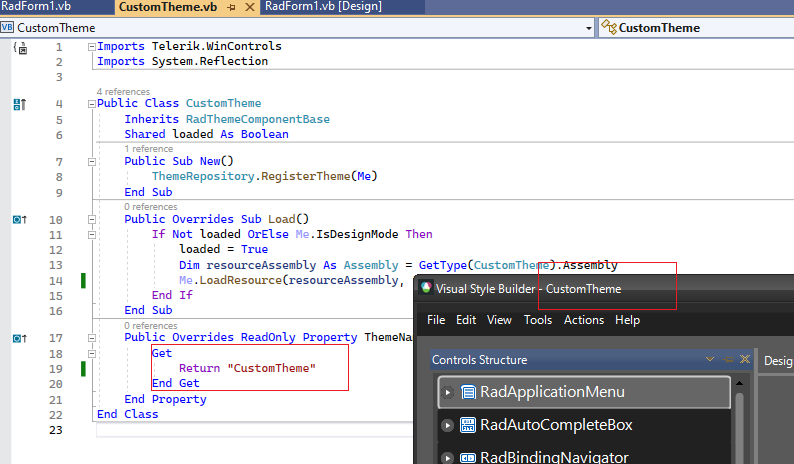
3. Add a new class to represent your theme component to the project:
public class CustomTheme : RadThemeComponentBase
{
    static bool loaded;
    public CustomTheme()
    {
        ThemeRepository.RegisterTheme(this);
    }
    public override void Load()
    {
        if (!loaded || this.IsDesignMode)
        {
            loaded = true;
            Assembly resourceAssembly = typeof(CustomTheme).Assembly;
            this.LoadResource(resourceAssembly, "ProjectDefaultNamespace.ContainingFolderName.CustomTheme.tssp");
        }
    }
    public override string ThemeName
    {
        get { return "CustomTheme"; }
    }
}
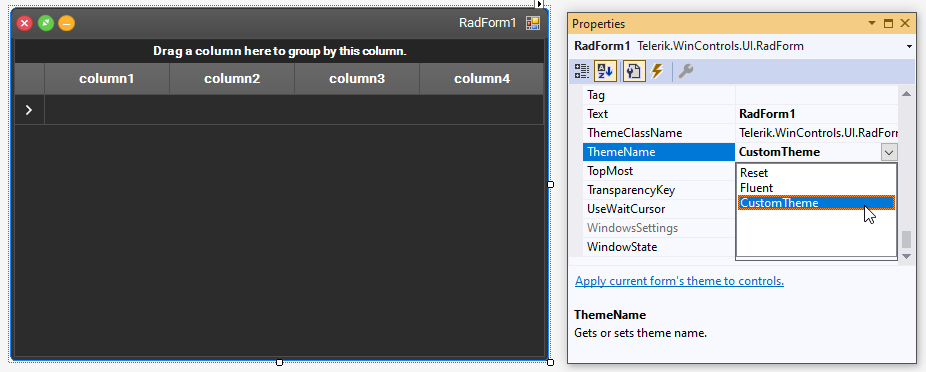
Please make sure that the theme name in Visual Style Builder corresponds to the name you are returning in the theme component.
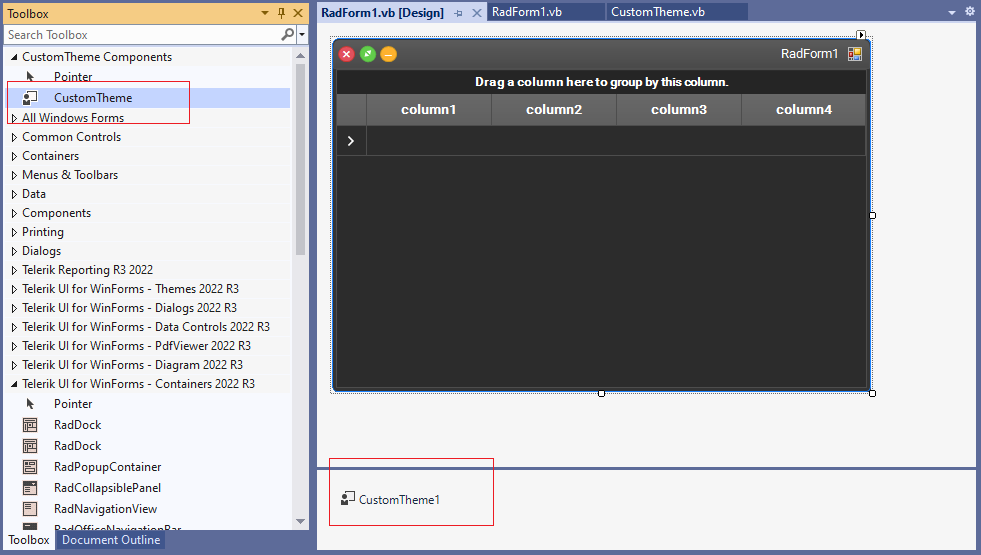
4. Build the entire application. The theme component will be available in the toolbox. You will be able to drag this component to the forms in all the projects in your solution which will load the corresponding theme.