Views Walkthrough
In this walkthrough (part of the Telerik UI for WinForms Step-by-step Tutorial) you will dynamically change the view, change some of the view specific properties and handle the ActiveViewChanging event.
Project Setup
-
Create a new Windows Forms application.
-
In the Solution Explorer, delete the default form.
-
Also in the Solution Explorer, right-click the project and select Add | New Item... from the context menu.
-
Select the "Telerik RadForm" template and click the Add button to close the dialog.
-
Add the DesertTheme from the ToolBox to the form.
-
In the Properties window, set the form ThemeName to Desert.
-
Add a RadStatusStrip to the form. Set the ThemeName to Desert. Add a RadLabelElement to the status strip. Set the Name property to "lblStatus" and the Text to "".
-
Add a RadCommandBar to the form. Add elements to the bar:
- Add a RadCommandBarDropDownList. Set the Name to "ddlActiveViewType" and Text to "".
- Add a RadCommandBarDropDownList. Set the Name to "ddlRange" and Text to "".
- Add a RadCommandBarDropDownList. Set the Name to "ddlACount" and Text to "".
-
Change the new RadForm1 to be the startup form.
-
From the Toolbox, add a RadScheduler to the form and set the Dock property to "Fill" and the ThemeName to Desert.
-
Add code to the form load that will add values to the combo boxes in the tool strip for SchedulerViewType and ScaleRange enumerations. Also, add a simple range of integers to the "count" combo box.
foreach (SchedulerViewType viewType in Enum.GetValues(typeof(SchedulerViewType)))
{
    RadListDataItem item = new RadListDataItem();
    item.Text = viewType.ToString();
    item.Value = viewType;
    ddlActiveViewType.Items.Add(item);
}
foreach (ScaleRange range in Enum.GetValues(typeof(ScaleRange)))
{
    RadListDataItem item = new RadListDataItem();
    item.Text = range.ToString();
    item.Value = range;
    ddlRange.Items.Add(item);
}
for (int i = 1; i < 10; i++)
{
    RadListDataItem item = new RadListDataItem();
    item.Text = i.ToString();
    item.Value = i;
    ddlCount.Items.Add(item);
}12. Next add a SelectedIndexChanged event handler for the ddlActiveViewType combo box:
void ddlActiveViewType_SelectedIndexChanged(object sender, Telerik.WinControls.UI.Data.PositionChangedEventArgs e)
{
    RadDropDownListElement dropDownList = sender as RadDropDownListElement;
    radScheduler1.ActiveViewType = (SchedulerViewType)(dropDownList.SelectedValue);
}13. Add another SelectedIndexChanged event handler for the ddlRange combo box element:
void ddlRange_SelectedIndexChanged(object sender, Telerik.WinControls.UI.Data.PositionChangedEventArgs e)
{
    RadDropDownListElement dropDownList = sender as RadDropDownListElement;
    ScaleRange range = (ScaleRange)(dropDownList.SelectedValue);
    // set the appropriate range factor based on the type of view
    switch (radScheduler1.ActiveViewType)
    {
        case SchedulerViewType.Day:
            (radScheduler1.ActiveView as SchedulerDayView).RangeFactor = range;
            break;
        case SchedulerViewType.MultiDay:
            (radScheduler1.ActiveView as SchedulerMultiDayView).RangeFactor = range;
            break;
        case SchedulerViewType.Week:
        case SchedulerViewType.WorkWeek:
            (radScheduler1.ActiveView as SchedulerWeekView).RangeFactor = range;
            break;
    }
}14. Add another SelectedIndexChanged event handler for the ddlCount combo box element:
void ddlCount_SelectedIndexChanged(object sender, Telerik.WinControls.UI.Data.PositionChangedEventArgs e)
{
    RadDropDownListElement dropDownList = sender as RadDropDownListElement;
    int count = (int)dropDownList.SelectedValue;
    // set the Day or WeekCount based on the current view
    switch (radScheduler1.ActiveViewType)
    {
        case SchedulerViewType.Day:
            (radScheduler1.ActiveView as SchedulerDayView).DayCount = count;
            break;
        case SchedulerViewType.MultiDay:
            (radScheduler1.ActiveView as SchedulerMultiDayView).DayCount = count;
            break;
        case SchedulerViewType.Month:
            (radScheduler1.ActiveView as SchedulerMonthView).WeekCount = count;
            break;
    }
}15. Handle the RadScheduler ActiveViewChanging event. Use the SchedulerViewChangingEventArgs OldView and NewView to display in the status label.
void radScheduler1_ActiveViewChanging(object sender, SchedulerViewChangingEventArgs e)
{
    lblStatus.Text = String.Format("Old: {0} New: {1}",
    e.OldView.ViewType.ToString(), e.NewView.ViewType.ToString());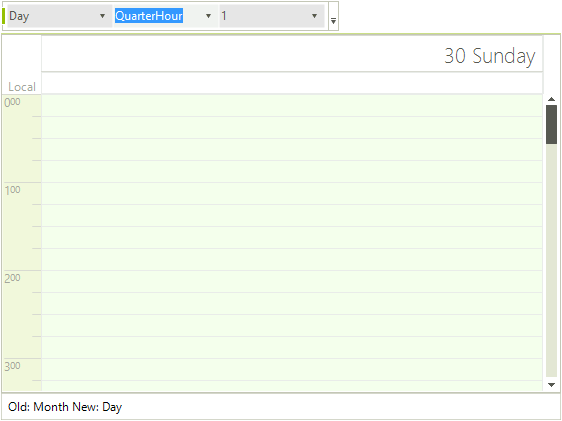
}16. Run the application and test the various combinations of settings.
Figure 1: Views Walkthrough