Dynamo DB
This article will show you how to create a WinForms application and access data stored in a DynamoDB table. It shows how you can connect to the AWS DynamoDB service from a blank WinForms project as well.
Please note that you can use the local version of DynamoDB to setup and test your application. This article shows a real example.
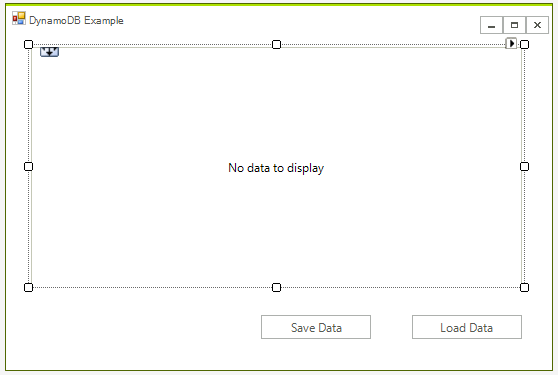
Step 1: Create a WinForms project.
First create the WinForms project, to do that create a blank Telerik UI for WinForms project and add a RadGridView and two buttons to it. The application design should look like this:
Step 2: Install the NuGet package
In Visual Studio open the NuGet package manager and install the DynamoDB module:
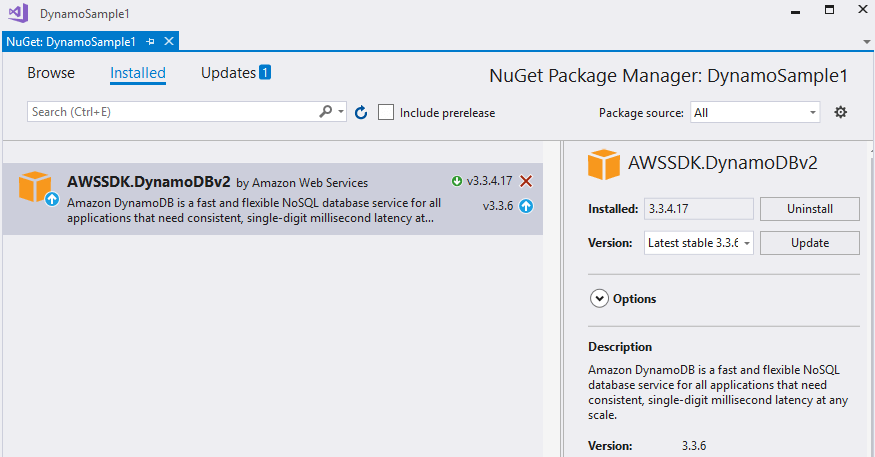
Another option is to to type the following command in the NuGet Package Manager Console: PM> Install-Package AWSSDK.DynamoDBv2
In addition you need to add the following to your App.config file:
<?xml version="1.0" encoding="utf-8" ?>
<configuration>
  <appSettings>
    <add key="AWSProfileName" value="Telerik"/>
    <add key="AWSRegion" value="eu-west-3" />
  </appSettings>
</configuration>
If you do not have a AWS account in Visual Studio please check the Getting Started article.
Step 3: Create the AWS manager class
Add a class called AWS_Manager to the example. You will use this class to add all functionality for managing the DynamoDB database. For now you can create the method that crates the table:
class AWS_Manager
{
    AmazonDynamoDBClient client;
    public AWS_Manager()
    {
        try
        {
            client = new AmazonDynamoDBClient();
        }
        catch (Exception ex)
        {
            RadMessageBox.Show("Error: failed to create a DynamoDB client; " + ex.Message);
        }
    }

    public void CreateTable()
    {
        List<string> currentTables = client.ListTables().TableNames;

        if (!currentTables.Contains("Customers"))
        {
            CreateTableRequest createRequest = new CreateTableRequest
            {
                TableName = "Customers",
                AttributeDefinitions = new List<AttributeDefinition>()
        {
            new AttributeDefinition
            {
                AttributeName = "Id",
                AttributeType = "N"
            },
            new AttributeDefinition
            {
                AttributeName = "Name",
                AttributeType = "S"
            }
        },
                KeySchema = new List<KeySchemaElement>()
        {
            new KeySchemaElement
            {
                AttributeName = "Id",
                KeyType = "HASH"
            },
            new KeySchemaElement
            {
                AttributeName = "Name",
                KeyType = "RANGE"
            }
        },
            };

            createRequest.ProvisionedThroughput = new ProvisionedThroughput(1, 1);

            CreateTableResponse createResponse;
            try
            {
                createResponse = client.CreateTable(createRequest);
            }
            catch (Exception ex)
            {
                RadMessageBox.Show("Error: failed to create the new table; " + ex.Message);

                return;
            }
        }
    }
}Now when the table is ready you can add some data, add the following method to the AWS_Manager class:
public void AddData()
{
    Table table = Table.LoadTable(client, "Customers");
    if (table.Keys.Count == 0)
    {
        Document dataObj1 = new Document();
        dataObj1["Name"] = "Telerik";
        dataObj1["Id"] = 2;
        dataObj1["Employees"] = 46;
        dataObj1["State"] = "NY";
        table.PutItem(dataObj1);

        Document dataObj2 = new Document();
        dataObj2["Name"] = "Progress";
        dataObj2["Id"] = 13;
        dataObj2["Employees"] = 54;
        dataObj2["State"] = "IL";
        table.PutItem(dataObj2);
    }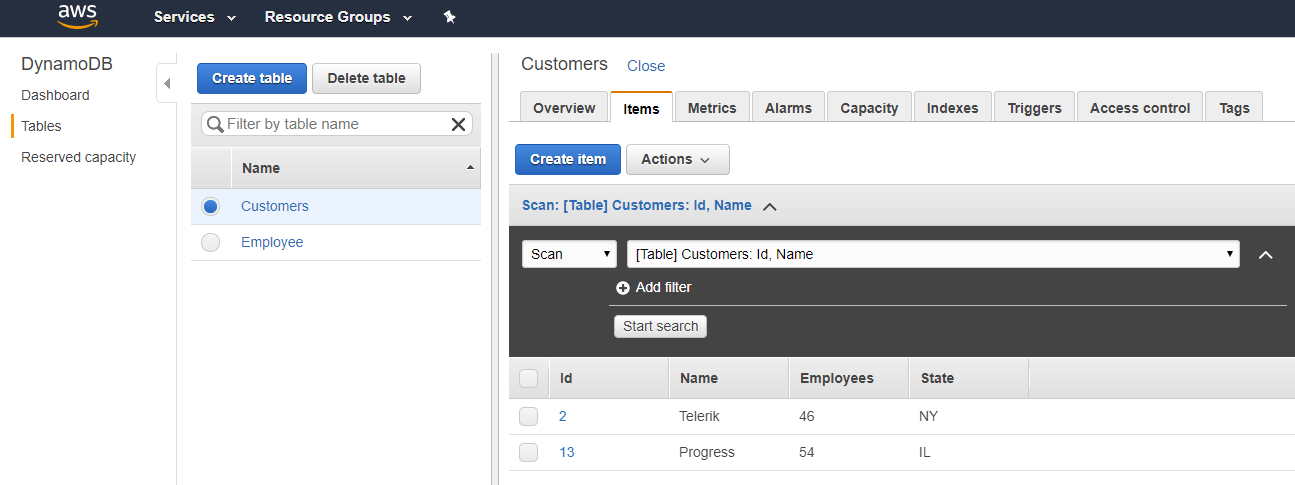
}If you run the code at this point you will be able to see the data in your AWS console:
Step 4: Get the Data from DynamoDb
Now you are ready to populate the grid with the data. Although you can directly populate the grid from the data I believe that is better to have a local business object to store the data.
First you need to get the data. The following method will return a List<Document>, each document represents an entry from the database.
public List<Document> GetData()
{
    Table table = Table.LoadTable(client, "Customers");
    ScanFilter scanFilter = new ScanFilter();
    ScanOperationConfig config = new ScanOperationConfig()
    {
        Filter = scanFilter,
        Select = SelectValues.AllAttributes,
    };
    Search search = table.Scan(config);

    List<Document> documentList = new List<Document>();
    do
    {
        documentList.AddRange(search.GetNextSet());

    } while (!search.IsDone);

    return documentList;
}We can use the above method to iterate the documents and get the data. Here is the code along with the business object.
private void radButton1_Click(object sender, EventArgs e)
{
    var data = manager.GetData();
    var gridData = new List<Customer>();

    foreach (Document doc in data)
    {
        var customer = new Customer();
        foreach (var attribute in doc.GetAttributeNames())
        {
            var value = doc[attribute];
            if (attribute == "Id")
            {
                customer.Id = Convert.ToInt32(value.AsPrimitive().Value);
            }
            else if (attribute == "Name")
            {
                customer.Name = value.AsPrimitive().Value.ToString();
            }
            else if (attribute == "Employees")
            {
                customer.Employees = Convert.ToInt32(value.AsPrimitive().Value);
            }
            else if (attribute == "State")
            {
                customer.State = value.AsPrimitive().Value.ToString();
            }
        }
        gridData.Add(customer);
    }
    radGridView1.DataSource = gridData;
}
class Customer
{
    public int Id { get; set; }
    public string Name { get; set; }

    public int Employees { get; set; }

    public string State { get; set; }
}
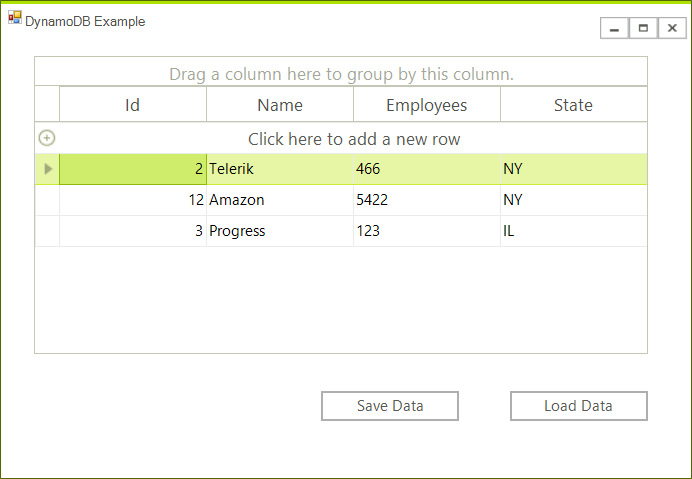
The grid is now populated.
Step: 5 Save the Changes
The final steps is to save the changes. Upon a button click we will iterate all rows and update the items in the database. We will need a function that updates an item in the manager class. Here is the code.
// Main form class
private void radButton2_Click(object sender, EventArgs e)
{
    foreach (GridViewDataRowInfo item in radGridView1.Rows)
    {
        manager.UpdateCustomerEntry(item.DataBoundItem as Customer);
    }
}

// AWS_Manager class
public void UpdateCustomerEntry(Customer customer)
{
    Table table = Table.LoadTable(client, "Customers");
    var entry = new Document();
    entry["Id"] = customer.Id;
    entry["Name"] = customer.Name;
    entry["Employees"] = customer.Employees;
    entry["State"] = customer.State;
    table.UpdateItem(entry);
}