New to Telerik UI for WinUI? Start a free 30-day trial
MVVM Support
Updated on Mar 26, 2026
The RadTimeBar control can be used with great success with the Model-View-ViewModel (MVVM) pattern. This help topic will demonstrate how to use the control with the pattern.
- Create new ViewModel class that inherits the
ViewModelBaseabstract class:
sample ViewModel class
C#
public class ExampleViewModel : ViewModelBase
{
private DateTime periodStart;
private DateTime periodEnd;
private IEnumerable<double> data;
private DateTime visiblePeriodStart;
private DateTime visiblePeriodEnd;
public ExampleViewModel()
{
this.PeriodStart = new DateTime(2023, 1, 1);
this.PeriodEnd = new DateTime(2023, 12, 31);
this.VisiblePeriodStart = new DateTime(2023, 2, 1);
this.VisiblePeriodEnd = new DateTime(2023, 4, 1);
}
public DateTime PeriodStart
{
get
{
return this.periodStart;
}
set
{
if (this.periodStart == value)
return;
this.periodStart = value;
this.OnPropertyChanged("PeriodStart");
}
}
public DateTime PeriodEnd
{
get
{
return this.periodEnd;
}
set
{
if (this.periodEnd == value)
return;
this.periodEnd = value;
this.OnPropertyChanged("PeriodEnd");
}
}
public DateTime VisiblePeriodStart
{
get
{
return this.visiblePeriodStart;
}
set
{
if (this.visiblePeriodStart == value)
return;
this.visiblePeriodStart = value;
this.OnPropertyChanged("VisiblePeriodStart");
}
}
public DateTime VisiblePeriodEnd
{
get
{
return this.visiblePeriodEnd;
}
set
{
if (this.visiblePeriodEnd == value)
return;
this.visiblePeriodEnd = value;
this.OnPropertyChanged("VisiblePeriodEnd");
}
}
public IEnumerable<double> Data
{
get
{
if (data == null)
{
Random r = new Random();
List<double> collection = new List<double>();
for (DateTime date = PeriodStart; date <= PeriodEnd; date = date.AddDays(1))
{
collection.Add(r.Next(0, 100));
}
this.data = collection;
}
return this.data;
}
}
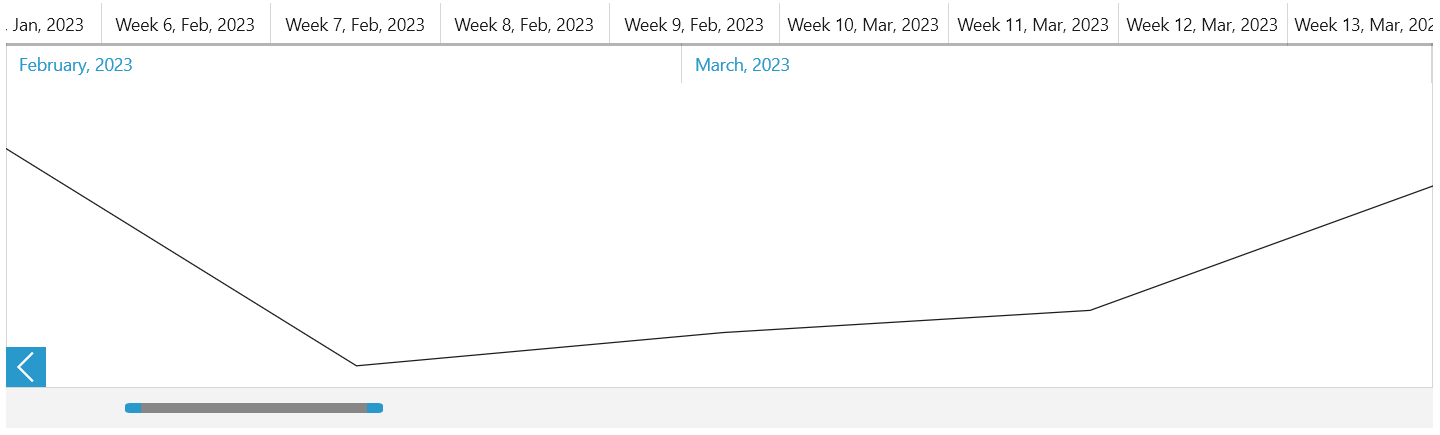
}The PeriodStart and PeriodEnd properties will specify the time period that the TimeBar will visualize. The VisiblePeriodStart and VisiblePeriodEnd properties will specify the visible time period on the screen. The Data collection will be used as datasource for the SparkLines that will be seen inside the TimeBar control.
- Add new
RadTimeBarandRadSparkLinedeclarations in XAML and bind the mentioned properties:
The properties should be bound using TwoWay binding. This is required because of the coercing of the values that happens when a binding is executed.
Defining RadTimeBar and RadSparkline
XAML
<Grid>
	<Grid.DataContext>
		<local:ExampleViewModel/>
	</Grid.DataContext>
	<telerik:RadTimeBar x:Name="timeBar" Margin="10"
					PeriodStart="{Binding PeriodStart, Mode=TwoWay}"
					PeriodEnd="{Binding PeriodEnd, Mode=TwoWay}"
					VisiblePeriodStart="{Binding VisiblePeriodStart, Mode=TwoWay}"
					VisiblePeriodEnd="{Binding VisiblePeriodEnd, Mode=TwoWay}">
		<telerik:RadTimeBar.Intervals>
			<telerikDataVisualization:YearInterval />
			<telerikDataVisualization:MonthInterval />
			<telerikDataVisualization:WeekInterval />
			<telerikDataVisualization:DayInterval />
		</telerik:RadTimeBar.Intervals>
		<telerik:RadTimeBar.Content>
			<telerikDataVisualization:RadLinearSparkline x:Name="sparkline" ItemsSource="{Binding Data}"/>
		</telerik:RadTimeBar.Content>
	</telerik:RadTimeBar>
</Grid>
RadTimeBar and RadSparkline in a MVVM scenario