Getting Started with the SpeechToTextButton
This tutorial explains how to set up the Telerik UI for ASP.NET MVC SpeechToTextButton and goes through the steps in the configuration of the component.
The SpeechToTextButton converts voice input into written text, which makes it suitable for form filling, content creation, search functionality, and displaying results directly in editor components like TextArea or TextBox.
You will integrate a SpeechToTextButton into a TextArea editor to display the converted speech-to-text results. Then, you will enable the continuous speech recognition functionality and reference the existing instance of the component.
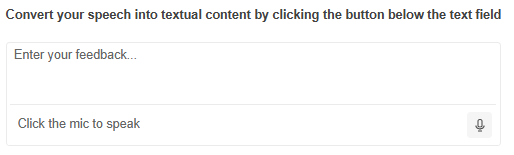
After completing this guide, you will achieve the following results:
Prerequisites
To successfully complete the tutorial, you need a project that is already configured to use the Telerik UI for ASP.NET MVC components:
-
To create a new pre-configured project for the Telerik UI for ASP.NET MVC components, you can use a project template.
-
To manually configure an existing project by using NuGet, see the Adding Telerik UI through NuGet.
1. Prepare the CSHTML File
The first step is to add the required directives at the top of the .cshtml document:
-
To use the Telerik UI for ASP.NET MVC HtmlHelpers:
cshtml@using Kendo.Mvc.UI
Optionally, you can structure the document by adding the desired HTML elements like headings, divs, paragraphs, and others.
    @using Kendo.Mvc.UI

    <h4>Convert your speech into textual content by clicking the button below the text field</h4>
    <div>

    </div>
2. Initialize the SpeechToTextButton
Use the SpeechToTextButton HtmlHelper to configure the component. By default, the component relies on the Web Speech API to perform speech recognition.
The following example shows how to initialize a basic SpeechToTextButton component. The Name() configuration method is mandatory as its value is used for the id and the name attributes of the SpeechToTextButton element.
@(Html.Kendo().SpeechToTextButton()
    .Name("speechButton")
)
3. Integrate the SpeechToTextButton into the TextArea
Create a TextArea and add the SpeechToTextButton after it using the SuffixOptions() configuration. Define the SpeechToTextButton in a Template component.
@(Html.Kendo().TextArea()
    .Name("feedbackForm")
    .SuffixOptions(suffix =>
    {
        suffix.Template(Html.Kendo().Template()
        .AddHtml("<div class='description k-ml-xs'>Click the mic to speak</div>")
        .AddComponent(btn => btn
        .SpeechToTextButton()
        .Name("speechButton")
        ));
    })
)
4. Handle Speech Recognition Results
Next, handle the Result event of the SpeechToTextButton to capture the transformed speech-to-text and display the result within the TextArea.
@(Html.Kendo().TextArea()
    .Name("feedbackForm")
    .SuffixOptions(suffix =>
    {
        suffix.Template(Html.Kendo().Template()
        .AddHtml("<div class='description k-ml-xs'>Click the mic to speak</div>")
        .AddComponent(btn => btn
        .SpeechToTextButton()
        .Name("speechButton")
        .Events(ev => ev.Result("onResult"))
        ));
    })
)5. Enable Continuous Recognition
By design, the component returns a single result once the recognition process stops. For scenarios where longer dictation or real-time transcription is required, enable the Continuous() option to receive ongoing speech recognition results as the user speaks, rather than waiting for the recognition session to end.
@(Html.Kendo().TextArea()
    .Name("feedbackForm")
    .SuffixOptions(suffix =>
    {
        suffix.Template(Html.Kendo().Template()
        .AddHtml("<div class='description k-ml-xs'>Click the mic to speak</div>")
        .AddComponent(btn => btn
        .SpeechToTextButton()
        .Name("speechButton")
        .Continuous(true)
        .Events(ev => ev.Result("onResult"))
        ));
    })
)
6. (Optional) Reference Existing SpeechToTextButton Instances
Referencing existing component instances allows you to build on top of their configuration. To reference an existing SpeechToTextButton instance, use the jQuery.data() method.
-
Use the
Name()option of the component to establish a reference.JS<script> var speechToTextBtnReference = $("#speechButton").data("kendoSpeechToTextButton"); // speechToTextBtnReference is a reference to the existing instance of the helper. </script> -
Use the SpeechToTextButton client-side API to control the behavior of the component. In this example, you will see how to start and stop the speech recognition service dynamically (for example, when clicking a button).
Razor@(Html.Kendo().Button() .Name("btnStart") .Content("Start the mic") .Events(ev => ev.Click("onStartClick"))) @(Html.Kendo().Button() .Name("btnStop") .Content("Stop the mic") .Events(ev => ev.Click("onStopClick")))
For more information on referencing specific helper instances, see the Methods and Events article.
Next Steps
- Customizing the appearance of the SpeechToTextButton
- Handling JavaScript Events of the User Interactions