Build the Team Efficiency Dashboard Project
Step 7: Telerik UI Datasource
In this chapter you'll learn how to work with Telerik UI datasources.
Working with the Telerik UI Datasource
Overview
The Kendo UI DataSource component plays a central role in practically all web applications built with Kendo UI. It is an abstraction for using local data arrays of JavaScript objects or remote data web services returning JSON, JSONP, OData or XML.
The Kendo UI DataSource has many abilities and responsibilities, among which to:
- Retrieve data from a remote endpoint.
- Maintain the structure and type of the data (schema).
- Process serialization formats to and from a remote endpoint.
- Synchronize updates, create, update, delete to and from a remote endpoint.
- Maintain an in-memory cache of data, including changes for updating to a remote endpoint.
- Calculate and maintain aggregates, sorting order and paging.
- Provide a query mechanism via filter expressions.
For detailed information on the capabilities of the DataSource, refer to its configuration API methods, and events, and demos.
At this point the dashboard is showing all invoice data. Let's use the EmployeeList list view and StatsFrom/StatsTo date pickers to filter the invoice grid by invoking the grid's datasource.
Exercise: Create a Filter
-
In the
/Views/Home/Index.cshtmlview, find the scripts section.Razor<script> ... </script> -
Add a function named
getEmployeeFilterthat gets theemployeeId,salesPerson,statsFromandstatsTovalues and returns a JSON object.The resulting code should be like the one shown in the example below.
Razorfunction getEmployeeFilter() { var employee = getSelectedEmployee(), statsFrom = $("#StatsFrom").data("kendoDatePicker"), statsTo = $("#StatsTo").data("kendoDatePicker"); var filter = { employeeId: employee.EmployeeId, salesPerson: employee.FullName, statsFrom: statsFrom.value(), statsTo: statsTo.value() } return filter; } -
In the
/Views/Invoice/Index.cshtmlview, find theEmployeeSalesgrid.Razor@(Html.Kendo().Grid<KendoQsBoilerplate.Invoice>() .Name("EmployeeSales") ... .Scrollable(scrollable => scrollable.Enabled(false)) .DataSource(dataSource => dataSource .Ajax() .Read(read => read.Action("Invoices_Read", "Invoice")) ) ) -
On the grid's
DataSourceproperty, set theDataproperty togetEmployeeFilter. TheDataproperty supplies additional data to the server. In this case the data is our filter parameters.Razor.DataSource(dataSource => dataSource .Ajax() .Read(read => read.Action("Invoices_Read", "Invoice") .Data("getEmployeeFilter")) ) -
Add the property
AutoBindto the end of the property chain and set the value tofalse. SettingAutoBindtofalsetells the Telerik UI for MVC that the datasource'sReadaction is invoked manually on the client.The resulting code should be like the one shown in the example below.
Razor@(Html.Kendo().Grid<KendoQsBoilerplate.Invoice>() .Name("EmployeeSales") ... .Scrollable(scrollable => scrollable.Enabled(false)) .DataSource(dataSource => dataSource .Ajax() .Read(read => read.Action("Invoices_Read", "Invoice") .Data("getEmployeeFilter")) ) .AutoBind(false) ) -
In the
/Views/Home/Index.cshtmlview, add a function namedrefreshGrid. This function will invoke the grid'sReadaction.Razorfunction refreshGrid() { var employeeSales = $("#EmployeeSales").data("kendoGrid"); employeeSales.dataSource.read(); } -
Find the
onCriteriaChangefunction and add a call to therefreshGridfunction. This will cause the Grid's data to refresh whenever the employee selection changes.Razorfunction onCriteriaChange() { updateEmployeeAvatar(); refreshGrid(); }Next, we'll need to update the grid's
Readaction to apply the filter using Entity Framework. -
Open
Controllers/InvoiceController.csand find theInvoices_Readaction.Razorpublic ActionResult Invoices_Read([DataSourceRequest]DataSourceRequest request) { IQueryable<Invoice> invoices = db.Invoices; DataSourceResult result = invoices.ToDataSourceResult(request, invoice => new { OrderID = invoice.OrderID, CustomerName = invoice.CustomerName, OrderDate = invoice.OrderDate, ProductName = invoice.ProductName, UnitPrice = invoice.UnitPrice, Quantity = invoice.Quantity, Salesperson = invoice.Salesperson }); return Json(result); } -
Add the
salesPerson,statsFromandstatsToparameters to the action. Note that the additional parameters match the parameters returned by thegetEmployeeFilterfunction exactly.Razorpublic ActionResult Invoices_Read([DataSourceRequest]DataSourceRequest request, string salesPerson, DateTime statsFrom, DateTime statsTo) -
Using the parameter values, filter the invoices using a
WhereLINQ query.The resulting code should be like the one shown in the example below.
Razorpublic ActionResult Invoices_Read([DataSourceRequest]DataSourceRequest request, string salesPerson, DateTime statsFrom, DateTime statsTo) { var invoices = db.Invoices.Where(inv => inv.Salesperson == salesPerson) .Where(inv => inv.OrderDate >= statsFrom && inv.OrderDate <= statsTo); DataSourceResult result = invoices.ToDataSourceResult(request, invoice => new { OrderID = invoice.OrderID, CustomerName = invoice.CustomerName, OrderDate = invoice.OrderDate, ProductName = invoice.ProductName, UnitPrice = invoice.UnitPrice, Quantity = invoice.Quantity, Salesperson = invoice.Salesperson }); return Json(result); } -
Run the project to see the behavior. Now the
EmployeeListandEmployeeSalesgrid are in sync. When an employee is selected, only that employee's data will show in the grid.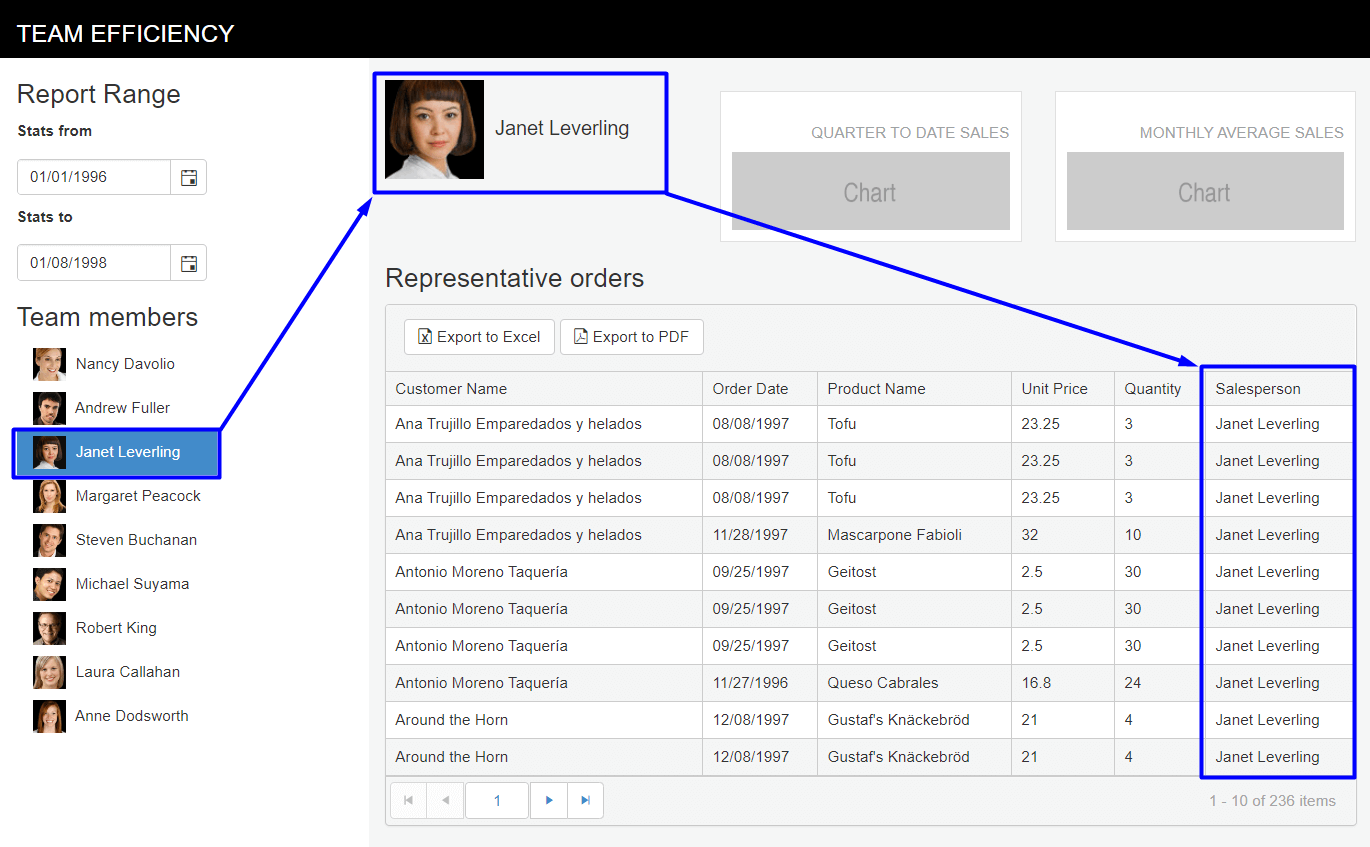
At this point, the EmployeeList is acting as a filter for the EmployeeSales. However, the data shown does not reflect the StatsFrom/StatsTo date range. With the filtering code in place, additional controls are wired up with relative ease. Let's wire up the StatsFrom/StatsTo DatePickers to EmployeeSales.
Exercise: Trigger the Grid DataSource from a DatePicker Event
-
In the
/Views/Home/Index.cshtmlview, find the StatsFrom DatePicker.Razor@(Html.Kendo().DatePicker() .Name("StatsFrom") .Value(new DateTime(1996, 1, 1)) ) -
Add the
Eventsproperty and set theChangeevent toonCriteriaChange.Razor@(Html.Kendo().DatePicker() .Name("StatsFrom") .Value(new DateTime(1996, 1, 1)) .Events(e => e.Change("onCriteriaChange")) ) -
Find the
StatsToDatePicker, set theEventsproperty, and set theChangeevent toonCriteriaChange.Razor@(Html.Kendo().DatePicker() .Name("StatsTo") .Value(new DateTime(1998, 8, 1)) .Events(e => e.Change("onCriteriaChange")) ) -
Save the changes and refresh the browser.
StatsFrom/StatsToandEmployeeListwill updateEmployeeSaleswith data based on the selected dates and employee.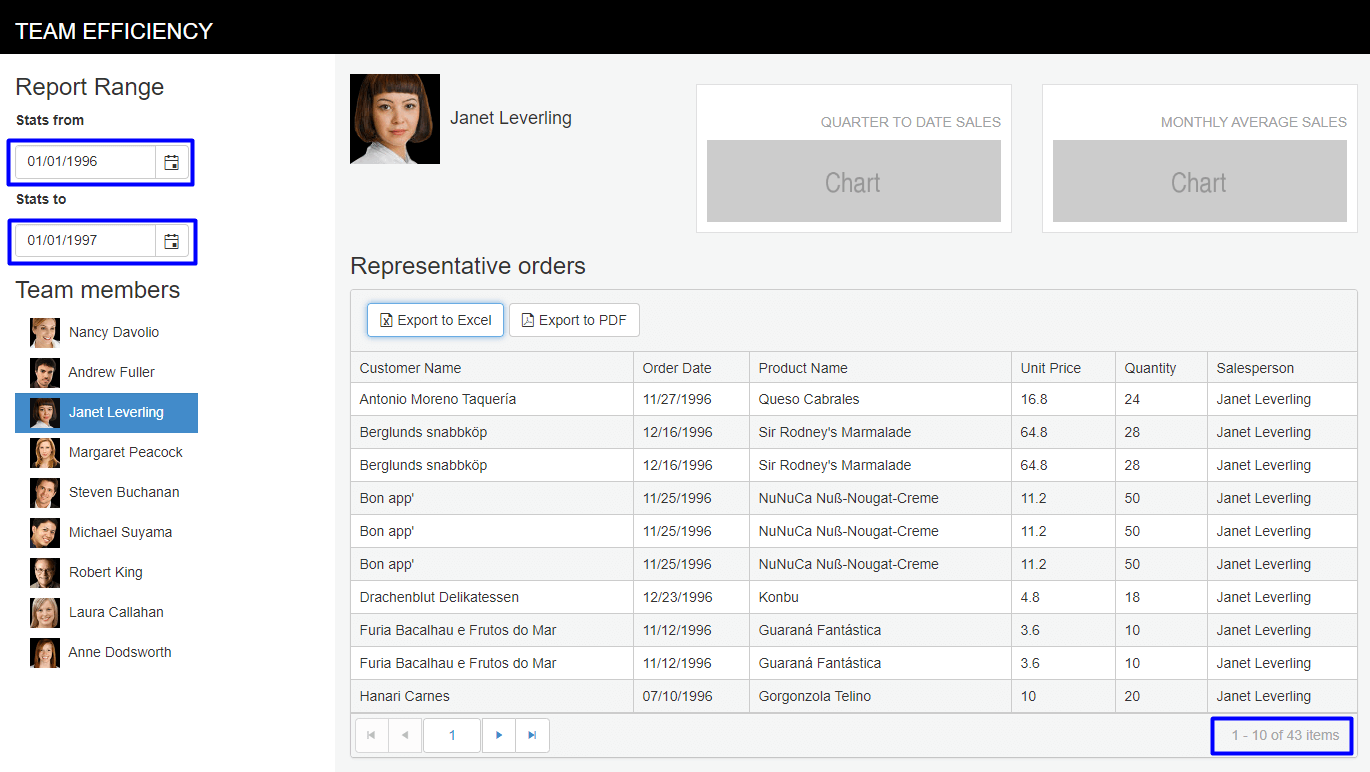
Your Team Efficiency Dashboard is now interactive. Users can filter data using dates and employees. Next, you'll enhance the application by adding some data visualizations.