Server Binding
By default, the Telerik UI Grid for ASP.NET MVC performs server-side requests (HTTP and GET) when doing paging, sorting, and filtering.
Supported Client-Side Events
The Grid supports the following client-side events when it is in server binding mode:
ChangeColumnHideColumnMenuInitColumnReorderColumnResizeColumnShowDetailCollapseDetailExpandExcelExportFilterMenuInitPdfExportGroupExpand—The group object that is associated with group row will be empty in server binding scenario.GroupCollapse—The group object that is associated with group row will be empty in server binding scenario.
- The other client-side events, which are related to data-binding and CRUD data operations, will not be raised when the Grid is configured for server binding.
- Locked columns are not supported. To support locked columns, use Ajax binding instead.
- Showing or hiding of columns and reordering with the
GroupHeaderColumnTemplatein server-binding scenarios is not supported. The reason is that in server-binding scenarios the Kendo UI for jQuery DataSource instance does not have groups and aggregates information. Therefore, the templates for the group rows cannot be compiled on the client side. If your project requires such a scenario, use Ajax binding.- Rows spanning is not supported. To support both rows and columns spanning, use Ajax binding instead and refer to the Row and Column Spanning article for configuration details.
Getting Started
To bind the Grid to data, set its data source and render the view by using any of the following approaches:
- Bind to the view model
- Bind to items from
ViewDataorViewBag - Use the
BindTomethod - Pass additional data to an action method
Binding to the View Model
The example below demonstrates how to bind the Grid to a model.
    public ActionResult Index()
    {
        var northwind = new NorthwindEntities();
        var products = northwind.Products;
        return View(products);
}Using the ViewData or ViewBag Items Binding
The following example demonstrate how to apply data binding with ViewData or ViewBag.
    public ActionResult Index()
    {
        var products = new NorthwindDataContext().Products;

        ViewData["products"] = products;

        return View();
}Applying the BindTo Method
The following example demonstrates how to bind the Grid to data by using the BindTo method.
    public ActionResult Index()
    {
        var products = new NorthwindDataContext().Products;

        ViewBag.Products = products;

        return View();
}The Grid makes HTTP GET requests to the action method which initially renders the view. The Grid page, sort, filter, and group information is passed as query string parameters.
For more information on how a typical URL looks like, refer to [this location](http://localhost:4939/?Grid-sort=ProductName-asc&Grid-page=2\). The Name of the Grid will be used as a prefix of the query string parameters. In this way, more than one server-bound Grid can coexist in the same view. The prefix can be disabled through the PrefixUrlParameters method.
<%: Html.Kendo().Grid(Model)
    .Name("Grid")
    .PrefixUrlParameters(false)
%>
Passing Additional Data to Action Methods
The action method which renders the view that contains the Grid may need additional data.
    public ActionResult Index(string firstName, string lastName)
    {
        var products = new NorthwindDataContext().Products;

        return View(products);
}Setting Up the Sample Project
-
Create a new ASP.NET MVC 5 application. If you have installed the Telerik UI for ASP.NET MVC Visual Studio Extensions, create a Telerik UI for ASP.NET MVC application. Name the application
KendoGridServerBinding. If you decided not to use the Telerik UI for ASP.NET MVC Visual Studio Extensions, follow the steps from the introductory article to add Telerik UI for ASP.NET MVC to the application. -
Add a new
Entity Framework Data Model. Right-click the~/Modelsfolder in the solution explorer and pick Add new item. Choose Data > ADO.NET Entity Data Model in the Add New Item dialog. Name the modelNorthwind.edmxand click Next. This starts the Entity Data Model Wizard.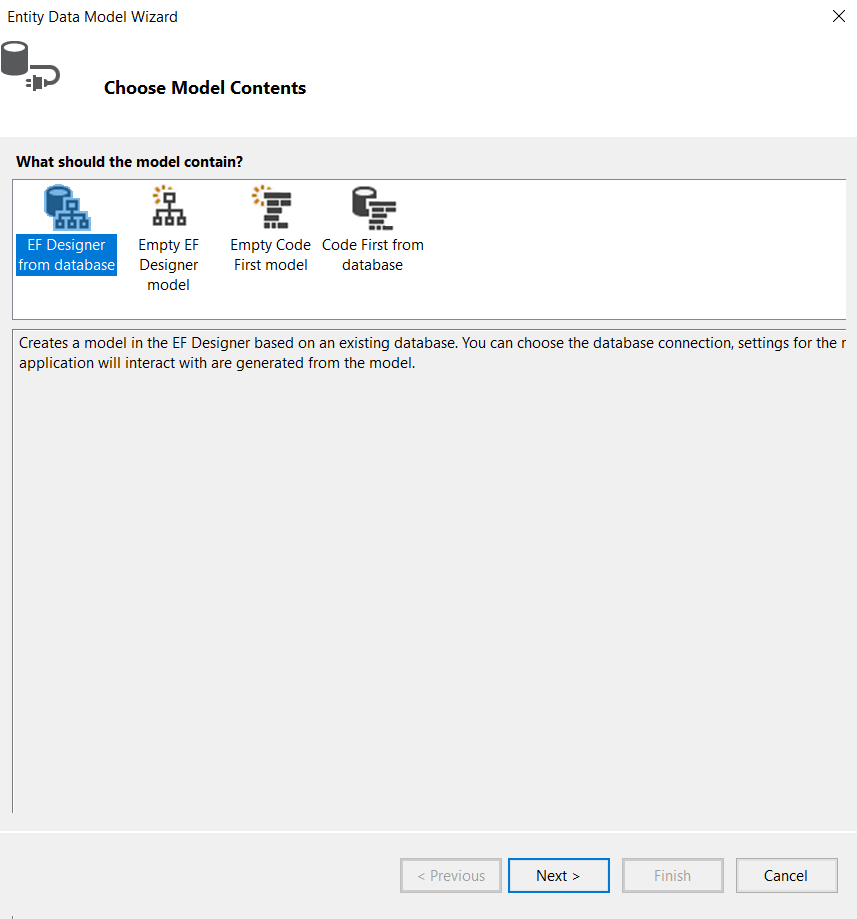
-
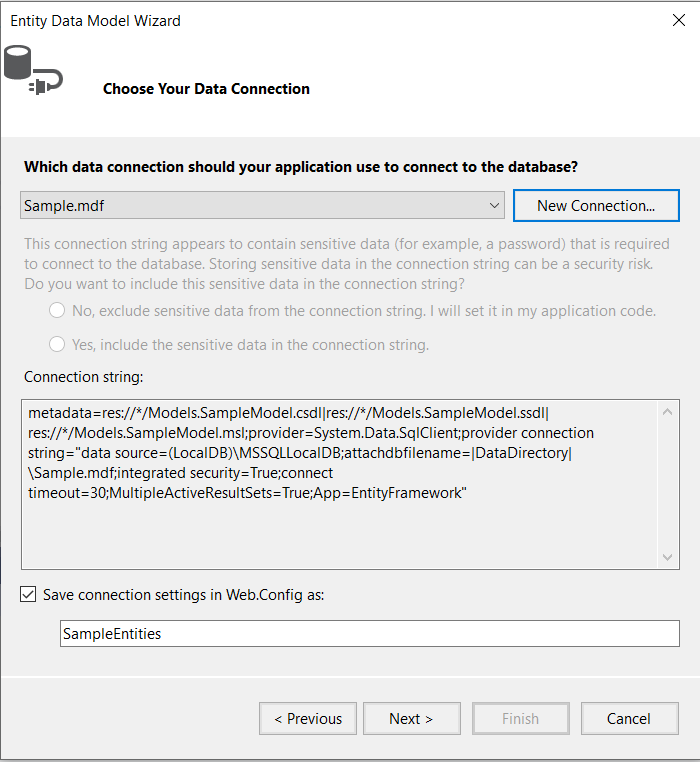
Pick the EF Designer from database option and click Next. Configure a connection to the Northwind database. Click Next.
-
Choose the Products table from the
Which database objects do you want to include in your model?. Leave all other options as they are set by default. Click Finish.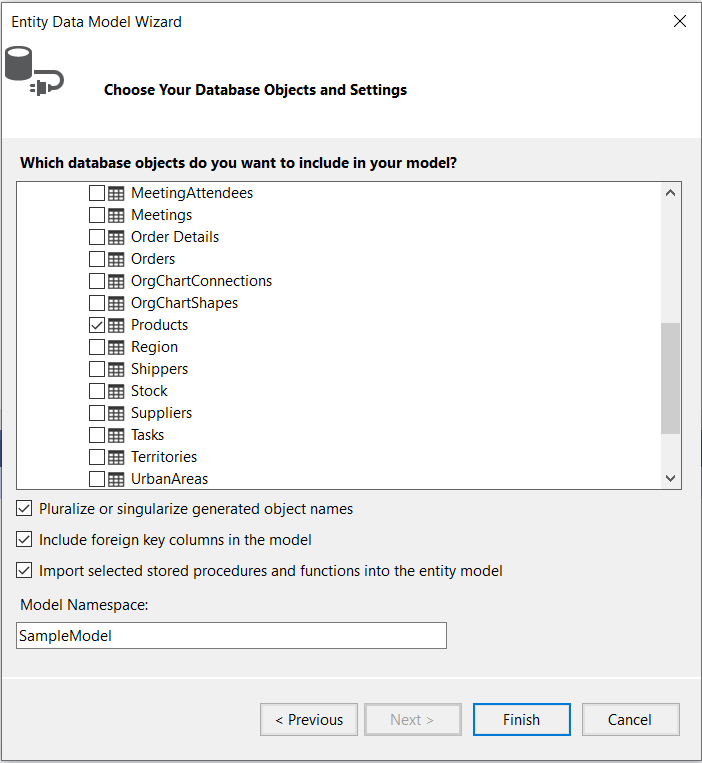
-
Open HomeController.cs and modify the
Indexaction method.Razorpublic ActionResult Index() { ViewBag.Message = "Welcome to ASP.NET MVC!"; var northwind = new NorthwindEntities(); // Get the Products entities and add them to the ViewBag. ViewBag.Products = northwind.Products; return View(); } -
Modify the
Createmethod as demonstrated in the following example.Razor[AcceptVerbs(HttpVerbs.Post)] public ActionResult Create(Product product) { if (ModelState.IsValid) { productService.Create(product); RouteValueDictionary routeValues = this.GridRouteValues(); return RedirectToAction("Index", routeValues); } return View("Index", productService.GetAll()); } -
Modify the
Updatemethod as demonstrated in the following example.Razor[AcceptVerbs(HttpVerbs.Post)] public ActionResult Update(Product product) { if (ModelState.IsValid) { productService.Update(product); RouteValueDictionary routeValues = this.GridRouteValues(); return RedirectToAction("Index", routeValues); } return View("Index", productService.GetAll()); } -
Modify the
Destroymethod as demonstrated in the following example.Razor[AcceptVerbs(HttpVerbs.Post)] public ActionResult Destroy(int productID) { Product product = productService.GetAll().FirstOrDefault(p => p.ProductID == productID); RouteValueDictionary routeValues; if (product == null) { routeValues = this.GridRouteValues(); return RedirectToAction("Index", routeValues); } productService.Destroy(product); routeValues = this.GridRouteValues(); return RedirectToAction("Index", routeValues); } -
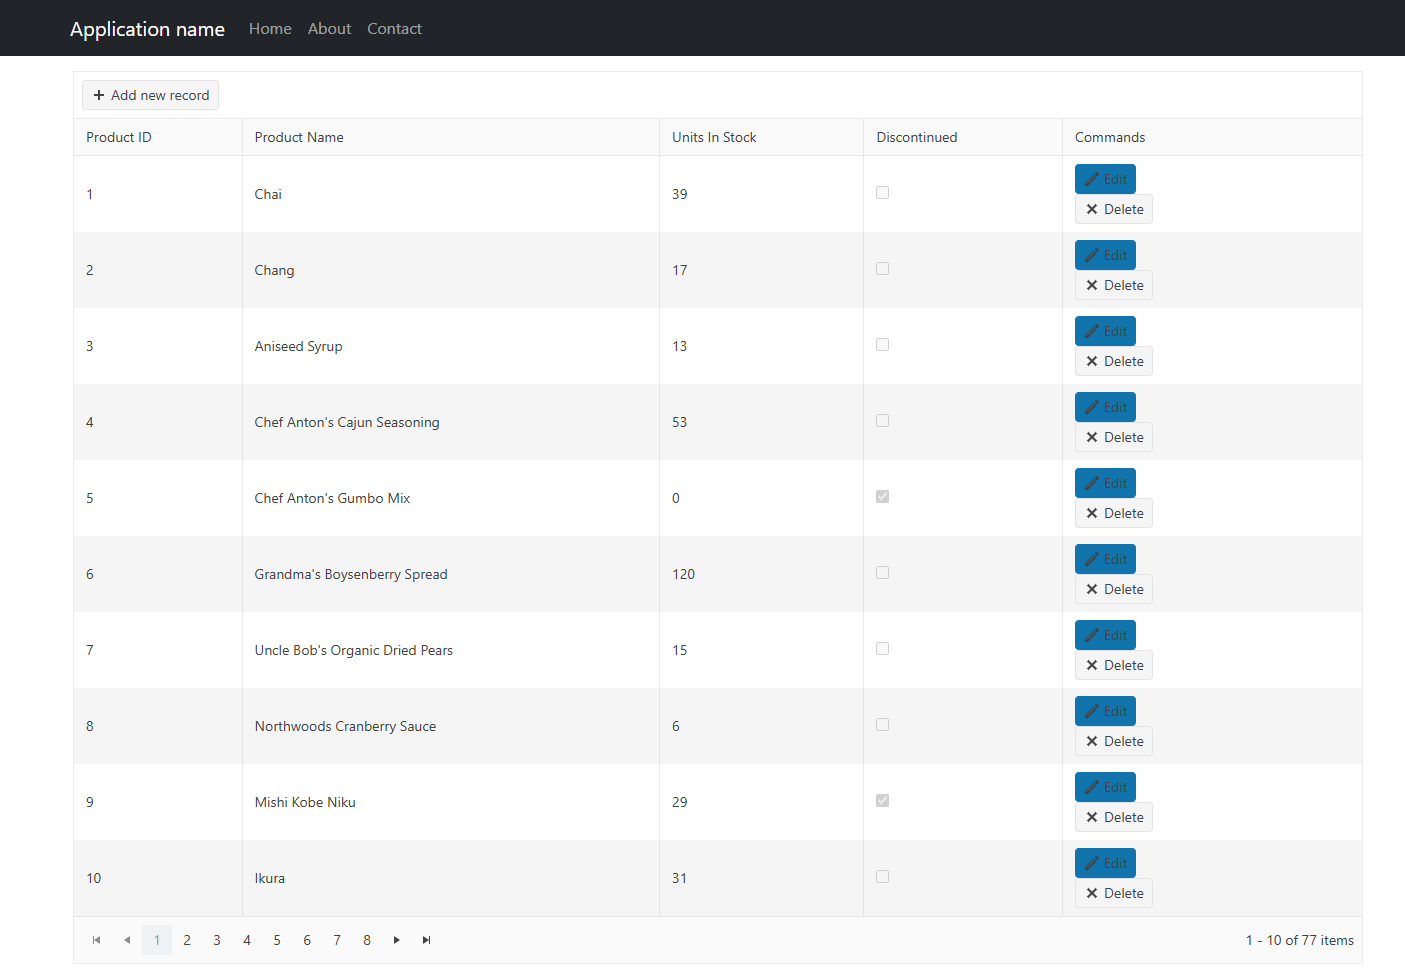
Add a Kendo UI Grid to the
Indexview.Razor@(Html.Kendo().Grid((IEnumerable<KendoGridServerBinding.Models.Product>)ViewBag.Products) //Bind the grid to ViewBag.Products .Name("grid") .Columns(columns => { columns.Bound(product => product.ProductID); columns.Bound(product => product.ProductName); columns.Bound(product => product.UnitsInStock); columns.Bound(product => product.Discontinued); columns.Command(commands => { commands.Edit(); // The "edit" command will edit and update data items. commands.Destroy(); // The "destroy" command removes data items. }).Title("Commands").Width(300); }) .ToolBar(commands => commands.Create()) .Pageable() //Enable the paging. .Sortable() //Enable the sorting. .DataSource(dataSource => dataSource .Server() // Specify that the ProductID property is the unique identifier of the model. .Model(model => model.Id(p => p.ProductID)) .Create(create => create.Action("Create", "Home")) .Update(update => update.Action("Update", "Home")) .Destroy(destroy => destroy.Action("Destroy", "Home")) ) ) -
Build and run the application.