
Zod + TypeScript: Schema Validation Made Easy

Summarize with AI:
Learn how to use Zod, a TypeScript schema validation library that allows you to validate external data at runtime.
TypeScript has rapidly become one of the most popular languages for web development. As a superset of JavaScript that adds optional static typing and other features, TypeScript offers benefits for development teams looking to write more robust and maintainable code.
There’s one area where TypeScript alone falls short: runtime validation. When data comes from external sources (API responses, form submissions or user inputs), TypeScript can’t guarantee that the data matches our expected types at runtime. This is where a library like Zod comes in.
Zod is a TypeScript-first schema validation library that bridges the gap between compile-time type safety and runtime validation. It allows us to define schemas that not only validate data at runtime but also automatically infer TypeScript types, giving us the best of both worlds. In this article, we’ll explore how Zod makes schema validation effortless, and how it integrates beautifully with TypeScript and React applications.
What Is Zod and Why Do We Need It?
Before diving into Zod, let’s understand the problem it solves. Consider a typical scenario where we’re fetching user data from an API:
interface User {
  name: string;
  email: string;
  age: number;
}

async function fetchUser(id: string): Promise<User> {
  const response = await fetch(`/api/users/${id}`);
  const data = await response.json();

  // Type assertion - dangerous!
  return data as User;
}
The type assertion as User tells TypeScript to trust that the data matches our User interface, but this is just a compile-time assumption. If the API returns data with a different structure or missing fields, our application could crash at runtime.
Zod solves this by allowing us to define schemas that validate data at runtime while automatically inferring the TypeScript types:
import { z } from 'zod';

const UserSchema = z.object({
  name: z.string(),
  email: z.string().email(),
  age: z.number().positive()
});

// Automatically infer the TypeScript type
type User = z.infer<typeof UserSchema>;

async function fetchUser(id: string): Promise<User> {
  const response = await fetch(`/api/users/${id}`);
  const data = await response.json();

  // Validate and parse the data
  return UserSchema.parse(data); // Throws if validation fails
}
In the above code example, we define a Zod schema using z.object() that describes the expected structure and validation rules for our User data. The z.infer<typeof UserSchema> automatically generates a TypeScript type from our schema, and UserSchema.parse() validates the incoming data at runtime.
Now we have runtime validation that verifies our data matches the expected structure, and TypeScript automatically knows the type. No manual interface definition needed!
Getting Started with Zod
To get started with Zod, we first need to install it:
npm install zod
Zod requires strict mode enabled in our tsconfig.json:
{
  "compilerOptions": {
    "strict": true
  }
}
Once installed, we can start defining schemas using Zod’s intuitive API.
Basic Schema Types
Zod provides schemas for all primitive JavaScript types and many common patterns. Let’s explore the fundamental building blocks:
Primitives
import { z } from 'zod';

// Basic types
const stringSchema = z.string();
const numberSchema = z.number();
const booleanSchema = z.boolean();
const dateSchema = z.date();

// Parse data
stringSchema.parse("hello"); // ✅ Returns: "hello"
stringSchema.parse(42); // ❌ Throws ZodError

// Safe parsing (doesn't throw)
const result = numberSchema.safeParse("not a number");
if (!result.success) {
  console.log(result.error); // ZodError with details
} else {
  console.log(result.data); // The validated number
}
Here we create individual schemas for each primitive type using Zod’s basic validators. The parse() method validates and returns the data if it matches the expected type, while safeParse() returns a result object that won’t throw errors, making it safer for user input validation.
String Validations
Zod shines when it comes to string validations. It provides built-in validators for common formats:
const emailSchema = z.string().email();
const urlSchema = z.string().url();
const uuidSchema = z.string().uuid();

// String constraints
const usernameSchema = z.string()
  .min(3, "Username must be at least 3 characters")
  .max(20, "Username must be at most 20 characters")
  .regex(/^[a-zA-Z0-9_]+$/, "Username can only contain letters, numbers, and underscores");

// String transformations
const normalizedEmail = z.string()
  .email()
  .toLowerCase()
  .trim();
// Returns: "user@example.com"
normalizedEmail.parse("  USER@EXAMPLE.COM  ");
This example demonstrates Zod’s powerful string validation capabilities. We can chain multiple validators, such as .email(), .min(), .max() and .regex() to create comprehensive validation rules. The transformation methods like .toLowerCase() and .trim() automatically normalize the data during parsing.
Numbers and Numeric Constraints
const ageSchema = z.number()
  .int("Age must be a whole number")
  .positive("Age must be positive")
  .max(120, "Please enter a valid age");

const priceSchema = z.number()
  .multipleOf(0.01) // Ensures two decimal places for currency
  .nonnegative();
For numbers, Zod provides validators for typical constraints like .int() for integers, .positive() for positive numbers and .multipleOf() for specific increments. These are particularly useful for form validation where you need to verify numeric input meets business requirements.
Complex Schema Types
The real power of Zod comes from composing simple schemas into complex structures that match an application’s data models.
Objects
Objects are probably the most common complex type we’ll work with:
const AddressSchema = z.object({
  street: z.string(),
  city: z.string(),
  state: z.string().length(2),
  zipCode: z.string().regex(/^\d{5}(-\d{4})?$/)
});

const PersonSchema = z.object({
  firstName: z.string(),
  lastName: z.string(),
  email: z.string().email(),
  age: z.number().int().positive(),
  address: AddressSchema, // Nested object
  phoneNumbers: z.array(z.string()), // Array of strings
  isActive: z.boolean().default(true) // Default value
});

type Person = z.infer<typeof PersonSchema>;
This example shows how Zod handles nested object validation. The PersonSchema contains the AddressSchema as a nested property, demonstrating how complex data structures can be validated recursively. Zod automatically handles array validation with z.array() and provides default values with .default().
We can also modify object schemas using helpful methods:
// Make all properties optional
const PartialPersonSchema = PersonSchema.partial();

// Pick specific properties
const PersonNameSchema = PersonSchema.pick({ firstName: true, lastName: true });

// Omit specific properties
const PersonWithoutAddressSchema = PersonSchema.omit({ address: true });

// Extend with additional properties
const EmployeeSchema = PersonSchema.extend({
  employeeId: z.string(),
  department: z.string()
});
Arrays and Tuples
// Arrays
const tagsSchema = z.array(z.string()).min(1, "At least one tag is required");
const scoresSchema = z.array(z.number()).length(5, "Exactly 5 scores required");

// Tuples (fixed-length arrays with different types)
const coordinateSchema = z.tuple([z.number(), z.number()]); // [x, y]
const rgbSchema = z.tuple([
  z.number().int().min(0).max(255),
  z.number().int().min(0).max(255),
  z.number().int().min(0).max(255)
]); // [r, g, b]
Arrays in Zod can have length constraints using .min(), .max() and .length(). Tuples are perfect for fixed-length arrays where each position has a specific type, like coordinates or RGB color values. The tuple schema restricts both the length and the type of each element.
Unions and Discriminated Unions
Unions allow us to validate data that can be one of several types:
// Simple union
const stringOrNumber = z.union([z.string(), z.number()]);
stringOrNumber.parse("hello"); // ✅
stringOrNumber.parse(42); // ✅
stringOrNumber.parse(true); // ❌

// Discriminated union (more efficient for object unions)
const ResponseSchema = z.discriminatedUnion("status", [
  z.object({
    status: z.literal("success"),
    data: z.string()
  }),
  z.object({
    status: z.literal("error"),
    error: z.string(),
    code: z.number()
  })
]);

// Response is:
// | { status: "success"; data: string }
// | { status: "error"; error: string; code: number }
type Response = z.infer<typeof ResponseSchema>;
Unions allow data to be one of several types, while discriminated unions are optimized for objects that share a common property (the discriminator). The z.discriminatedUnion() creates more efficient validation by checking the discriminator field first, then applying the appropriate schema. This is ideal for handling different response types or state variations.
Form Validation with Zod and KendoReact
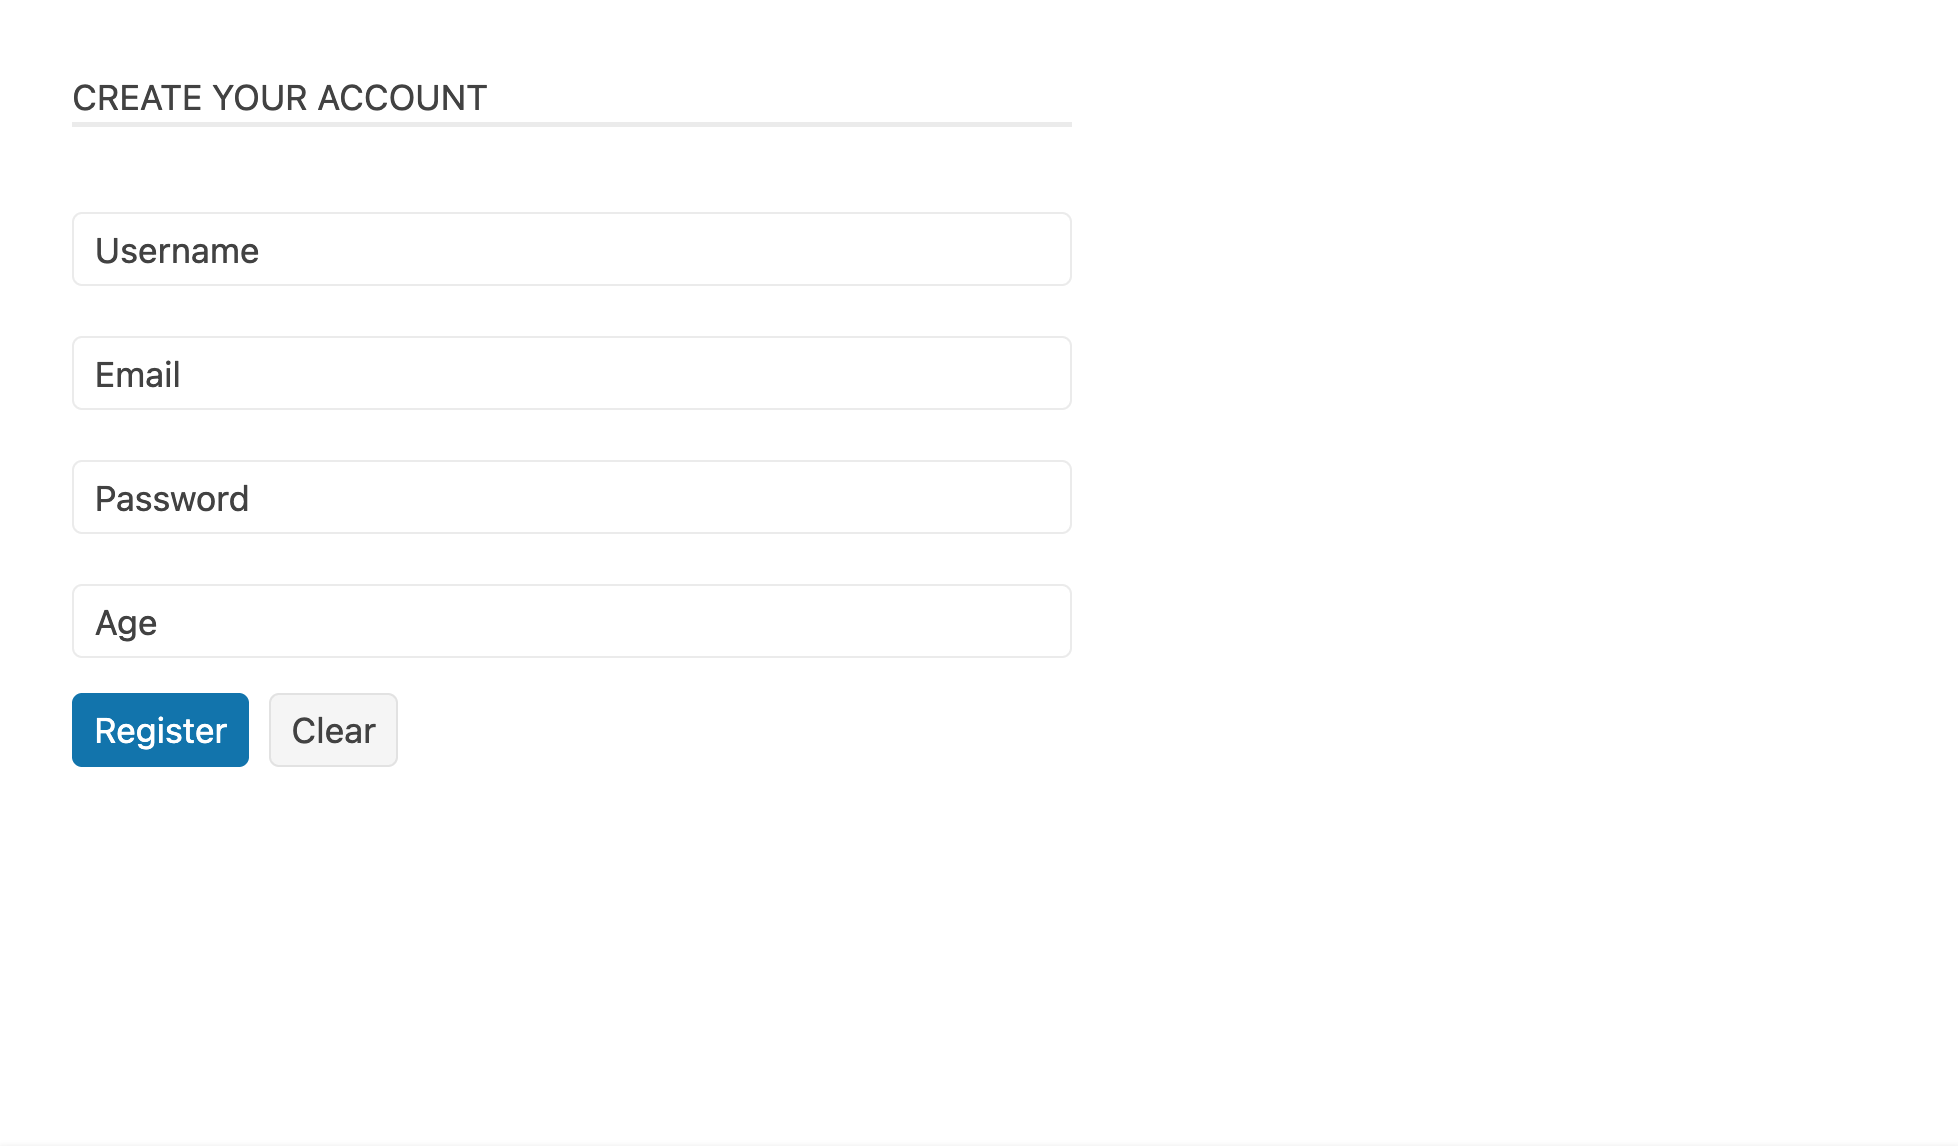
One of the most common use cases for runtime validation is form handling. Let’s build a registration form step by step to see how Zod integrates with a React Form component from the Progress KendoReact UI library.
Step 1: Setting Up the Basic Form Components
First, let’s create the basic form structure using KendoReact Form components:
import * as React from 'react';
import {
  Form,
  Field,
  FormElement,
  FieldRenderProps,
  FormRenderProps,
} from '@progress/kendo-react-form';
import { Input } from '@progress/kendo-react-inputs';
import { Error } from '@progress/kendo-react-labels';
import { Button } from '@progress/kendo-react-buttons';

// Custom input component with error handling
const FormInput = (fieldRenderProps: FieldRenderProps) => {
  const { validationMessage, visited, ...others } = fieldRenderProps;
  return (
    <div className="k-form-field-wrap">
      <Input {...others} labelClassName={'k-form-label'} />
      {visited && validationMessage && (
        <Error>
          <span>{validationMessage}</span>
        </Error>
      )}
    </div>
  );
};

const App = () => {
  const handleSubmit = (dataItem: { [name: string]: any }) => {
    console.log('Form submitted:', dataItem);
  };

  return (
    <Form
      onSubmit={handleSubmit}
      render={(formRenderProps: FormRenderProps) => (
        <FormElement style={{ maxWidth: 400 }}>
          <fieldset className={'k-form-fieldset'}>
            <legend className={'k-form-legend'}>Create Your Account</legend>

            <Field
              name={'username'}
              component={FormInput}
              label={'Username'}
            />

            <Field
              name={'email'}
              component={FormInput}
              label={'Email'}
              type={'email'}
            />

            <Field
              name={'password'}
              component={FormInput}
              label={'Password'}
              type={'password'}
            />

            <Field
              name={'age'}
              component={FormInput}
              label={'Age'}
              type={'number'}
            />

            <div className="k-form-buttons">
              <Button
                themeColor={'primary'}
                type={'submit'}
                disabled={!formRenderProps.allowSubmit}
              >
                Register
              </Button>
              <Button onClick={formRenderProps.onFormReset}>Clear</Button>
            </div>
          </fieldset>
        </FormElement>
      )}
    />
  );
};

export default App;
In this basic setup, we create a FormInput component that wraps the KendoReact Input with error display logic, and build a form with four fields (username, email, password, age) using the KendoReact Form, Field and FormElement components. The form structure is ready, but it lacks validation. This creates our basic form structure, including styled inputs and error handling.
Step 2: Adding Zod Schema and Validation
Now let’s add Zod to provide type-safe validation. We’ll import Zod and create our validation schema:
import { z } from 'zod';

// Define our form schema with Zod
const RegistrationSchema = z.object({
  username: z
    .string()
    .min(3, 'Username must be at least 3 characters')
    .max(20, 'Username must be at most 20 characters'),
  email: z.string().email({ message: 'Please enter a valid email address' }),
  password: z
    .string()
    .min(8, 'Password must be at least 8 characters')
    .regex(/[A-Z]/, 'Password must contain at least one uppercase letter')
    .regex(/[0-9]/, 'Password must contain at least one number'),
  age: z
    .string()
    .transform((val) => parseInt(val, 10))
    .pipe(
      z.number()
        .int('Age must be a whole number')
        .min(18, 'You must be at least 18 years old')
        .max(120, 'Please enter a valid age')
    ),
});

// Infer the TypeScript type
type RegistrationData = z.infer<typeof RegistrationSchema>;

// Create a validator function for KendoReact
const createZodValidator = (schema: z.ZodSchema) => {
  return (value: any) => {
    const result = schema.safeParse(value);
    if (!result.success) {
      return result.error.issues[0]?.message || 'Invalid value';
    }
    return '';
  };
};
Here we define validation rules for each field:
- Username length constraints (3-20 characters)
- Email format validation
- Password requirements (8+ characters with uppercase and numbers)
- Age restrictions (18-120) with string-to-number transformation since HTML inputs return strings.
The createZodValidator helper function converts Zod schemas into KendoReact-compatible validators, and we also automatically infer a TypeScript type from our schema.
Step 3: Integrating Form Submission with Full Validation
Finally, we’ll update our form to use the validators and handle form submission with complete Zod validation. This makes our full component code look like the following:
import * as React from 'react';
import {
  Form,
  Field,
  FormElement,
  FieldRenderProps,
  FormRenderProps,
} from '@progress/kendo-react-form';
import { Input } from '@progress/kendo-react-inputs';
import { Error } from '@progress/kendo-react-labels';
import { Button } from '@progress/kendo-react-buttons';
import { z } from 'zod';

// Define our form schema with Zod
const RegistrationSchema = z.object({
  username: z
    .string()
    .min(3, 'Username must be at least 3 characters')
    .max(20, 'Username must be at most 20 characters'),
  email: z.email({ message: 'Please enter a valid email address' }),
  password: z
    .string()
    .min(8, 'Password must be at least 8 characters')
    .regex(/[A-Z]/, 'Password must contain at least one uppercase letter')
    .regex(/[0-9]/, 'Password must contain at least one number'),
  age: z
    .string()
    .transform((val) => parseInt(val, 10))
    .pipe(
      z
        .number()
        .int('Age must be a whole number')
        .min(18, 'You must be at least 18 years old')
        .max(120, 'Please enter a valid age')
    ),
});

// Infer the TypeScript type
type RegistrationData = z.infer<typeof RegistrationSchema>;

// Create a validator function for KendoReact
const createZodValidator = (schema: z.ZodSchema) => {
  return (value: any) => {
    const result = schema.safeParse(value);
    if (!result.success) {
      return result.error.issues[0]?.message || 'Invalid value';
    }
    return '';
  };
};

// Custom input component with error handling
const FormInput = (fieldRenderProps: FieldRenderProps) => {
  const { validationMessage, visited, ...others } = fieldRenderProps;
  return (
    <div className="k-form-field-wrap">
      <Input {...others} labelClassName={'k-form-label'} />
      {visited && validationMessage && (
        <Error>
          <span>{validationMessage}</span>
        </Error>
      )}
    </div>
  );
};

const App = () => {
  const handleSubmit = (dataItem: { [name: string]: any }) => {
    // Validate the entire form with Zod
    const result = RegistrationSchema.safeParse(dataItem);

    if (result.success) {
      // Type-safe data!
      const data: RegistrationData = result.data;
      console.log('Registration successful:', data);
      // Submit to API...
    } else {
      // Handle validation errors
      console.error('Validation failed:', result.error);
    }
  };

  return (
    <Form
      onSubmit={handleSubmit}
      render={(formRenderProps: FormRenderProps) => (
        <FormElement style={{ maxWidth: 400 }}>
          <fieldset className={'k-form-fieldset'}>
            <legend className={'k-form-legend'}>Create Your Account</legend>

            <Field
              name={'username'}
              component={FormInput}
              label={'Username'}
              validator={createZodValidator(RegistrationSchema.shape.username)}
            />

            <Field
              name={'email'}
              component={FormInput}
              label={'Email'}
              type={'email'}
              validator={createZodValidator(RegistrationSchema.shape.email)}
            />

            <Field
              name={'password'}
              component={FormInput}
              label={'Password'}
              type={'password'}
              validator={createZodValidator(RegistrationSchema.shape.password)}
            />

            <Field
              name={'age'}
              component={FormInput}
              label={'Age'}
              type={'number'}
              validator={createZodValidator(RegistrationSchema.shape.age)}
            />

            <div className="k-form-buttons">
              <Button
                themeColor={'primary'}
                type={'submit'}
                disabled={!formRenderProps.allowSubmit}
              >
                Register
              </Button>
              <Button onClick={formRenderProps.onFormReset}>Clear</Button>
            </div>
          </fieldset>
        </FormElement>
      )}
    />
  );
};

export default App;
In this final step, we connect each field to its respective Zod validator using RegistrationSchema.shape.fieldName, which gives us access to the individual field schemas. The handleSubmit function performs a final validation of the entire form data, providing type safety and comprehensive validation before processing the submission. Now, we’ll notice field-level validation errors appear in real-time as users interact with the form.
This integration gives us the best of both worlds: powerful KendoReact form components with Zod’s robust validation and automatic TypeScript type inference!
If you’re interested in interacting with this form example and the related, be sure to check out the following StackBlitz project.
Wrap-up
Zod brings together the best of TypeScript’s compile-time type safety and runtime validation in a way that feels natural and intuitive. By defining our schemas once, we get both validation and type inference, eliminating the duplication and potential mismatches between our TypeScript types and validation logic.
As our applications grow in complexity and handle more diverse data sources, having a reliable validation layer becomes increasingly essential. Zod not only provides that reliability but does so in a way that enhances our development experience through excellent TypeScript integration and clear, customizable error messages. It truly makes schema validation easy!

Hassan Djirdeh
Hassan is a senior frontend engineer and has helped build large production applications at-scale at organizations like Doordash, Instacart and Shopify. Hassan is also a published author and course instructor where he’s helped thousands of students learn in-depth frontend engineering skills like React, Vue, TypeScript, and GraphQL.
Related Posts
Comments
All articles
Topics
Web MobileMobile
Desktop
Design
Productivity
People
