
Sorting, Filtering, Grouping and Aggregating Data in Angular

When you build an app that involves interacting with data, it will mean your users need ways to perform actions like sorting, grouping, filtering and aggregating.
When we build apps with data, providing options like sorting, grouping, filtering and aggregating data for our customers is required to interact with it. We can achieve this through multiple paths:
- Use the built-in Array object – it provides functions like
filter,sortmethods andreducefor grouping and aggregating. - Use the power of Kendo UI for Angular Data Query – it provides a range of handy and developer-friendly features that help us handle data operations such as sorting, filtering, grouping and aggregates. (We will cover this option in the next article!)
Because we already know JavaScript, we will use the built-in Array methods. This is a good option for most developers.
First, let’s learn about the Array methods:
The Built-in Array Methods
The Array object provides methods for the actions of sorting and filtering, but for grouping and aggregating data, we need to use the reduce() method. Let’s explain a bit about each
of these:
The sort() method on an array returns the sorted array. By default, it sorts the elements as strings in alphabetical and ascending order. We must provide a compare function to sort elements in a custom order.
The filter() method returns a new array containing only the elements that pass the test implemented by the provided function.
The reduce() method helps us with grouping and aggregating:
For grouping, it takes an accumulator function and iterates over the array, returning an object that has keys for each unique value in the array and the corresponding values being an array of elements that match the key.
For aggregating, it takes an accumulator function that keeps track of the running total or any other aggregation value. It calls for each element in the array, and the result is the final accumulated value.
Because we already know each method, we will solve the following scenario and find its limitations for complex and advanced topics.
Let’s go!
Scenario
We work for a company that wants an Angular app with a list of products. The user wants to filter, group, sort and aggregate the data. Our manager wants to release it with all these features as soon as possible.
We are going to use the built-in array methods in order to solve each requirement. Let’s go set up the project.
Setting up the Project
We start to build the project using Angular CLI. You can install it using the following command:
npm install -g @angular/cli
Once you have the Angular CLI installed, create the project by running the following command:
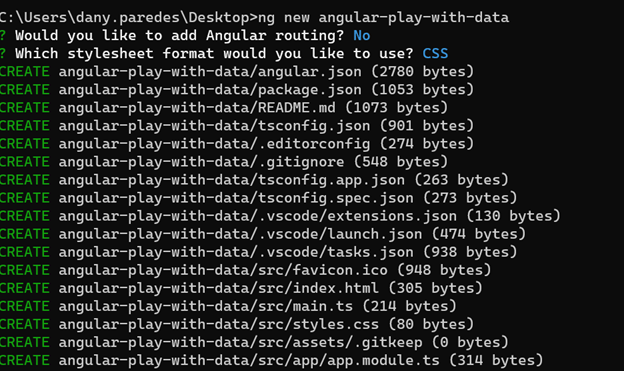
ng new angular-play-with-data
When prompted by the Angular CLI, choose “No” when asked about adding routing. Additionally, select “CSS” as the preferred stylesheet format.
Now that our application has been created, navigate to the directory:
cd angular-play-with-data
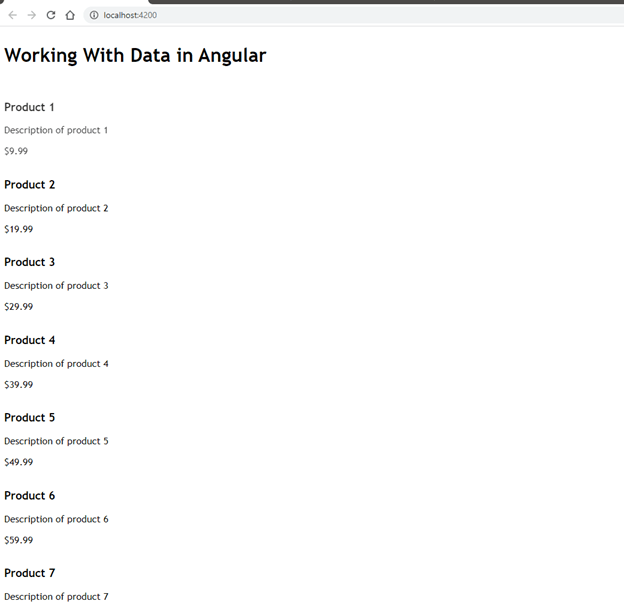
Go ahead and remove the example markup in app.component.html and the following markup:
<h1>Working With Data in Angular</h1>
Open the app.component.ts and add the property products with the example data:
 products = [
    {
      "id": 1,
      "name": "Product 1",
      "category": "Category A",
      "description": "Description of product 1",
      "price": 9.99
    },
    {
      "id": 2,
      "name": "Product 2",
      "category": "Category B",
      "description": "Description of product 2",
      "price": 19.99
    },
    {
      "id": 3,
      "name": "Product 3",
      "category": "Category A",
      "description": "Description of product 3",
      "price": 29.99
    },
    {
      "id": 4,
      "name": "Product 4",
      "category": "Category C",
      "description": "Description of product 4",
      "price": 39.99
    },
    {
      "id": 5,
      "name": "Product 5",
      "category": "Category B",
      "description": "Description of product 5",
      "price": 49.99
    },
    {
      "id": 6,
      "name": "Product 6",
      "category": "Category A",
      "description": "Description of product 6",
      "price": 59.99
    },
    {
      "id": 7,
      "name": "Product 7",
      "category": "Category C",
      "description": "Description of product 7",
      "price": 69.99
    },
    {
      "id": 8,
      "name": "Product 8",
      "category": "Category B",
      "description": "Description of product 8",
      "price": 79.99
    },
    {
      "id": 9,
      "name": "Product 9",
      "category": "Category A",
      "description": "Description of product 9",
      "price": 89.99
    },
    {
      "id": 10,
      "name": "Product 10",
      "category": "Category C",
      "description": "Description of product 10",
      "price": 99.99
    }
  ]
Perfect, we have the basic setup. Next, we create a component to render the list of products.
List Products
Using the Angular CLI, we will create the list-products component using the -t flag for an inline template, preventing html file creation by running the following command:
PS C:\Users\dany.paredes\Desktop\angular-play-with-data> ng g c -t list-products
CREATE src/app/list-products/list-products.component.spec.ts (642 bytes)
CREATE src/app/list-products/list-products.component.ts (229 bytes)
CREATE src/app/list-products/list-products.component.css (0 bytes)
Add the property products with the Input() decorator to allow us to get the list of products from app.component.ts, and add the template using the ngFor and interpolation.
import { Component, Input } from '@angular/core';
@Component({
  selector: 'app-list-products',
  template: `
    <div *ngFor="let item of products">
      <h3>{{ item.name }}</h3>
      <p>{{ item.description }}</p>
      <span>{{ item.price | currency }}</span>
    </div>
  `,
})
export class ListProductsComponent {
  @Input() products: any;
}
Angular Basics: Introduction to ngFor Directive in Angular
Learn more about looping through lists in Angular using the ngFor directive and keywords like index, first and last.
In app.component.html, use app-list-products to show the list of products.
<h2>All Products</h2>
<app-list-products [products]="products"></app-list-products>
Save the changes and run the app with ng -serve -o to open the browser automatically.
The scenario is ready; next, we will face our first challenge sorting the list of products.
Sorting
We want the user to have two buttons to order the products by ascending and descending price. As we learned before, the sort() method helps to sort the elements of an array in place and returns the sorted array. By default,
it sorts elements as strings in alphabetical and ascending order, and we want to sort the prices.
Remember, we can provide a custom sorting function to sort the elements in a different order.
First, open app.component.ts and create the method sortProductsAsc to put the price in ascending order using the sort() method. We pass the function
(a, b) => a.price - b.price) to sort ascending.
To sort it in descending, add another method, sortProductsDesc, and change the comparison in the sort function to b.price - a.price. In App.component.ts:
public sortProductsDesc(): void {
    this.products = this.products.sort((a, b) => a.price - b.price);
  }

  public sortProductsAsc() {
    this.products = this.products.sort((a, b) => b.price - a.price);
  }
Next, add two buttons to allow the user to sort ascending and descending and link the click event with the methods.
<button (click)="sortProductsAsc()">Sort Asc</button>
<button (click)="sortProductsDesc()">Desc Desc</button>
Save this, and the browser reloads. When you click on the sort methods, it orders the products by price in descending and ascending ways.

What happens if we want to add sorting for other fields with other data types like Booleans, dates or strings? How much time will that take?
Let’s continue with the following feature because we need to release it soon!
Filtering Data
We must allow the user to filter the product by name. The filter() method helps to filter the elements of an array based on a specific condition and returns a new array containing only the elements that pass the test implemented
by the provided function.
First, we create the function filterBy , which expects the UI’s value. If the filter has a value, then nameInput has a value and the filter method updates the list of products.
filterBy(nameInput: HTMLInputElement) {
    if (nameInput.value) {
      this.products = this.products.filter(p => p.name === nameInput.value)
    }
  }
In the app.component.html, add an input using template reference variables #filterValue, and a button to call the filterBy method to pass the template reference to gain access to the
input value.
...
<label for="filter">Filter By Name: </label>
<input id="filter" type="text" #filterValue>
<button (click)="filterBy(filterValue)">Filter</button>
Read more about template reference variables and event binding in Angular.
Save this, and the browser reloads. Type a product name and click the filter button to see the results.
What happen if we want to add the following features:
- Filter by other parameters
- Ignore the case
- Allow filtering when the product starts with some letter
- Combine multiple search criteria like by “Name” and “Category”
It looks very tricky to code fast, and we will have to release soon. Let’s continue with grouping the data.
Grouping Data
We want to list a new section with the product group by category. The reduce() method helps to group the elements of an array based on a specific property and returns an object that has keys for each unique value in
the array and the corresponding values being an array of elements that match.
Because we want to have a clear structure for our group of products, first create a new interface in the app.component.ts:
interface groupeByCategory {
  category: string;
  products: any;
}
Next, declare a new array of type groupByCategory:
categories: groupByCategory[] = [];
Create a new method, showGroup; inside use the reduce() method to loop through the products array and create an object with keys for each unique category.
If a key doesn’t exist in the accumulator object, we make it and assign an empty array to it. Then, we push the current product to the array associated with the corresponding key.
Finally using Object.keys to assign each category and products to the categories array.
The final code looks like:
  showGroup() {
    //First, group the products by category
    const group = this.products.reduce((acc: any, curr) => {
      let key = curr.category;
      if (!acc[key]) {
        acc[key] = [];
      }
      acc[key].push(curr);
      return acc;
    }, {});

    //Get the categories and product related.
    this.categories = Object.keys(group ).map(key => ({
      category: key,
      products: group[key]
    }));

  }
Add the button to show the list of product groups by category.
<button (click)="showGroup()">Show Group</button>
Next, use the ngFor access to each category and pass the products list to the list-product component.
<div class="category" *ngFor="let item of categories">
  <h2>{{item.category}}</h2>
  <app-list-products [products]="item.products"></app-list-products>
</div>
Save and the browser reloads and clicks on the show group. It shows a new list of products by category.
Yeah, it works, but what happens if we want to group for more fields? It looks like too much code, and we will have to release soon. Let’s continue.
Aggregating Data
We want to know the total price of all products. The reduce() function helps to aggregate the elements of an array into a single value, so we can use it for summing the price property.
Add a new property total starting with 0.00 in the app.component.ts to store the sum of all products. Next, add the new method showTotal, which uses the reduce function to accumulate
all property price values.
total = 0.00;
showTotal() {
   this.total = this.products.reduce((acc, curr) => acc + curr.price, 0);
}
In the app.component.html render, add a new button to show the total property. Bind the button click to the showTotal method and render the total property using interpolation.
<button (click)="showTotal()"> Total of all products</button> {{total}}
Save, and the browser reloads. When you click on the new button, it shows the total of all products!
It works, but what happens if we want to do the following points?
- Sum all products by category
- Get the average price
- Get the min and max price
Finally, we finished “the basic” features, but remember, we have a huge list of pending features, which looks like too much work.
When to Use Array Methods
We’re going to emphasize a few points about why and when to use Array methods.
- The Filter methods work well in proof of concept and minimal implementation.
- The sorting works very well for strings and data without too many properties
- Aggregate and Group with the
reducehelp with an object with small properties and not complex combinations.
When to Look Elsewhere?
Because everything has a weakness, using the built-in Array methods has a few flaws. If you remember, we have some pending tasks in our demo:
- Sort by other data types like Booleans, date, string.
- Filter by other parameters or by ignoring case.
- Allow filtering when the product starts with some letter.
- Combine multiple search criteria like by “Name” and “Category.”
- Group for more fields?
- Sum all products by other properties or get the average price.
- Get the min or max price.
Implementing all these will take time, and if we work as a team, we really should have a framework with methods to make the code predictable and easy to maintain. It is a considerable amount of time without including testing and performance improvements.
Conclusion
This article covered how to sort, filter, group and aggregate data using Array methods. Still, maybe we can find a better solution when we build a complex app or your team doesn’t have substantial experience and needs to meet a complex scenario—let’s see in the next post!
You can find a complete code example for this article and play with the sample app at the following links:

Dany Paredes
Dany Paredes is a Google Developer Expert on Angular and Progress Champion. He loves sharing content and writing articles about Angular, TypeScript and testing on his blog and on Twitter (@danywalls).
Related Posts
Comments
All articles
Topics

Latest Stories
in Your Inbox
Subscribe to be the first to get our expert-written articles and tutorials for developers!
All fields are required