Blazor .NET 8 Preview 6—Server-Side Rendering, Edit Forms and Interactive WASM Components

Blazor development continues apace as .NET 8 draws closer. Preview 6 rounds off the edges of Server Side Rendering, making it possible to capture user input via Blazor’s EditForm.
.NET 8 Preview 6 also brings interactivity (for selected components) via Blazor WebAssembly (as well as Blazor Server), so you can enable “islands of interactivity” in your app.
Capture User Input via EditForm
Blazor apps make it straightforward to capture user input via forms using an EditForm. For example, here’s a small form to invite someone to sign up for your app.
Customers/Invite.razor
@page "/Customer/Invite"

<EditForm Model="CustomerInvite" OnValidSubmit="InviteCustomer" class="col-md-4">
    <DataAnnotationsValidator />
    <div class="mb-2">
        <label for="firstName" class="form-label">First Name:</label>
        <InputText id="firstName" class="form-control" @bind-Value="CustomerInvite.FirstName"/>
    </div>
    <div class="mb-2">
        <label for="firstName" class="form-label">Email:</label>
        <InputText id="firstName" class="form-control" @bind-Value="CustomerInvite.Email"/>
    </div>
    <div class="mb-2">
        <button type="submit" class="btn btn-primary">Invite</button>
    </div>
</EditForm>
@code {

    public CustomerInvite CustomerInvite { get; set; } = new();

    private void InviteCustomer()
    {
        Console.WriteLine("Inviting Customer: " + CustomerInvite.Email);
    }

}
In a Blazor Server or WASM app, Model points to an object (an instance of CustomerInvite in this case).
public record CustomerInvite
{
    [Required]
    public string FirstName { get; set; }
    [Required]
    public string Email { get; set; }
}
Each form input uses @bind-Value to enable two-way binding with specific fields.
For example:
- If you enter a value into the
firstNameinput, theFirstNameproperty onCustomerInvitewill be updated with the new value. - Then, when the form is submitted (and passes all validation checks), the
InviteCustomermethod will be invoked.
In Blazor Server this happens in a stateful circuit on the server (and DOM updates are sent to the browser via a socket connection).
With Blazor WASM this all happens in the browser.
How Edit Forms Work with Server-Side Rendering
With server-side rendering (SSR) in .NET 8, the initial request for the page at Customer/Invite is sent to the server, which renders the relevant component then returns static HTML.
The result is a page which, once loaded in the browser, is disconnected from your app (you know, the way webpages used to work!).
So how can we capture user input?
Well, long before the advent of single-page applications (SPAs) and persistent socket connections, this kind of interaction was handled via forms. If your page included a form, the user could enter data into that form and “post” it back to the server.
<form method="post" action="/customer/invite">
    ...
</form>
With SSR and Blazor in .NET 8, we can wire an EditForm up to act just like a regular form, and post data back to the server.
First we need to modify our EditForm ever so slightly, to set its method attribute to post.
@page "/Customer/Invite"

<EditForm method="post" Model="CustomerInvite" OnValidSubmit="InviteCustomer" class="col-md-4">
    ...
</EditForm>
Then, to bind the submitted values to the CustomerInvite property, we can use the SupplyParameterFromForm attribute.
@code {

    private bool customerInvited;

    [SupplyParameterFromForm]
    public CustomerInvite CustomerInvite { get; set; } = new();

    private void InviteCustomer()
    {
        Console.WriteLine("Inviting Customer: " + CustomerInvite.Email);
        customerInvited = true;
    }

}
When the form is submitted, Blazor will map the incoming form values to CustomerInvite and run the logic contained within InviteCustomer.

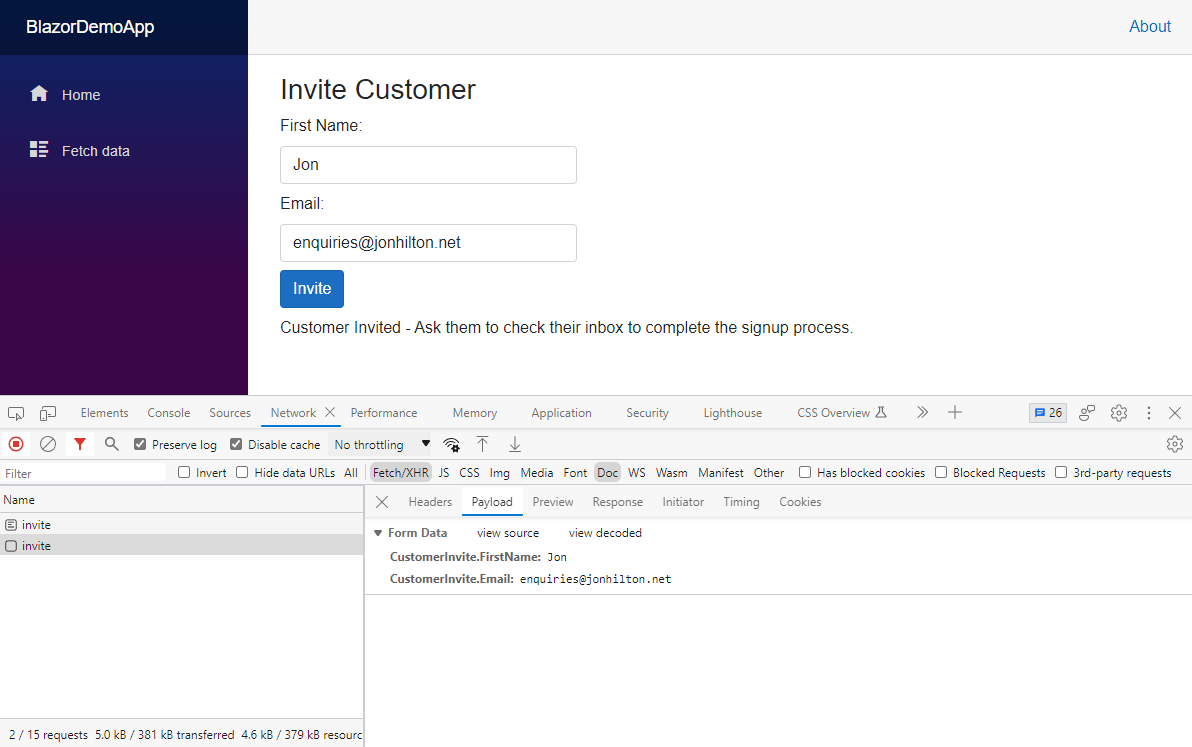
Here we can see the results of submitting the form:
- A
fetchrequest was made to /customer/invite which included the submitted form values. - Blazor (on the server) routed that
fetchrequest to the Invite.razor component. - Invite.razor used model binding to populate the instance of
CustomerInvitein theInvitecomponent from the submitted payload (form data). - The logic in the
InviteCustomermethod was executed, which set thecustomerInvitedfield to true. - The component was rendered, and the resulting HTML sent back to the browser.
Validation also works (just as it does when you use an EditForm with Blazor Server or WASM). In this case the two fields in CustomerInvite are marked as Required using Data Annotations.
So long as our EditForm includes a DataAnnotationsValidator, attempting to submit the form without either (or both) of these values missing will result in HTML which indicates that a validation
error has occurred.
For a lot of “Line Of Business” apps, this combination of SSR and forms will handle most requirements but, just occasionally, you might want to make parts of your app more “interactive.”
Islands of Interactivity with Blazor WebAssembly
Preview 5 made it possible to flag components that should run via Blazor Server.
So, for example, you could take this simple Banner component and indicate it should run via Blazor Server.
This enables you to make specific components interactive, using the full power of Blazor Server (where DOM interactions are processed in a stateful circuit on the server), even when most of your app is using server-side rendering.
Now, with Preview 6, it’s also possible to make individual components run via Blazor WASM. For this to work, you need a separate WASM client project to house any components you want to run via WASM.
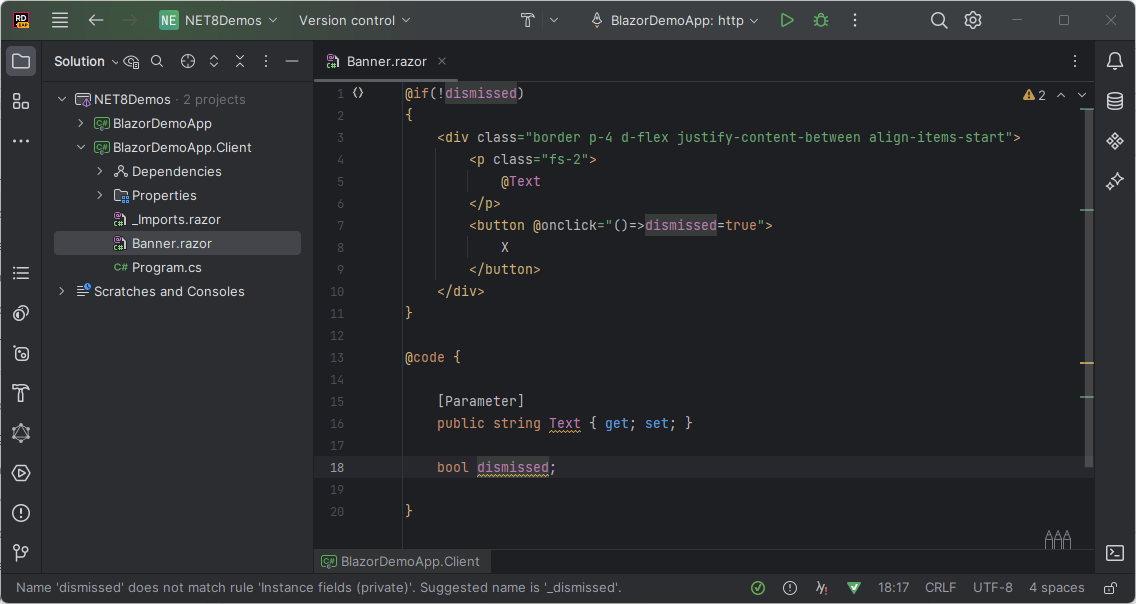
For example, here I’ve added a separate Blazor WASM project to house the simple Banner.razor component.

The key thing to remember is that this entire .dll (for BlazorDemoApp.Client in this case) will be shipped to, and run in, the browser.
You’ll need to reference this new Client project from your Server project, then you can render instances of the Banner component on any of your pages.
For example, here I’ve rendered an instance of the Banner component (from BlazorDemoApp.Client) on the default home page for the app (Index.razor).
BlazorDemoApp (Server)/Pages/Index.razor
@page "/"

<PageTitle>Index</PageTitle>

<Banner Text="Hi from Blazor Web Assembly"/>
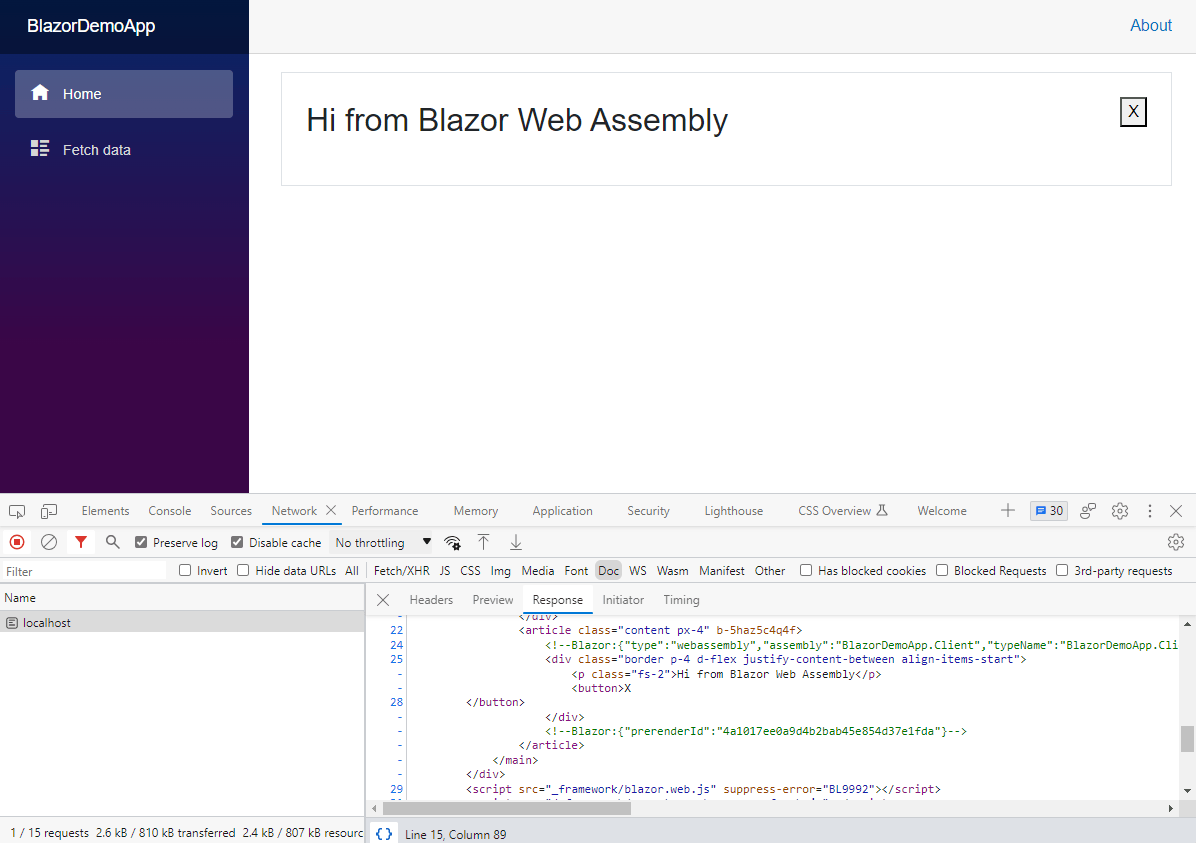
Added like this, the Banner component will be rendered “statically.”
When we navigate to /, Blazor will render the Index component (on the server) including the Banner component.
The resulting HTML will include the markup for the Banner component.

At this point the component is static; we can hit that X button as much as we like, the banner isn’t going anywhere!
To make it interactive, we need to indicate that we want this component to be rendered using Blazor WASM. We can do this using the new rendermode parameter.
BlazorDemoApp (Server)/Pages/Index.razor
@page "/"

<PageTitle>Index</PageTitle>

<Banner Text="Hi from Blazor Web Assembly" @rendermode="@RenderMode.WebAssembly"/>
Or at the component level, using an attribute.
BlazorDemoapp.Client/Banner.razor
@attribute [RenderModeWebAssembly]

...
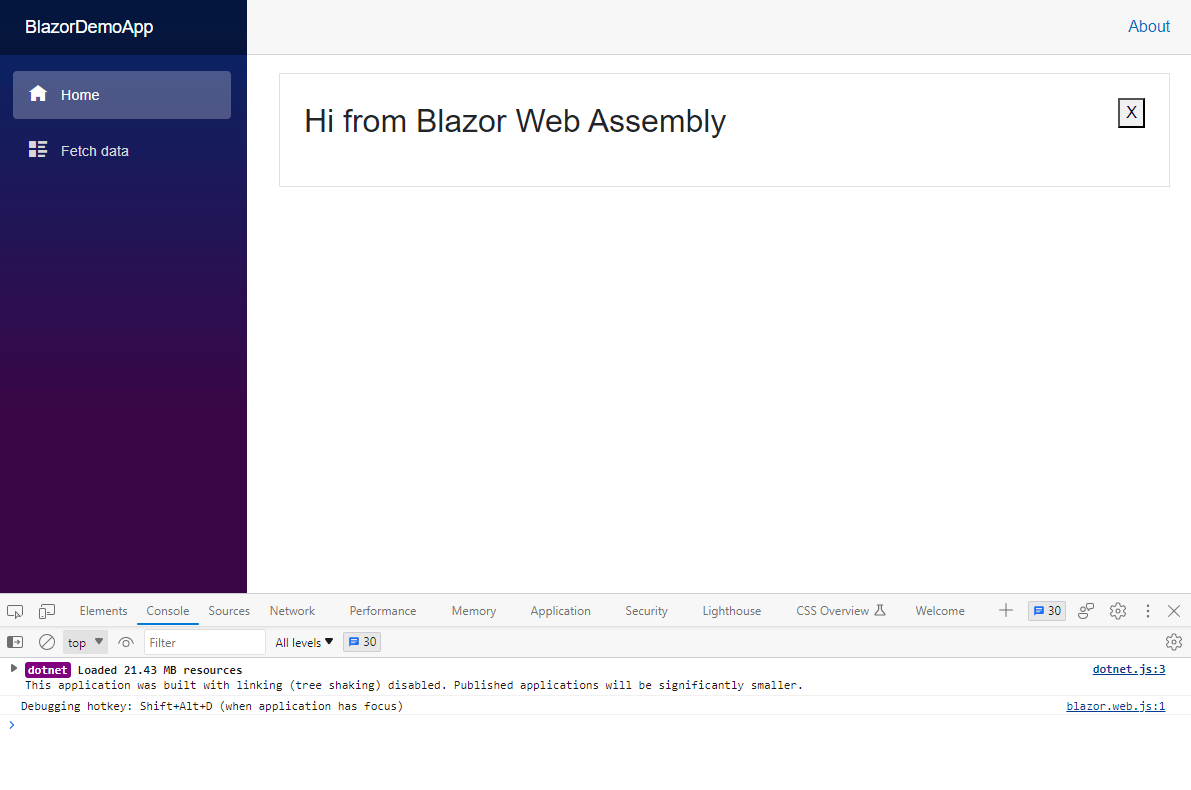
Either way, this time, when we view the app in the browser, we can see Blazor WASM loads, and the component becomes interactive (the banner is now dismissible).

Making Blazor WASM Rendering Work in .NET 8 Preview 6
As of Preview 6, there are a few hoops to jump through to make Blazor WASM rendering work (expect this to be cleaned up in a future preview, and also included in the new project template).
Check out this small sample project to see how it all comes together but the main steps are:
- Reference the
Microsoft.AspNetCore.Components.WebAssembly.ServerNuget package in your server project. - Reference the
Microsoft.AspNetCore.Components.WebAssemblyNuget package in your client project.
Then, in your server project, update Program.cs to add the required services:
builder.Services.AddRazorComponents()
    .AddWebAssemblyComponents();
The call to MapRazorComponents also needs amending:
app.MapRazorComponents<App>()
    .AddWebAssemblyRenderMode();
Finally, at the time of writing (for Preview 6) you’ll need to modify your .csproj for the Server project to explicitly specify the correct Razor Language Version:
<Project Sdk="Microsoft.NET.Sdk.Web">

  <PropertyGroup>
    <TargetFramework>net8.0</TargetFramework>
    <Nullable>enable</Nullable>
    <ImplicitUsings>enable</ImplicitUsings>

  	<!-- Specify the Razor Language Version -->
    <RazorLangVersion>8.0</RazorLangVersion>

  </PropertyGroup>
Cascading Query String Values
In a Blazor component you can access query string values using the handy SupplyParameterFromQuery attribute.
For example, here’s a search page which accepts a search term via the query string.
Search.razor
@page "/Search"

<p>You searched for: @Query</p>
@code {

    [SupplyParameterFromQuery]
    [Parameter]
    public string Query { get; set; }

}
The current version of Blazor only supports mapping values from the query string in components with a @page directive.
So, for example, if the search page renders a child component called SearchResults, that SearchResults component can’t pull values from the query string itself. It instead relies
on the parent component fetching those values and passing them along.
With .NET 8 we can forgo that extra step and use SupplyParameterFromQuery directly on the child component.
Search.razor
<SearchResults />
SearchResults.razor
<p>You searched for: @Query</p>
@code {

    [SupplyParameterFromQuery]
    public string Query { get; set; }

}
Under the hood Blazor will pull the values from the query string and cascade them down to any components which use the SupplyParameterFromQuery attribute.
We can also drop the Parameter attribute as, from .NET 8 onwards, it’s sufficient to just use the SupplyParameterFromQuery attribute by itself.
Better Sections Support
Previous releases of Blazor have enabled you to define templates (layouts) with a single place to render your content.
For example, here’s a minimal template:
@inherits LayoutComponentBase

<div class="page">
    <main>
        <article class="content px-4">
            @Body
        </article>
    </main>
</div>
When you indicate that a component should use this layout its contents will be inserted in place of the @Body call.
From .NET 8 you can define multiple “outlets” for your content.
@using Microsoft.AspNetCore.Components.Sections
@inherits LayoutComponentBase

<div class="page">
    <main>
        <article class="content px-4">
            @Body
        </article>
    </main>
</div>

<SectionOutlet SectionName="Footer" />
Here we’ve added a new section for a footer.
In a component which uses this template you can provide content for the footer section using the new SectionContent component.
HelloTemplates.razor
@page "/HelloTemplates"

<h3>Hello Templates</h3>

<SectionContent SectionName="Footer">
    Hello, I'm in the footer
</SectionContent>
As of Preview 6, sections work correctly with cascading values, error boundaries and streaming rendering.
Project Template Improvements
Finally, work continues on the new project template for building a Blazor app.
The new Blazor Web App template (introduced in Preview 5) now has an option to automatically enable interactivity using server components.
This will automatically include the plumbing necessary to make your components interactive using Blazor Server (with Blazor WASM on the way).
This preview also sees the removal of the Blazor Server template and “ASP.NET Core hosted” option from the Blazor WebAssembly template, as part of Microsoft’s efforts to unify the various Blazor hosting models into a single model.

Jon Hilton
Jon spends his days building applications using Microsoft technologies (plus, whisper it quietly, a little bit of JavaScript) and his spare time helping developers level up their skills and knowledge via his blog, courses and books. He's especially passionate about enabling developers to build better web applications by mastering the tools available to them. Follow him on Twitter here.

