
The Best of Both Angular Worlds: Standalone & Modules Combined 💥

Angular modules have been a hurdle for newcomers, so Angular introduced standalone components. You can actually use the best from both in your apps—learn how!
In recent years, while building applications in Angular, modules (ngModules) have played a central role. Modules enable us to group components, pipes and services into a single feature, like customer.module.ts. However, outside of Angular, the concept of ngModules doesn’t exist.
For newcomers or developers new to Angular, the module system can seem like unnecessary extra work. They’re not used to organizing applications with ngModules; instead, they prefer creating apps with more freedom, without the need to register every piece into an ngModule or AppModule.
The Angular team recognizes this issue. Starting with Angular version 14, they introduced standalone components, allowing users to build applications without the need for modules. By version 17, standalone components became the default in our applications. They are fully integrated with the Angular CLI, enabling the generation of components, pipes and directives without requiring modules. The best way to learn is by building an app yourself.
We’ll build one with the help of Progress Kendo UI for Angular to make our lives even easier. Let’s get started!
Setting Up Angular 17
To install Angular CLI globally on your computer, enabling you to create and manage Angular projects from anywhere, you can use the following command:
npm install -g @angular/cli
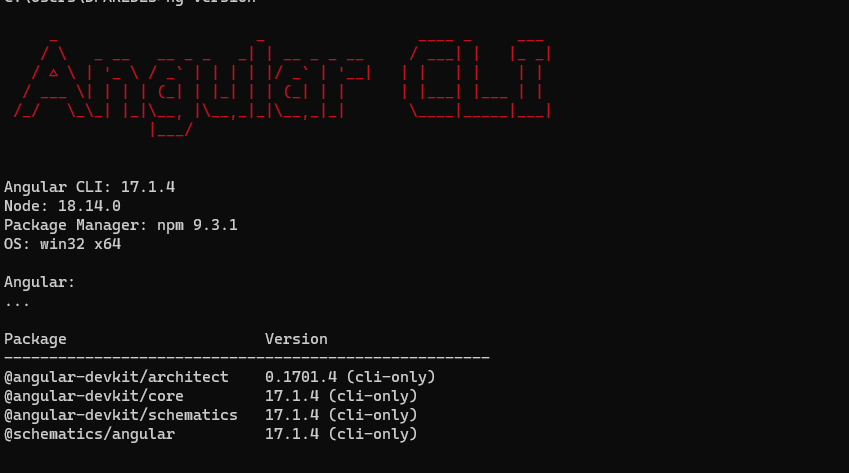
After completing the installation, you can confirm that everything is set up correctly by running this command in your terminal or command prompt:
ng version
This command will display the installed version of Angular CLI, verifying that the installation was successful.
We’re on the right track. To create your new Angular project named “kendostore,” run the command ng new kendostore:
ng new kendostore
? Which stylesheet format would you like to use? SCSS   [
https://sass-lang.com/documentation/syntax#scss                ]
? Do you want to enable Server-Side Rendering (SSR) and Static Site Generation
(SSG/Prerendering)? No
✔ Packages installed successfully.
    Successfully initialized git.
dany ~/Desktop  $
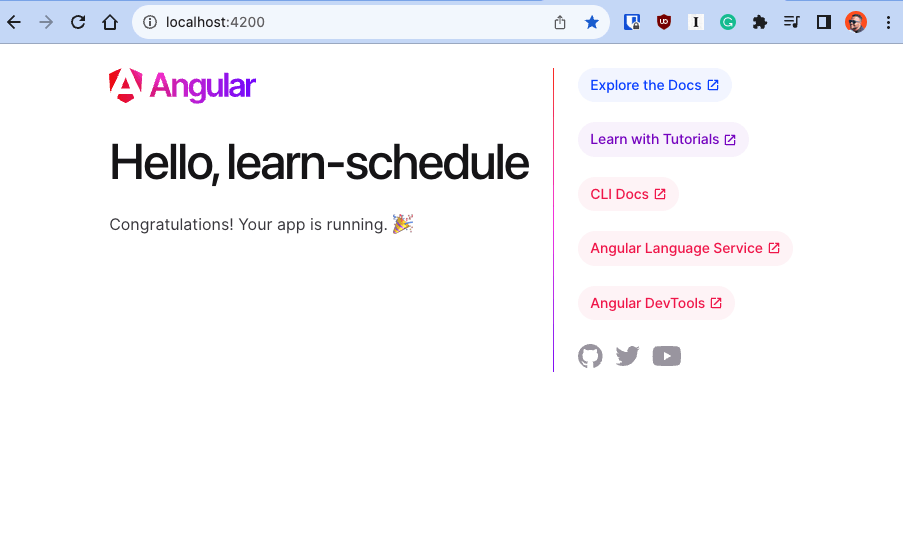
After that’s finished, navigate to the directory and run ng serve -o to see your first Angular 17 project ready! This is just the beginning, and you can now start developing your module-less “kendostore” application.
The New Structure
The Angular team has done excellent work in reducing the number of files and the amount of boilerplate code in our applications, making it easier for both experienced and new Angular developers to learn and work with Angular.
With the latest updates, the Angular CLI now generates standalone components, pipes and directives by default. This change eliminates the need to register them in the app.module.ts file.
What About app.module and router.module?
Most configurations previously managed in modules like app.module or router.module are now part of the app.config.ts file. By default, this includes the provideRouter() function, which provides everything necessary for routing and additional feature services.
import { ApplicationConfig } from '@angular/core';
import { provideRouter } from '@angular/router';
import { routes } from './app.routes';

export const appConfig: ApplicationConfig = {
  providers: [provideRouter(routes)]
};
Don’t worry about missing out on RouterModule or HttpClientModule—throughout this article, we will demonstrate the new ways to incorporate these features. But first, let’s start by adding navigation to your Angular application!
Importing Components, Modules and Directives
The app.component.ts file includes the standalone flag set to true. This means it doesn’t need to be registered into a module, offering a more streamlined development process. However, it can still import existing modules, directives and pipes as needed.
Components have two main options—provide and imports:
- provide: This gives access to services or classes. It’s used to make services available to a part of the application.
- imports: This is used to access everything related to the HTML or template. It includes directives, pipes and components, which are essential for building the visual part of the application.
Additionally, we can import modules. Remember, an ngModule is a collection of services, directives, pipes and components. It simplifies the process by grouping these elements together. We are moving away from using modules, Angular developers will need to co-exist with both standalone and module-filled applications for quite a long time still.
For example, in the app.component, we import the RouterOutlet directive and the CommonModule. The RouterOutlet is used for routing in the application, and the CommonModule provides common functionalities like loops and conditions in templates.
import { Component } from '@angular/core';
import { CommonModule } from '@angular/common';
import { RouterLink, RouterOutlet } from '@angular/router';
import { NavigationModule } from "@progress/kendo-angular-navigation";

@Component({
  selector: 'app-root',
  standalone: true,
  imports: [CommonModule, RouterOutlet],
  templateUrl: './app.component.html',
  styleUrls: ['./app.component.scss']
})
export class AppComponent {

}
But what if we already have a group of components and directives bundled together in a module? Can we still use them?
Let’s find out!
Using Modules in Standalone Component
Let’s say we want to create an attractive navigation menu using Kendo UI Navigation. This tool offers a range of components to build powerful navigation systems, saving us time compared to building one from scratch.
First, we need to install the Kendo UI Navigation package, answering yes to automatically configure everything in our app.
ng add @progress/kendo-angular-navigation
i Using package manager: npm
√ Found compatible package version: @progress/kendo-angular-navigation@14.3.0.
√ Package information loaded.

The package @progress/kendo-angular-navigation@14.3.0 will be installed and executed.
Would you like to proceed? Yes
√ Packages successfully installed.
UPDATE package.json (1404 bytes)
UPDATE angular.json (3017 bytes)
√ Packages installed successfully.
UPDATE src/main.ts (295 bytes)
UPDATE tsconfig.app.json (294 bytes)
UPDATE tsconfig.spec.json (300 bytes)
Kendo UI Navigation comes with the NavigationModule, which provides access to all its components and directives, like kendo-appbar. We add this module to our app.component.ts file in the imports section, together with the RouterLink directive:
import {NavigationModule} from "@progress/kendo-angular-navigation";
...

imports: [CommonModule, RouterOutlet, NavigationModule, RouterLink],
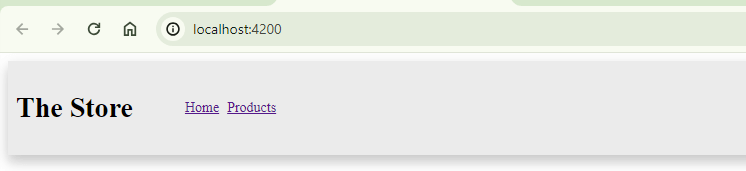
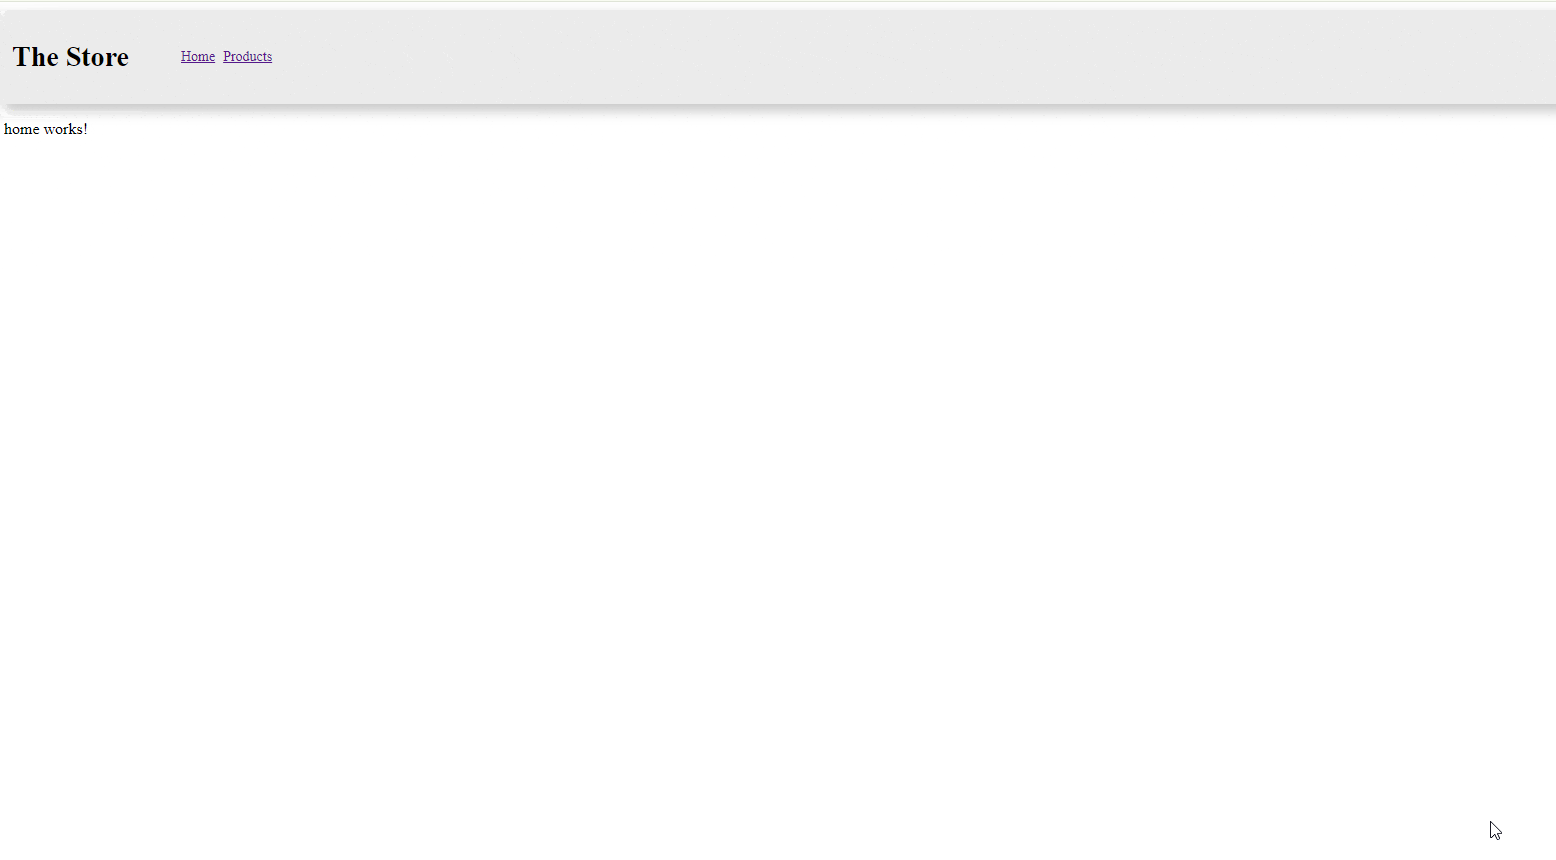
Now, in our app.component.html template, we can use various components from Kendo UI for Angular, such as kendo-appbar and kendo-appbar-section. Here’s a snippet to add basic navigation to your app using routerLink with kendo-appbar above the <router-outlet></router-outlet>:
<kendo-appbar position="top">
  <kendo-appbar-section>
    <h1>The Store</h1>
  </kendo-appbar-section>
  <kendo-appbar-spacer width="32px"></kendo-appbar-spacer>
  <kendo-appbar-section>
    <a [routerLink]="['']">Home</a>
    <a [routerLink]="['products']">Products</a>
  </kendo-appbar-section>
  <kendo-appbar-spacer></kendo-appbar-spacer>
</kendo-appbar>
To have a better menu, add the following CSS snippet into the app.component.scss to add padding between the links in the kendo-appbar-section.
kendo-appbar-section a {
  padding: 4px;
}
After saving and reloading the page, the kendo-appbar component should be visible, thanks to the NavigationModule and the RouterLink directive working together.
Now we have our navigation set up, but what about routes and the well-known RouterModule? How can we define routes without the RouterModule? Let’s explore this next!
Navigation and Routing
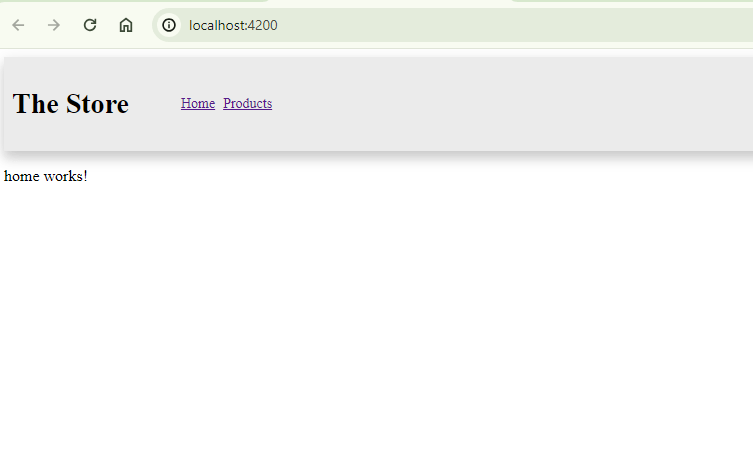
Before we start with the router, we need to create two more components: home and products.
Use the CLI to create these components:
ng g c pages/home
ng g c pages/products
Initially, the CLI generates an app.routes.ts file for us, which contains an empty Routes array. We need to add routes for our app. The basic requirements for a route are a path and a component.
Import the components and define the path: '' for HomeComponent and 'products' for ProductsComponent. The final code should look like this:
import { Routes } from '@angular/router';
import { HomeComponent } from './pages/home/home.component';
import { ProductsComponent } from './pages/products/products.component';

export const routes: Routes = [
  {
    path: '',
    component: HomeComponent,
  },
  {
    path: 'products',
    component: ProductsComponent,
  },
];
Now we have the routes configured. But how does the app know about these routes? Instead of configuring the RouterModule directly, remember the app.config.ts from the beginning? It has providers and the provideRouter function, which accepts the routes as a parameter to set up the router.
export const appConfig: ApplicationConfig = {
  providers: [
    provideRouter(routes),
  ]
};
We can also add more features like withDebugTracing():
export const appConfig: ApplicationConfig = {
  providers: [
    provideRouter(routes, withDebugTracing()),
  ]
};
Now, when users navigate to the root or products path, the corresponding component will load into the <router-outlet></router-outlet>.
- Learn more about provideRouter and RouterFeatures
After saving, the home page should appear. If you click on 'products', it will show the empty components.
To make this more interesting, let’s display some products and make an HTTP request. It’s time to learn about HttpClient!
Getting Data with HttpClient
In the era of modules, we used HttpClientModule to access the HttpClient service in our Angular apps. But now, in a module-less setup, instead of importing HttpClientModule, we use the provideHttpClient() function in the app.config.ts. Similar to provideRouter, we can also pass additional functions like withFetch to it. The final code will look like this:
import { ApplicationConfig } from '@angular/core';
import { provideRouter, withDebugTracing } from '@angular/router';
import { routes } from './app.routes';
import { provideHttpClient, withFetch } from "@angular/common/http";

export const appConfig: ApplicationConfig = {
  providers: [
    provideRouter(routes,
withDebugTracing()
),
    provideHttpClient(
      withFetch(),
    )
  ]
};
With this configuration, we gain access to the httpClient service. In product.component.ts, we can access httpClient using the inject function.
Let’s make a request to the https://fakestoreapi.com/products API, which returns a list of products. First, define a type for the product:
export type Product = {
  id: string;
  title: string;
  description: string;
  price: string;
  image: string;
};
Since we have a price property, we can use the CurrencyPipe to format it in the template. Next, add a new variable http to store the response. As httpClient returns an observable, a good approach is to use toSignal() to convert the observable into a signal.
Yes, signals are another great feature of Angular. Learn more!
The final code for the component looks like this:
export type Product = {
  id: string;
  title: string;
  description: string;
  price: string;
  image: string;
};

@Component({
  selector: 'app-products',
  standalone: true,
  imports: [ CurrencyPipe],
  templateUrl: './products.component.html',
  styleUrl: './products.component.scss',
})
export class ProductsComponent {
  http = inject(HttpClient);
  products = toSignal(
    this.http.get<Product[]>('https://fakestoreapi.com/products'),
  );
}
Now, how do we display the data?
Let’s use Kendo UI cards for the layout. First, install the kendo-angular-layout package, answering yes to configure everything automatically:
ng add @progress/kendo-angular-layout
i Using package manager: npm
√ Found compatible package version: @progress/kendo-angular-layout@14.3.0.
√ Package information loaded.

The package @progress/kendo-angular-layout@14.3.0 will be installed and executed.
Would you like to proceed? Yes
√ Packages successfully installed.
            @progress/kendo-theme-default already installed, skipping styles registration.
UPDATE package.json (1555 bytes)
√ Packages installed successfully.
We only need the CardModule, so import it in the component’s imports section. The final code for the component will then be:
import { Component, inject } from '@angular/core';
import { HttpClient } from "@angular/common/http";
import {CardModule} from "@progress/kendo-angular-layout";
import {CurrencyPipe} from "@angular/common";
import {toSignal} from "@angular/core/rxjs-interop";
export type Product = {
id: string;
title: string;
description: string;
price: string;
image: string;
};
@Component({
  selector: 'app-products',
  standalone: true,
  imports: [
    CardModule, CurrencyPipe ],
  templateUrl: './products.component.html',
  styleUrls: ['./products.component.scss']
})
export class ProductsComponent {
  http = inject(HttpClient);
  products = toSignal(this.http.get<Product[]>('https://fakestoreapi.com/products'));
}
Display the Data & Utilizing Control Flow
In the template, we access the array of products using products(). We iterate over the array using @for, and inside it, we use <kendo-card>, <kendo-card-body>, kendoCardSeparator, and <kendo-footer>, binding them with product information. The final code for the template looks like:
  @for (product of products();track product.id) {
    <kendo-card width="360px">
      <img [src]="product.image" kendoCardMedia alt="cover_img"/>
      <kendo-card-body>
        <h4>{{ product.title }}</h4>
        <hr kendoCardSeparator/>
        <p>
          {{ product.description }}
        </p>
      </kendo-card-body>
      <kendo-card-footer class="k-hstack">
        <span>Price {{ product.price | currency }}</span>
      </kendo-card-footer>
    </kendo-card>
  } @empty {
    <h2> No products! 😌</h2>
  }
Before to save, add the following CSS snippet to improve the products’ visualization:
:host {
  display: flex;
  flex-wrap: wrap;
  gap: 7rem;
  justify-content: center;
  padding: 3rem;
  align-items: center;
  max-width: 1200px;
  margin: 0 auto;
  box-sizing: border-box;
}

@media (max-width: 768px) {
  :host {
    gap: 3rem;
    padding: 1.5rem;
  }
}
Done! We have our minimal module-less app combined with Kendo UI Modules and Pipes, taking the best of both worlds.
What Can I Do with Module Apps?
Most companies and developers have applications built on top of modules. Do we have to upgrade manually? No! The Angular team has created a standalone migration tool.
Watch Let’s Migrate to Module-less: An Angular Re-factoring Stream or learn about Standalone Migration.
Recap
We learned a lot! We built our first module-less application with standalone components, using directives, pipes, configuring Router, HttpClient. In short, we can take the best of both worlds’ modules to get access to a list of components, directives and services, or access to specific directives when we don’t need to load everything.
Source code: https://github.com/danywalls/moduless-with-kendo/tree/master
Curious About Kendo UI?
The Kendo UI Angular component library comes with more than 110 components optimized for ease-of-use and accessibility. The library comes with a free 30-day trial—give it a try!

Dany Paredes
Dany Paredes is a Google Developer Expert on Angular and Progress Champion. He loves sharing content and writing articles about Angular, TypeScript and testing on his blog and on Twitter (@danywalls).
Related Posts
Comments
All articles
Topics

Latest Stories
in Your Inbox
Subscribe to be the first to get our expert-written articles and tutorials for developers!
All fields are required