
Adding a Context Menu Inside Your Telerik UI for ASP.NET Core Grid

Context menus allow you to offer extra functionality and options to the end user of your application right where they are. Let’s see how to use one in the ASP.NET Core Grid.
The context menu in the Progress Telerik UI for ASP.NET Core Grid is a welcome feature, making it possible for you to customize the user experience and create options that make sense for the data presented.
Context menus are one of the best features that an application can have, for both desktop and web, because they allow you to add extra functions and options to the user directly from the data presented on the screen, adding value to your product.
Are You Familiar with Telerik UI for ASP.NET Core Grid?
Telerik UI for ASP.NET Core is a robust UI component library recognized for its exceptional quality and performance. The Data Grid is one of the suite’s standout features.
The Grid component demonstrates Progress Telerik’s commitment to continuous evolution and innovation. It results from careful market observation and a keen ear for customer feedback. This dedication to continuous improvement ensures that the Telerik tools are always at the cutting edge of technology, meeting the needs of both developers and end users.
Try out the Grid Context Menu
Let’s check it out!
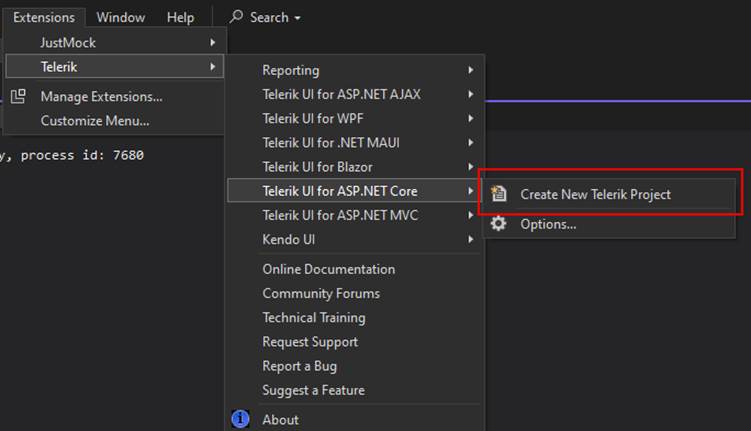
Start creating your project type as Telerik UI for ASP.NET Core after installing Telerik using the Progress Control Panel app, or from the VS extension:
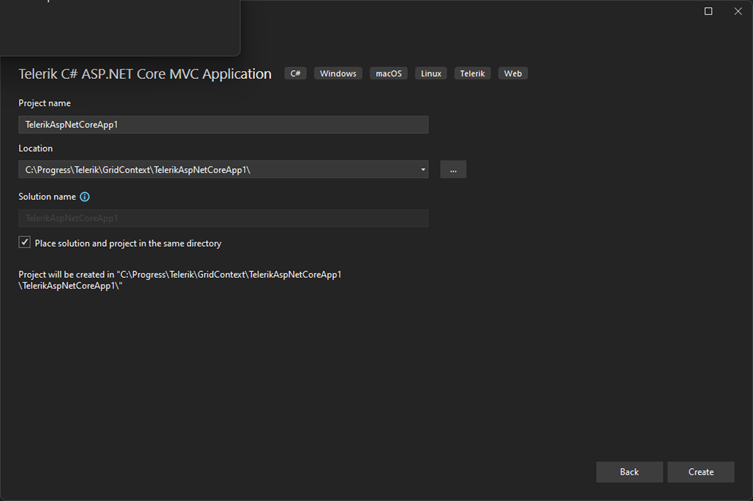
Choose a path for your project:
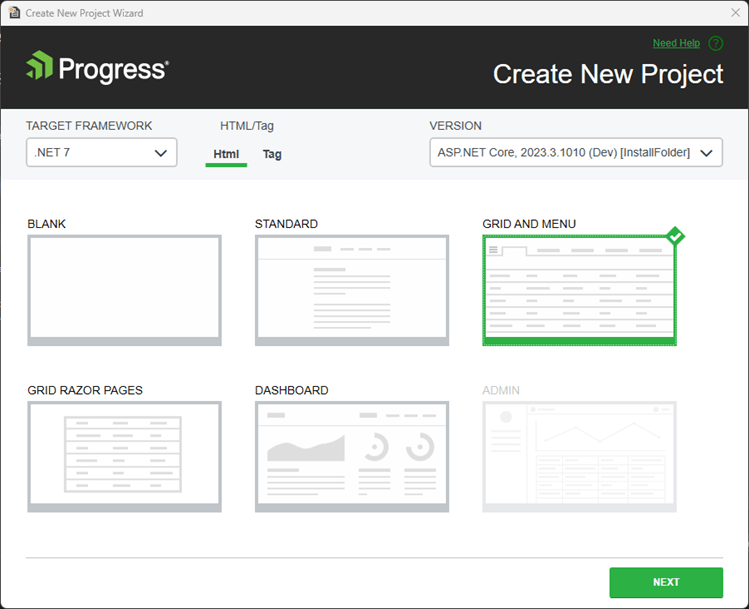
Choose the technology that fits better for your project: HTML or Tag Helpers. For this sample, I picked the Grid and Menu template.
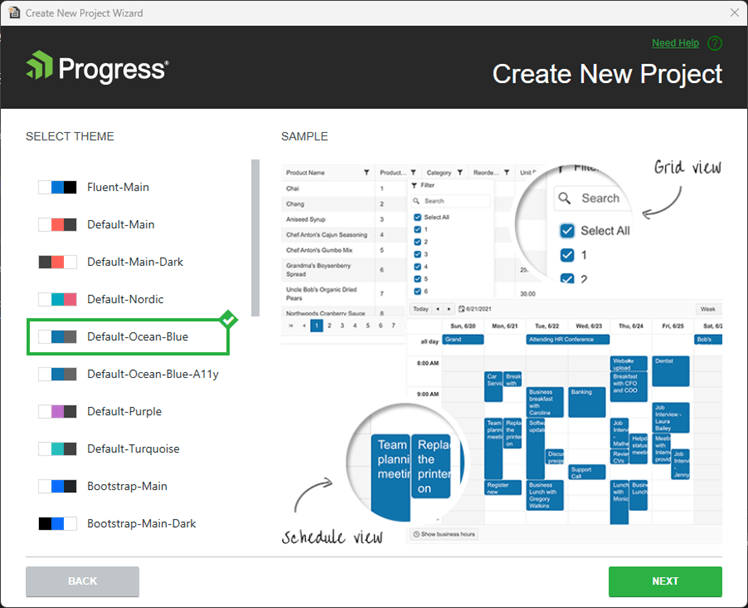
Choose a theme for your project.
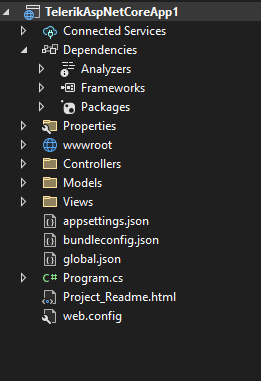
Confirm the next screen, and your project will look like this:
The Grid ContextMenu
The ContextMenu option in the Grid component exposes many sophisticated features that enable developers to interact with grid material more effectively and intuitively.
Here is a description of some of the Grid’s ContextMenu features and functionalities:
1. Header Context Menu
Sorting: From the header context menu, users can sort the grid columns straight from the context menu, improving the user experience.
Exporting: It supports exporting grid data to multiple formats such as PDF, Excel and others, allowing data sharing and reporting.
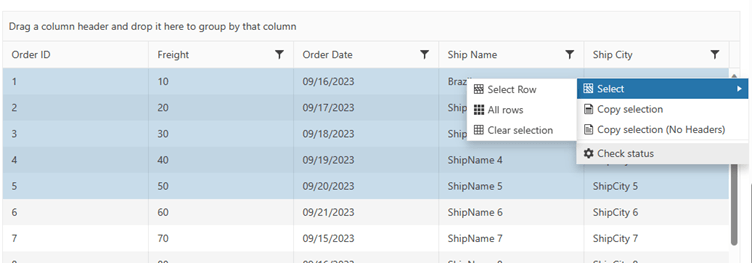
2. Body Context Menu
Select: This feature allows you to choose individual rows or cells within the grid.
Edit: Editing the grid content directly is now possible, easing user interaction for data updates.
Copy selection: Users can copy the selected cells or rows to make it easier to use the data elsewhere.
Copy selection with no headers: It allows you to copy the selected data without the headers, giving you more flexibility in data consumption.
Reorder row: The reordering tool allows users to rearrange the rows based on their choices or needs.
3. Data-Driven Custom Actions
Conditional actions: Developers can set the context menu to display different options depending on the data in the grid. Specific menu options, for example, can be revealed or hidden based on the values in the rows or cells.
Dynamic Menu Options: The context menu’s options can be dynamically adjusted, allowing for a more responsive and intelligent interface that reacts to the grid’s data.
4. Extendibility
Custom Menu Items: Developers can add custom menu items that trigger specific actions, extending the grid’s functionality based on project requirements.
How Does the Code Work?
On the GridController, I changed the code to return my desired data for this demonstration:
1.	using Kendo.Mvc.Extensions;
2.	using Kendo.Mvc.UI;
3.	using Microsoft.AspNetCore.Mvc;
4.	using TelerikAspNetCoreApp1.Models;
5.
6.	namespace TelerikAspNetCoreApp1.Controllers;
7.	public class GridController : Controller
8.	{
9.	    public ActionResult Orders_Read([DataSourceRequest] DataSourceRequest request)
10.	    {
11.	        var result = Enumerable.Range(2, 51).Select(i => new OrderViewModel
12.	        {
13.	            OrderID = i,
14.	            Freight = i * 10,
15.	            OrderDate = new DateTime(2023, 9, 15).AddDays(i % 7),
16.	            ShipName = "ShipName " + i,
17.	            ShipCity = "ShipCity " + i
18.	        });
19.
20.	        var customRet = result.ToList();
21.
22.	        customRet.Insert(0,  new OrderViewModel
23.	        {
24.	            OrderID = 1,
25.	            Freight = 1 * 10,
26.	            OrderDate = new DateTime(2023, 9, 15).AddDays(1 % 7),
27.	            ShipName = "Brazil",
28.	            ShipCity = "Porto Alegre"
29.	        });
30.
31.
32.	        var dsResult = customRet.ToDataSourceResult(request);
33.	        return Json(dsResult);
34.	    }
35.	}
Now, the first row has specific data that will be monitored by the option in the context menu.
On Index.cshtml, I added two notifications:
1.	   @(Html.Kendo().Notification()
2.	       .Name("notification")
3.	       .Position(p => p.Pinned(true).Top(60).Left(30))
4.	       .AutoHideAfter(3000)
5.	       )
6.
7.	   @(Html.Kendo().Notification()
8.	       .Name("notificationOk")
9.	       .Position(p => p.Pinned(true).Top(30).Left(30))
10.	       .AutoHideAfter(2500)
11.	       )
Add the method ContextMenu to the Grid component:
1.	@(Html.Kendo().Grid<TelerikAspNetCoreApp1.Models.OrderViewModel>()
2.	    .Name("grid")
3.	    .ContextMenu(
Add the Head method with the options your requirements demand:
1.	@(Html.Kendo().Grid<TelerikAspNetCoreApp1.Models.OrderViewModel>()
2.	            .Name("grid")
3.	            .ContextMenu(menu => menu
4.	            .Head(head =>
5.	            {
6.	                head.Create();
7.	                head.Separator();
8.	                head.SortAsc();
9.	                head.SortDesc();
10.	                head.Separator();
11.	                head.ExportPDF().Text("Generate Pdf File").Icon("file");
12.	                head.ExportExcel();
13.	            })
In this sample, I added a custom text to ExportPDF().
Add the Body method with the options your requirements demand:
1.	 @(Html.Kendo().Grid<TelerikAspNetCoreApp1.Models.OrderViewModel>()
2.	     .Name("grid")
3.	     .ContextMenu(menu => menu
4.	     .Head(head =>
5.	     {
6.	         head.Create();
7.	         head.Separator();
8.	         head.SortAsc();
9.	         head.SortDesc();
10.	         head.Separator();
11.	         head.ExportPDF().Text("Generate Pdf File").Icon("file");
12.	         head.ExportExcel();
13.	     })
14.	     .Body(body =>
15.	     {
16.	         body.Edit();
17.	         body.Destroy();
18.	         body.Separator();
19.	         body.Select();
20.	         body.CopySelection();
21.	         body.CopySelectionNoHeaders();
22.	         body.Separator();
23.	         body.ReorderRow();
24.	         body.Custom("myTool").Text("Check status").Icon("gear");
25.
26.	     })
27.	     )
I added a custom command to “Check status” on the Body method. Pay attention to the custom name “myTool.”
On the Index.cshtml I added the script:
1.	<script>
2.
3.	         kendo.ui.grid.commands["myToolCommand"] = kendo.ui.grid.GridCommand.extend({
4.	             exec: function () {
5.
6.	                 var selectedItems = $("#grid").data("kendoGrid").selectedKeyNames();
7.	                 var actualItems = [];
8.
9.	                 if (selectedItems.length > 0) {
10.	                     selectedItems.forEach(function (key) {
11.
12.	                         var item = grid.dataSource.get(key);
13.	                         if (item.ShipCity == "Porto Alegre") {
14.	                             var popupNotification = $("#notification").data("kendoNotification");
15.	                             popupNotification.show(`This city ’${item.ShipCity}’ is temporary blocked!`, "error")
16.	                         }
17.	                         else {
18.	                             actualItems.push(item);
19.	                         }
20.	                     });
21.	                 }
22.	                 if (actualItems.length > 0) {
23.	                     var popupNotification = $("#notificationOk").data("kendoNotification");
24.	                     popupNotification.show(`’${actualItems.length}’ cities available!`, "info")
25.	                 }
26.	             }
27.	         });
28.
29.	 </script>
The name “myTool” becomes a command by adding “Command” to the name in the grid commands:
1.	kendo.ui.grid.commands["myToolCommand"] = kendo.ui.grid.GridCommand.extend({
2.	...
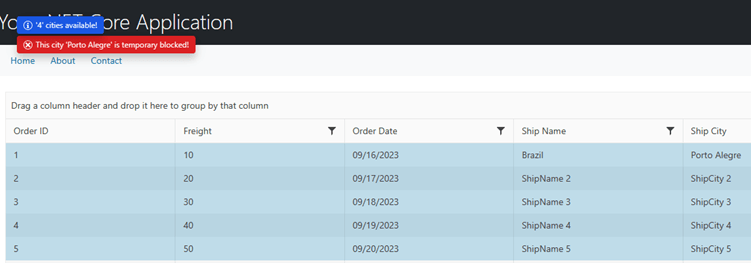
The image below shows the working demonstration:
Now, when the “Check status” is clicked, it will execute this validation below:
1.	var selectedItems = $("#grid").data("kendoGrid").selectedKeyNames();
2.	var actualItems = [];
3.
4.	if (selectedItems.length > 0) {
5.	    selectedItems.forEach(function (key) {
6.
7.	        var item = grid.dataSource.get(key);
8.	        if (item.ShipCity == "Porto Alegre") {
9.	            var popupNotification = $("#notification").data("kendoNotification");
10.	            popupNotification.show(`This city ’${item.ShipCity}’ is temporary blocked!`, "error")
11.	        }
12.	        else {
13.	            actualItems.push(item);
14.	        }
15.	    });
16.	}
17.	if (actualItems.length > 0) {
18.	    var popupNotification = $("#notificationOk").data("kendoNotification");
19.	    popupNotification.show(`’${actualItems.length}’ cities available!`, "info")
20.	}
The line below receives all selected key values:
1. var selectedItems = $("#grid").data("kendoGrid").selectedKeyNames();
The line below gets the data record by the key:
1. var item = grid.dataSource.get(key);
This line below analyzes the property/column ShipCity from the Model:
1. if (item.ShipCity == "Porto Alegre")
And the notification will be displayed with:
1.	   if (actualItems.length > 0) {
2.	       var popupNotification = $("#notificationOk").data("kendoNotification");
3.	       popupNotification.show(`’${actualItems.length}’ cities available!`, "info")
4.	   }
There are extra configurations you need to do to on this sample to it works:
Add the Model method and define the unique Id for the grid, using .Model(model => model.Id(p => p.**OrderID**)):
1.	.DataSource(dataSource => dataSource
2.	    .Ajax()
3.	    .Model(model => model.Id(p => p.OrderID))
4.	    .PageSize(20)
5.	    .Read(read => read.Action("Orders_Read", "Grid"))
6.	    )
7.	)
On the OrderViewModel, define the [Key] for OrderID:
1.	 [Key]
2.	 public int OrderID
3.	 {
4.	     get;
5.	     set;
6.	 }
And that’s it. It should be running!
Here is the complete definition of the Grid component for your convenience:
1.	@(Html.Kendo().Grid<TelerikAspNetCoreApp1.Models.OrderViewModel>()
2.	    .Name("grid")
3.	    .ContextMenu(menu => menu
4.	    .Head(head =>
5.	    {
6.	        head.Create();
7.	        head.Separator();
8.	        head.SortAsc();
9.	        head.SortDesc();
10.	        head.Separator();
11.	        head.ExportPDF().Text("Generate Pdf File").Icon("file");
12.	        head.ExportExcel();
13.	    })
14.	    .Body(body =>
15.	    {
16.	        body.Edit();
17.	        body.Destroy();
18.	        body.Separator();
19.	        body.Select();
20.	        body.CopySelection();
21.	        body.CopySelectionNoHeaders();
22.	        body.Separator();
23.	        body.ReorderRow();
24.	        body.Custom("myTool").Text("Check status").Icon("gear");
25.
26.	    })
27.	    )
28.	    .Columns(columns =>
29.	    {
30.	        columns.Bound(p => p.OrderID).Filterable(false);
31.	        columns.Bound(p => p.Freight);
32.	        columns.Bound(p => p.OrderDate).Format("{0:MM/dd/yyyy}");
33.	        columns.Bound(p => p.ShipName);
34.	        columns.Bound(p => p.ShipCity);
35.	    })
36.	    .Selectable(selectable => selectable
37.	    .Mode(GridSelectionMode.Multiple))
38.	    .Pageable()
39.	    .Sortable()
40.	    .Scrollable()
41.	    .Groupable()
42.	    .Filterable()
43.	    .HtmlAttributes(new { style = "height:550px;" })
44.	    .DataSource(dataSource => dataSource
45.	        .Ajax()
46.	        .Model(model => model.Id(p => p.OrderID))
47.	        .PageSize(20)
48.	        .Read(read => read.Action("Orders_Read", "Grid"))
49.	        )
50.	    )
You can access this working project sample at my GitHub.
Conclusion
Including the ContextMenu in Telerik UI for ASP.NET Core’s DataGrid is valuable and practical. This feature represents a significant leap in the customization and manipulation of data within the grid, allowing for a more nuanced and user-specific interaction with the data shown. It ensures that users may accomplish jobs with greater efficiency and productivity by providing a profusion of alternatives and actions that can be instantly applied through the context menu.
In summary, the ContextMenu is a powerful ally, assisting users in quickly navigating, managing and modifying data, significantly contributing to improved user experiences and operational fluency in data handling within web applications.
Start creating data solutions that are worth using immediately by registering for a free trial. Plus, even during your free trial, you’ll receive unparalleled support from the industry-leading Progress Telerik team.

Jefferson S. Motta
Jefferson S. Motta is a senior software developer, IT consultant and system analyst from Brazil, developing in the .NET platform since 2011. Creator of www.Advocati.NET, since 1997, a CRM for Brazilian Law Firms. He enjoys being with family and petting his cats in his free time. You can follow him on LinkedIn and GitHub.
Related Posts
Comments
All articles
Topics

Latest Stories
in Your Inbox
Subscribe to be the first to get our expert-written articles and tutorials for developers!
All fields are required