# Quick Mouse Actions
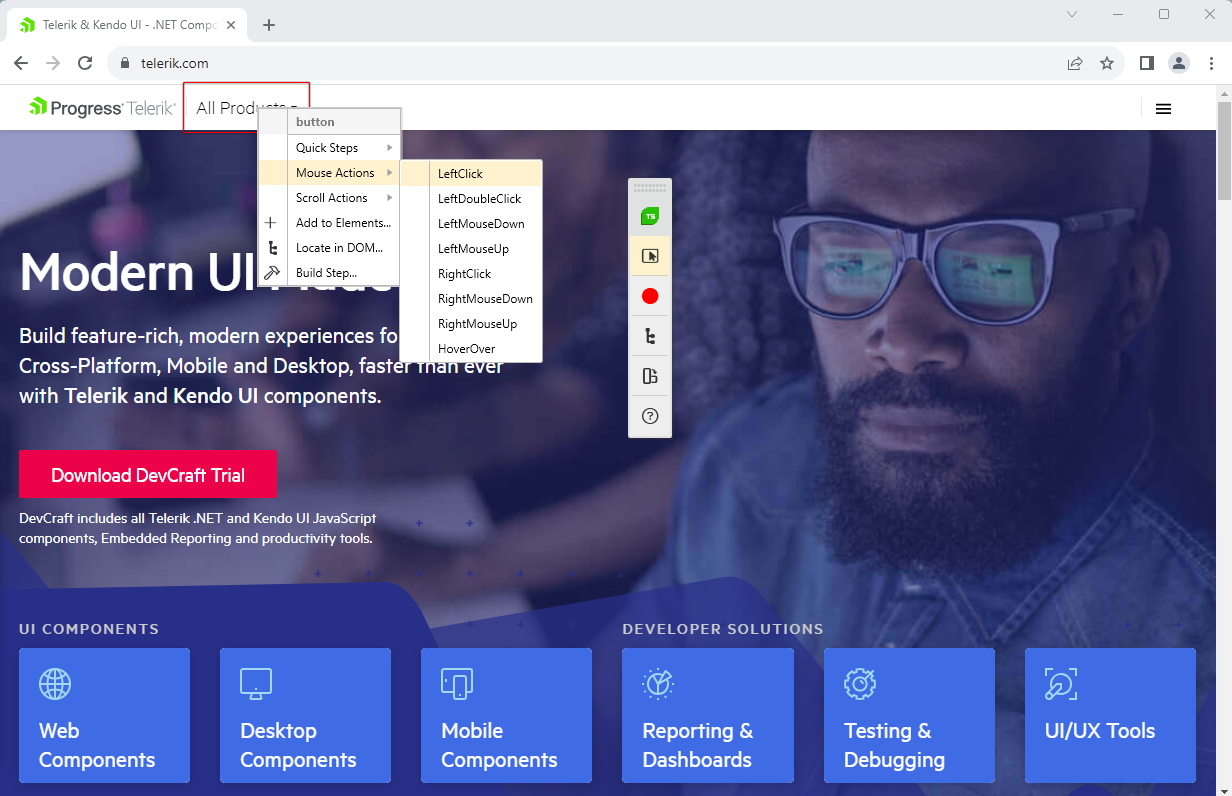
The **Quick Mouse Actions** section in the Highlighting menu allows you to add different type of desktop mouse actions like right or double clicks and hover over an element.
* [General notes](https://www.telerik.com/teststudio/documentation/features/recorder/highlighting-menu/mouse-actions#general-notes)
* [Add a mouse action step](https://www.telerik.com/teststudio/documentation/features/recorder/highlighting-menu/mouse-actions#add-a-desktop-mouse-action-step-in-recording-mode)
* [Add a mouse action step without recording](https://www.telerik.com/teststudio/documentation/features/recorder/highlighting-menu/mouse-actions#create-a-click-step-without-recording-session)
## General Notes
In the general case **Test Studio Compact Recorder** detects the click and type actions automatically during a recording session and adds the corresponding steps into the test - *'Click an element'* or *'Type text into element'*. So, often you may not need to use the **Mouse Actions** from the Highlighting menu for an ordinary click on an element in the application.
But the **Mouse Actions** are very useful if you need to include a **double left click**, a **right click** or you need to **hover over** an element to activate its functionality.
## Add a Desktop Mouse Action Step in Recording Mode
1. Create a test and start a recording session. Navigate to the tested application - in this example we use a web test and the Telerik official page.
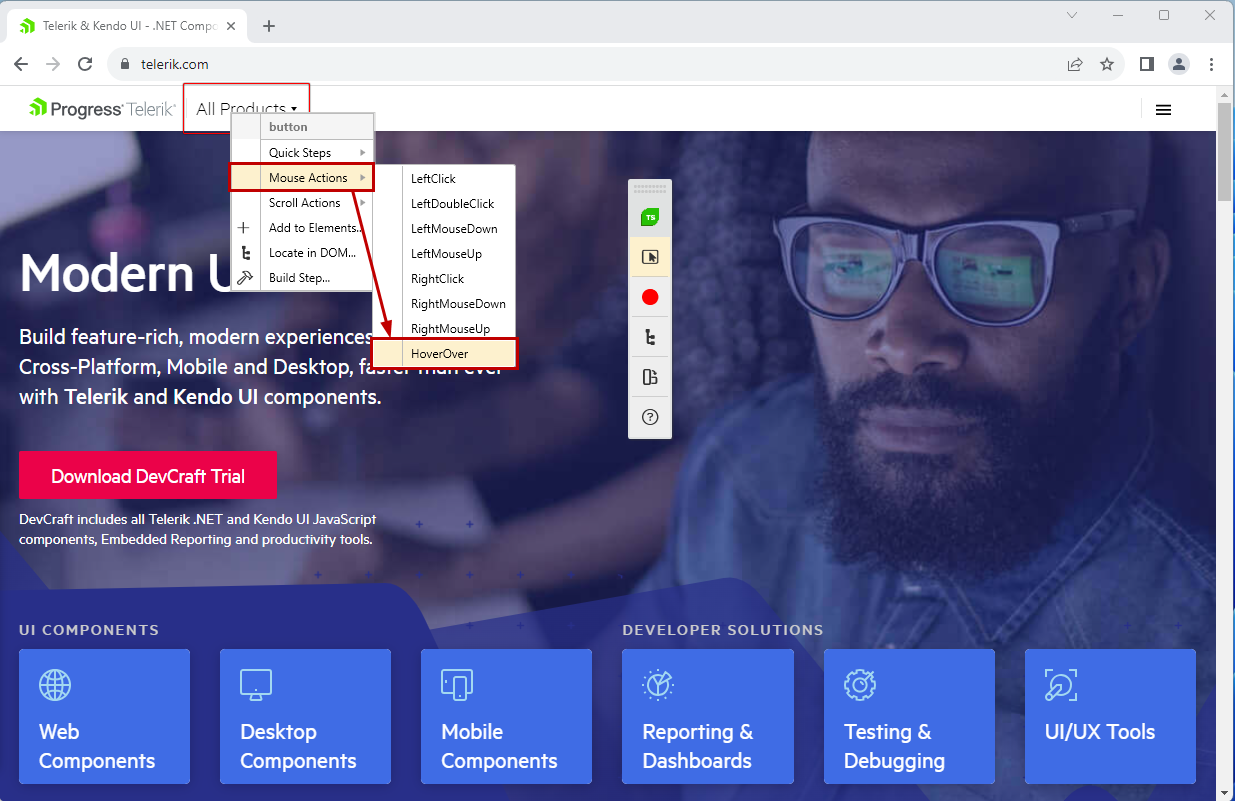
2. If the recording browser window is large enough (it behaves differently if the browser window is shrunk) the **All Products** list appears after you hover over it with the mouse. To automate the scenario you need to add a **Mouse HoverOver Step**.
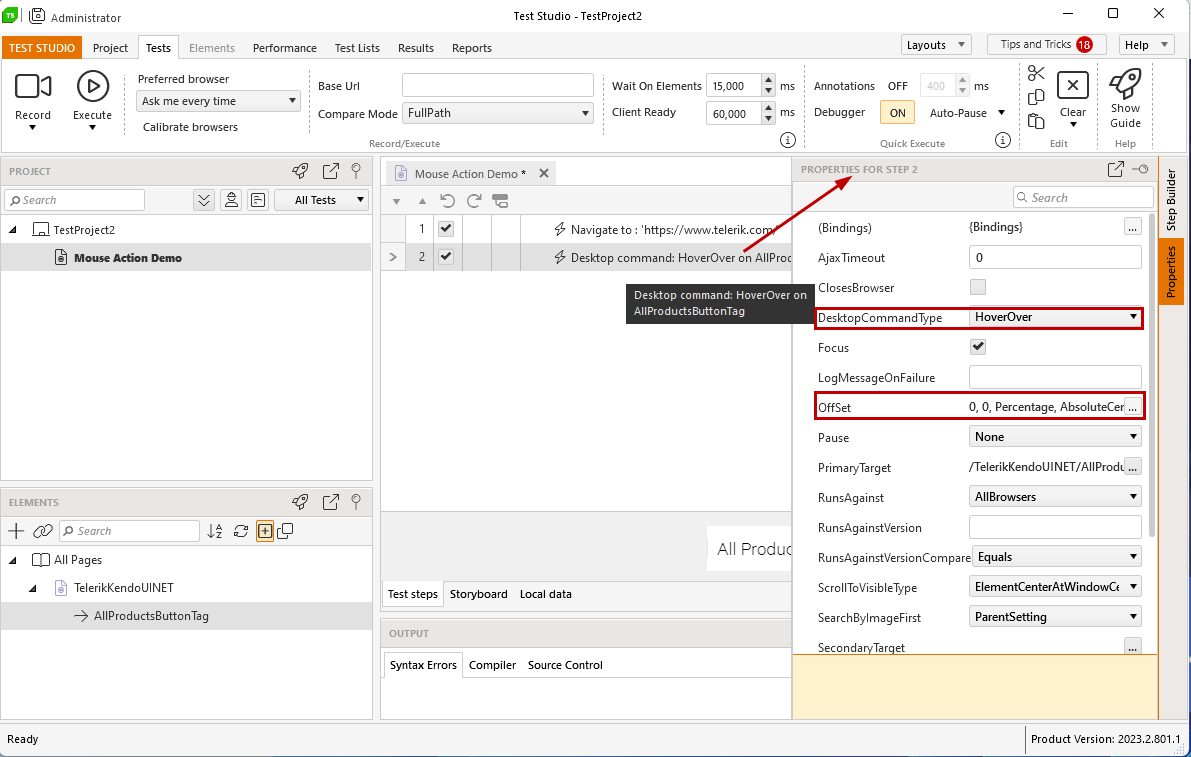
3. Some of the step properties are specific for the desktop action step and allow you to change the command type or offset position of the click point.
## Create a Click Step without Recording Session
Automated test maintenance may require adding new steps in an existing test. For such cases Test Studio provides the options for partial test execution, which allow you to get to a certain point of the test and record the additional steps.
For the cases when the project and scenarios are quite complex, you can **add action steps for an already recorded element** and without starting a recording session. The below list guide you through the steps for this:
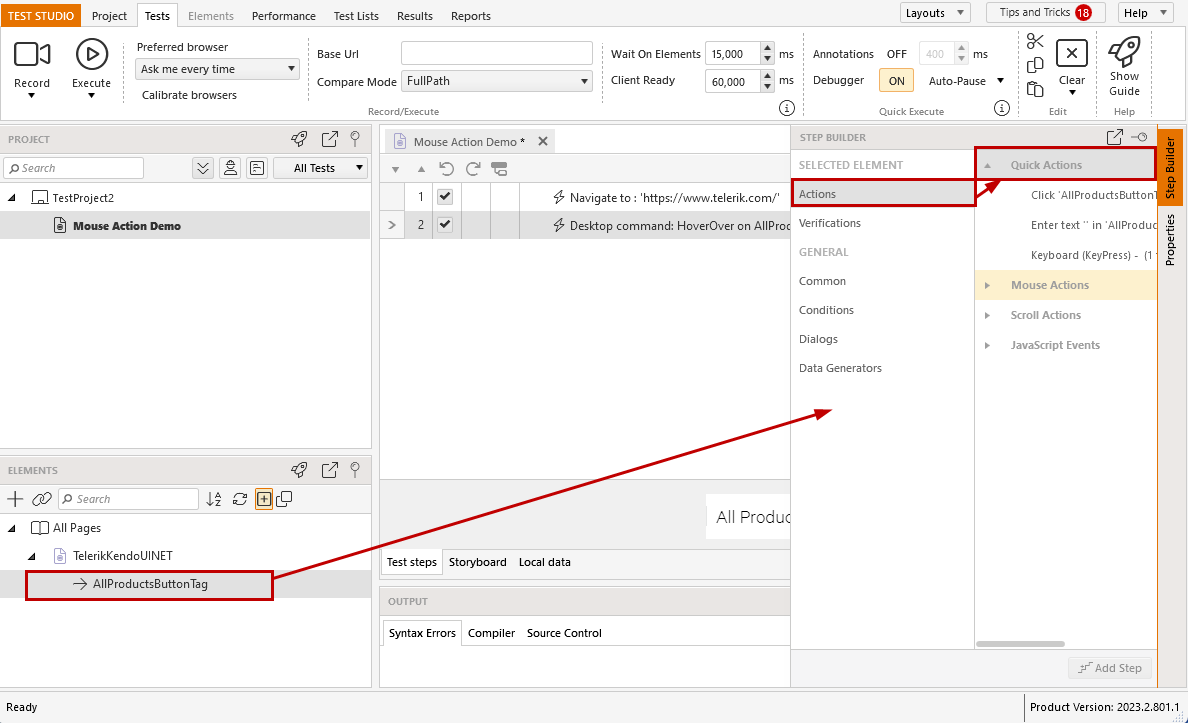
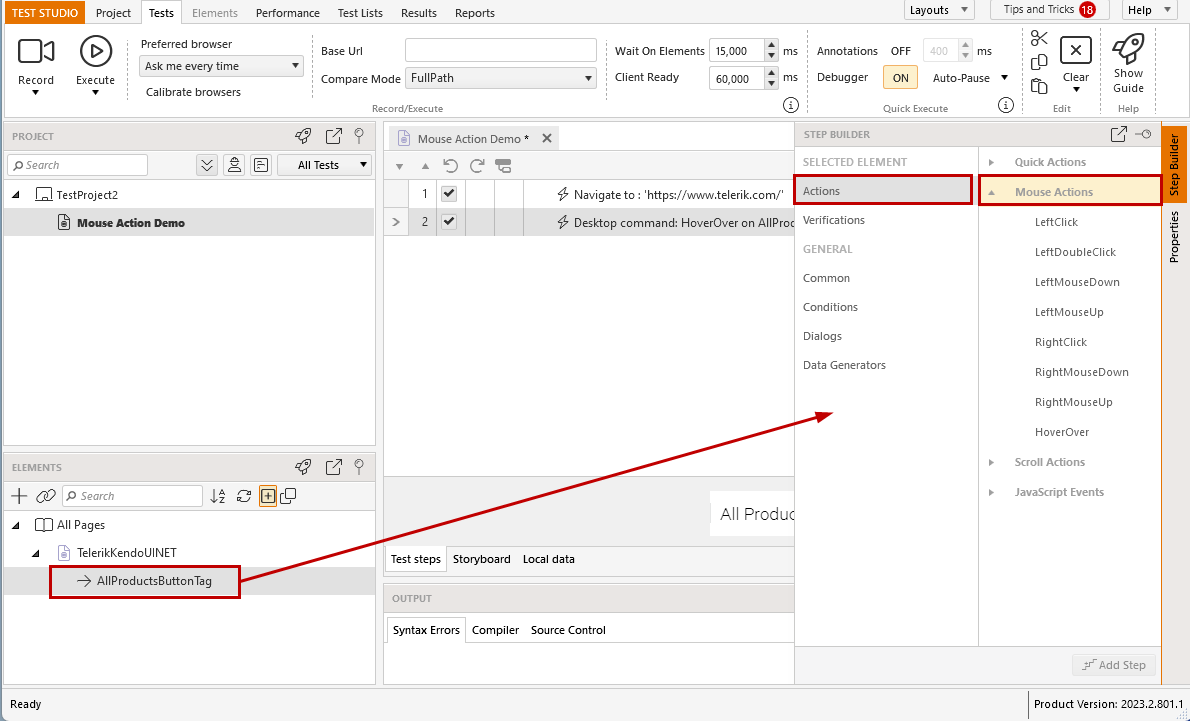
1. Open a test in which you need to add a step. Choose an element from the **Elements Explorer**.
2. Click the **Step Builder** pane to activate it. Under the **Actions** and **Verification** sections, you can see the options corresponding to the type of selected element.
3. You can choose adding a click step from the **Quick Actions** list or from the **Mouse Actions** list. Select the step you need and click the **Add Step** button to insert the step in the test.
> **Tip**
>
>
> Check this short video demonstrating how to add a step for an existing element in Test Studio.