DevCraft
How to Renew

Tutorial – Enroll in Auto-Renewal Program
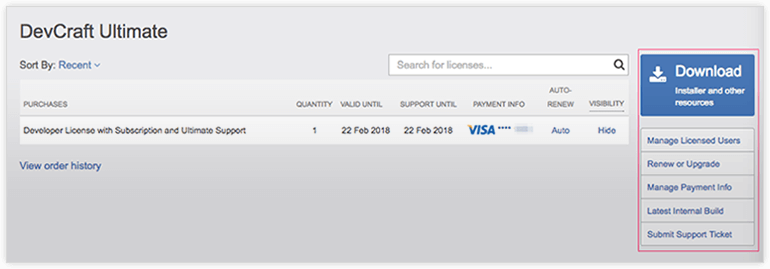
1. Log into your Telerik.com → Your Account page and look under the Products & Subscriptions menu, and choose the product that you wish to enroll into the Auto-Renewal Program.
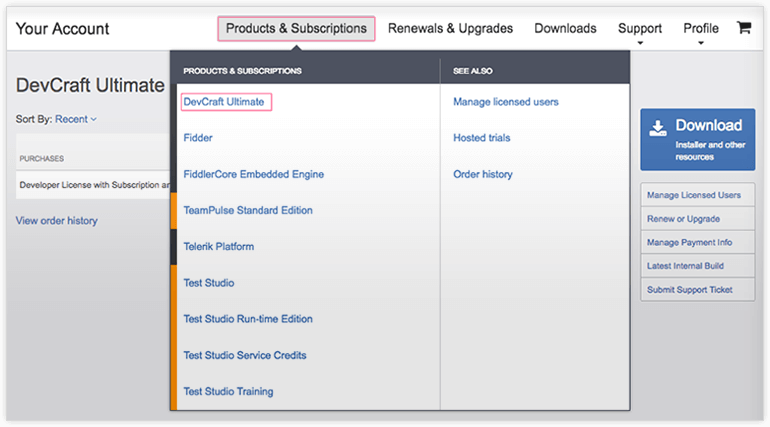
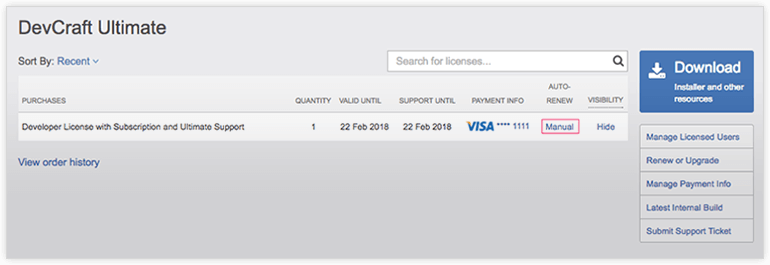
2. Click the Manual link next to the product that you would like to enroll into the Auto-Renewal Program.
NOTE: If you do not have a credit card on file, the link will read Configure and you should follow the prompts to add a new payment profile to your account. Please see the tutorial – Change / Update Credit Card information for Auto-Renewal Program for step by step instructions.
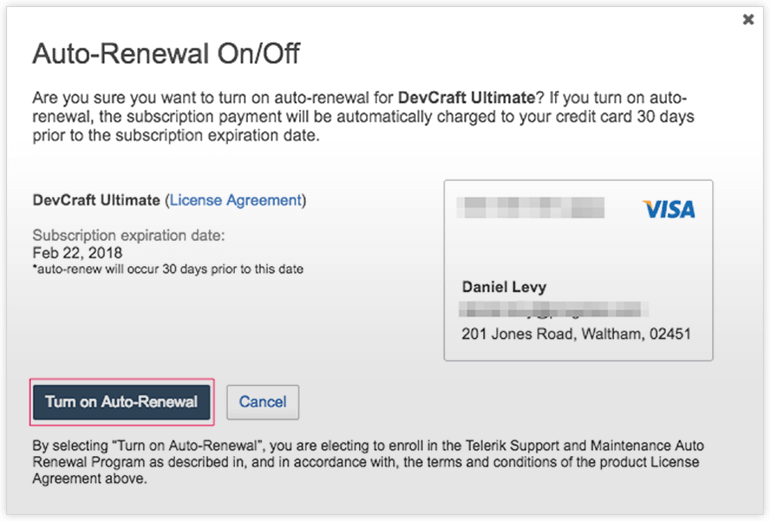
3. A dialog will appear, click the Turn on Auto-Renewal button.
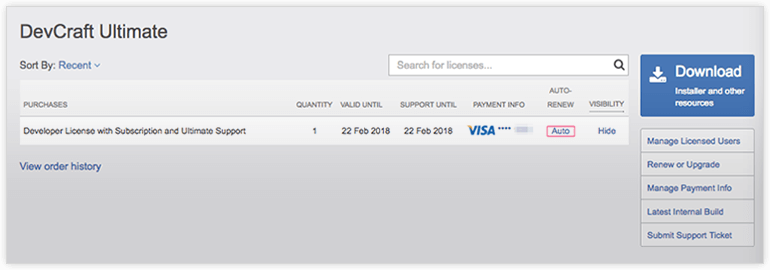
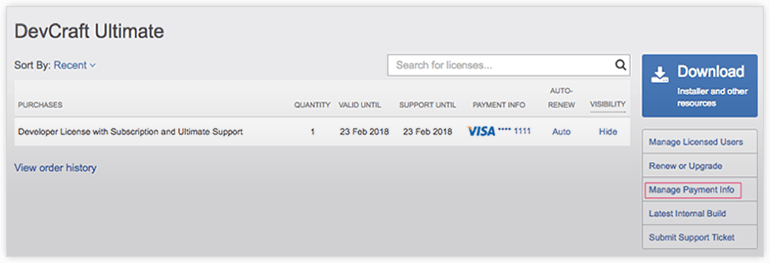
4. You will be returned to the previous page and the link under the auto-renew column will now display as Auto. This confirms that you have successfully enrolled in the Auto-Renewal Program for this purchase.
Tutorial – Cancel Enrollment in Auto-Renewal Program
1. Log into your Telerik.com → Your Account page and look under the Products & Subscriptions menu, and choose the product that you wish to cancel auto-renewal for.
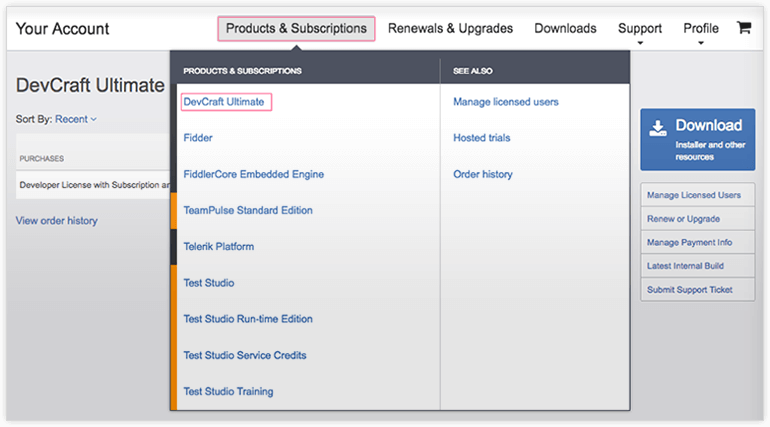
2. Click the Auto link next to the product that you would like to cancel auto-renewal for.
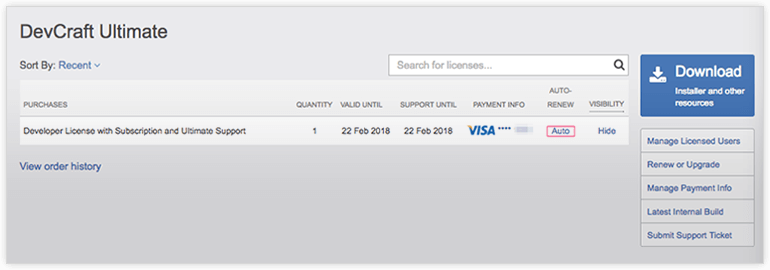
3. A dialog will appear, click the Turn off Auto-Renewal button.

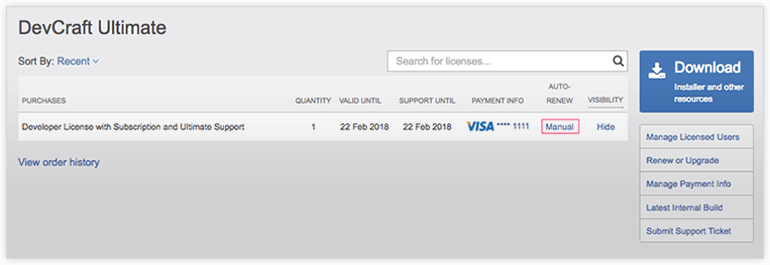
4. You will be returned to the previous page and the link under the auto-renew column will not display as Manual. This confirms that auto-renewal has been disabled for this purchase.
Tutorial – Add Payment Profiles for Auto-Renewal Program
1. If you attempt to enable auto-renewal without a ‘Payment Profile’, you may see a Configure link. This link appears because we need to put a credit card on file for the auto-renewal to take place. Alternatively, you could create a Payment Profile by clicking the Manage Payment Info link.
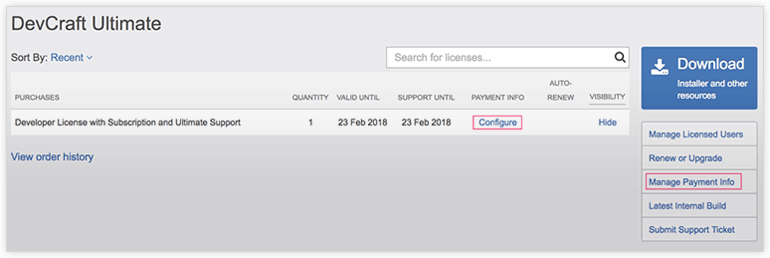

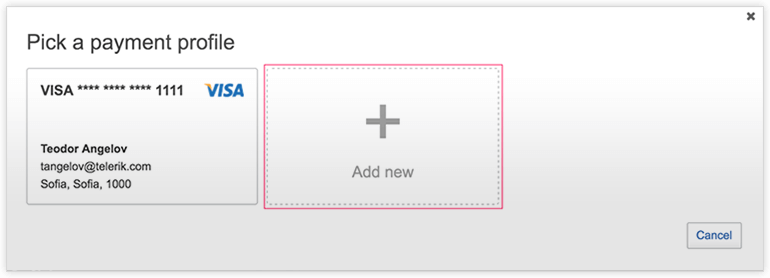
2. After clicking Configure or Manage Payment Info, click the Add New button. Please note, the screen appears slightly different from the screenshot below if you clicked the Manage Payment Info link, however that screen will also have an Add new button.
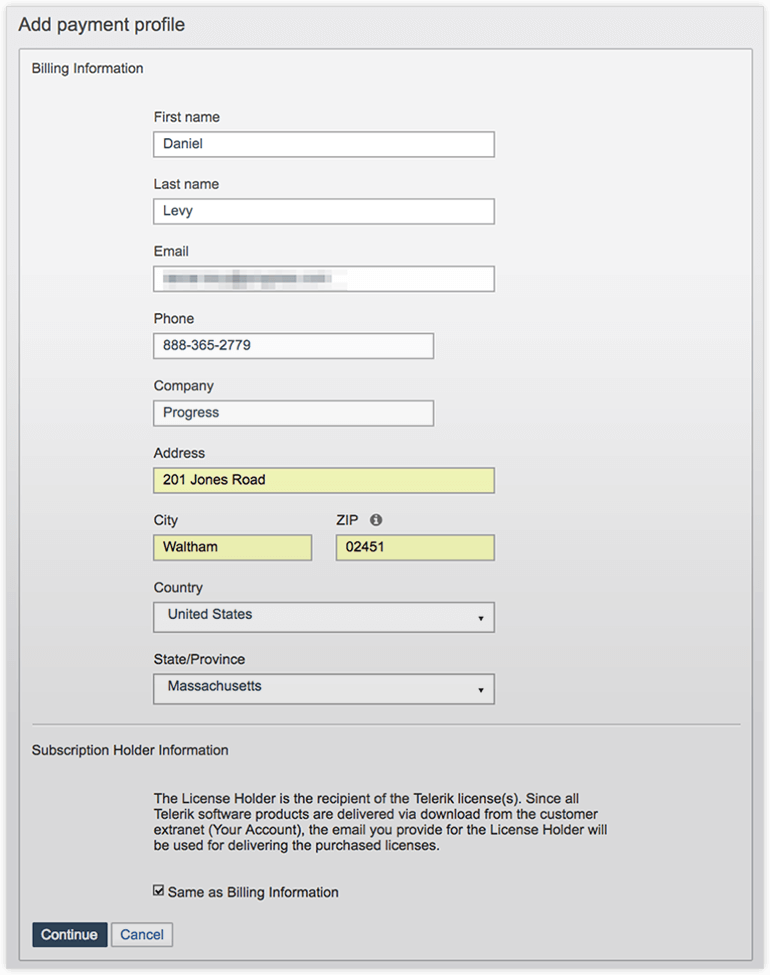
3. Enter your billing / license / subscription holder information and click Continue.
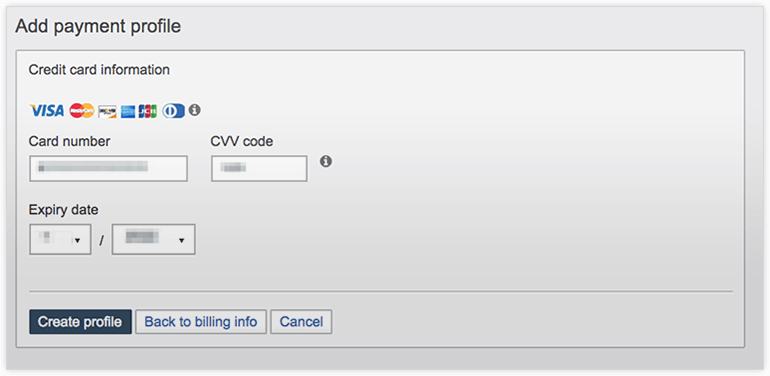
4. Enter your credit card information and click Create profile.
5. You can now click Configure and choose the credit card that you added.
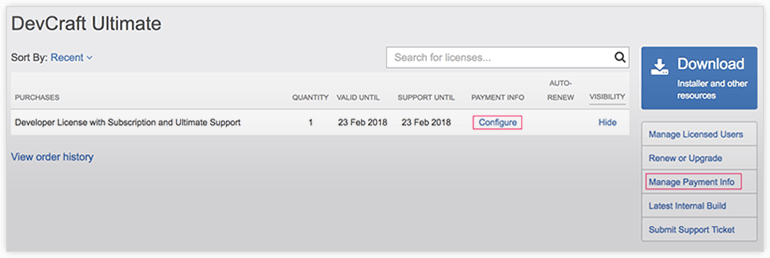
6. This attaches the Payment Profile to the license, as shown below. Click the Manual link.

7. A dialog will appear, you will see your selected Payment Profile, confirm it is correct, then click the Turn on Auto-Renewal button.
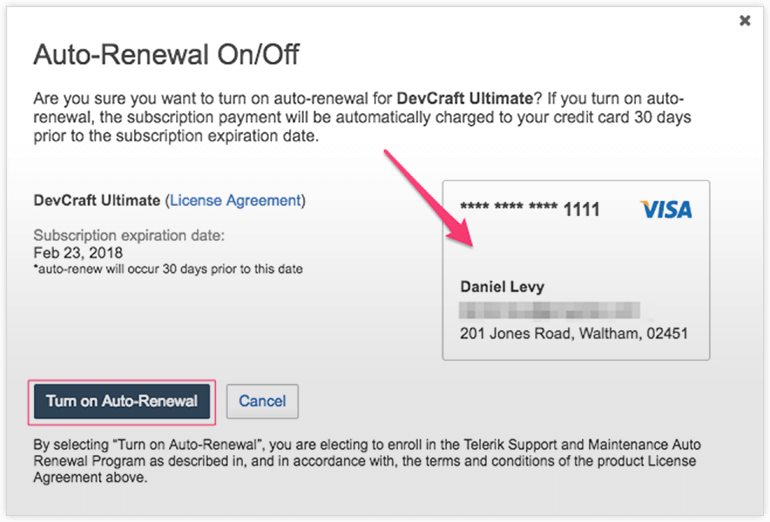
8. You will receive a brief on-screen confirmation and be returned to the Your Product page. The link now appears as Auto – you are now done!

Tutorial – Update Payment Profiles for Auto-Renewal Program
1. Log in to your Telerik.com and navigate to the Your Products page for a product enrolled in the Auto-Renewal Program. Click Manage Payment Info.
2. Expand the Payment profile and choose the appropriate button to either Edit credit card information or Edit billing information.
3. Make the changes required and choose Save.
Tutorial – Enable Auto-Renewal at the time of purchase
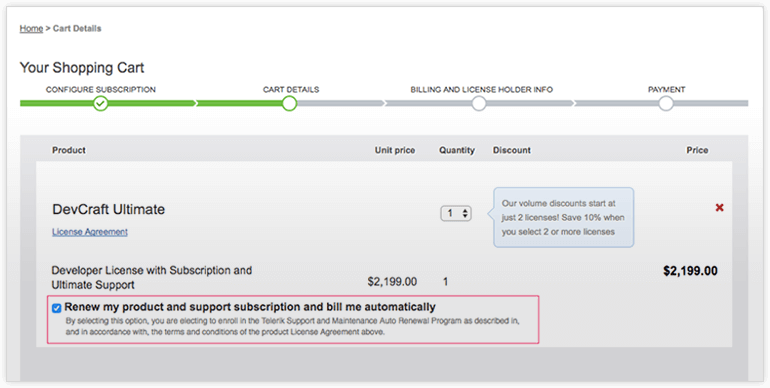
1. After adding an eligible product to your shopping cart, you will see a checkbox to enroll in auto-renewal. Review and accept the EULA, and click Continue to proceed.
2. Enter your billing and license holder information and click Continue to proceed.
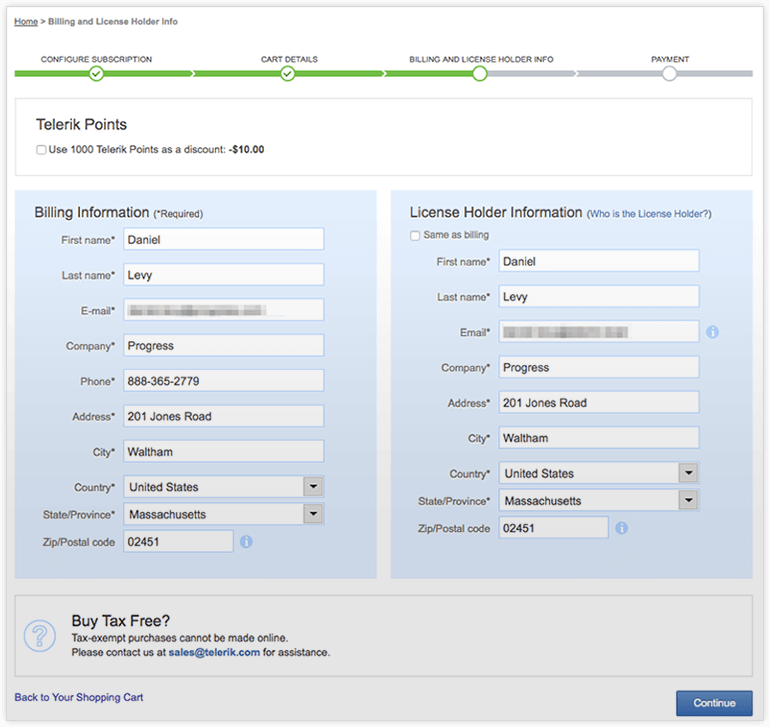
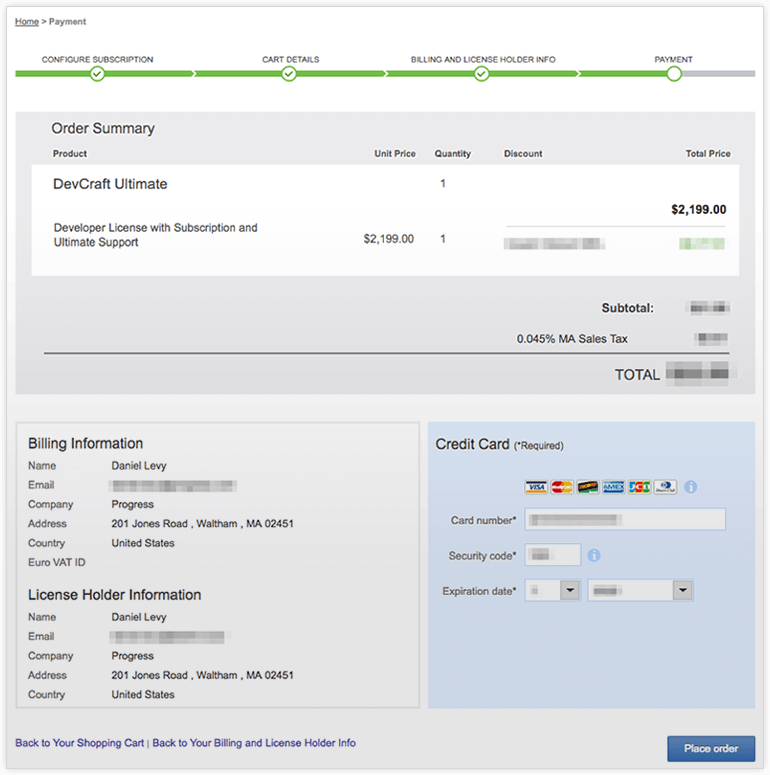
3. Enter your credit card information and click Place order.
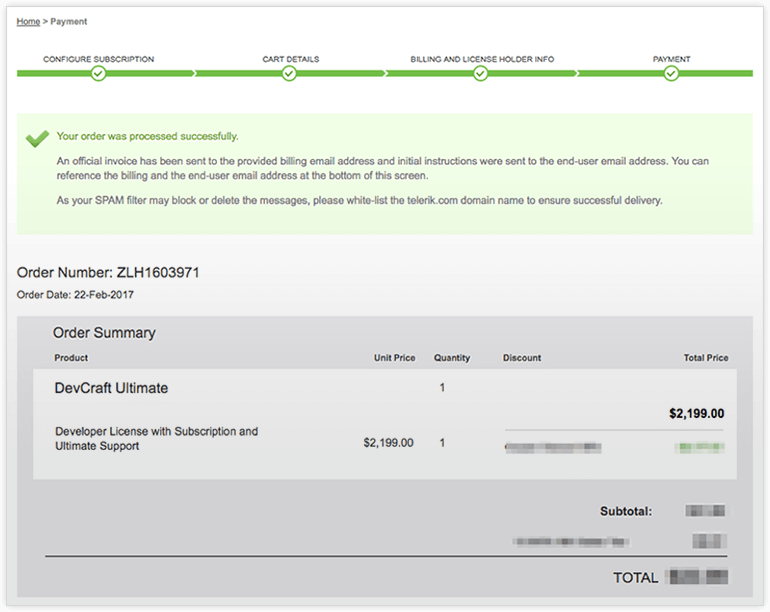
4. Your order will process and you will receive confirmation of your purchase, along with a confirmation email and invoice for your records.
5. If you log into your Telerik.com → Your Account page and look under the Products & Subscriptions menu, you will see your new license listed.
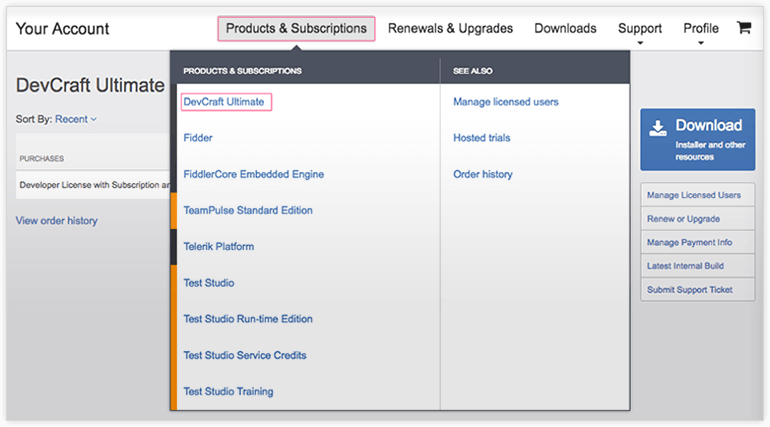
6. From here, you can download the installer, submit support tickets, manage license information, update payment information, and change your auto-renewal preferences.
