
React Router Hooks—Part 2

This article discusses three less commonly known but still very powerful hooks from React Router—useSubmit(), useBeforeUnload() and useRouteError(). These hooks have been released as part of the latest major version of React Router, v6.
In a previous article, we discussed how to use three very commonly used hooks from the React Router library, a routing library specifically designed for use in React applications.
We discussed the useNavigate(), useParams() and useLocation() hooks. These hooks allow developers to programmatically navigate within a functional component,
access URL parameters, and access the current location object that represents the current URL, respectively.
In this article, we’ll take a look at some less commonly used, but still very powerful hooks, from React Router. In particular, the hooks we’ll discuss today are new and have been released as part of the latest major version of React Router (v6). React Router v6 is a significant update that introduces a new API for programmatic navigation, improved support for server-side rendering, and new features for managing routes and URLs.
We’ll be discussing the following hooks:
useSubmit()useBeforeUnload()useRouteError()
It’s important to note that in v6.4 of React Router, new routers were introduced to support the new data APIs available to us like loaders, actions and fetchers.
The hooks discussed in this article are designed to be used in conjunction with one of the new data routers from React Router. If you’re following along or want to try one of the hooks discussed in this article, be sure to use a data router, like the recommended createBrowserRouter() for web applications, over a traditional router.
useSubmit() Hook
The useSubmit() hook allows us to programmatically submit a form instead of having the user trigger the form submit action themselves.
Here is an example of how the useSubmit() hook can be used to handle a form submission.
import { useSubmit } from "react-router-dom";

const App = () => {
  const submit = useSubmit();

  return (
    <form
      onSubmit={(event) => {
        submit(event.currentTarget);
      }}
    >
      <input name="email" type="email" placeholder="Email" />
      <input name="password" type="password" placeholder="Password" />
      <button type="submit">Sign Up</button>
    </form>
  );
};
In this example, when the form is submitted, the hook’s submit() function is invoked which submits the form data. Instead of relying on the traditional <form> submit action
that occurs, we’re programmatically triggering the form submission with the help of the useSubmit() hook.
Programmatic form navigation can be helpful in situations when we want to:
- Trigger a form submit from a separate action (e.g., user clicks a button not placed within a form) or event (a certain period of time elapses).
- Handle form validation programmatically before a form is submitted.
- Conditionally navigate the user under certain conditions (e.g., if a user is not logged in, we redirect them to the login page before submitting the form).
useBeforeUnload() Hook
The useBeforeUnload() hook is a wrapper around the native browser window.unload event. The hook allows us to run functionality just before the document is about to be unloaded. The unload event typically occurs when a user navigates from one page to another page.
Let’s use the same form example we’ve used when discussing the useSubmit() hook above. This time, we’ll use the useBeforeUnload() hook function to fire a console.log message just before the page is unloaded (i.e., just before the user is navigated away after the form submit).
import { useCallback } from "react";
import { useSubmit, useBeforeUnload } from "react-router-dom";

const App = () => {
  const submit = useSubmit();

  useBeforeUnload(
    useCallback(() => {
      console.log("logging this before navigate!");
    }, [])
  );

  return (
    <form
      onSubmit={(event) => {
        submit(event.currentTarget);
      }}
    >
      <input name="email" type="email" placeholder="Email" />
      <input name="password" type="password" placeholder="Password" />
      <button type="submit">Sign Up</button>
    </form>
  );
};
When we submit the form, we’ll quickly notice the console.log message just before the form submission is made complete.
The useBeforeUnload() hook can be helpful when we want to save some important state/data before a user is navigated away.
useRouteError() Hook
The useRouteError() hook allows us to handle route errors in a functional component. It helps us handle and display errors that are thrown during
an action(), loader() or render of a component. We’ll go through a few examples to better explain how this works.
Error During Render
When we declare the route information of a certain component, we often use the React Router <Route /> component to
do so. Here is an example of using the <Route /> component to declare that an <App /> component should render in the base URL path (/).
We do this with the help of the element prop the <Route /> component accepts.
const App = () => {
  // ...
};

<Route path="/" element={<App />} />;
The <Route /> component also accepts a component for the errorElement prop. The component used as the value of the errorElement prop is rendered whenever
an exception occurs during the rendering of the intended component (i.e., the component used in the element prop).
const App = () => {
  // ...
}

<Route
  path="/"
  element={<App />}
  /*
      the component we place here is rendered instead
      whenever an exception is thrown when <App />
      component is being rendered.
  */
  errorElement={/* ... */}
/>
We can construct an <ErrorBoundary /> component to use as the value of the errorElement prop. We’ll have the component use the useRouteError() hook to retrieve an error object. The component will use the error object to display an error in the console and an error message in its markup.
const ErrorBoundary = () => {
  const error = useRouteError();
  console.error(error);
  return <div>{error.message}</div>;
};
We can then place the <ErrorBoundary /> component as the value of the errorElement prop.
const ErrorBoundary = () => {
  const error = useRouteError();
  console.error(error);
  return <div>{error.message}</div>;
};

const App = () => {
  // ...
};

<Route
  path="/"
  element={<App />}
  /*
      this error component is rendered when an exception is thrown
      when the <App /> component is being rendered
  */
  errorElement={<ErrorBoundary />}
/>;
This <ErrorBoundary /> component will render whenever an exception is thrown during the rendering process of the <App /> component.
Error in action()
The error element component is also rendered when an exception is thrown in either the action() or loader() functions of a <Route /> component.
The action() function can be used to perform data mutations whenever a non-get submission (“post”, “put”,
“patch”, “delete”) is made to the route (the React Router docs explains this in more detail).
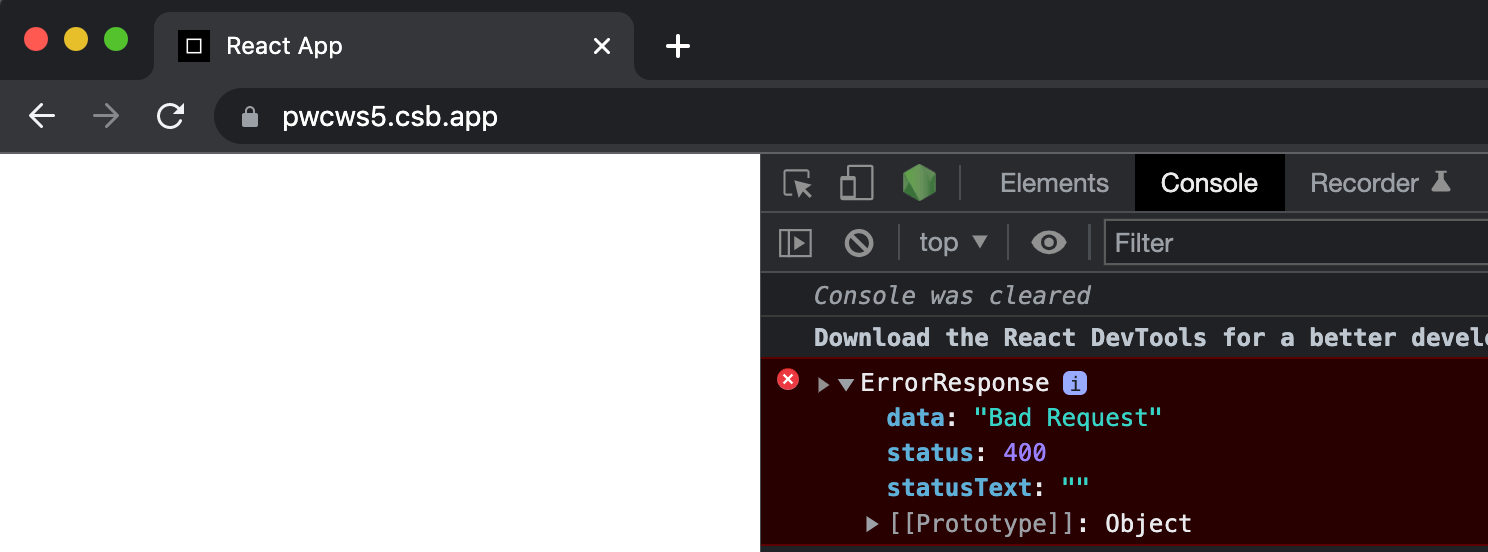
If the action() function is triggered and an error is being thrown, the error boundary component will render. Here’s an example of us forcing an error to be thrown in the action() function.
const ErrorBoundary = () => {
  const error = useRouteError();
  /*
    Thrown response error from action()
    will be shown in console.
  */
  console.error(error);
  return <div>{error.message}</div>;
};

const App = () => {
  // ...
};

<Route
  path="/"
  element={<App />}
  action={() => {
    throw new Response("Bad Request", { status: 400 });
  }}
  /*
    ErrorBoundary component will render when action() function runs
    since it throws an error.
  */
  errorElement={<ErrorBoundary />}
/>;
In the example above, if a non-get submission is made to the / path, the action() function will trigger. Since a 400 response error is thrown in the
action() function, the <ErrorBoundary /> component will render which will result in the response error being shown in the console.
Error in loader()
The loader() function can be used to provide data to a route element before it renders. It is often described as the “read” to the action() function’s write.
If an error is thrown in the loader() function, the error boundary component will render instead of the main component that should be shown in the route. Here’s an example of us forcing an error to be thrown in the
loader() function.
const ErrorBoundary = () => {
const error = useRouteError();
console.error(error);
/*
Error message from thrown error in loader()
will be rendered.
*/
return <div>{error.message}</div>;
};
<Route
path="/"
element={<App />}
loader={() => {
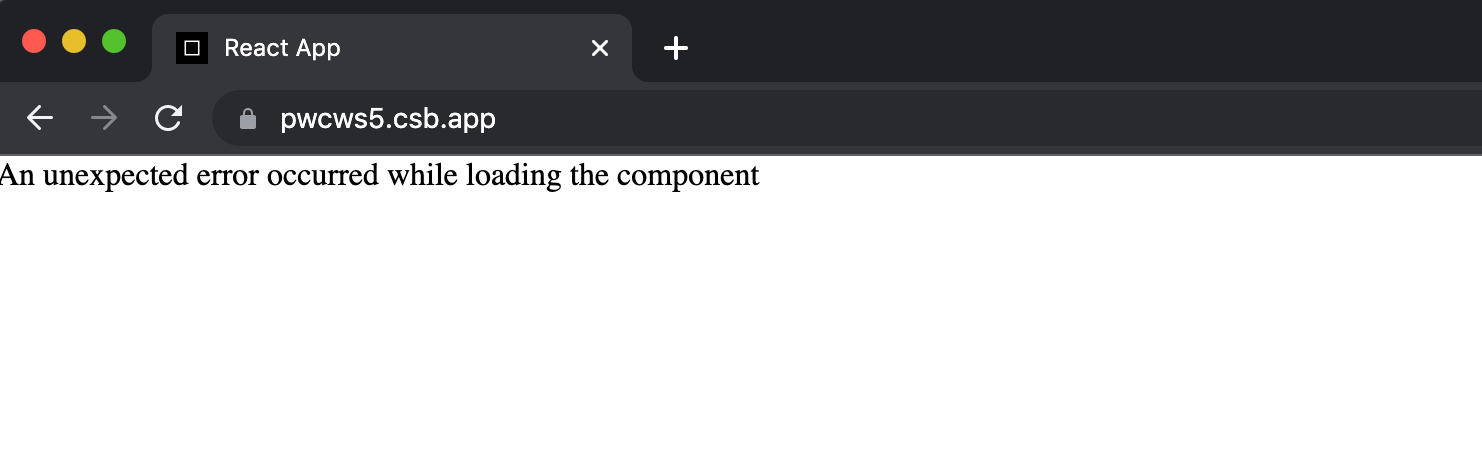
throw new Error("An unexpected error occurred while loading the component");
}}
/*
ErrorBoundary component will render since loader() function
throws an error.
*/
errorElement={<ErrorBoundary />}
/>;
Since an error is thrown in the loader() function, this error will be thrown before the intended component (<App />) is rendered. This is because the loader() function runs before the intended <Route /> component is rendered.
In the example above, we’ll see the <ErrorBoundary /> component render instead of the expected <App /> component.
The useRouteError() hook can allow us to provide a better user experience and improved debugging capabilities since it helps us easily handle and display errors that are thrown during an action(),
loader() or render of a component.
Wrap-up
In this article, we covered several new React Router Hooks that were introduced in React Router v6. These hooks provide additional functionality for handling routing in React applications, including programmatic form submission, route error handling and triggering a change before the window unloads. By using these hooks, developers can build more powerful and flexible applications with React Router.
Be sure to check out the React Router documentation for more details on the different utilities and hooks the library provides! Or read another blog post about React hooks useNavigate(), useParams() and useLocation().

Hassan Djirdeh
Hassan is currently a senior frontend engineer at Doordash. Prior to Doordash, Hassan worked at Instacart and Shopify, where he helped build large production applications at-scale. Hassan is also a published author and course instructor and has helped thousands of students learn in-depth fronted engineering tools like React, Vue, TypeScript and GraphQL. Hassan’s non-work interests range widely and, when not in front of a computer screen, you can find him at the gym, going for walks or running through the six.
Related Posts
Comments
All articles
Topics

Latest Stories
in Your Inbox
Subscribe to be the first to get our expert-written articles and tutorials for developers!
All fields are required