Manipulating CSV Files in .NET

Reading and writing data are common tasks in the routine of a .NET developer, but when the data source is a file, different from the traditional database, many doubts arise. Check in this blog post how to manipulate data in CSV files in a .NET application.
As developers, we are used to creating applications that read data from a database, whether relational or not, but something that many people do not know is that there are other ways to store data, one of which is CSV files.
CSV files serve many purposes and are a great way to store data due to their simplicity and versatility.
In this article, we’ll see how we can use CSV files in our developer routine and how to implement a .NET application that reads and creates CSV files.
Why Are CSV Files Used?
CSV files are text files used to store large amounts of data. It is common to find CSV files on large enterprise systems as they serve many business purposes.
It is possible to export a large volume of data and perform complex filters and sorting through this file format, as your data can be organized in a spreadsheet format depending on the software used to read it.
How Are CSV Files Used in a Developer’s Routine?
As a .NET developer, you will probably come across situations where large-scale data manipulation is required. To avoid the cost and effort of implementing a database, be it relational or not, using CSV files can be the best choice.
Imagine the following scenario: You are working on a project for a large marketplace, and a few thousand products need to be inactivated because they have incorrect data. You as a developer do not have access to the database that stores these products, and the only way to disable them in bulk is via API.
So you enter the marketplace’s admin panel, filter the thousands of products with incorrect data, and generate a CSV file with these products. Then you create an API that reads the file and sends the products for inactivation.
Realize how simple it can be to solve problems with the help of CSV files?
Manipulating CSV Files in a .NET Application
Next, we will create a Minimal API in .NET and manipulate CSV files through the CsvHelper library. CsvHelper is an excellent open-source library for working with CSV files in .NET.
Regarding the project scenario, we will have a CSV file with hundreds of product records, many of which have the same supplier code, but we want to get only one example from each supplier. So, the application will read the CSV document with the records, filter and sort, and then save an example product for each customer in another CSV file.
The source code of the complete project can be accessed here: source code.
Creating the Application
First, let’s create the application, then in Visual Studio follow the steps below:
- Create a new project
- Choose ASP.NET Core Web API
- Choose .NET 7.0
- Uncheck the option to use controllers, we won’t need it in this example
Adding the Dependencies
First, let’s download the CSV Helper dependency that we’ll be using later. For that, you can download it via the link CSV Helper NuGet or add the code below in the project’s .csproj file:
<PackageReference Include="CsvHelper" Version="30.0.1" />
Note that in this example .NET version 7.0 will be used and the CSV Helper version is 30.0.1. Make sure you use compatible versions of both.
Creating the Model Classes
The first model class will be CsvFile, which will contain the fields corresponding to the header of the CSV file. Note that through the attribute [Name()] we are defining the name of each column of the CSV file while reading
the file.
So, create a new folder called “Models” and inside it the class below:
using CsvHelper.Configuration.Attributes;

namespace ProductFilter.Models;
public class CsvFile
{
    [Name("sellerId")]
    public string? SellerId { get; set; }

    [Name("productId")]
    public string? ProductId { get; set; }
}
The second class will be responsible for mapping between the columns of the CSV file and the properties of the CsvFile class when writing the data—that is, the reverse process of the previous class where we added the attributes for reading the file.
So, inside the “Models” folder, create the class below:
using CsvHelper.Configuration;

namespace ProductFilter.Models;
public class CsvFileMap : ClassMap<CsvFile>
{
    public CsvFileMap()
    {
        Map(m => m.SellerId).Name("sellerId");
        Map(m => m.ProductId).Name("productId");
    }
}
Performing the Reading and Writing of the CSV File
Next, we will create a service class that will contain the necessary logic for writing and reading files. Then create a new folder called “Service” and inside it add the class below:
- ProductService
using CsvHelper;
using CsvHelper.Configuration;
using ProductFilter.Models;
using System.Globalization;

namespace ProductFilter.Service;

public class ProductService
{
    public void ExecuteService()
    {
        var filteredProducts = new List<CsvFile>();

        ReadCsvFile(filteredProducts);
        WriteCsvFile(filteredProducts);
    }

    public void ReadCsvFile(List<CsvFile> filteredProducts)
    {
        var config = new CsvConfiguration(CultureInfo.InvariantCulture)
        {
            HasHeaderRecord = true,
        };

        using (var reader = new StreamReader("YOUR FILE DIRECTORY\\products.csv"))
        {
            using (var csv = new CsvReader(reader, config))
            {
                var products = csv.GetRecords<CsvFile>().ToList();

                foreach (var product in products)
                {
                    var repeatSeller = products.FindAll(p => p.SellerId == product.SellerId);
                    var filteredProductsAlreadyContainsSeller = filteredProducts.Where(p => p.SellerId == product.SellerId).ToList();

                    if (repeatSeller.Count > 1 && !filteredProductsAlreadyContainsSeller.Any())
                        filteredProducts.Add(product);
                }
            }
        }
    }

    public void WriteCsvFile(List<CsvFile> filteredProducts)
    {
        using (var writer = new StreamWriter("YOUR FILE DIRECTORY\\producstFiltered.csv"))
        {
            using (var csv = new CsvWriter(writer, CultureInfo.InvariantCulture))
            {
                csv.Context.RegisterClassMap<CsvFileMap>();

                csv.WriteHeader<CsvFile>();
                csv.NextRecord();
                csv.WriteRecords(filteredProducts);
            }
        }
    }
}
The code above contains two main methods, ReadCsvFile and WriteCsvFile.
The first one, ReadCsvFile is creating a new instance of the StreamReader class that receives the directory where the CSV file is stored. Then the value of the StreamReader class variable is used to create an instance of the CsvReader class and its value is assigned to the csv variable. Then, through the GetRecords extension method, the records are obtained
from the CSV file.
With the records obtained, we managed to manipulate them. Thus, the list of products is traversed and the records that have the repeated sellerId property are found. If it does not already exist in the list, it is added.
That way, at the end we have a list with a product from each of the sellers.
The second method, WriteCsvFile, creates a new instance of the StreamWriter class that receives the directory and name of the file that will be created. Then a new instance of the
CsvWriter class is created and assigned to the csv variable, and then through the extension methods WriteHeader, NextRecord and WriteRecords the new CSV file is created, containing the records obtained in the previous method.
Now that the reading and writing logic is ready, just create an endpoint to run the service and thus verify that everything is working as expected.
So, in the Program.cs file add the code below:
builder.Services.AddScoped<ProductService>();
And after the code snippet app.MapControllers(); add the following:
app.MapPost("/execute", (ProductService service) =>
{
    try
    {
        service.ExecuteService();
        return Results.Ok("Success");
    }
    catch (Exception ex)
    {
        return Results.BadRequest($"Error: {ex.Message}");
    }
});
Executing the Application
Before running the application, it is necessary to have the CSV file that will be read. You can download it here—CSV file example—then place it in the directory of your choice, but it is important that you replace the section “YOUR FILE DIRECTORY” with the directory where the CSV file is.
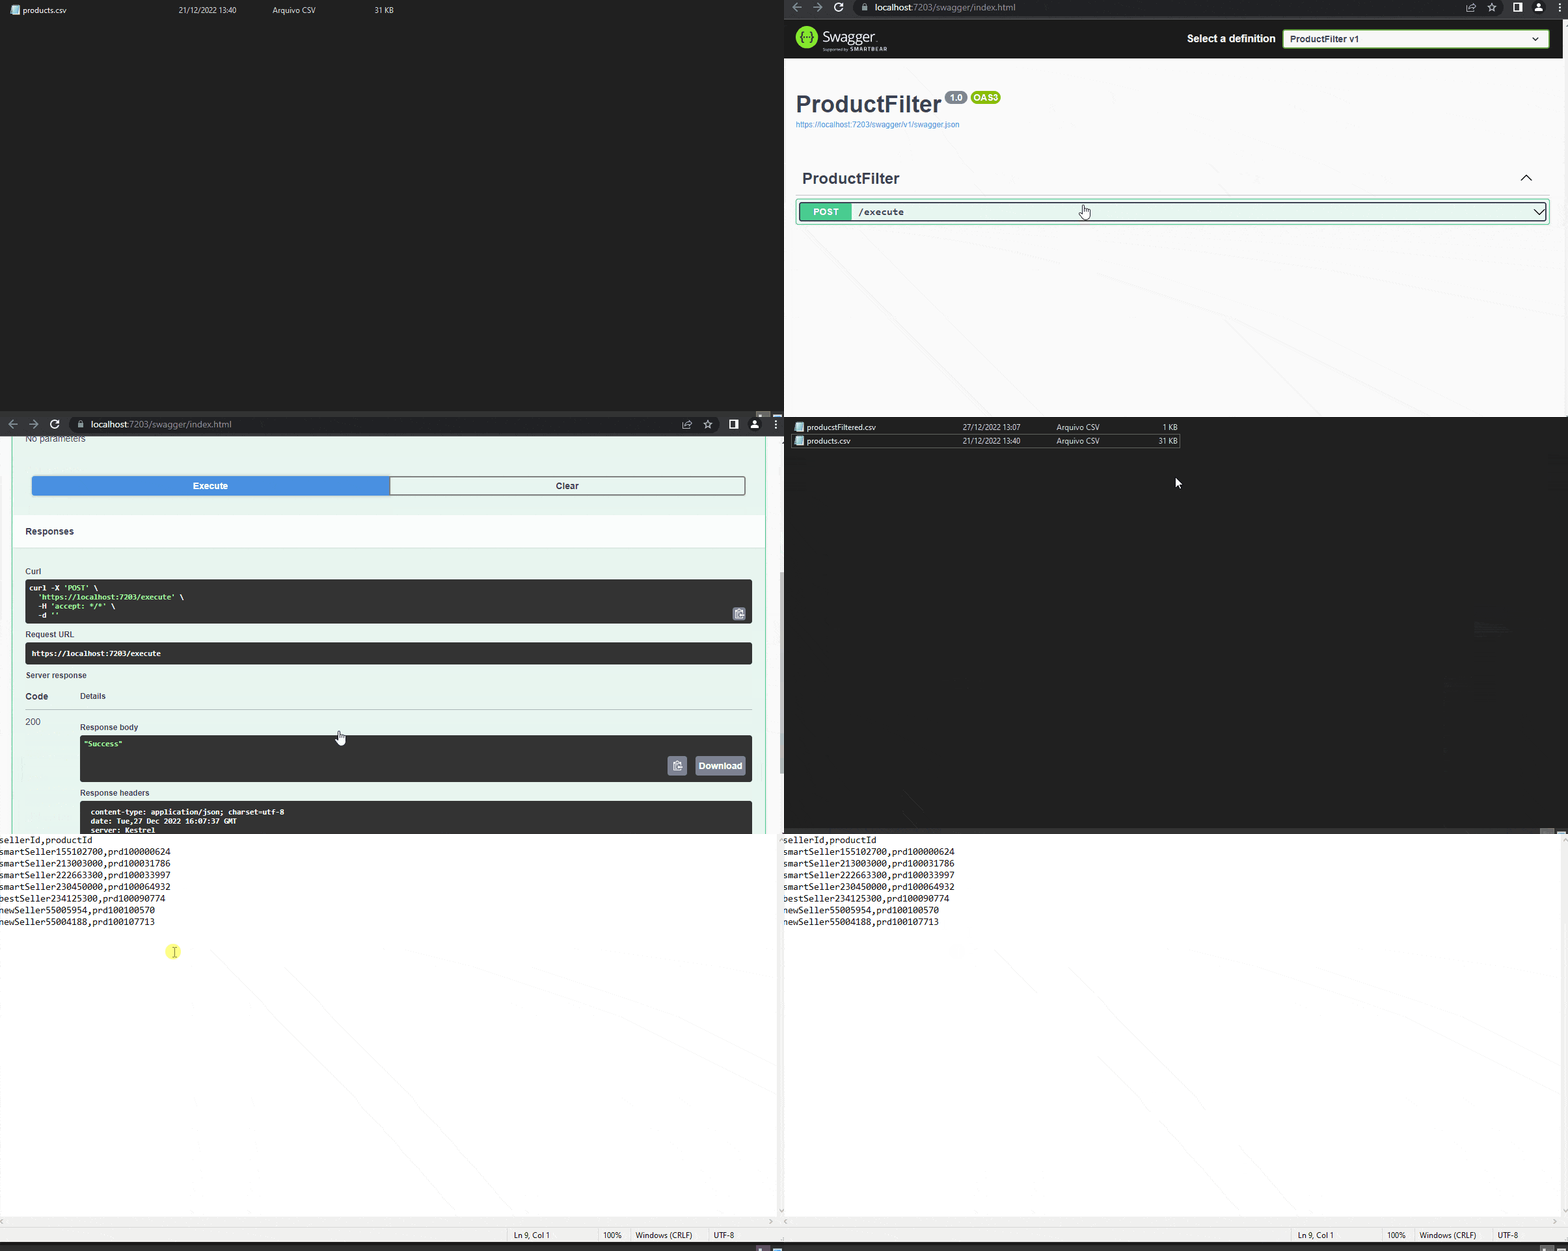
Now, just run the project and the Swagger interface will open in the browser. When executing the “/execute” route, the products.csv file will be read and the processed records will be written in the producstFiltered.csv file, as shown in the GIF below:

Conclusion
CSV files are great for working with large amounts of data due to their simplicity and low cost.
In this article, we learned how to read and write CSV files through the CSVHelper library, but there are still several other resources available to work with this type of file, so feel free to explore them in your next projects, and always remember to use them when the opportunity arises.


