
How to Use Angular to Create Next-Level UI for Python Apps (and Why Do It)

How can your Python app benefit from combining it with Angular? Let’s see how these two can work together to level-up your development.
In today’s world of web development, creating engaging and responsive user interfaces (UIs) is crucial for the success of any application. While Python excels in backend development and data processing, combining it with Angular—a powerful JavaScript framework—can take your Python apps to the next level.
In this article, we will explore the benefits of using Angular for UI development in Python applications and guide you through consuming data from a Python API (Flask) in an Angular UI.
What is the Benefit of Using Angular to Create UI for Python?
Here are some benefits of using Angular in combination with Python:
- Rich UI development: Angular offers powerful tools and features for creating dynamic and responsive user interfaces.
- Separation of concerns: Angular allows you to separate frontend and backend development tasks, making the codebase more maintainable.
- Single-page applications (SPAs): Angular excels at building SPAs, providing a smooth and seamless user experience.
- Extensive ecosystem: Angular has a large and active community, offering a rich ecosystem of libraries and resources.
- TypeScript integration: Angular is built with TypeScript, which brings benefits like static type checking and improved code maintainability.
- Modular development: Angular’s modular approach aligns well with Python’s code organization and maintainability.
- Performance and optimizations: Angular comes with built-in performance optimizations that improve the speed and efficiency of your application.
How to Consume Data from Python API (Flask) in Angular UI
Building a complete Angular app integrated with a Python backend is beyond the scope of a single conversation. However, I can provide you with a simplified example to help you get started. This example demonstrates the basic setup and integration between Angular and Python. Keep in mind that you’ll need to adapt and expand upon this example to fit your specific requirements. Here’s a simplified step-by-step guide:
Set up Your Development Environment
- Install Node.js from the official website
- Open your command-line interface
- Run the following command to install the Angular CLI globally:
npm install -g @angular/cli
Create a New Angular Project
- Create a new Angular project by running:
ng new angular-python-app - Change to the project directory:
cd angular-python-app

Create Angular Components
Now that we have all the files we need, we modify the HTML template (app.component.html) to display dynamic data. In this case, we add an <h1> heading element to display the title and a <p> paragraph element to display the message. These values will be fetched from the Python backend.
Open src/app/app.component.html and replace the generated code with:
<p>{{ newdata}}</p>
Now create a new file called service.ts in the same directory for performing HTTP requests:
import { HttpClient } from "@angular/common/http";
import { Injectable } from "@angular/core";
In this section, the necessary imports are made. The HttpClient module is imported from @angular/common/http, which provides functionalities to perform HTTP requests. The Injectable decorator is imported from @angular/core, which allows the service to be injected and used in other parts of the application.
@Injectable({
  providedIn: 'root'
})
The @Injectable decorator is used to declare that this service is injectable and specify its scope. In this case, 'root' is provided as the value, indicating that a single instance
of this service will be created and shared across the entire application.
constructor(private _http: HttpClient) { }
The constructor is defined with a parameter named _http of type HttpClient. This is a shorthand syntax provided by TypeScript to automatically create a private property _http and assign the injected HttpClient instance to it. This allows the service to use the HttpClient methods to make HTTP requests.
getdata() {
  return this._http.get('http://127.0.0.1:5000/api/data');
}
The getdata() method is defined within the service. It makes use of the _http property (which holds the HttpClient instance) to send an HTTP GET request
to the specified URL http://127.0.0.1:5000/api/data. This method returns an Observable that represents the asynchronous response from the server.
By utilizing this service in other components of your Angular application, you can make use of the getdata() method to retrieve data from the specified URL.
Note: Make sure you have a Python backend running on
http://127.0.0.1:5000that exposes the/api/dataendpoint for this service to fetch data successfully.
Now open up src/app/app.component.ts and replace the generated code with:
import { Component, OnInit } from '@angular/core';
import { HttpClient } from '@angular/common/http';
import { ApiserviceService } from './service';

@Component({
  selector: 'app-root',
  templateUrl: './app.component.html',
  styleUrls: ['./app.component.css']
})
export class AppComponent implements OnInit {
  newdata:any;

  constructor(private _apiservice:ApiserviceService) { }

  ngOnInit() {
	this.getData();
  }

  getData() {
	this._apiservice.getdata().subscribe(res=>{
  	this.newdata=res;
	})
  }
}
The code represents an Angular component called AppComponent that interacts with the ApiserviceService to fetch data and store it in the newdata variable.
Here’s a summary of the code:
- The
AppComponentclass implements theOnInitinterface, which requires implementing thengOnInit()method. - The
newdataproperty is declared to store the fetched data. - The constructor injects an instance of
ApiserviceServiceinto the component. - In the
ngOnInit()method, thegetData()method is called to fetch data from the API. - The
getData()method uses theApiserviceServiceto make an HTTP request and subscribes to the response. - The response is assigned to the
newdataproperty, making it accessible in the component’s template.
If you are already convinced that Angular is a great choice for your UI, consider taking your skill to the next level. Learn how the Kendo UI for Angular component library can make data display and management easy with this tutorial: How to Use Kendo UI for Angular to Display and Manage Data from Your Python.
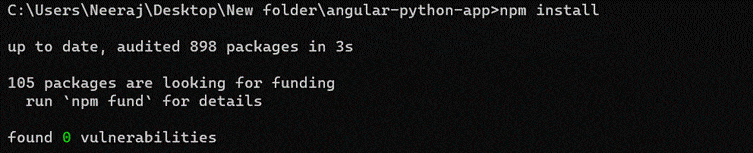
Install the Necessary Dependencies
- Run
npm installto install the required packages.
Create a Python Backend
- Install Flask, a lightweight Python web framework, by running
pip install flask. - Create a new file called
app.pyin the project directory and add the following code:
from flask import Flask, jsonify
app = Flask(__name__)
@app.route('/api/data')
def get_data():
    data = {
        'title': 'Welcome to Angular-Python App',
        'message': 'This is an example integration between Angular and Python!'
    }
    return jsonify(data)

if __name__ == '__main__':
    app.run()
Start the Application
Run the Angular app:
○ In a separate command-line interface, navigate to the project directory (angular-python-app).
○ Runng serveto start the Angular development server.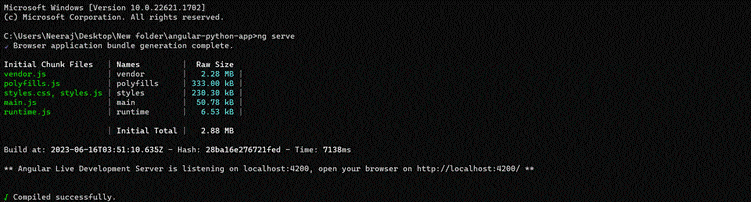
○ The app will be available at http://localhost:4200.Run the Python backend:
○ In the original command-line interface, navigate to the project directory.
○ Runpython app.pyto start the Flask server.
○ This is how it should look:
Interact with the app:
○ Open your browser and visithttp://localhost:4200.
○ You should see the title and message fetched from the Python backend displayed on the page.
The console logs:

This example demonstrates a basic integration between Angular and Python. You can expand upon it by adding more components, implementing user input, connecting to a database, and adding more complex functionality to suit your app’s needs.
Final Words
In this article, we explored how to consume data from a Python API built with Flask in an Angular UI. By leveraging the power of Angular’s HttpClient module, we were able to establish communication between the frontend and backend, enabling the retrieval and display of data from the Python API.
By following this guide, you now have the knowledge to consume data from a Python API in an Angular UI. Armed with this understanding, you can build sophisticated and interactive user interfaces that seamlessly integrate with your Python backend.
For even more productivity gains, check out Progress Kendo UI for Angular. You get ready-to-use tools such as a Data Grid, PivotGrid, Charts and Gauges.

Vyom Srivastava
Vyom Srivastava is an enthusiastic full-time coder and also writes at GeekyHumans. With more than four years of experience, he has worked on many technologies like Apache Jmeter, Google Puppeteer, Selenium, etc. He also has experience in web development and has created a bunch of websites as a freelancer.
Related Posts
Comments
All articles
Topics
Web MobileMobile
Desktop
Design
Productivity
People
