
How to Protect Your Vue Router

We’ll create a simple authentication page and learn to protect the important route or links containing private information from unauthenticated users.
One of the mistakes developers make during authentication is failure to protect routes. Not protecting your route from unauthenticated users can give attackers access to manipulate and get hold of the private information on that particular page. It can also reduce the trust of your users, most especially for an ecommerce product, because hackers can access the cart page and create a risk of data breaches.
You must protect every router page containing classified information from unauthenticated users, as this will prevent cybercriminals from manipulating and stealing users’ data from your website. In this article, we will create a simple authentication page and learn to protect the important route or links containing private information from unauthenticated users.
Prerequisites
This article assumes you have a basic knowledge of working with Vue Router and you have a Vue project installed on your system, as we won’t go into the details of installing and setting up a Vue project and Vue Router in this article, only the basic steps.
Table of Contents
- Brief Introduction to Vue Router
- Installation and Setup
- Create an Authentication Page and an Admin Page
- How to Protect Your Vue Router
- Conclusion
Brief Introduction to Vue Router
Vue Router is a routing library for Vue.js; it is used to create single-page applications where the content of the page is dynamically updated based on the current URL and the component that matches that URL.
Installation and Setup
For us to install and setup Vue Router, we will need to have our Vue project installed on our system. Vue Router is a package for Vue.js that allows you to add routing to your application. If you haven’t installed it, use the following command
vue create <project-name>
We can install the Vue router through npm or when installing our Vue project. Since we have our Vue project installed, we will install our Vue Router through npm or yarn package managers. To install Vue Router, run the following command:
npm install vue-router
We have successfully installed and created our Router; the next step is to create an authentication page.
Create Authentication and Admin Page
We will create an authentication and admin page. Non-authenticated users will be redirected to the registration page when they try to access the Admin page, which is the private route.
To do that, we will create two components, “Login.vue” and “Admin. vue” in the “views” folder. Copy the code below and paste it into the “Login.vue” file:
<template>
  <card class="card-section" style="width: 450px; margin: auto">
    <h1>Login</h1>
    <form @submit.prevent="login">
      <div class="form-group">
        <KInput
          class="form-input"
          :style="{ width: '370px' }"
          v-model="username"
          name="username"
          placeholder="Name or email address"
        ></KInput>
      </div>
      <div class="form-group">
        <KInput
          class="form-input"
          :style="{ width: '370px' }"
          v-model="password"
          name="password"
          placeholder="Enter Password"
        ></KInput>
      </div>
      <div class="example-col">
        <kButton :style="{ width: '100px' }" id="submit-btn">Login</kButton>
      </div>
    </form>
  </card>
</template>

<script>
import { Card } from "@progress/kendo-vue-layout";
import { Input } from "@progress/kendo-vue-inputs";
import "@progress/kendo-theme-default";
import { Button } from "@progress/kendo-vue-buttons";
export default {
  name: "Register",
  components: {
    card: Card,
    KInput: Input,
    kButton: Button,
  },
  data() {
      return {
        username: "",
        password: "",
      }
   }
}
</script>
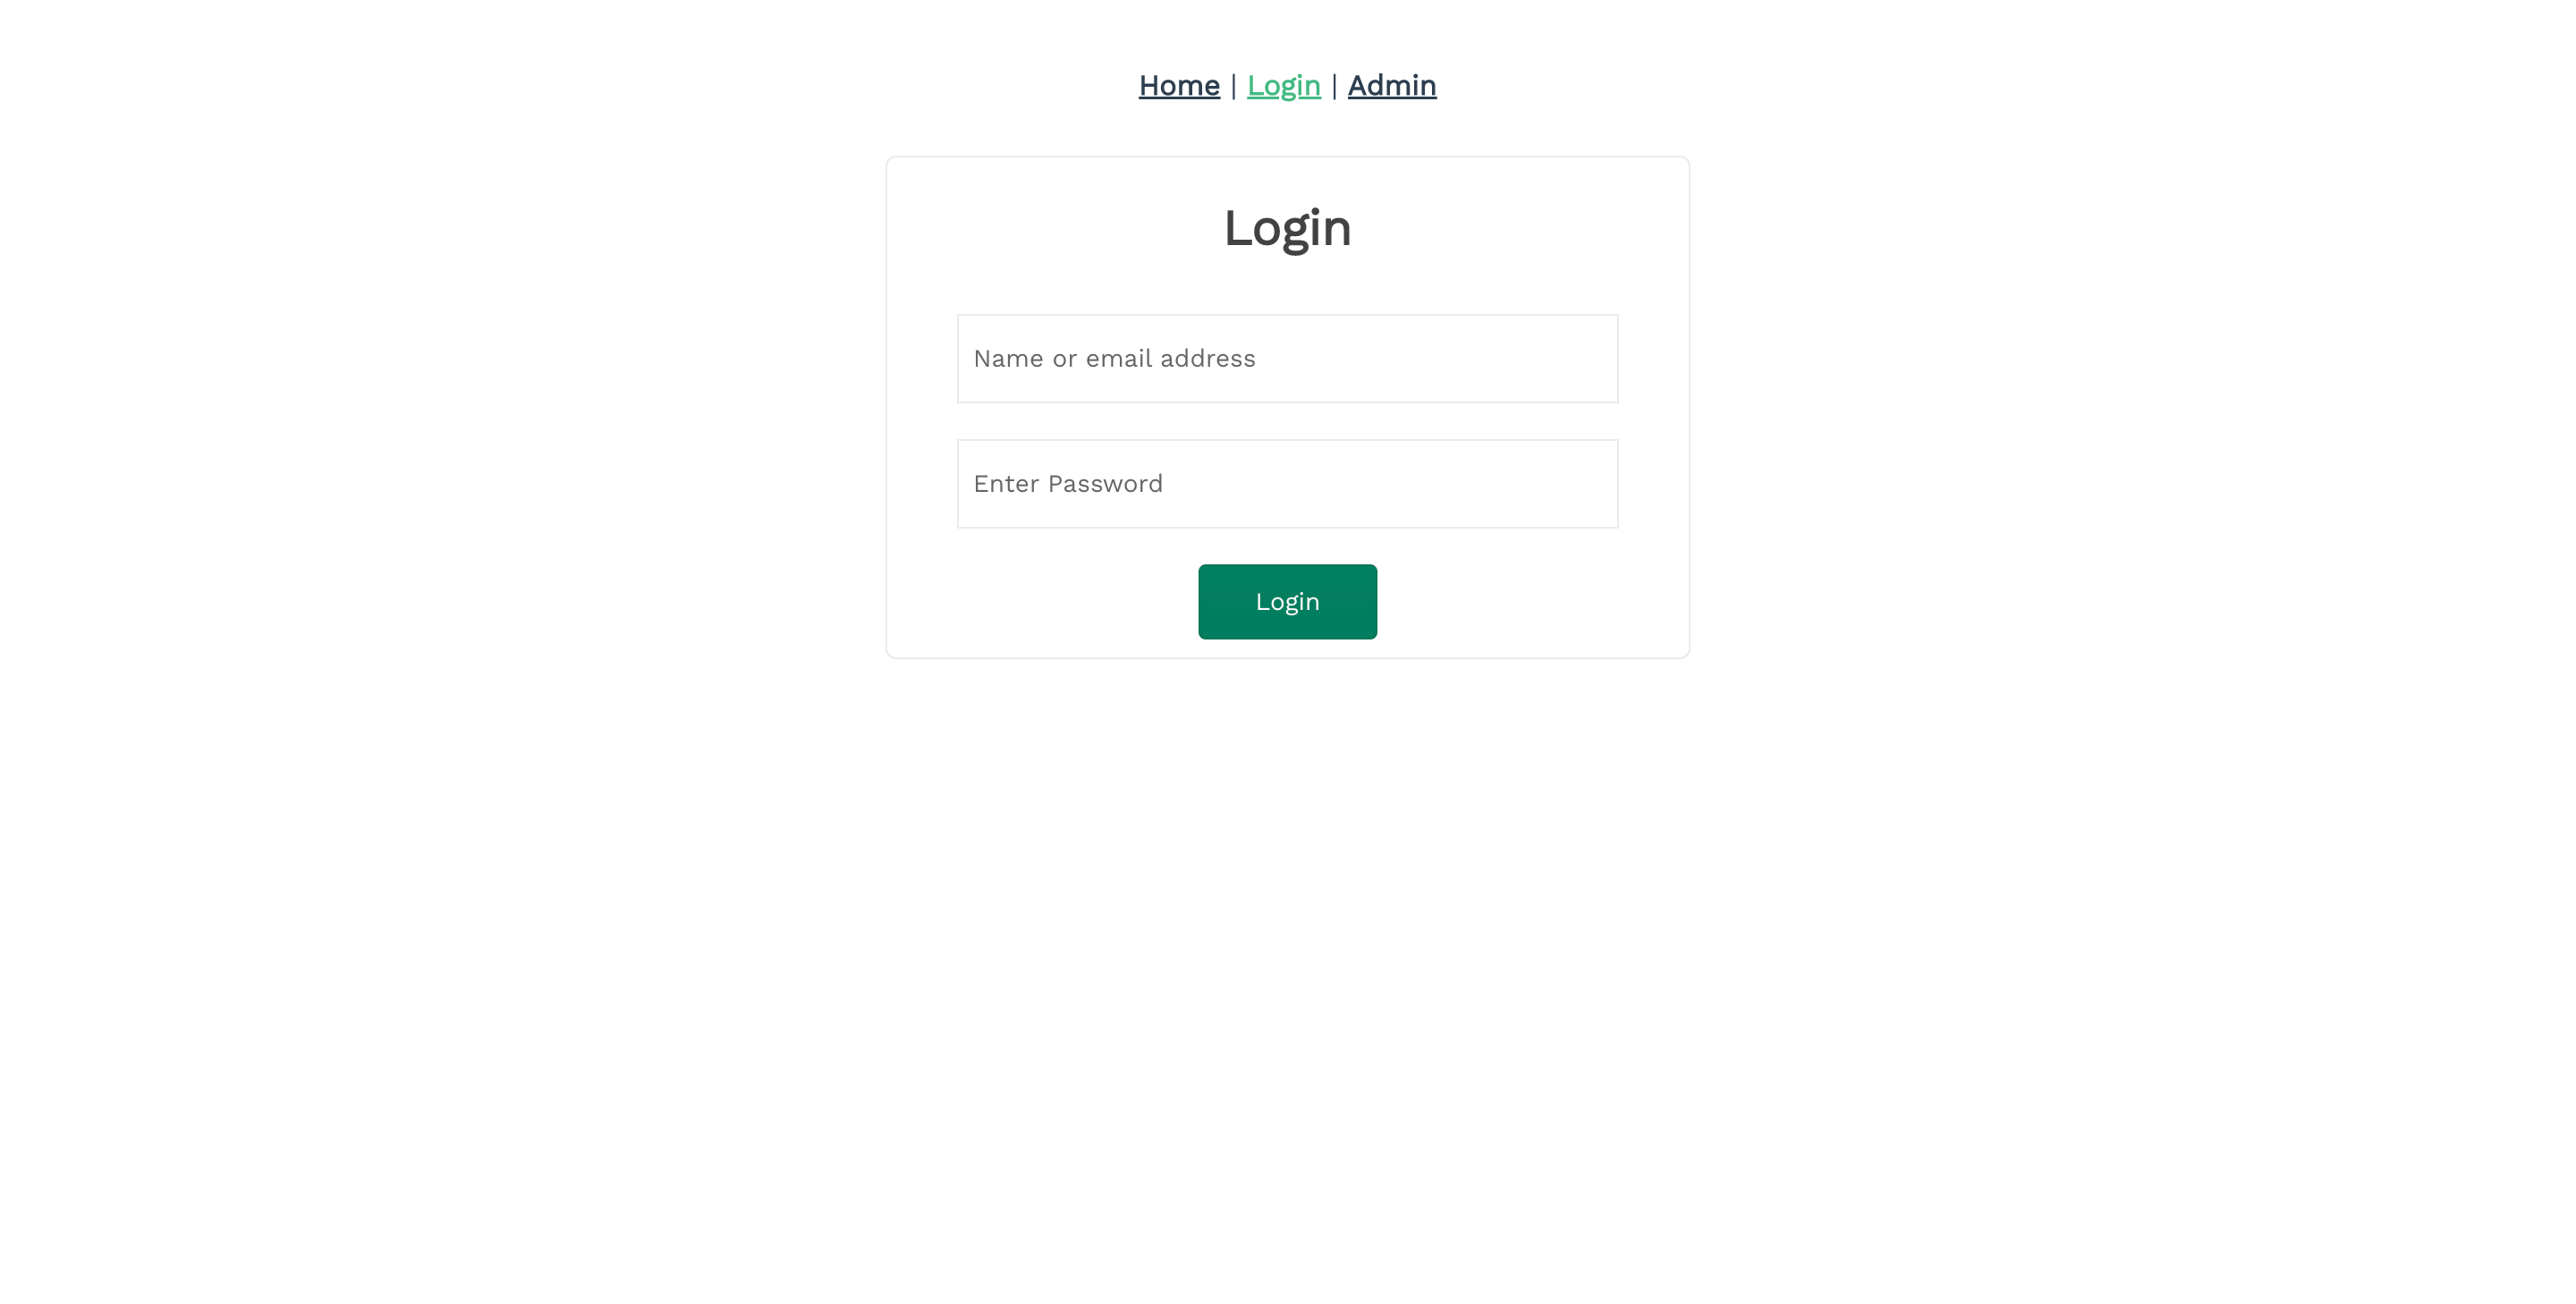
Output
This an example of what our authentication page will look like:
After creating the Admin page, copy the code below into the Admin page we created. This is the route we are going to protect from unauthenticated users.
<template>
  <main>
    <div>
      <div class="heading-text">
        <h1>Summary</h1>
      </div>
      <div :class="currentLayout">
        <card style="width: 400px" id="card-layout">
          <cardBody>
            <cardTitle> <h1>Weekly Profit</h1></cardTitle>
            <p>$35100</p>
          </cardBody>
        </card>
        <card style="width: 400px" id="card-layout">
          <cardBody>
            <cardTitle> <h1>Monthly Profit</h1></cardTitle>
            <p>$1053000</p>
          </cardBody>
        </card>
        <card style="width: 400px" id="card-layout">
          <cardBody>
            <cardTitle> <h1>Total Profit</h1></cardTitle>
            <p>$9005300</p>
          </cardBody>
        </card>
      </div>
    </div>
    <div>
      <h1>Clients Chart and Statistics</h1>
    </div>
    <hr />
    <Chart>
      <ChartLegend :position="'bottom'" :orientation="'horizontal'" />
      <ChartCategoryAxis>
        <ChartCategoryAxisItem :categories="categories">
          <ChartCategoryAxisTitle :text="'New clients per day'" />
        </ChartCategoryAxisItem>
      </ChartCategoryAxis>
      <ChartSeries>
        <ChartSeriesItem
          :name="'Jane Doe'"
          :type="'bar'"
          :stack="{ type: '100%' }"
          :data-items="firstSeries"
        />
        <ChartSeriesItem
          :name="'John Gabriel'"
          :type="'bar'"
          :data-items="secondSeries"
        />
        <ChartSeriesItem
          :name="'Kelvin Mark'"
          :type="'bar'"
          :data-items="thirdSeries"
        />
      </ChartSeries>
    </Chart>
  </main>
</template>

<script>
import { Card, CardBody, CardTitle } from "@progress/kendo-vue-layout";
import {
  Chart,
  ChartSeries,
  ChartSeriesItem,
  ChartCategoryAxis,
  ChartCategoryAxisItem,
  ChartCategoryAxisTitle,
  ChartLegend,
} from "@progress/kendo-vue-charts";
import "@progress/kendo-theme-default";
import "hammerjs";
export default {
  components: {
    card: Card,
    cardBody: CardBody,
    cardTitle: CardTitle,
    Chart,
    ChartSeries,
    ChartSeriesItem,
    ChartCategoryAxis,
    ChartCategoryAxisItem,
    ChartCategoryAxisTitle,
    ChartLegend,
  },
  data: function () {
    return {
      currentLayout: "k-card-deck",
      data: ["k-card-list", "k-card-group", "k-card-deck"],
      firstSeries: [1, 2, 3],
      secondSeries: [1, 3, 1],
      thirdSeries: [1, 5, 3],
      categories: [
        new Date(),
        new Date().setDate(new Date().getDate() + 1),
        new Date().setDate(new Date().getDate() + 2),
      ],
    };
  },
  methods: {
    handleChange: function (e) {
      this.currentLayout = e.value;
    },
  },
};
</script>
I used the Kendo UI for Vue Card layout and Chart in the code example above. To install it, go to the official documentation and Chart. After that, install Hammer.js.
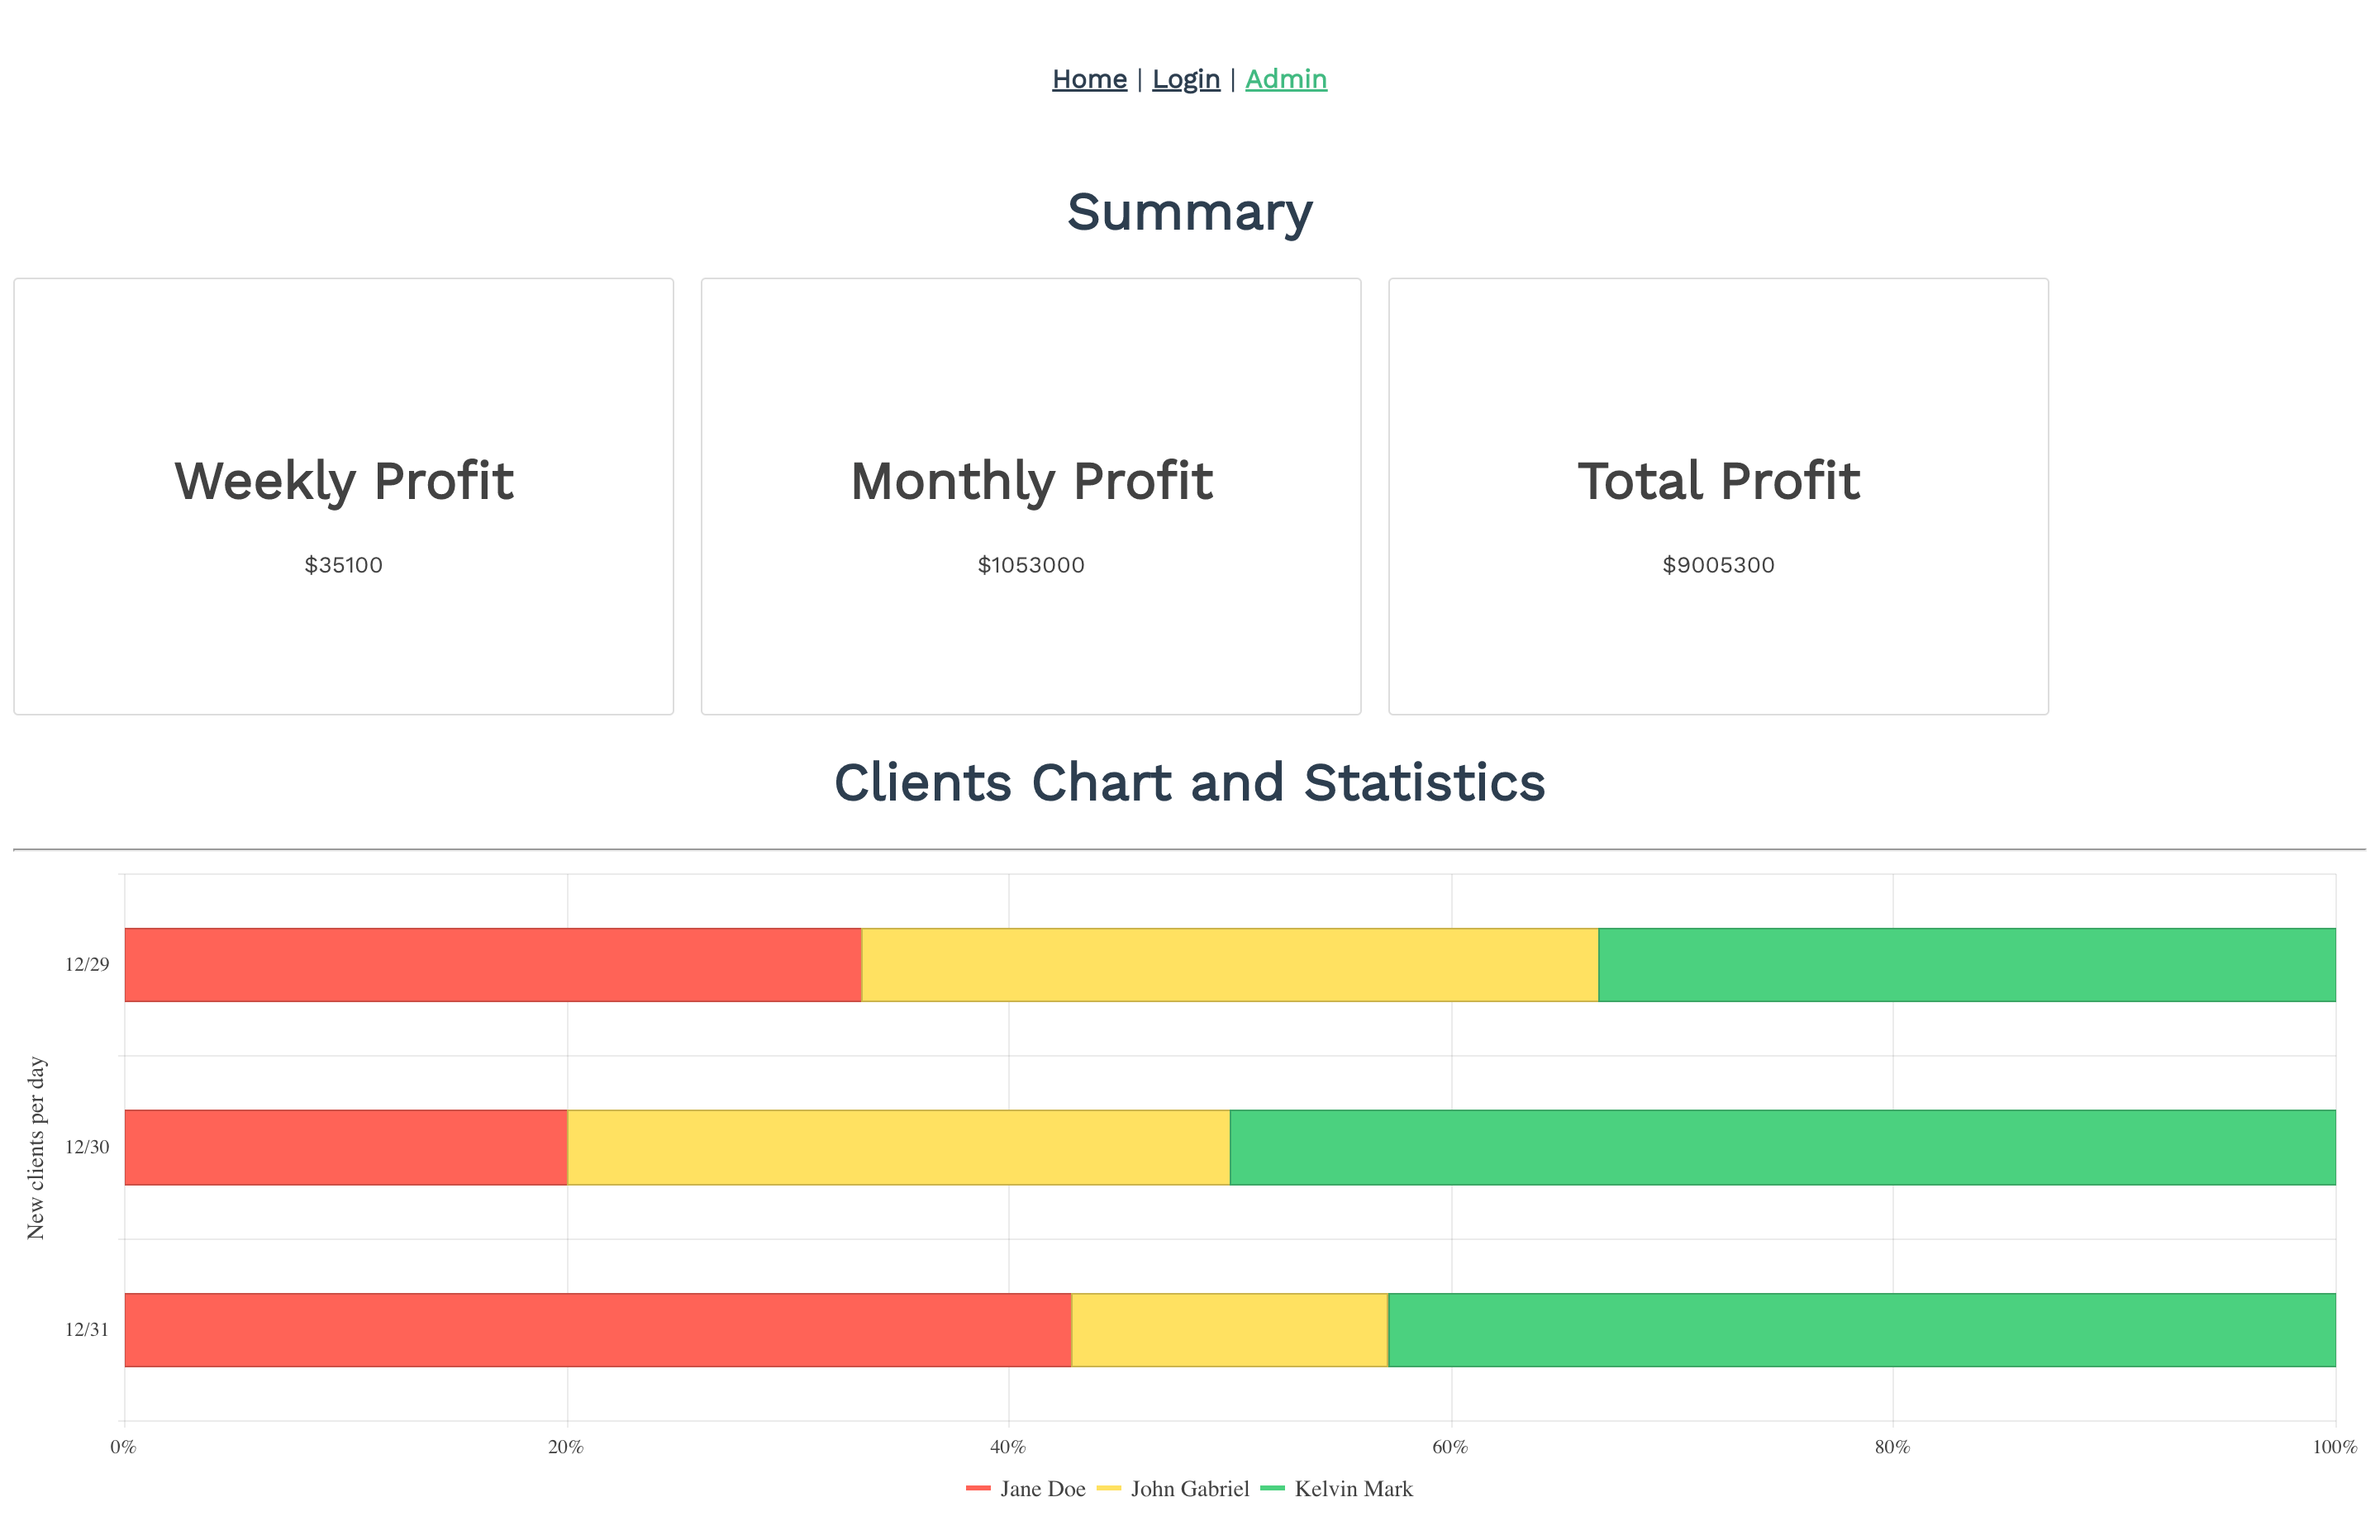
Here is an example of what our admin page will look like after installing the components I mentioned above:
How to Protect Your Vue Router
We have created our authentication page and admin page. Currently, the admin page is accessible like other pages, but we want to protect the admin page route from unauthenticated users. To do that, we will go to our index.js file in the “router” folder and add the code below in our “Admin route.”
A meta field is used to specify certain requirements for a route.
meta: {
      requiresAuth: true,
    },
The first step is for us to add a meta field in our route object (Admin) since it is the route that requires authentication:
{
    path: "/admin",
    name: "Admin",
    component: Admin,
    meta: {
      requiresAuth: true,
    },
  },
Output:
We have access to the homepage and registration page, but we no longer have access to the admin page. This results from the meta field tag requiring us to be authenticated before accessing the route.
Next, we will create a route guard function that checks for the “requiresAuth” property in the route’s meta field and prevents unauthorized access to the route:
router.beforeEach((to, from, next) => {
  if (to.meta.requiresAuth) {
    next("login");
  } else {
    next();
  }
});
We created a function that checks for a route that requires authentication. When a user tries to access the protected route without being authenticated, the user will be redirected to the login page. Let’s see an example below.
Conclusion
In conclusion, protecting your Vue router is important to ensure the security of your application and its users. We have learned how to protect our Vue Route in this article. You can check out the full code on GitHub.

Ezekiel Lawson
Ezekiel Lawson is a technical writer and software developer. Aside from building web tools and applications, he enjoys educating people and simplifying complicated issues for their easy understanding by sharing resources that will guide developers through technical writing.
Related Posts
Comments
All articles
Topics

Latest Stories
in Your Inbox
Subscribe to be the first to get our expert-written articles and tutorials for developers!
All fields are required