Telerik blogs

Overview

Ever wondered if there was a way a file upload could be done in your application without writing a single line of code. As a web programmer for 12 years, I have always wondered this myself. I would like to let a control know where it needs to upload and it should do the rest for me. I am happy to say that today that thought of mine is possible with Telerik’s Cloud Upload for ASP.NET AJAX. In this blog post we will see how you can upload files to your Windows Azure Storage BLOBs without writing a single line of code.

About Cloud Upload for ASP.NET AJAX

RadCloudUpload is an ASP.NET AJAX control that provides you and your application the ability to upload files directly to your cloud providers. With the 2013 Q3 release, we support – Amazon S3, Azure Blob Storage and Everlive (Telerik’s Backend as a Service). On modern browsers, the control makes use of the File API and falls back to an IFrame upload module on older browsers. Some of the key features of the control are:

  • Multiple File Selection
  • Validation
  • Progress Monitoring
  • Large file uploading
  • Localization
  • Customization etc.

In rest of the sections, we will see how to use RadCloudUpload with a Windows Azure Storage account.

Setting up Windows Storage Account

In this section, we will see how to set up a storage account on Windows Azure. I am assuming that you have a Windows Azure account, if not you can register for a trial account and follow along.
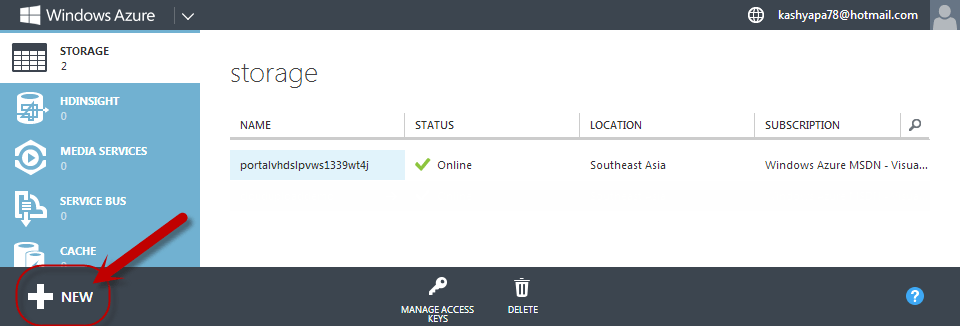
First thing to do is to log in to your azure management portal at http://manage.windowsazure.com. After logging in, click on the “New” button available at bottom left hand corner of the page.


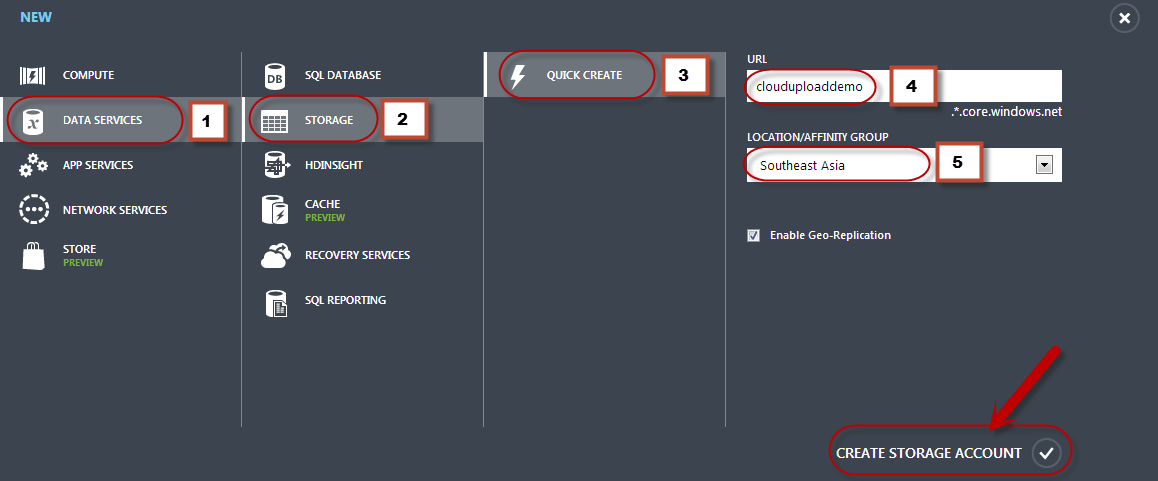
You will be presented with a new item dialog. Select Data Service > Storage > Quick Create. Enter a name for your storage account and select which location you want the account to be created. You can optionally enable the Geo Replication feature. Once you have completed the form, click on Create Storage Account.


Azure will go ahead and provision your account.
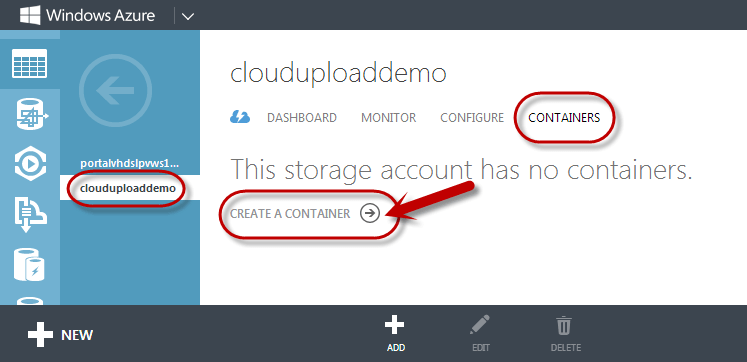
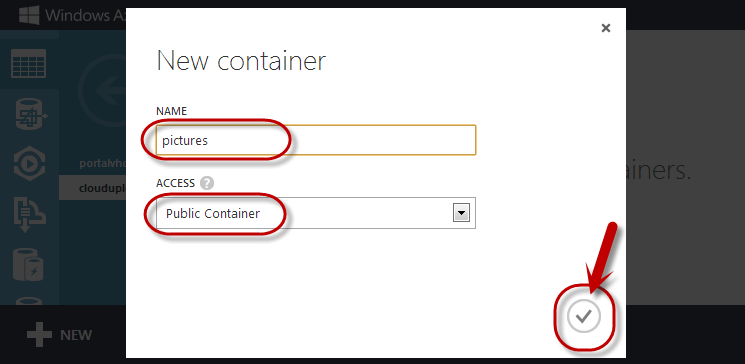
Once your storage account is created, navigate to the storage account and access the Containers tab. We will create a container to hold our files. I will name my container pictures for this demo. The idea is to upload and save pictures as blobs in my storage container.


Write down the container name you have assigned, as we will need this to set up the RadCloudControl in our application.

Identifying Azure Storage Account Name and Key

For the RadCloudUpload control to work – it needs three things. Namely:

  • Storage Account Name
  • Storage Account Key
  • Storage Container Name

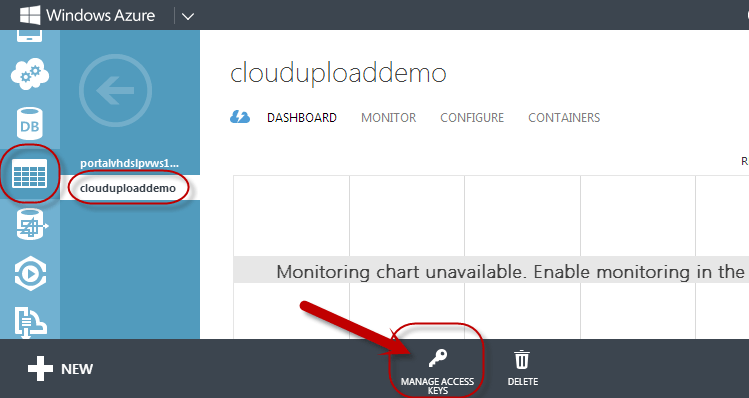
In your azure management portal, navigate to your storage account that we created in the previous section. Bottom of the page you should see a link which says “Manage Access Keys” – click on that link.


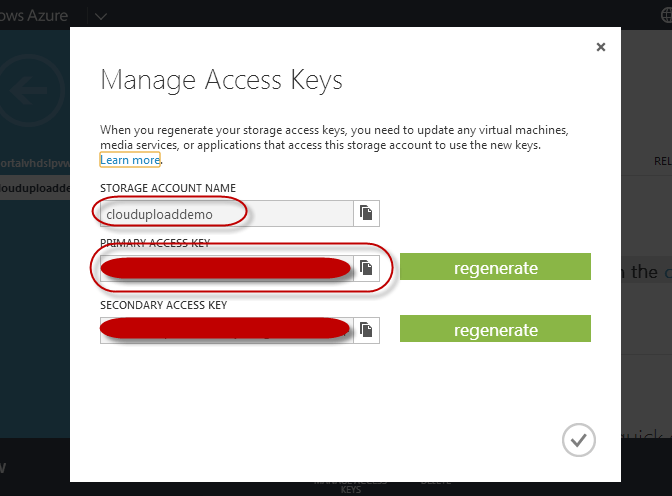
You will be presented with the Manage Access keys dialog. From this dialog write down the Storage Account Name and Primary Access Key. Secondary Access key is also provided if you want to share the account to your 3rd party associates.


Next, we see the RadCloudUpload in action.

Create a Web Application

I am using Visual Studio 2013 as our RadControls are VS2013 compliant. However, you can also do this with 2012. Fire up a VS and select File > New Project. In web templates select “RadControls Web Application”, give it a name & location and click Ok. Visual Studio will spin up the new project with a default.aspx already added to the project. We will use this page for the demo.

Adding Azure Storage Client Library

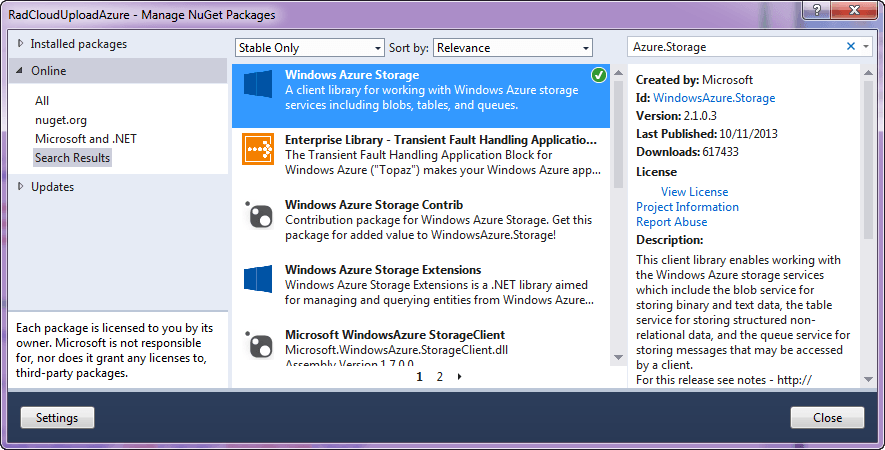
In order for the RadCloudUpload to work with Azure Storage, it needs Azure Storage Client Libraries. You can get those from NuGet. Right click on References node in Solution explorer and select Manage NuGet Packges. In the NuGet Package Manager, search for “WindowsAzure.Storage” and add the package to the application. The package will install 2 dlls – Microsoft.WindowsAzure.StorgaeClient.dll and Microsoft.WindowsAzure.Configuration.dll. For this demo we don’t need the Configuration assembly. Therefore, we can remove its reference.


Using the Cloud Upload control

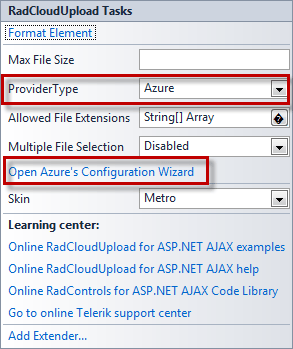
From the toolbox drag and drop RadCloudUpload control on to Default.aspx page. Access the smart tag of the control and choose Azure as the provider type. Then click on the “Open Azure’s Configuration Wizard”.


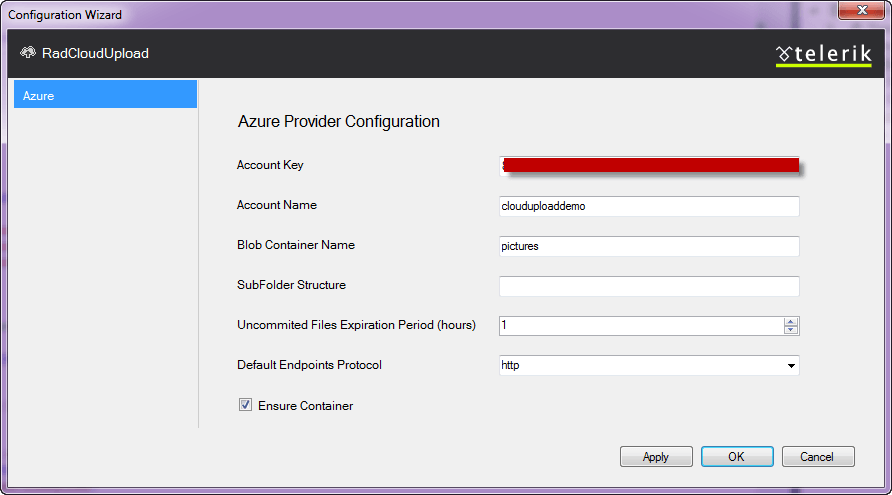
In Configuration Wizard dialog enter Azure Storage Account Key, Storage Account Name and the Storage Blob Container Name. In this demo the Account Name is clouduploaddemo and container name is pictures.


Specifying the Uncommitted Files Expiration Period (hours), you could easily configure the time, after which the unprocessed files will be removed from the storage.

When Ensure Container is checked, the control will create a new Container if it does not exist. In the scenario where it is not checked and the Container does not exists - an exception will be thrown.

Here is the mark up that is generated:

<telerik:RadCloudUpload ID="RadCloudUpload1"
runat="server" ProviderType="Azure" Skin="Metro" />

This will add the following configuration setting in the web.config file:

<telerik.web.ui>
    <radCloudUpload>
      <storageProviders>
        <add name="Azure" type="Telerik.Web.UI.AzureProvider" accountKey="<YOUR ACCOUNT KEY>" accountName="clouduploaddemo" blobContainer="pictures" ensureContainer="true" uncommitedFilesExpirationPeriod="1" defaultEndpointsProtocol="" />
      </storageProviders>
    </radCloudUpload>
  </telerik.web.ui>

RadCloudUpload in Action

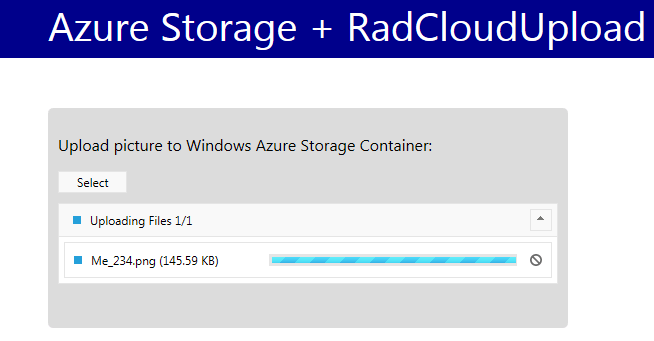
We are all set now. Just run the application. You will see a select button. Click on the select button to select a file. As soon as a file is selected, the upload will start. Here is the snapshot of file being uploaded:


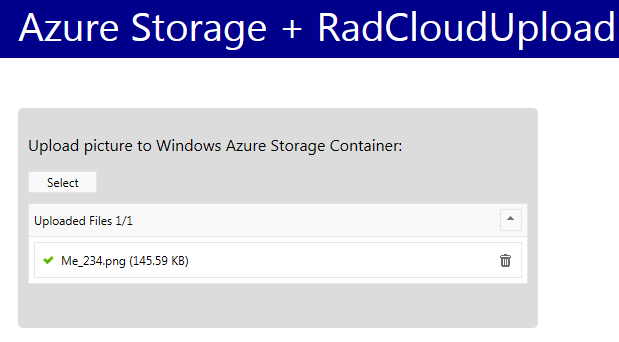
Here is the snapshot of file upload being finished:


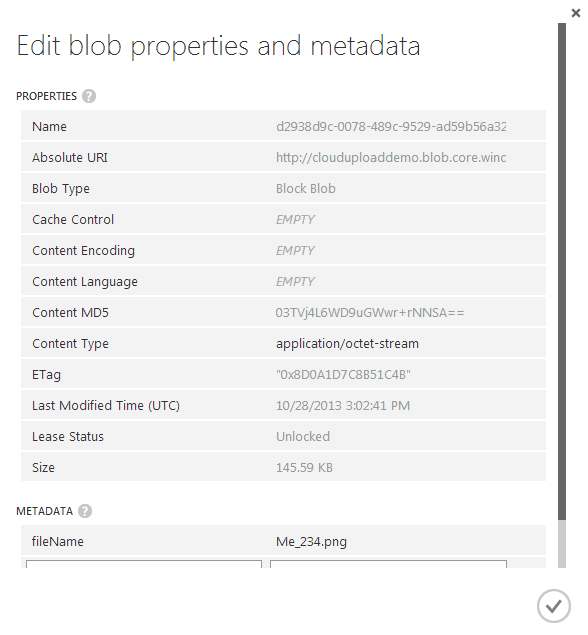
Here is the blob container meta data properties of the file we uploaded:

Conclusion

As you have seen in the post, I did not write even a single line of code. Apart from dragging and dropping the control on to the page, the rest of the things were just settings. Codeless file uploading is a reality with Telerik’s Cloud Upload for ASP.NET AJAX. Check out more demos of Cloud Upload at http://demos.telerik.com/aspnet-ajax/cloud-upload/examples/overview/defaultcs.aspx

About the Author

Lohith Goudagere Nagaraj

is a Microsoft MVP in ASP.NET and a Developer Evangelist for Telerik in India. He has a decade of experience building web applications and is well versed with the Web Forms and MVC models of web development. You can get more information from Lohith on Twitter by following @kashyapa.Google Profile

Related Posts

Comments

Comments are disabled in preview mode.