# Test Studio Tests and Azure DevOps Build Pipeline
Test Studio tests can be successfully integrated for execution with the Azure DevOps Build pipelines. Below you can read details for the prerequisites and necessary configurations to apply.
## Environmental Prerequisites
The build machine can be any virtual or physical machine to host the Test Studio Runner. Please refer to the system requirements for the required machine configuration.
The components to be installed on the machine:
* **Test Studio Run-time Edition** (ArtOfTest.Runner.exe must be available): **mandatory**
* **Internet Browser** (IE latest, Chrome latest and Firefox latest, Edge latest): **mandatory**
* **Visual Studio 2019 Professional**: optional, required only for additional functions like build tasks and other non-directly related to running tests with Test Studio
## Configuring the Azure DevOps Build Pipeline
Below are listed the steps to configure the build pipeline in Azure DevOps.
### Create a new project in Azure DevOps
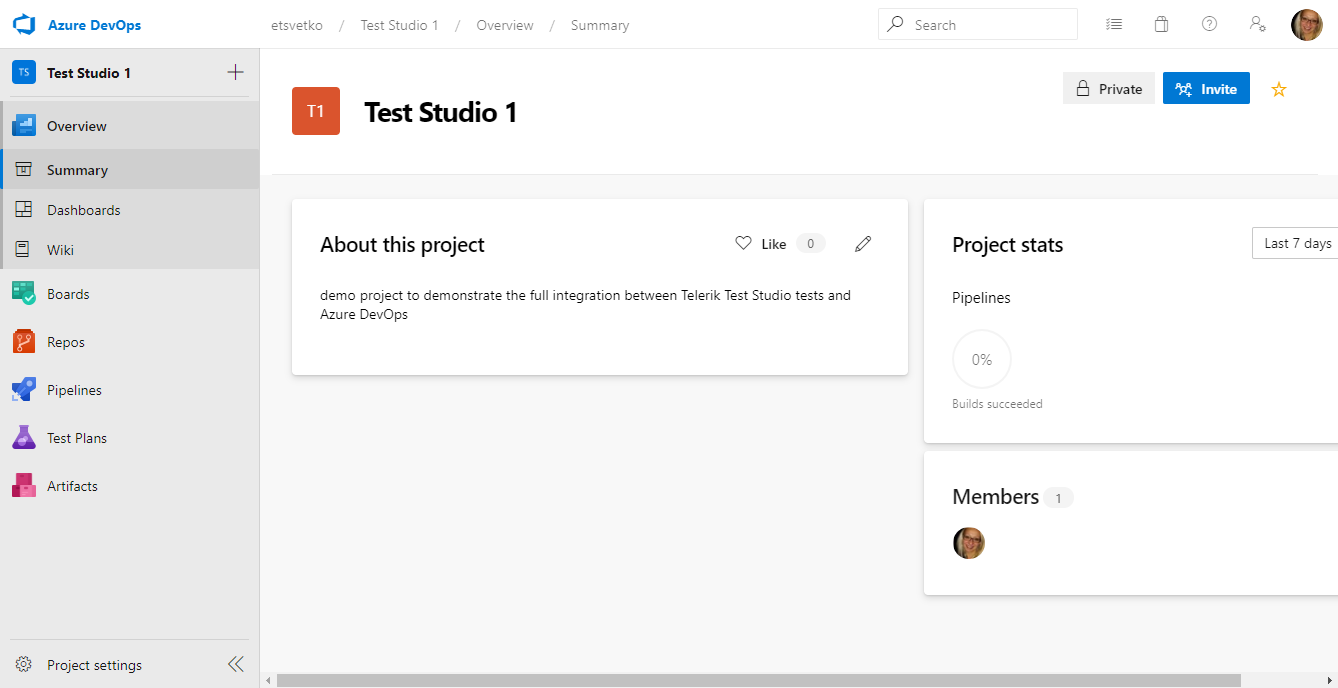
Start with creating a new project in Azure. The one used in this example is named *Test Studio 1*.
### Create a Self-hosted Agent
Depending on whether tests should be running as a part of the app under test deployment to Live/Test environments or as part of daily builds there are **two types of agents**. If tests are supposed to run as a part of the release, the agent executing the tests should be registered in a Deployment group. If tests are supposed to run on demand after each build of the source code, the agent executing the tests should be registered to an Agent pool.
The tests should be run using self-hosted Windows agents in order to be able to use the corresponding Test Studio installation.
To create such agent, follow the steps listed below
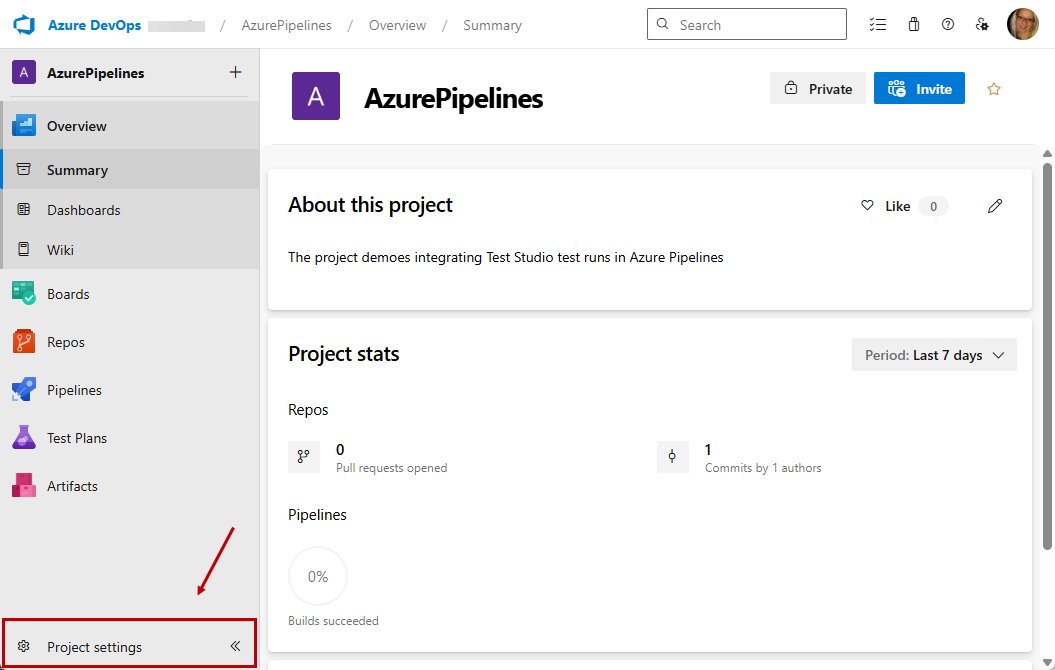
1. Open the current **Project settings**.
2. Click on **Pipelines -> Agent Pools**.
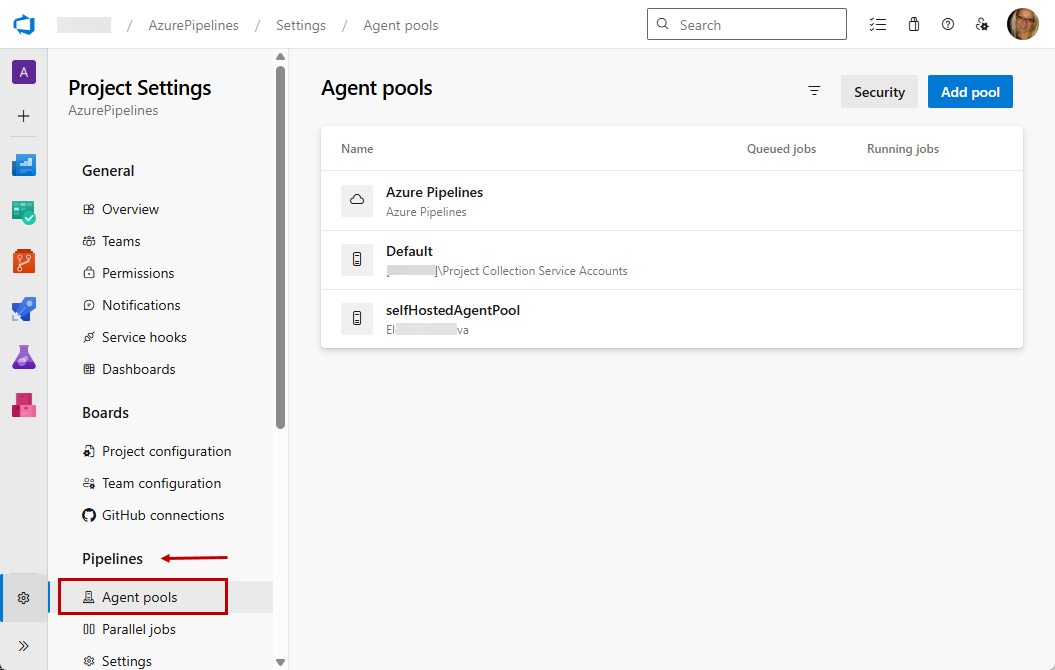
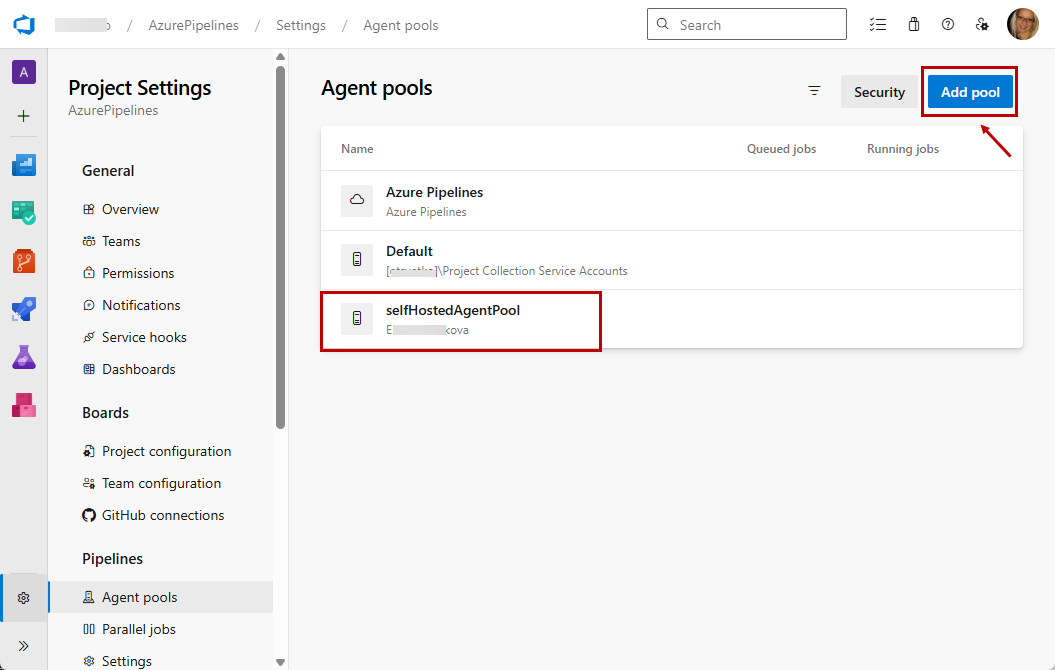
3. Add a new pool or open the default one.
4. Click **New Agent**,
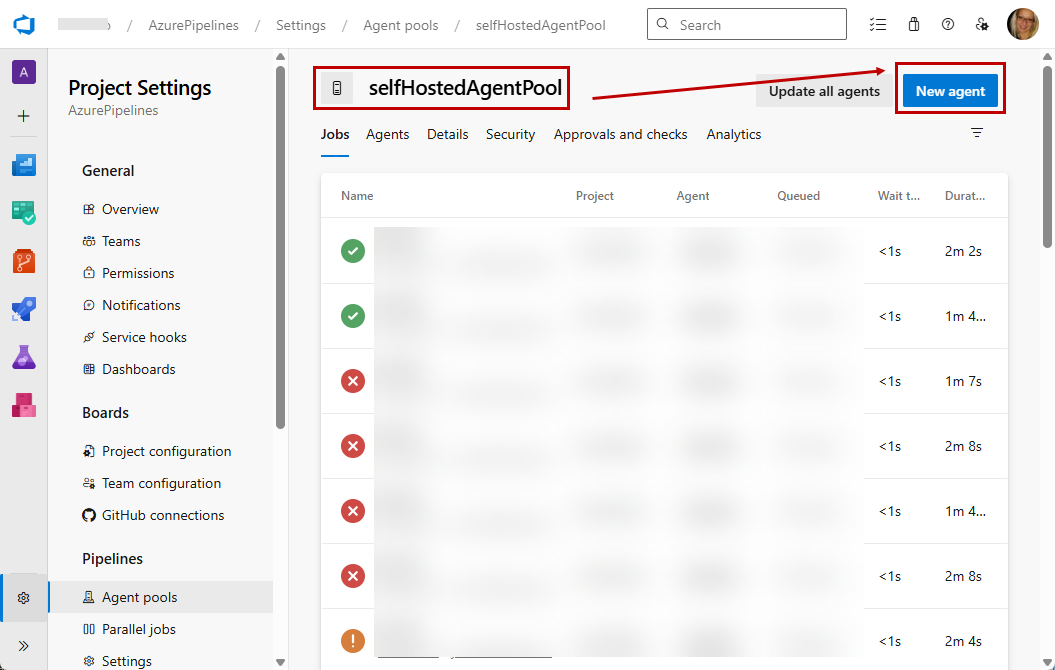
5. Download the Agent to the corresponding physical or virtual machine as per the installation requirements above.
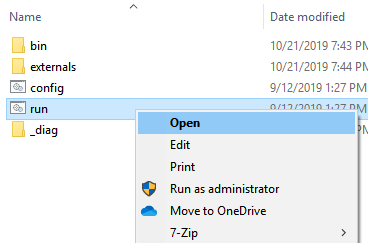
6. Extract the Agent and run as Administrator.
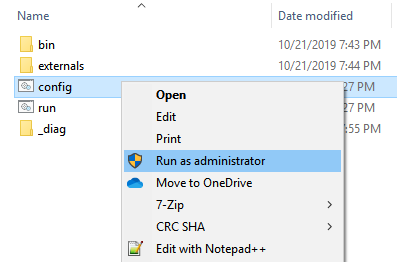
> **Note** In order to avoid any permissions issues, please make sure that the user configuring the Agent is part of the following Permission Groups: Build Administrators, Release Administrators, Project Administrators, **ProjectName** Team.
### Configure a Self-hosted Agent
1. Enter server URL: i.e. .
2. Create Personal Access Token (PAT) as described here and save it.
3. Choose PAT for authentication type and paste yours.
4. Choose the Agent pool you created earlier.
5. Choose Agent name, the default name is the machine name on which it is hosted.
6. Choose a work folder or press enter for the default one \_work sub-folder.
7. Select N when asked to enter agent as a service.
8. Enter configure autologon and run agent on startup Y/N is optional.
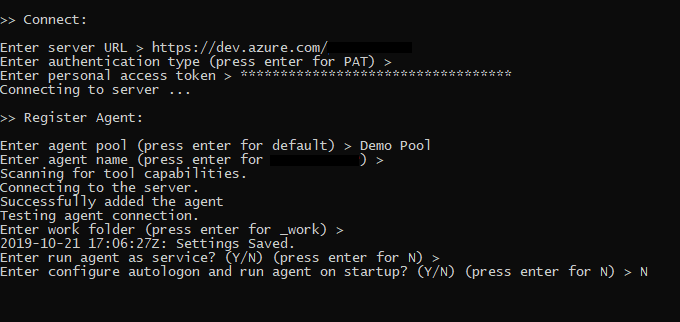
9. Upon successful configuration the config console will close, so execute run.cmd in console to trigger the Agent.
### Run Tests on Agent
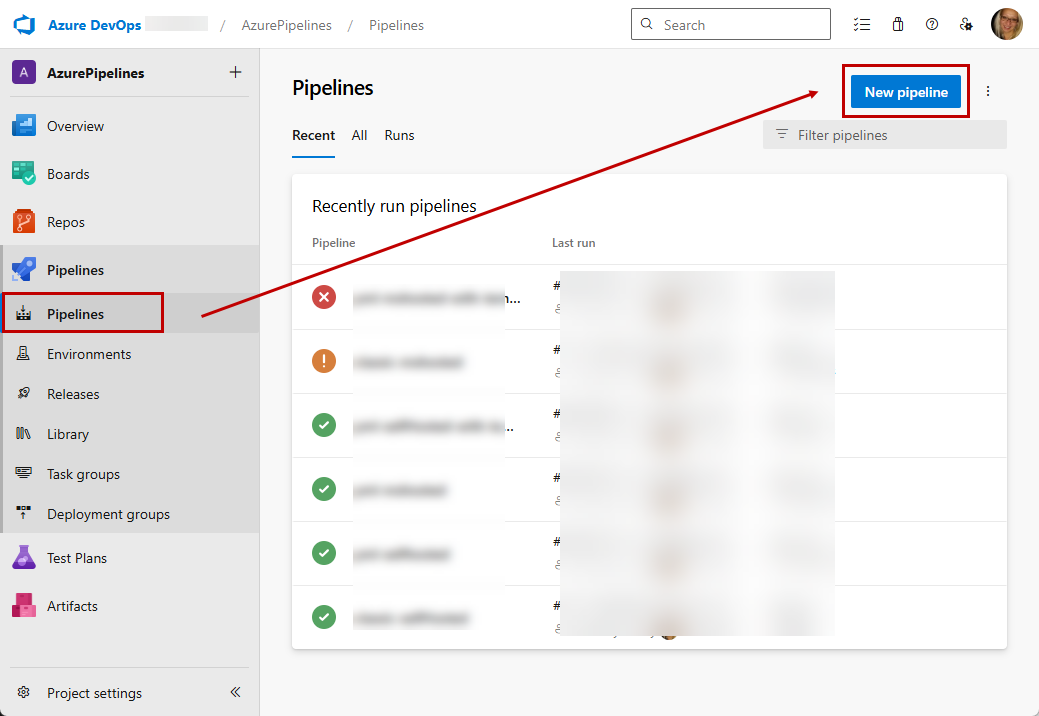
1. Go to **Pipelines >> Builds >> Create new**.
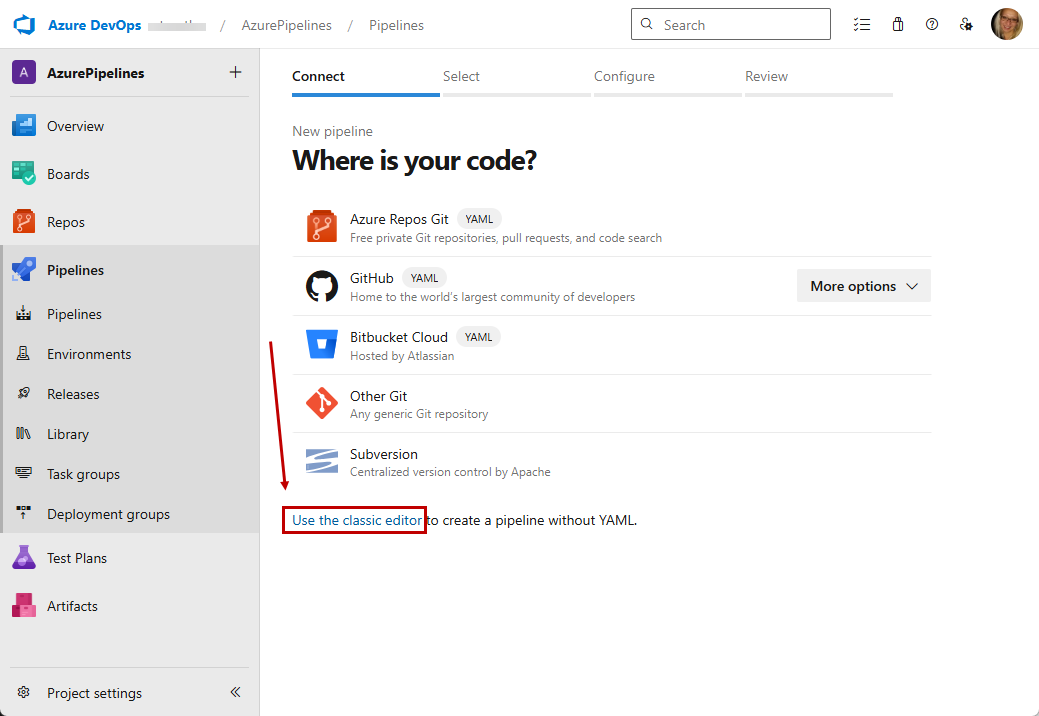
2. For this setup choose the option to **Use the classic editor**.
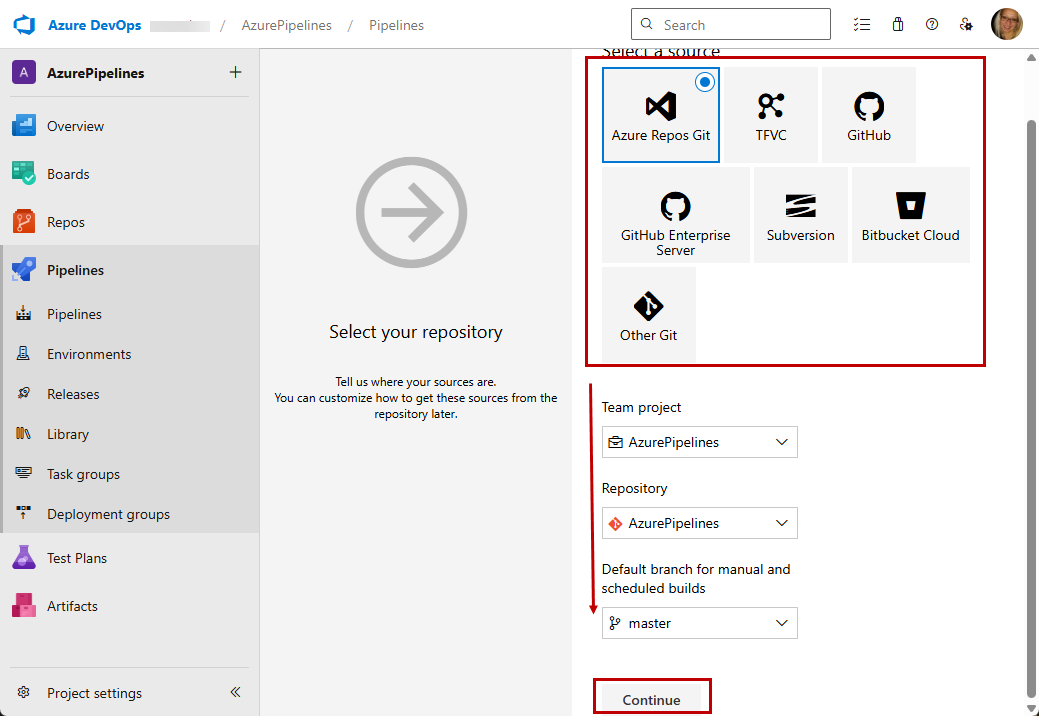
3. Choose the repository where your code is and click **Continue**.
4. Choose **Empty job** as a template for the build
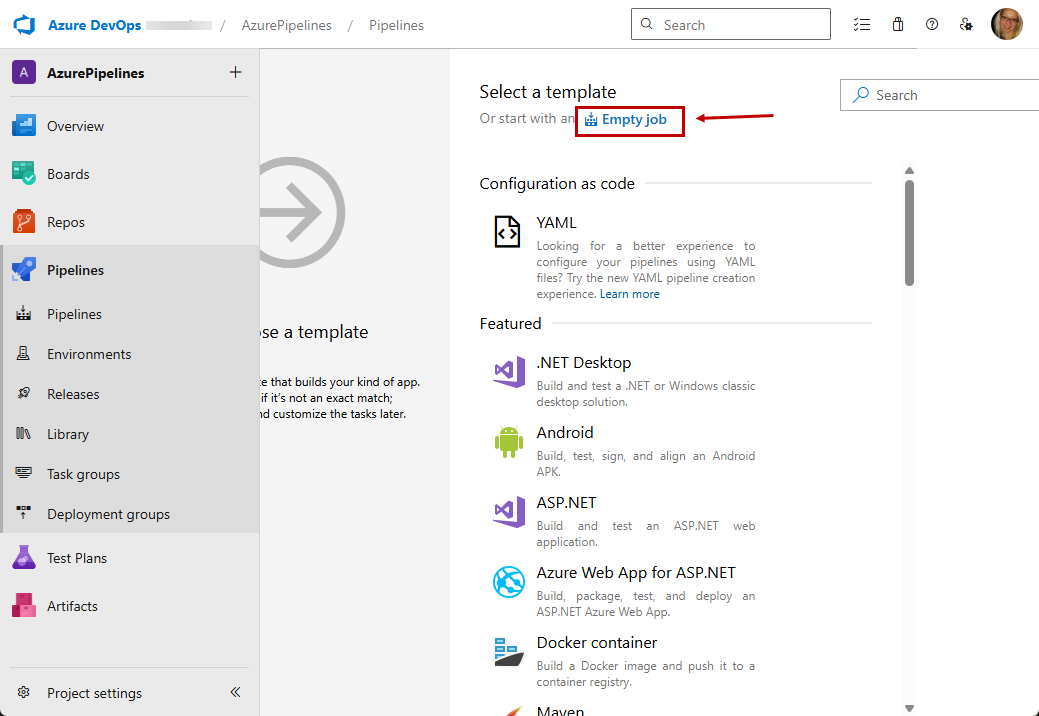
5. Select a pipeline and choose the Agent pool configured earlier.
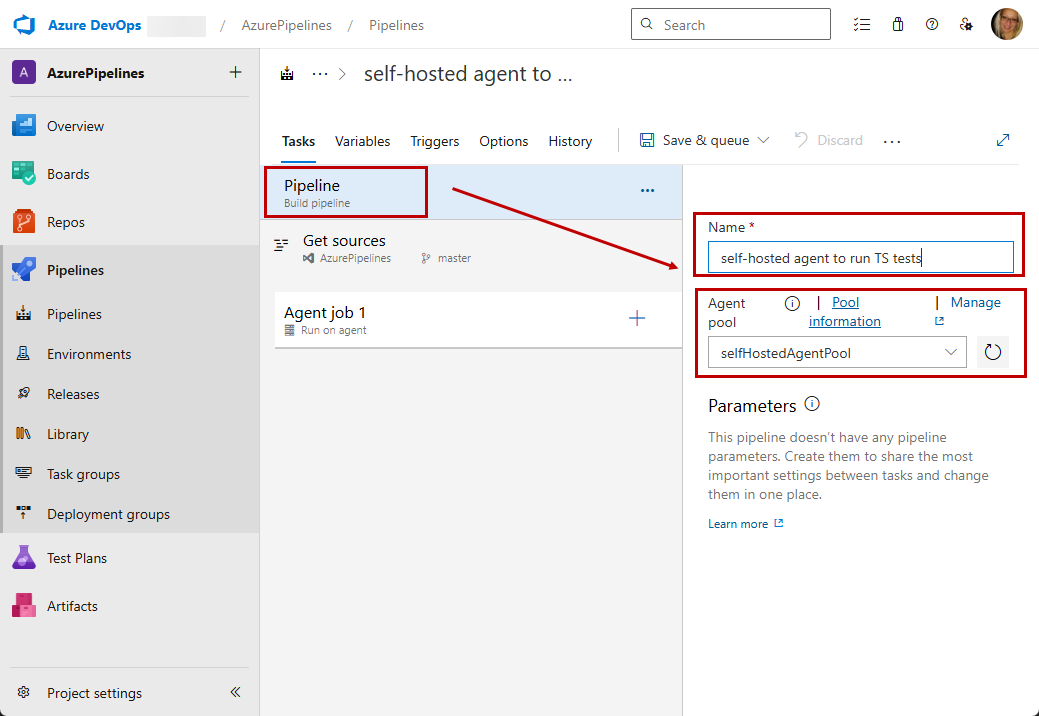
6. Create a new task on the **Agent -> Utility -> Command line**.
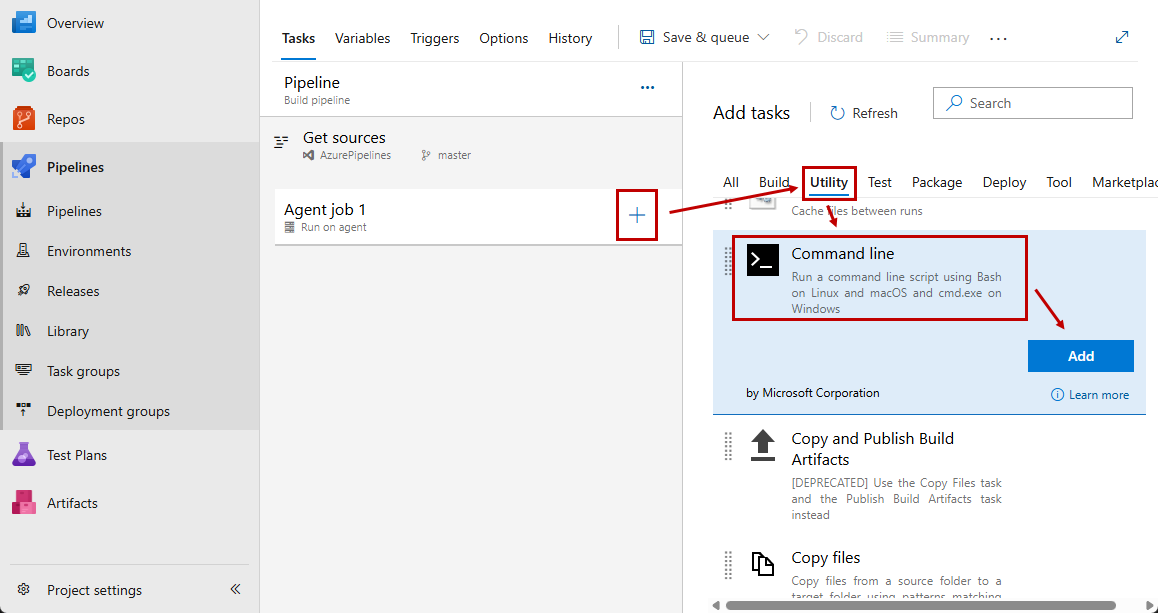
7. Insert a command which triggers the test execution via the Test Studio CLI Runner called ArtOfTest.Runner.exe - see the CLI runner syntax options here.
> **Note!** The **Publish results** task in the Azure pipeline supports reading results in *junit* format. Test Studio CLI runner provides the option to automatically output the results in that format, so if you intend to use that task **make sure you add the *junit* option in the command**.
The below example executes a test list.
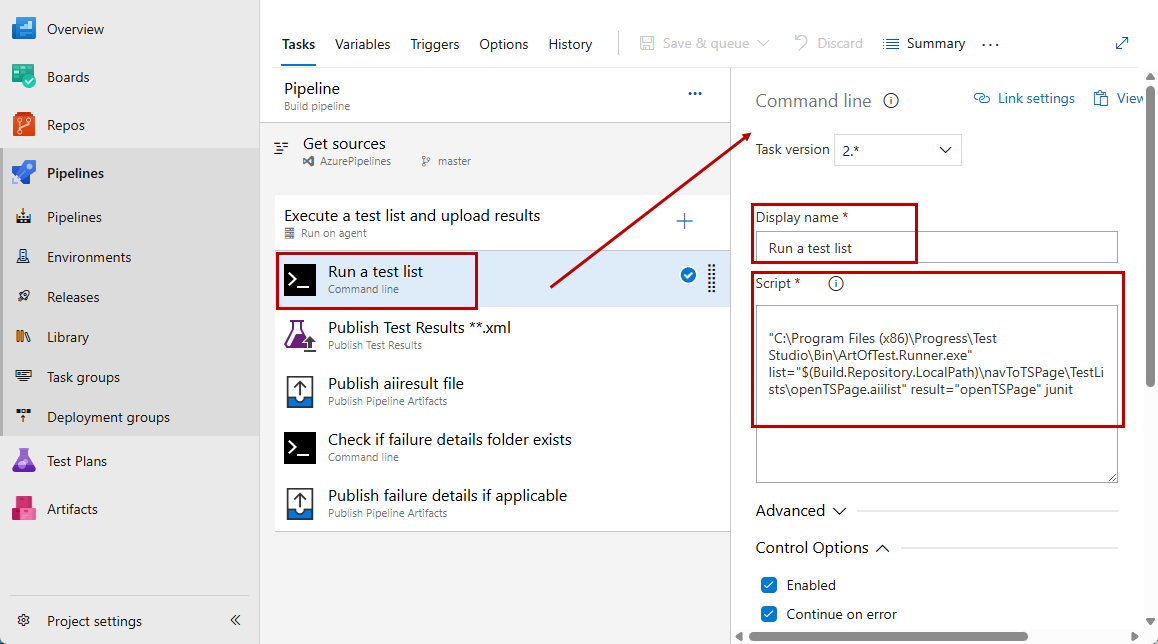
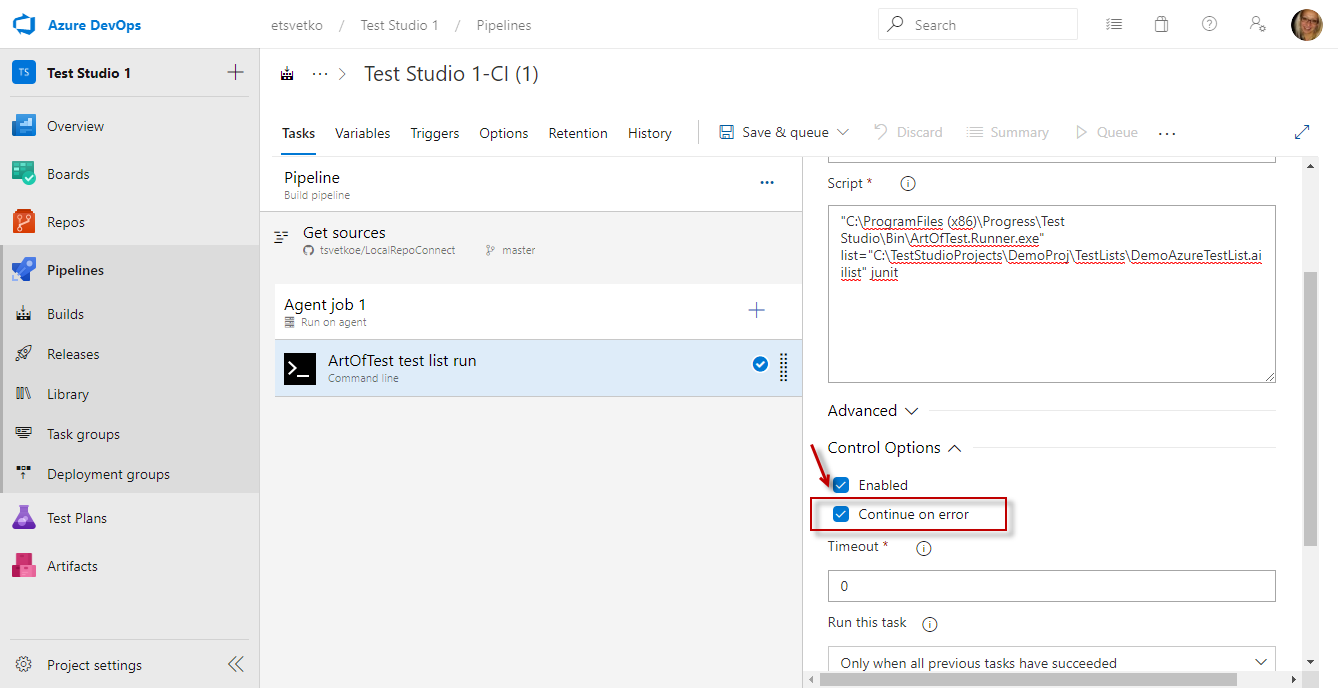
8. Select **Continue on error** from the Command line script **Control Options**, if you’d like to complete a results' upload task (see next point) even if the test execution task fails.
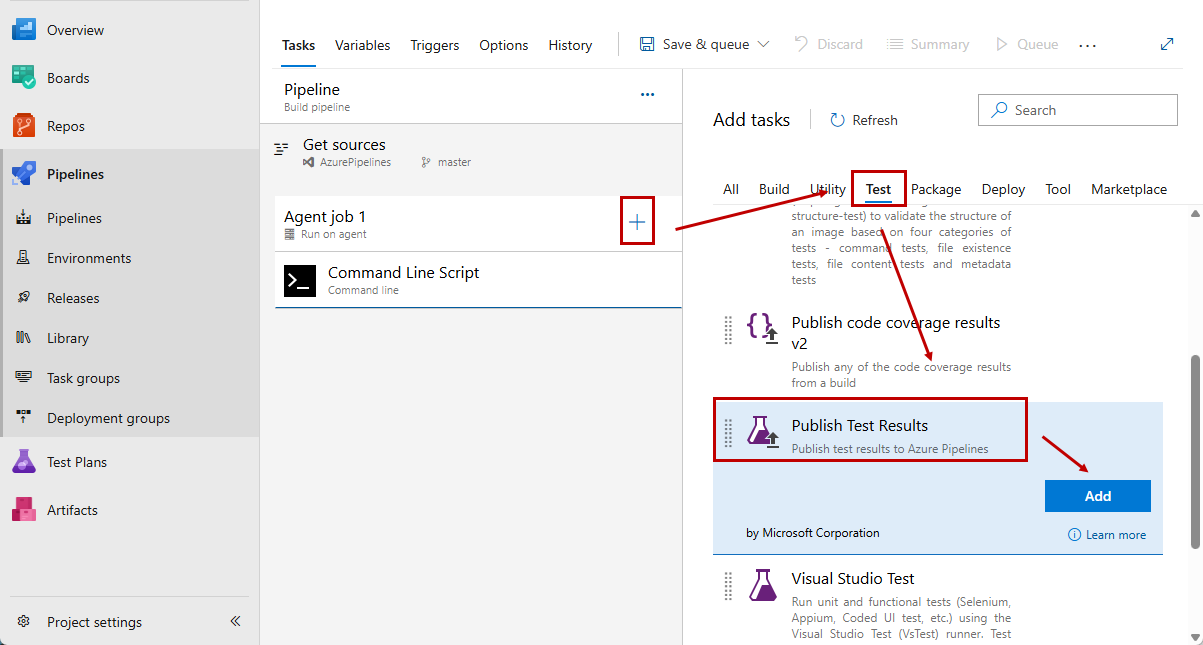
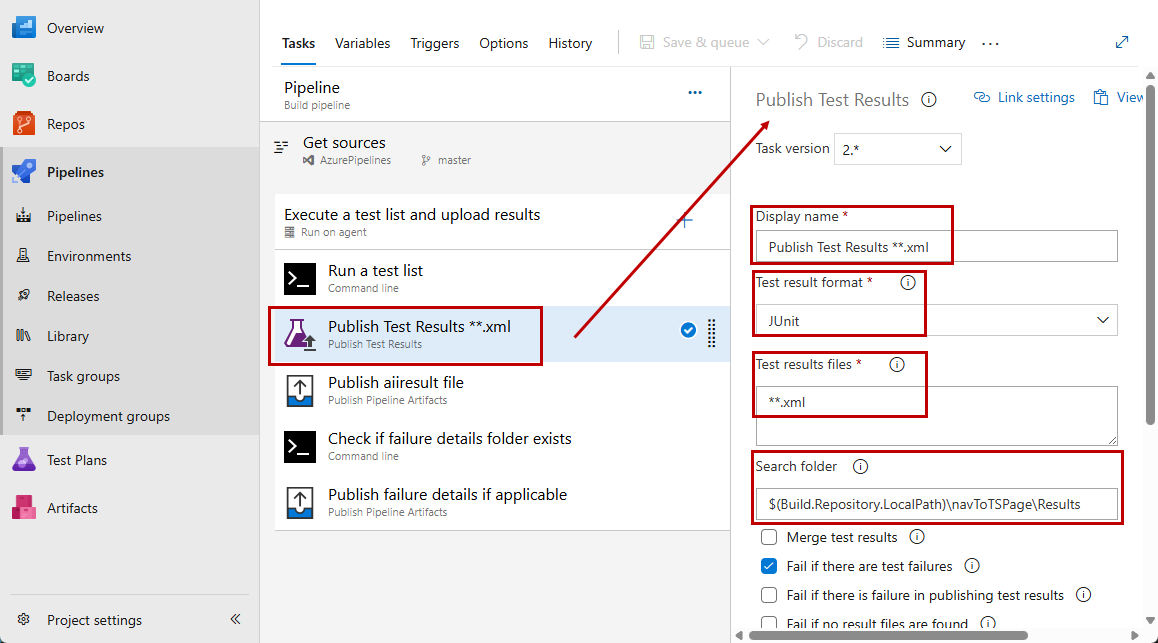
9. To add a **Publish Test Result** task, select the folder to which the test results are deployed and choose to upload all .xml files \*\*.xml for file search for example.
Something to consider here is whether results are piled together in this folder, if that’s the case there may be a need to make sure the results folder is empty before each run. If the folder is part of the build folders managed by the Azure agent, then this is not a concern because they are recreated for each run.
### Results from Test Execution
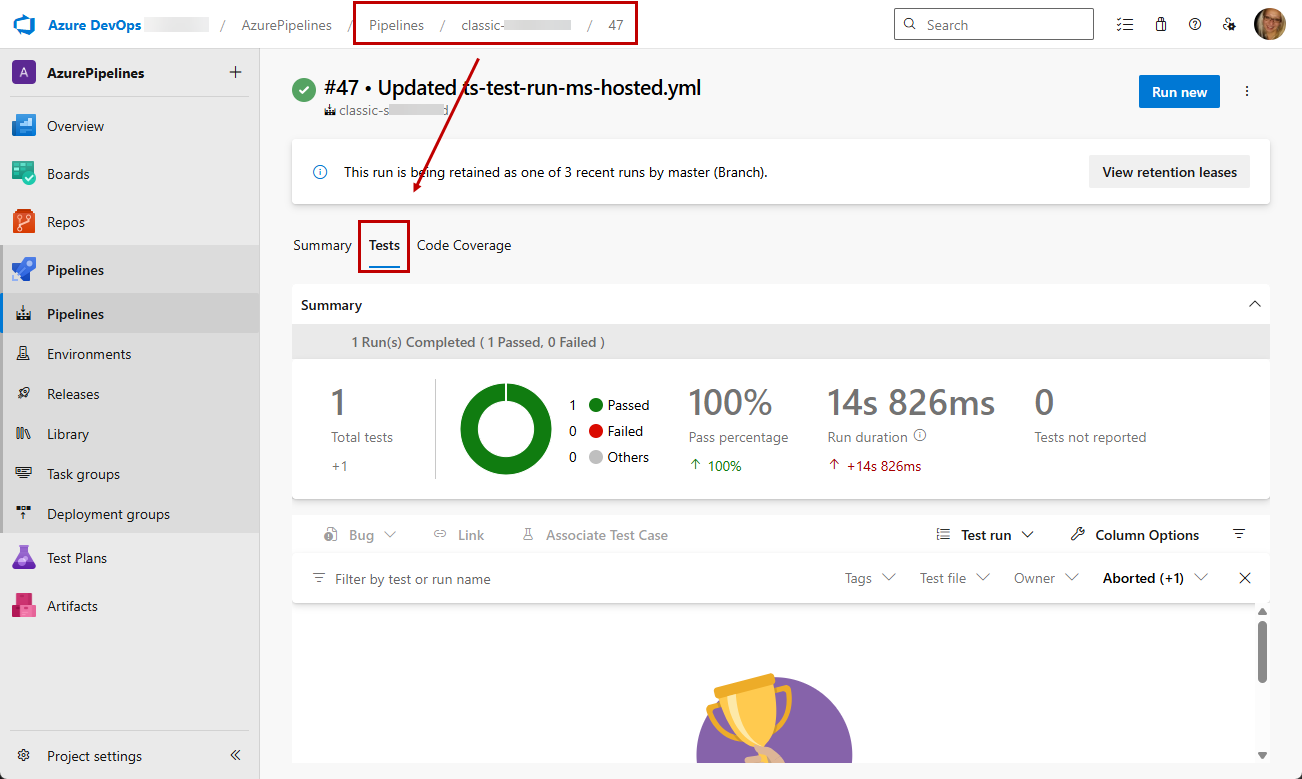
Once the test run finishes, you can see the results in the **Test** tab.