
Create a WebAssembly App with Blazor + Google Authorization

In this article, I’ll guide you in creating a Blazor WebAssembly app with a login that uses Blazor’s native security and a Google account.
The new template has integrated security and is EXTREMELY easy to set up. Following this guide, you will have your app using Blazor and Google Account in less than an hour.
Start with Your Blazor App
1. Create a New Blazor App with Visual Studio Interface
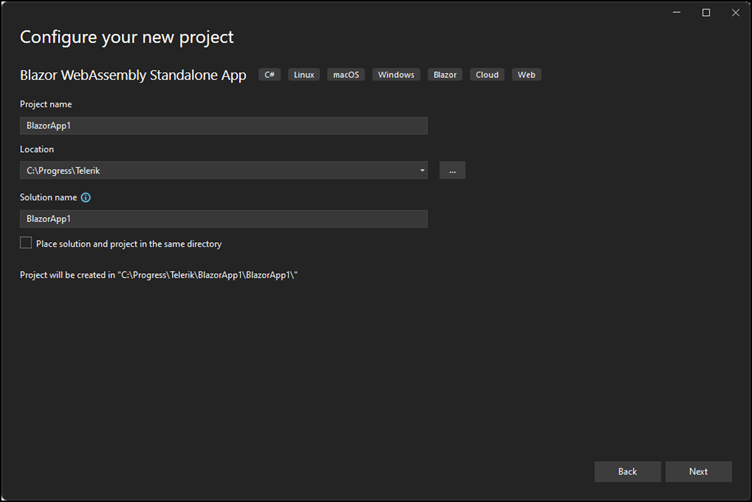
Start Visual Studio 2022 and start a new solution called Blazor WebAssembly Standalone App. See the image below.

2. Select the Desired Path to Store Your Project
Save your project in your favorite place on your device.
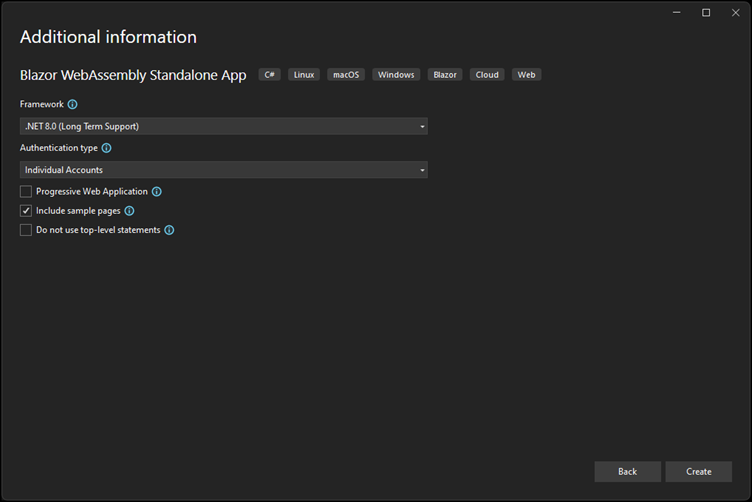
3. Select the Authentication Type Individual Accounts
Select the Authentication type option to choose how the template will work. I used the Individual Accounts type in this sample and decided to include sample pages.
Set Up Google Console
1. Create Your Google Account
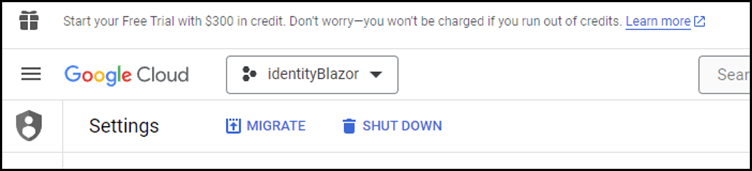
You’ll need to create a Google Account if you don’t have one yet and access https://console.cloud.google.com/ to create your application settings.
Now, you must configure your application/web app on the Google Console and register your URL to work with the Blazor authentication.
2. Create a New Project
Click on the list button and choose “New Project.” Now, you create the project and start the new app.
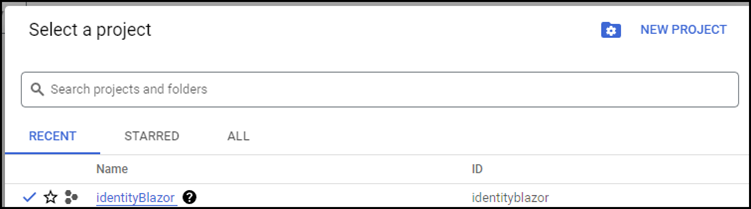
3. Name Your Project
Create your project name as the world will know it. After naming it, you will not be able to change it again. There is no need to have an organization.
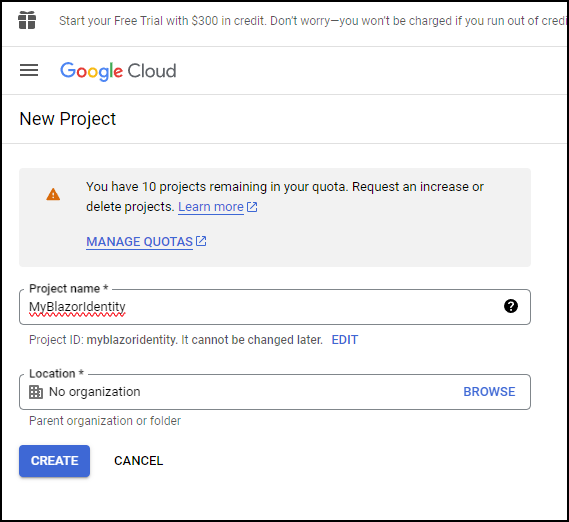
*To capture the images, I merged them with my published demo (IdentityBlazor) and the new one (MyBlazorIdentity), for this article.
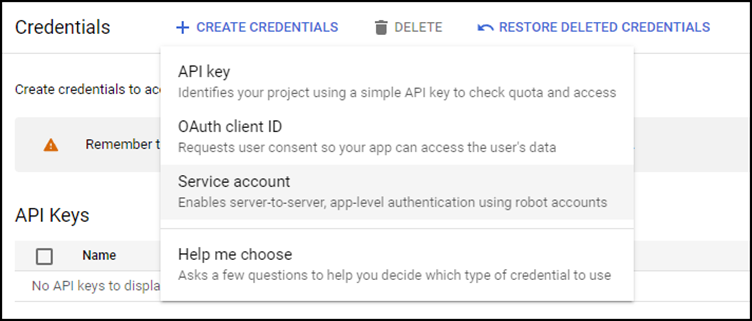
4. Create the API Key
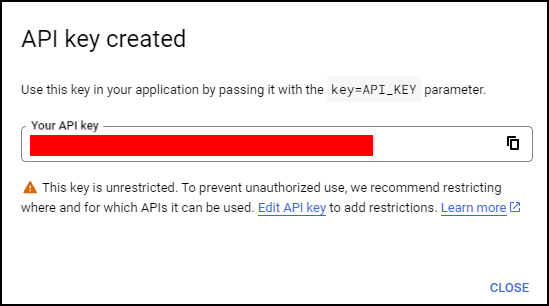
Create the API Key that you will set on the Blazor code using the menu “+ Create Credentials.”
Save the API Key securely on your device.
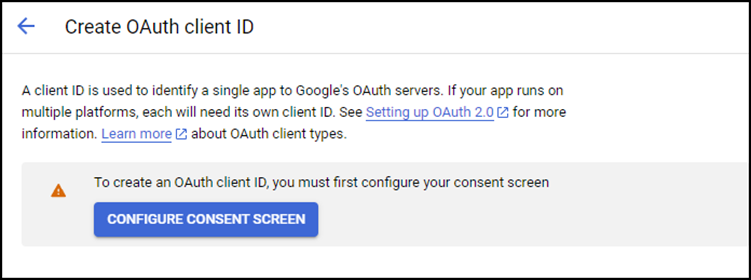
5. Create an OAuth Client ID
Now, you need to create the OAuth client ID for your project. In the same menu, “+ Create Credentials,” choose the second option:
Click on Configure Consent Screen to set up the URLs for privacy and terms of use.
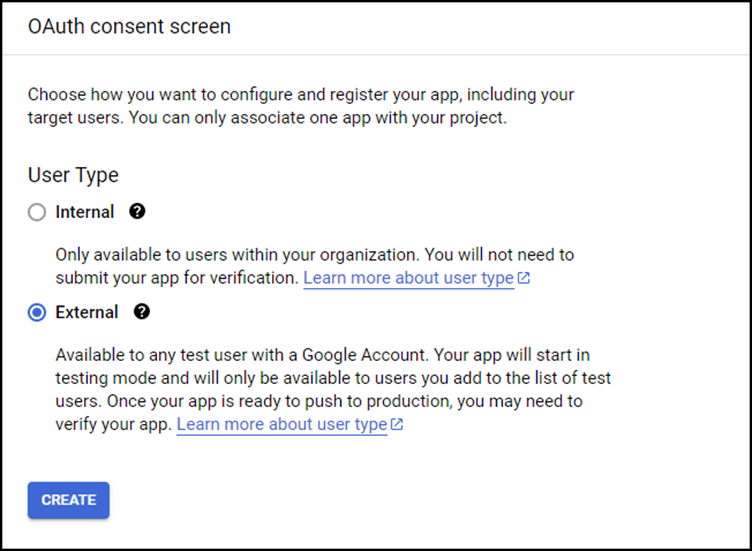
6. Set Users to External
If you are not an organization, you must use External so all Google users can log in to your app.
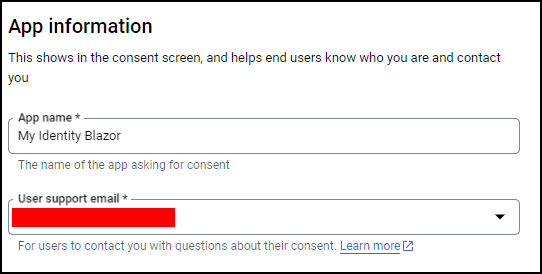
7. Fill in the Information About Your Application
Now, fill in the app name and email address supporting your application.
Add your app logo:
![]()
Register the URLs according to their types of application, privacy policy and terms.
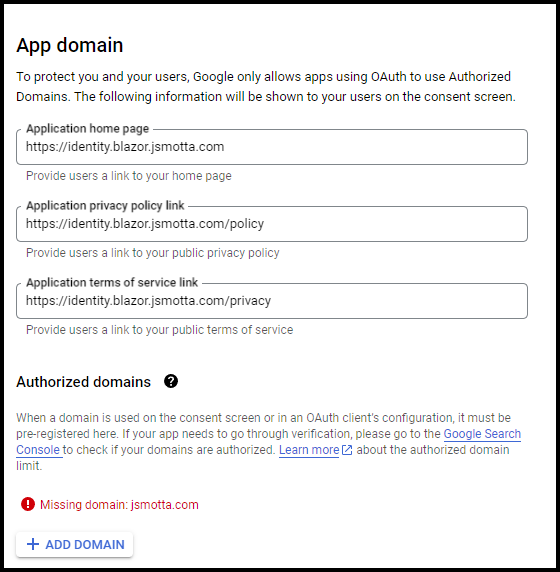
Note: Your domain must be recognized in the Google Console with the DNS TXT configuration enabled. Follow the Google Search Console to help do it. If you are using CloudFlare, it is easier.
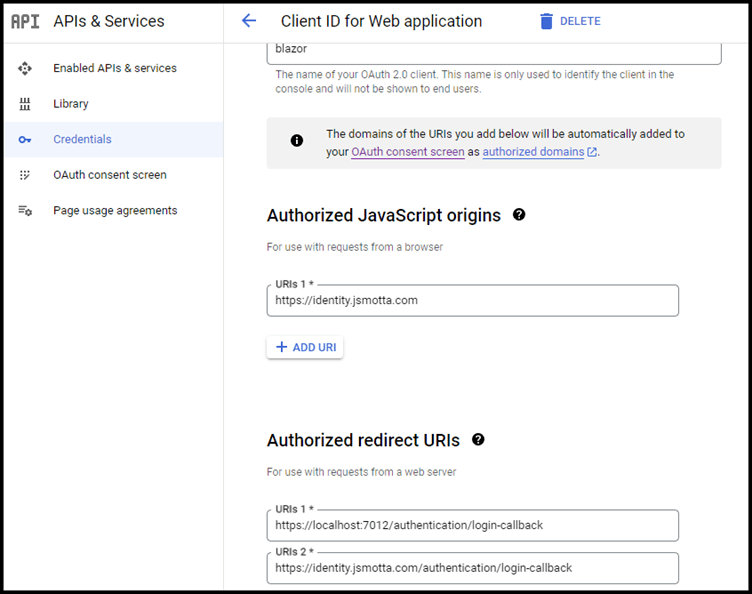
8. Authorize the URLs to Redirect URIs
You need to configure your local host to test on your developer device.
The URL for localhost use is necessary. Otherwise, you will face an error when logging in with Google Account.
Now, Let’s Finish Setting Up the Project
Now is the Blazor part where you need to add your Client ID, and get this information from Google Console.
Start configuring the Program.cs with your Client ID. You will find it on the Credentials Google Console page:
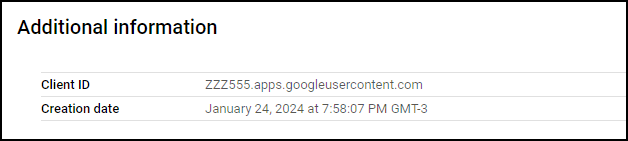
Add it to the ProviderOptions.ClientId and set the Authority to Google Accounts:
1.	builder.Services.AddOidcAuthentication(options =>
2.	{
3.	    options.ProviderOptions.Authority = "https://accounts.google.com/";
4.	    options.ProviderOptions.ClientId = "ZZZ555.apps.googleusercontent.com";
5.	    options.ProviderOptions.ResponseType = "id_token";
6.	    options.ProviderOptions.DefaultScopes.Add("openid");
7.	    options.ProviderOptions.DefaultScopes.Add("profile");
8.	});
WOW! IT’S DONE!
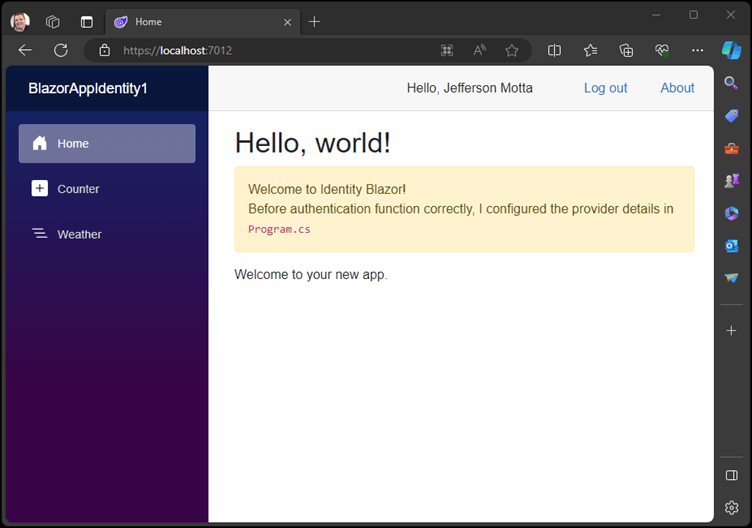
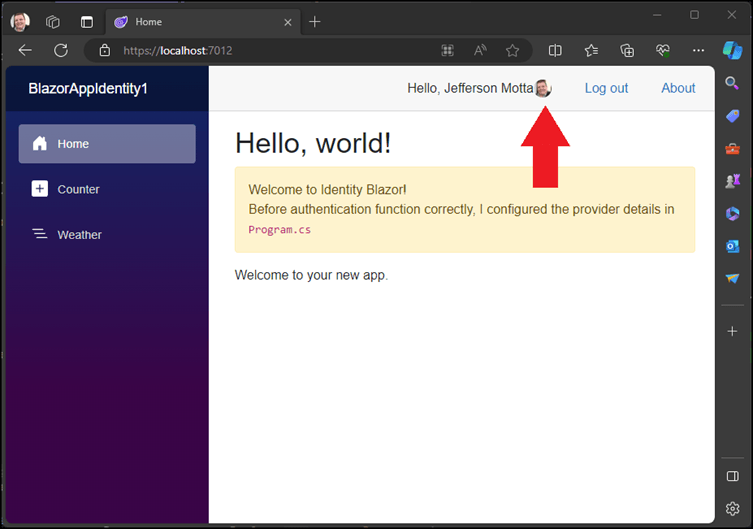
Now to customize the template showing the user picture on the screen.
For this purpose, you’ll need to store it in the local browser. I’m using Blazored Local Storage. Add it from the NuGet package:

On Program.cs, add the service reference:
1. builder.Services.AddBlazoredLocalStorage();
Replace the code for Authentication.razor:
- Add the Blazored.LocalStorage, used to store the key value for URL Google Account picture.
- Alter then RemoteAuthenticatorView to read OnLogInSucceeded and OnLogOutSucceeded.
- Add the CascadingParameter.
- Add the HandleLoginSucceeded to read the UID and the picture from the Google Account.
- Add the HandleLogOutSucceeded to clear the cache.
1.	@page "/authentication/{action}"
2.	@using Microsoft.AspNetCore.Components.WebAssembly.Authentication
3.	@using Blazored.LocalStorage
4.	@inject ILocalStorageService localStorage
5.
6.	<RemoteAuthenticatorView Action="@Action" OnLogOutSucceeded="HandleLogOutSucceeded" OnLogInSucceeded="HandleLoginSucceeded" />
7.
8.	@code {
9.
10.	    [Parameter] public string? Action { get; set; }
11.
12.	    [CascadingParameter]
13.	    private Task<AuthenticationState> authenticationStateTask { get; set; }
14.
15.	    private async Task HandleLogOutSucceeded(RemoteAuthenticationState arg)
16.	    {
17.	       await localStorage.ClearAsync();
18.	    }
19.
20.	    private async Task HandleLoginSucceeded(RemoteAuthenticationState arg)
21.	    {
22.	        var authState = await authenticationStateTask;
23.	        var user = authState.User;
24.	        var img = user.FindFirst("picture")?.Value;
25.	        var uid = user.FindFirst("sub")?.Value; // UID of the Google Account
26.
27.	        await localStorage.SetItemAsStringAsync("userImg", img);
28.	    }
29.	}
In the LoginDisplay.razor, add the code to display the picture:
1.	<AuthorizeView>
2.	    <Authorized>
3.	        <span class="d-inline-block">
4.	            Hello, @context.User.Identity?.Name
5.	        </span>
6.	        <img src="@UserImg" width="22" height="22" class="@StyleHidden" />
7.	        <button class="nav-link btn btn-link" @onclick="BeginLogOut">Log out</button>
8.	    </Authorized>
9.	    ...
10.	</AuthorizeView>
Note: The LoginDisplay.razor is processed before the HandleLoginSucceeded, so I added a trick to read when it becomes available in the LoginDisplay. Indeed, there are other more clever ways than that, but this was easy and effective.
1.	@code {
2.	    private string UserImg { get; set; }
3.	    private string StyleHidden { get; set; }= "invisible";
4.	    private Timer? _timer;
5.
6.	    protected override async Task OnAfterRenderAsync(bool firstRender)
7.	    {
8.	        if (firstRender)
9.	        {
10.	            var userImg = await localStorage.GetItemAsStringAsync("userImg") ?? "";
11.	            while (userImg.Length == 0)
12.	            {
13.	                userImg = await localStorage.GetItemAsStringAsync("userImg") ?? "";
14.	                await Task.Delay(1000);
15.	            }
16.	            UserImg = userImg;
17.	            StyleHidden = "d-inline-block rounded-circle border-0";
18.	            await InvokeAsync(StateHasChanged);
19.	        }
20.	    }
21.	}
Voilà! It’s ready!
Publishing
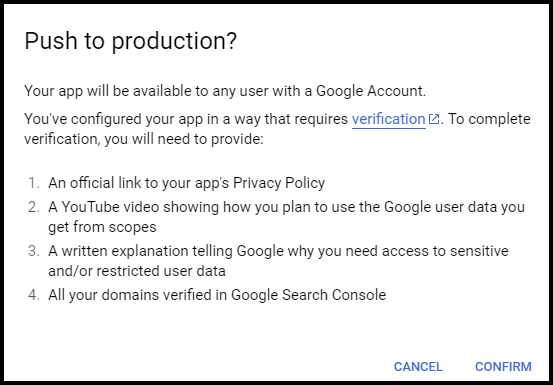
To publish your app, click “Publish App” on Google Console:
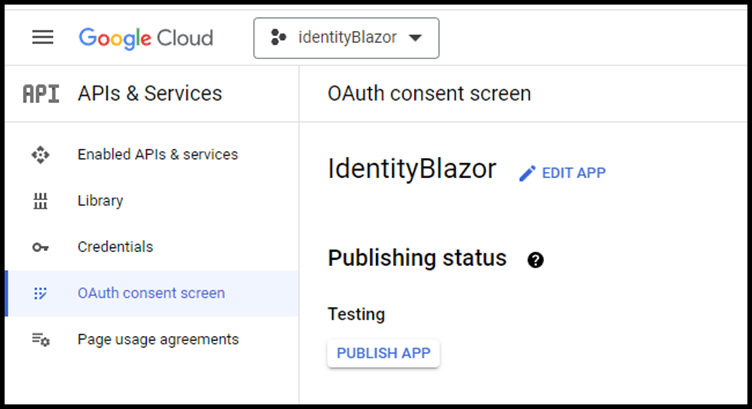
Before confirmation, check if you are truly ready. Did you make your privacy policy and application terms? If yes, go on and Confirm.
How Do You Use Blazor to Display and Hide Information?
It’s simple: add the tag on your page AuthorizeView and inside it the Authorized and NotAuthorized, automatically the page will render according to the current log status.
Add your private content inside the Authorized tag.
And add your not authorized content inside the NotAuthorized tag.
Example:
1.	<AuthorizeView>
2.	    <Authorized>
3.	        <PageTitle>Weather for @context.User.Identity?.Name</PageTitle>
4.
5.	        ...
6.
7.	    </Authorized>
8.	    <NotAuthorized>
9.	        <p> You’re not authorized to view this page.</p>
10.	    </NotAuthorized>
11.	</AuthorizeView>
Inside the Authorized, you will have access to the @context.User.Identity.Name to access the username.
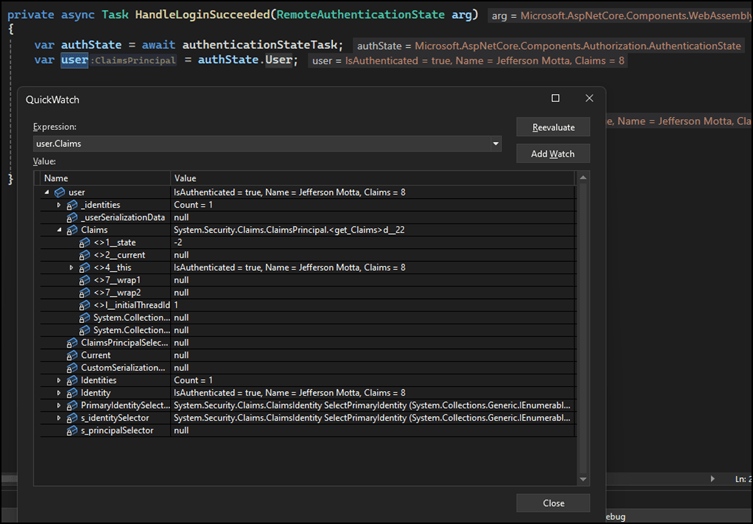
When the HandleLoginSucceeded event occurs, you can access the Claims where the picture is. You can use this code:
1. user.FindFirst("picture")?.Value;
When you configure the Google Account, you can claim information from the user, so they will be sent to you on this property: Claims from the User property.
1.	var authState = await authenticationStateTask;
2.	var user = authState.User;
Below is a sample of the User Claims property.
Use Telerik UI for Blazor in WebAssembly
Don’t forget that you can you Progress Telerik UI for Blazor in WebAssembly. Here’s a video showing you how to introduce Telerik UI components on this project.
Wrap-up
If you want to try this sample, visit https://identity.jsmotta.com.
Do you have any questions about it? Feel free to contact me on my LinkedIn profile in my bio.
References
- GitHub repository: https://github.com/jssmotta/TelerikIdentityBlazor24
- Credentials: https://console.cloud.google.com/apis/credentials?project=
- Working sample: https://identity.jsmotta.com

Jefferson S. Motta
Jefferson S. Motta is a senior software developer, IT consultant and system analyst from Brazil, developing in the .NET platform since 2011. Creator of www.Advocati.NET, since 1997, a CRM for Brazilian Law Firms. He enjoys being with family and petting his cats in his free time. You can follow him on LinkedIn and GitHub.
Related Posts
Comments
All articles
Topics

Latest Stories
in Your Inbox
Subscribe to be the first to get our expert-written articles and tutorials for developers!
All fields are required