# Indicators
The controls from the RadSparkline suite support several types of indicators which can be used to highlight the plotted data.
## Markers
The markers are visual indicators showing the location of each data point along the graph line. This setting is applicable to sparkline controls deriving from **RadLinearSparklineBase** - RadLinearSparkline and RadAreaSparkline. To enable the markers set the **ShowMarkers** property to True.
#### **Example 1: Show markers of RadLinearSparkline in XAML**
```XAML
```
#### **Example 2: Show markers of RadLinearSparkline in code**
```C#
this.sparklineControl.ShowMarkers = true;
```
#### **Figure 1: RadLinearSparkline and RadAreaSparkline with shown markers**
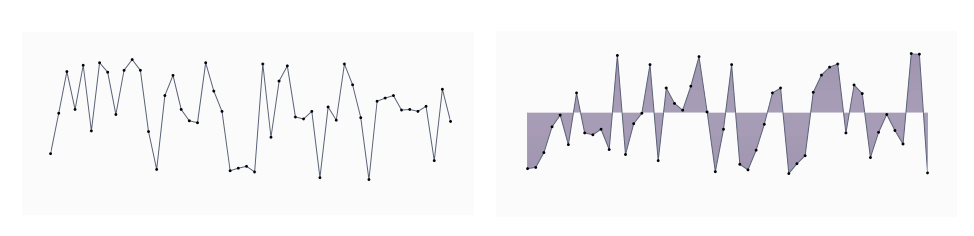
You can change the color of the marker via the **MarkersBrush** property.
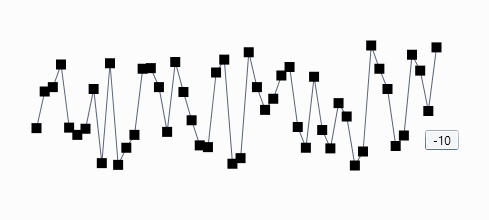
The markers can be customized via the **MarkersStyle** property of the control.
#### **Example 3: Setting MarkersStyle**
```XAML
```
#### **Figure 2: RadLinearSparkline with custom MarkersStyle**
## High Point
This is a visual indicator which highlights the single highest-value datapoint in a series. In case there is more than one high point, all such points are highlighted. If the spark line is of type RadColumnSparkline or RadWinLossSparkLine, the bar which represents the highest value is highlighted. The highpoint is enabled by setting the **ShowHighPointIndicator** property to True.
#### **Example 4: Show high point indicator of RadColumnSparkline in XAML**
```XAML
```
#### **Example 5: Show high point indicator of RadColumnSparkline in code**
```C#
this.sparklineControl.ShowHighPointIndicators = true;
```
#### **Figure 3: RadColumnSparkline with shown high point indicator**
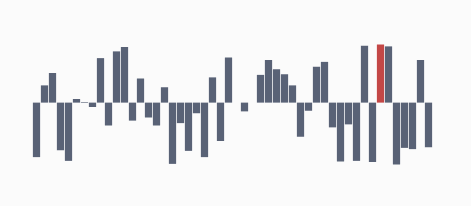
You can change the color of the high point indicator via the **HighPointBrush** property.
You can customize the appearance of the data point via the **HighPointStyle** property.
#### **Example 6: Setting HighPointStyle**
```XAML
```
#### **Figure 4: RadColumnSparkline with custom HighPointStyle**

## Low Point
This is a visual indicator which highlights the single lowest-value datapoint in a series. In case there is more than one such point, all similar points are highlighted. If the spark line is of type RadColumnSparkline or RadWinLossSparkLine, the bar which represents the lowest value is highlighted. The low point is enabled by setting the **ShowLowPointIndicator** property to True.
#### **Example 7: Show low point indicator of RadColumnSparkline in XAML**
```XAML
```
#### **Example 8: Show low point indicator of RadColumnSparkline in code**
```C#
this.sparklineControl.ShowLowPointIndicators = true;
```
#### **Figure 5: RadColumnSparkline with shown low point indicator**
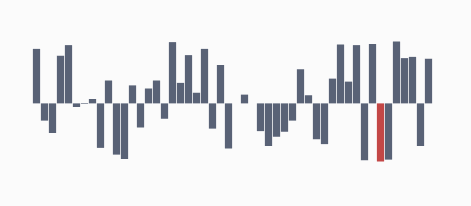
You can change the color of the low point indicator via the **LowPointBrush** property.
You can customize the appearance of the data point via the **LowPointStyle** property.
#### **Example 9: Setting LowPointStyle**
```XAML
```
#### **Figure 6: RadColumnSparkline with custom LowPointStyle**

## Negative Points
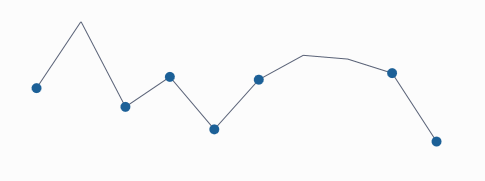
These visual indicators highlight all negative data points in a series. If the spark line is of type RadColumnSparkline or RadWinLossSparkLine the bars which represent negative values are highlighted. The negative points indicators are enabled by setting the **ShowNegativePointsIndicator** to True.
#### **Example 10: Show negative points of RadLinearSparkline in XAML**
```XAML
```
#### **Example 11: Show negative points of RadLinearSparkline in code**
```C#
this.sparklineControl.ShowNegativePointIndicators = true;
```
#### **Figure 7: RadLinearSparkline with shown negative point indicators**
You can change the color of the negative points via the **NegativePointBrush** property.
The negative points can be customized via the **NegativePointStyle** property of the control.
#### **Example 12: Setting NegativePointStyle (see Figure 7)**
```XAML
```
## First Point
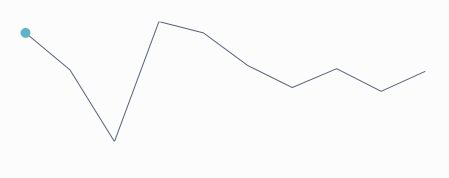
This is a visual indicator, which highlights the first data point in a series. If the spark line is of type RadColumnSparkline or RadWinLossSparkLine the bar which represents the first data point is highlighted. If the spark line is of type RadColumnSparkline or RadWinLossSparkLine the first bar is highlighted.
The first point is enabled in the series by setting the **ShowFirstPointIndicator** property to True.
#### **Example 13: Show first point of RadLinearSparkline in XAML**
```XAML
```
#### **Example 14: Show first point of RadLinearSparkline in code**
```C#
this.sparklineControl.ShowFirstPointIndicator = true;
```
#### **Figure 8: RadLinearSparkline with shown first point indicator**
You can change the color of the first point via the **FirstPointBrush** property.
The first point can be customized via the **FirstPointStyle** property of the control.
#### **Example 15: Setting FirstPointStyle (see Figure 8)**
```XAML
```
## Last Point
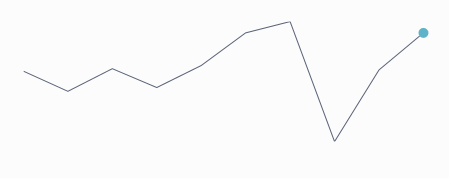
This is a visual indicator which highlights the last data point in a series. If the spark line is of type RadColumnSparkline or RadWinLossSparkLine the bar which represents the last value is highlighted. The last point is indicated in the series, by setting the **ShowLastPointIndicator** property to True.
#### **Example 16: Show last point of RadLinearSparkline in XAML**
```XAML
```
#### **Example 17: Show last point of RadLinearSparkline in code**
```C#
this.sparklineControl.ShowFirstPointIndicator = true;
```
#### **Figure 9: RadLinearSparkline with shown last point indicator**
You can change the color of the last point via the **LastPointBrush** property.
The last point can be customized via the **LastPointStyle** property of the control.
#### **Example 18: Setting LastPointStyle (see Figure 9)**
```XAML
```
## Empty Points
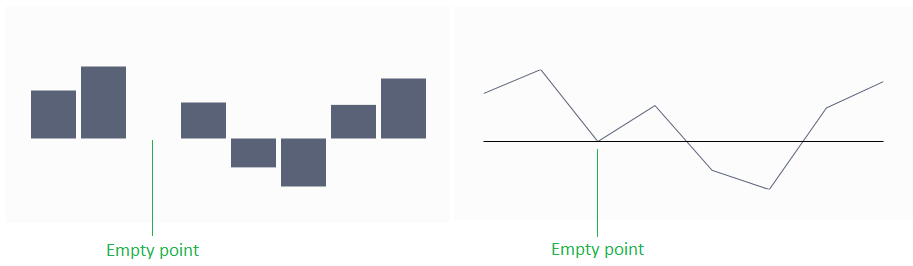
There are cases when the collection of data to which the Sparkline is bound may contain empty elements (null values) with no data to which the control can bind and visualize. The behavior of the control in such cases is governed by the **EmptyPointBehavior** property of the control. There are two possible settings:
* **DropPoint**: The empty point is removed. This is the **default** value.
* **ShowAsZero**: The empty point visualizes as though its original value was zero.
#### **Example 19: Setting EmptyPointBehavior**
```XAML
```
#### **Figure 10: RadLinearSparkline and RadColumnSparkline with a single null value shown as zero**
## See Also
* [Data Binding](https://www.telerik.com/winui/documentation/controls/radsparkline/data-binding)