# Getting Started with WinUI HeatMap
This guide provides the information you need to start using the Telerik UI for WinUI HeatMap by adding the component to your project.
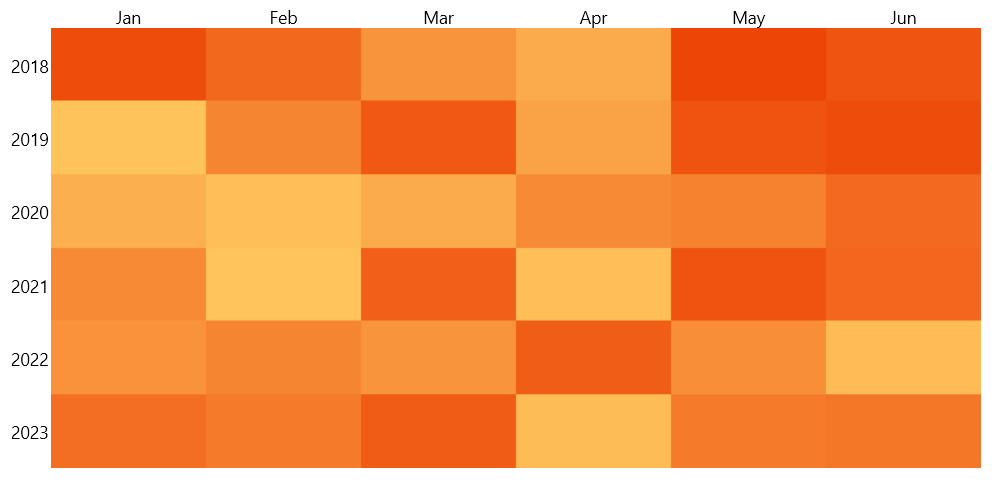
At the end, you will be able to achieve the following result.
## Prerequisites
Before adding the HeatMap, you need to:
1. [Set up your WinUI project](https://www.telerik.com/winui/documentation/installation-and-deployment/systemrequirements).
2. Create your Telerik UI for WinUI application and install the Telerik UI for WinUI components depending on the required installation approach:
* [Getting Started with NuGet](https://www.telerik.com/winui/documentation/getting-started/first-steps-nuget#step-2-create-the-winui-application)
* [Getting Started with the MSI file](https://www.telerik.com/winui/documentation/getting-started/first-steps-msi#step-2-create-the-winui-application)
* [Getting Started with the ZIP file](https://www.telerik.com/winui/documentation/getting-started/first-steps-zip#step-2-create-the-winui-application)
* [Getting Started with the Telerik UI Visual Studio Extension](https://www.telerik.com/winui/documentation/getting-started/first-steps-vsextension#step-2-create-the-winui-application)
3. Merge the `Generic.xaml` ResourceDictionary in `App.xaml`.
#### **Add the required HeatMap styles**
```XAML
```
## Add the Assembly References
To use the `RadHeatMap` component, add references to `Telerik.WinUI.Controls.dll` and `Telerik.Licensing.Runtime.dll`.
## Set Up the Data
To use the HeatMap control, you have to define a model to describe the data that will be shown.
#### **Define the model**
```C#
public class TempInfo
{
public int Year { get; set; }
public string Month { get; set; }
public double Temperature { get; set; }
}
```
## Set Up the HeatMap
The control works with few different definitions that describe how to data will be shown. The following example uses the `CategoricalDefinition`. The definition provides a few properties to define what data will be used.
The `RowGroupMemberPath` contains the name of the property in the custom model that will be used to generate the rows.
The `ColumnGroupMemberPath` contains the name of the property in the custom model that will be used to generate the columns. The `ValuePath` contains the name of the property in the custom model that will be used to generate the cells. Based on that value, the cell will be colored differently.
To populate the control with data, use its `ItemsSource` property.
#### **Define the HeatMap**
```XAML
```
#### **Create the data and set the ItemsSource**
```C#
int year = 2018;
string[] months = new string[6] { "Jan", "Feb", "Mar", "Apr", "May", "Jun" };
var randomNumberGenerator = new Random();
var source = new ObservableCollection();
for (int i = 0; i < months.Length; i++)
{
for (int k = 0; k < 6; k++)
{
var info = new TempInfo() { Year = year + k, Month = months[i], Temperature = randomNumberGenerator.Next(10, 300) };
source.Add(info);
}
}
this.categoricalDefinition.ItemsSource = source;
```
## Colorize the HeatMap
For the purposes of this guide, the HeatMap uses its built-in colorizer which sets the color of each cell based on the plotted value. However, you can change the colors as you like by [defining a new colorizer](https://www.telerik.com/winui/documentation/controls/radheatmap/colorizers).
## Telerik UI for WinUI Learning Resources
* [Telerik UI for WinUI HeatMap Component](https://www.telerik.com/winui/heatmap)
* [Getting Started with Telerik UI for WinUI Components](https://www.telerik.com/winui/documentation/getting-started/first-steps-nuget)
* [Telerik UI for WinUI Installation](https://www.telerik.com/winui/documentation/installation-and-deployment/installing-which-file-do-i-need)
* [Telerik UI for WinUI Examples](https://www.telerik.com/winui/documentation/examples/demos-app)
* [Telerik UI for WinUI Accessibility](https://www.telerik.com/winui/documentation/common/accessibility)
* [Telerik UI for WinUI License Agreement](https://www.telerik.com/purchase/license-agreement/winui)
## See Also
* [HeatMap Labels](https://www.telerik.com/winui/documentation/controls/radheatmap/labels)
* [Populating the HeatMap with Data](https://www.telerik.com/winui/documentation/controls/radheatmap/populating-with-data)