# Getting Started with WinUI DataForm
This guide provides the information you need to start using the Telerik UI for WinUI DataForm by adding the component to your project.
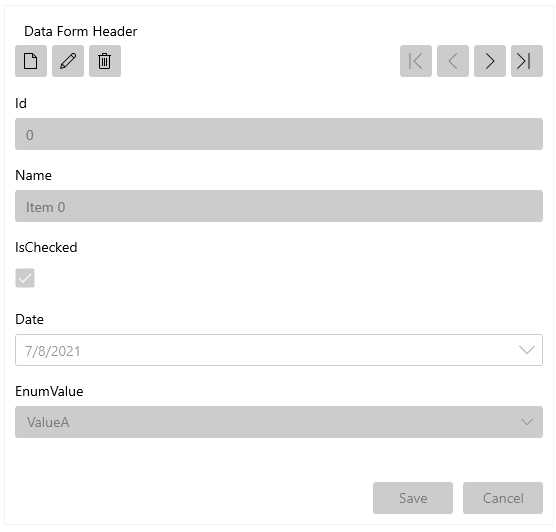
At the end, you will be able to achieve the following result.

## Prerequisites
Before adding the DataForm, you need to:
1. [Set up your WinUI project](https://www.telerik.com/winui/documentation/installation-and-deployment/systemrequirements).
2. Create your Telerik UI for WinUI application and install the Telerik UI for WinUI components depending on the required installation approach:
* [Getting Started with NuGet](https://www.telerik.com/winui/documentation/getting-started/first-steps-nuget#step-2-create-the-winui-application)
* [Getting Started with the MSI file](https://www.telerik.com/winui/documentation/getting-started/first-steps-msi#step-2-create-the-winui-application)
* [Getting Started with the ZIP file](https://www.telerik.com/winui/documentation/getting-started/first-steps-zip#step-2-create-the-winui-application)
* [Getting Started with the Telerik UI Visual Studio Extension](https://www.telerik.com/winui/documentation/getting-started/first-steps-vsextension#step-2-create-the-winui-application)
## Add the Assembly References
To use the DataForm component, add references to `Telerik.WinUI.Controls.dll` and `Telerik.Licensing.Runtime.dll`.
## Define the Component
To start using the DataForm, you need to initialize it and assign its `ItemsSource` property. The following example shows how to bind the `ItemsSource` to a collection of custom objects.
#### **Define the Item Model**
```C#
public class DataInfo
{
public int Id { get; set; }
public string Name { get; set; }
public bool IsChecked { get; set; }
public DateTime Date { get; set; }
public MyEnum EnumValue { get; set; }
}
public enum MyEnum
{
ValueA,
ValueB
}
```
#### **Define the DataForm in XAML**
```XAML
```
#### **Set the ItemsSource of the DataForm**
```C#
public MainWindow()
{
this.InitializeComponent();
var source = new BindableCollection();
for (int i = 0; i < 10; i++)
{
source.Add(new DataInfo()
{
Id = i,
Name = "Item " + i,
IsChecked = i % 2 == 0,
Date = DateTime.Today.AddDays(i),
EnumValue = i % 2 == 0 ? MyEnum.ValueA : MyEnum.ValueB
});
}
this.dataForm.ItemsSource = source;
}
```
## Set the Header of the DataForm
The DataForm component provides a built-in header element that is displayed on top of the data fields. To define the header, set the `Header` property.
#### **Set the DataForm Header**
```XAML
```
**DataForm with Its Defined Header**
## Telerik UI for WinUI Learning Resources
* [Telerik UI for WinUI DataForm Component](https://www.telerik.com/winui/dataform)
* [Getting Started with Telerik UI for WinUI Components](https://www.telerik.com/winui/documentation/getting-started/first-steps-nuget)
* [Telerik UI for WinUI Installation](https://www.telerik.com/winui/documentation/installation-and-deployment/installing-which-file-do-i-need)
* [Telerik UI for WinUI Examples](https://www.telerik.com/winui/documentation/examples/demos-app)
* [Telerik UI for WinUI Accessibility](https://www.telerik.com/winui/documentation/common/accessibility)
* [Telerik UI for WinUI License Agreement](https://www.telerik.com/purchase/license-agreement/winui)