# Getting Started with WinUI Buttons
This guide provides the information you need to start using the Telerik UI for WinUI Buttons by adding the available button components to your project.
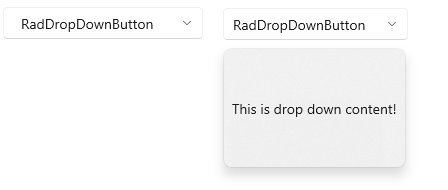
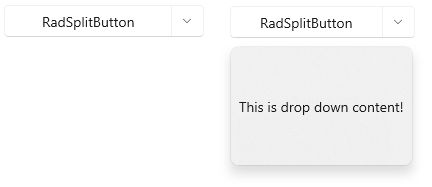
At the end, you will see the following buttons.

## Prerequisites
Before adding the Buttons, you need to:
1. [Set up your WinUI project](https://www.telerik.com/winui/documentation/installation-and-deployment/systemrequirements).
2. Create your Telerik UI for WinUI application and install the Telerik UI for WinUI components depending on the required installation approach:
* [Getting Started with NuGet](https://www.telerik.com/winui/documentation/getting-started/first-steps-nuget#step-2-create-the-winui-application)
* [Getting Started with the MSI file](https://www.telerik.com/winui/documentation/getting-started/first-steps-msi#step-2-create-the-winui-application)
* [Getting Started with the ZIP file](https://www.telerik.com/winui/documentation/getting-started/first-steps-zip#step-2-create-the-winui-application)
* [Getting Started with the Telerik UI Visual Studio Extension](https://www.telerik.com/winui/documentation/getting-started/first-steps-vsextension#step-2-create-the-winui-application)
## Add the Assembly References
To use the DataForm component, add references to `Telerik.WinUI.Controls.dll` and `Telerik.Licensing.Runtime.dll`.
## Define the Components
To start using the Buttons, you need to initialize the needed element and assign its `Content`, `Click` event handler, `Command` or any other settings you need. The following example shows how to use the available buttons and subscribe to their `Click` events.
To access the button elements in XAML, add a namespace that points to *Telerik.UI.Xaml.Controls* - `xmlns:telerikControls="using:Telerik.UI.Xaml.Controls" `.
#### **Adding a reference to the Telerik namespace**
```XAML
```
#### **Defining RadButton**
```XAML
```
#### **Button Click event handler**
```C#
private void Button_Click(object sender, RoutedEventArgs e)
{
}
```

The next several examples show the other type of buttons. The `Click` event handler's example is ommitted on purpose because it matches the one shown in the previous example (for `RadButton`).
#### **Defining RadToggleButton**
```XAML
```

#### **Defining RadRadioButton**
```XAML
```

> tip You can group a set of `RadRadioButton` in a `StackPanel`. This way when you check one of the buttons, the others will get automatically unchecked.
#### **Defining RadDropDownButton**
```XAML
```
#### **Defining RadSplitButton**
```XAML
```
## Telerik UI for WinUI Learning Resources
* [Telerik UI for WinUI Buttons Component](https://www.telerik.com/winui/buttons)
* [Getting Started with Telerik UI for WinUI Components](https://www.telerik.com/winui/documentation/getting-started/first-steps-nuget)
* [Telerik UI for WinUI Installation](https://www.telerik.com/winui/documentation/installation-and-deployment/installing-which-file-do-i-need)
* [Telerik UI for WinUI Examples](https://www.telerik.com/winui/documentation/examples/demos-app)
* [Telerik UI for WinUI Accessibility](https://www.telerik.com/winui/documentation/common/accessibility)
* [Telerik UI for WinUI License Agreement](https://www.telerik.com/purchase/license-agreement/winui)
## See Also
* [Events](https://www.telerik.com/winui/documentation/controls/radbuttons/events)
* [Commands](https://www.telerik.com/winui/documentation/controls/radbuttons/commands)