# Drag and Drop Action
Test Studio supports completely codeless drag\&drop action and you can insert such step with only few clicks.
This type of steps requires two elements - one, which is dragged, and the second to be used as drop target location. Find out how to define these elements in the below article.
* [Select an element to drag](https://www.telerik.com/teststudio/documentation/features/recorder/advanced-recording-tools/element-steps/actions/drag-and-drop#select-the-element-to-drag)
* [Pick the target element](https://www.telerik.com/teststudio/documentation/features/recorder/advanced-recording-tools/element-steps/actions/drag-and-drop#pick-the-target-drop-element)
* [Maintain and adjust Drag\&Drop step properties](https://www.telerik.com/teststudio/documentation/features/recorder/advanced-recording-tools/element-steps/actions/drag-and-drop#maintain-and-edit-the-dragdrop-step)
## Create a Drag\&Drop Step
For the purposes of this demonstration we use the Kendo jQuery TreeView component, which supports drag and drop.
### Select the Element to Drag
1. Create a test and start a recording session. Navigate to the mentioned demo page with the TreeView component.
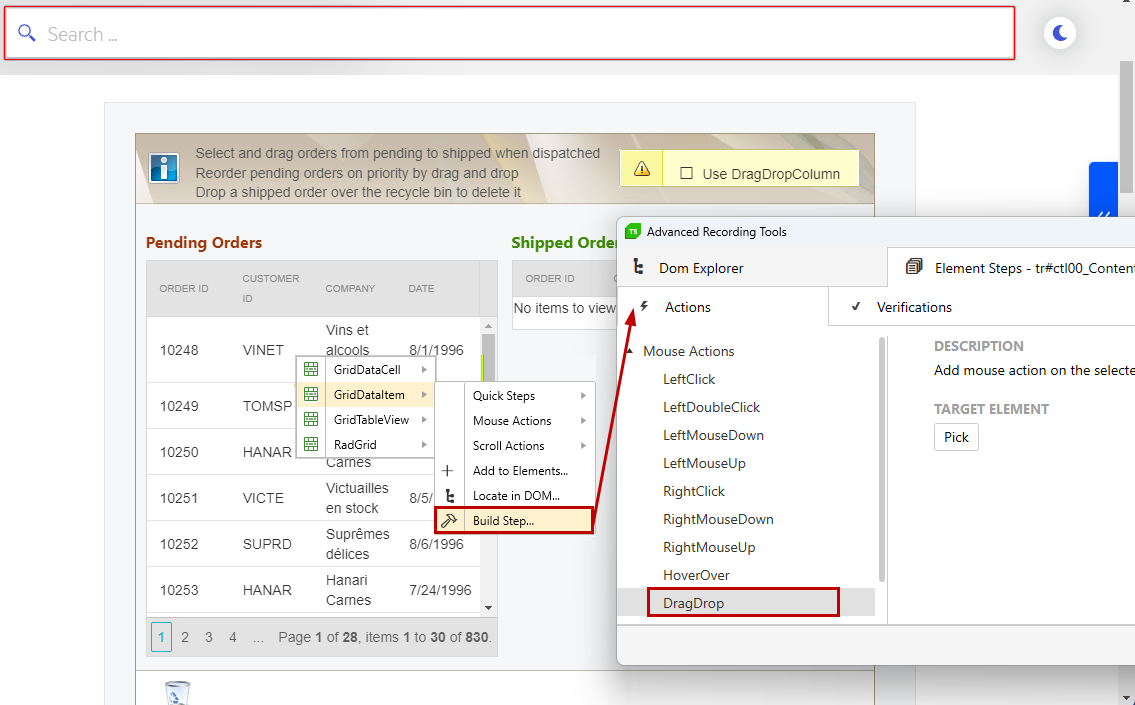
2. Enable the highlighting and choose an element to drag. Highlight that element and choose the elements menu option to Build Step....
3. The **Advanced Recording Tools** window gets opened directly on its **Element Steps** tab with that element selected in the DOM. Switch to the *Actions* section and choose the **DragDrop** action.
### Pick the Target Drop Element
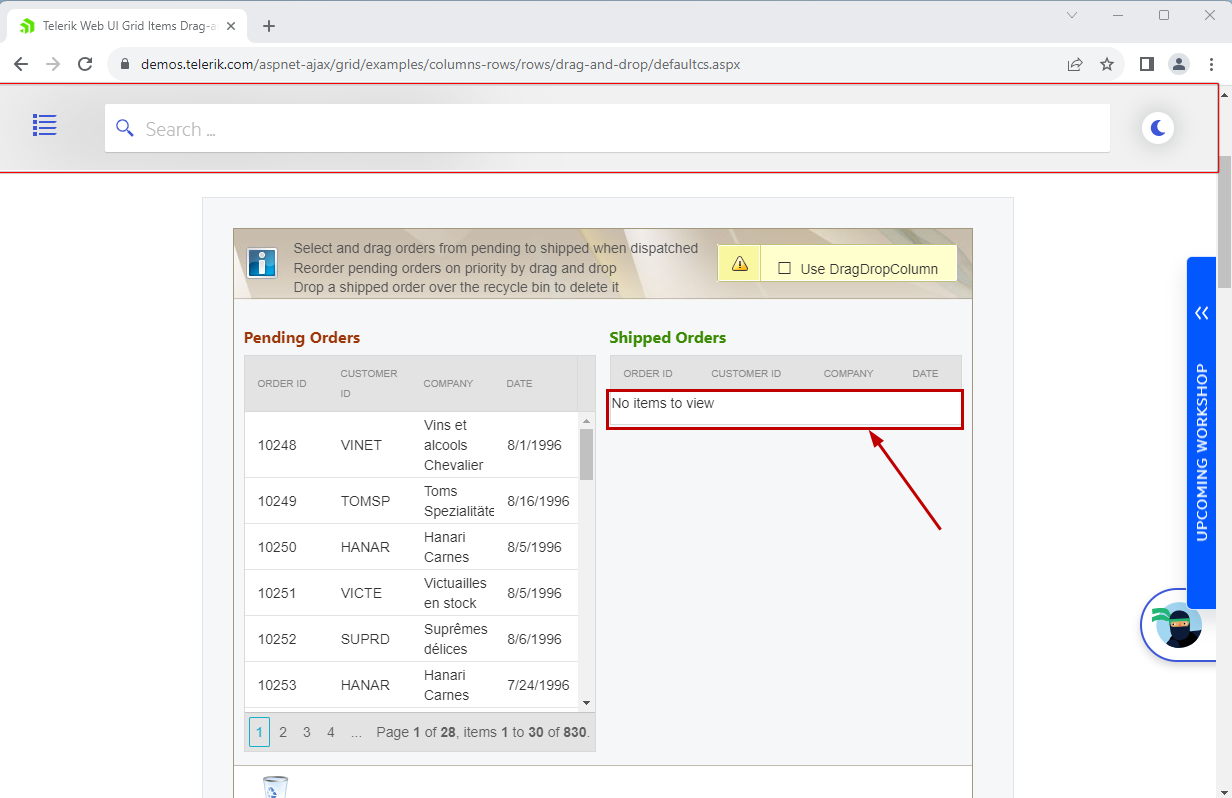
4. The **DragDrop** action step lets you choose the target element where to drop the initially selected element. Click the **Pick** button under the *Target Element* property. This switches the focus on the browser and lets you choose the target element with enabled highlighting. Once you stop over an element, a **Select Element** button appears and you can add this element as target.
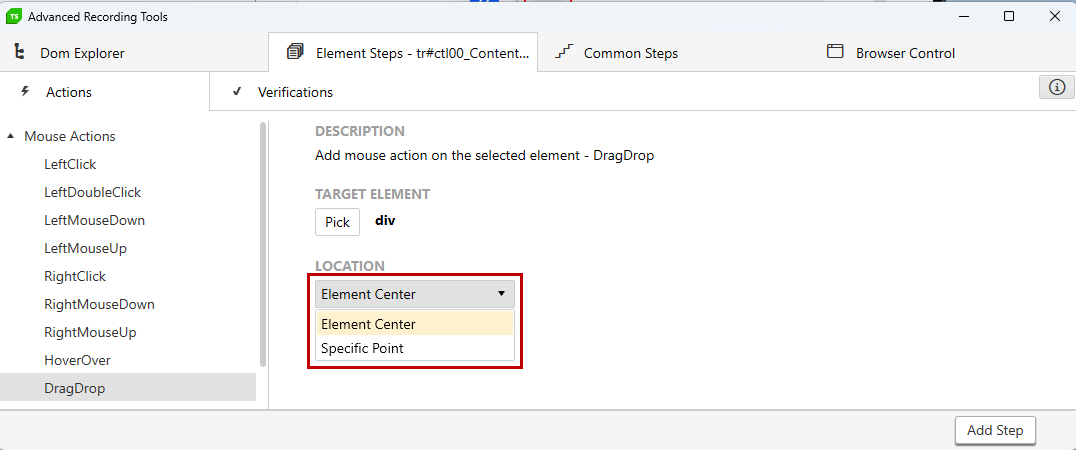
5. You can specify the drop point **Location** - you can choose between *Element Center* or *Specific Point*. **Element Center** is the default setting, and **Specific Point** can be set as for the mouse click steps.
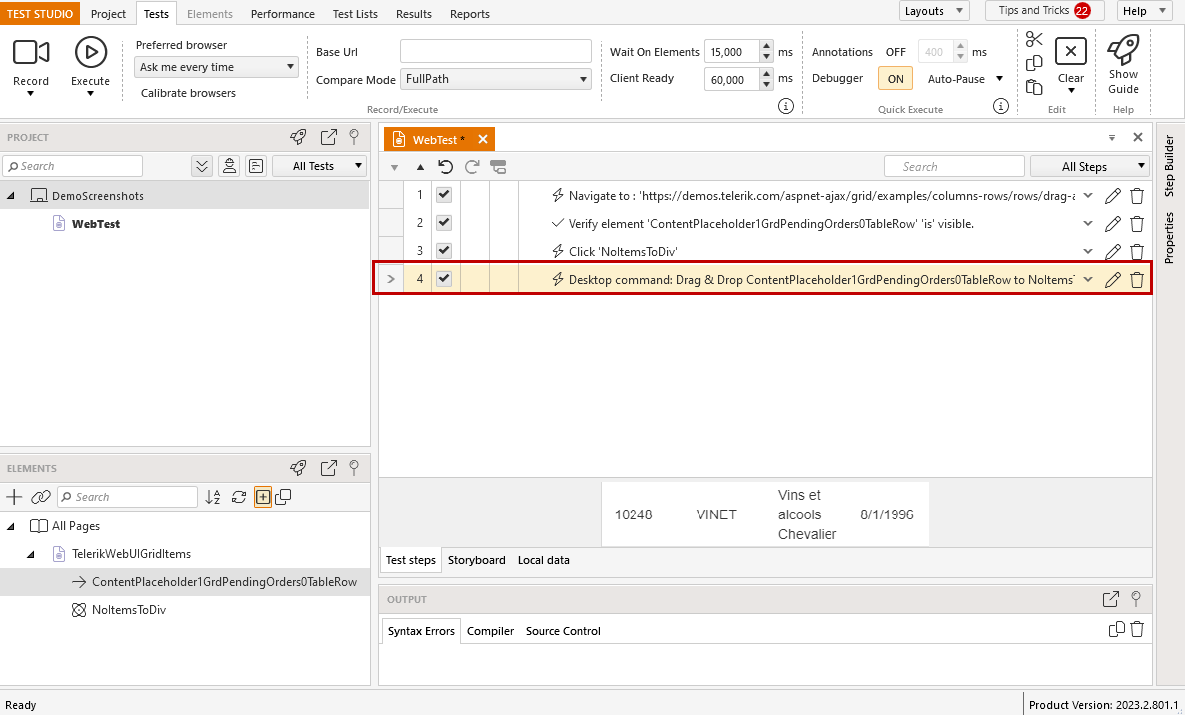
6. Click the **Add Step** button and the **Drag\&Drop** step is added to the test specifying the two elements you worked with.
## Maintain and Edit the Drag\&Drop Step
The **Drag\&Drop** step has its specific step properties specifying the two elements used in the step and the offsets used to interact with these. Once a drag and drop step is added into the test you can use its properties to change its behavior completely.
### Drag Element Properties
The step properties related to the dragged element are named *Drag Element* and *OffSet*. These define the element to choose on page and the click point to start dragging it.
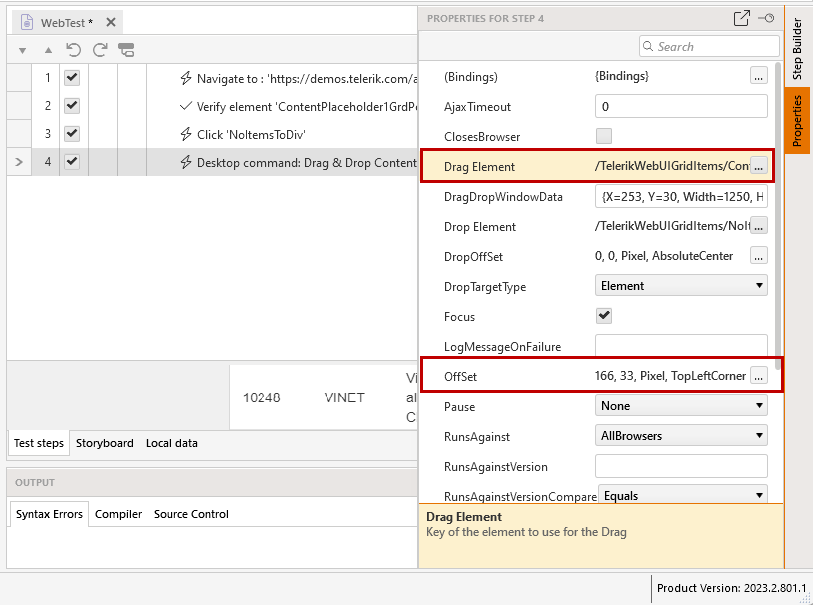
* The **Drag element** can be changed with any existing element from the Elements Explorer.
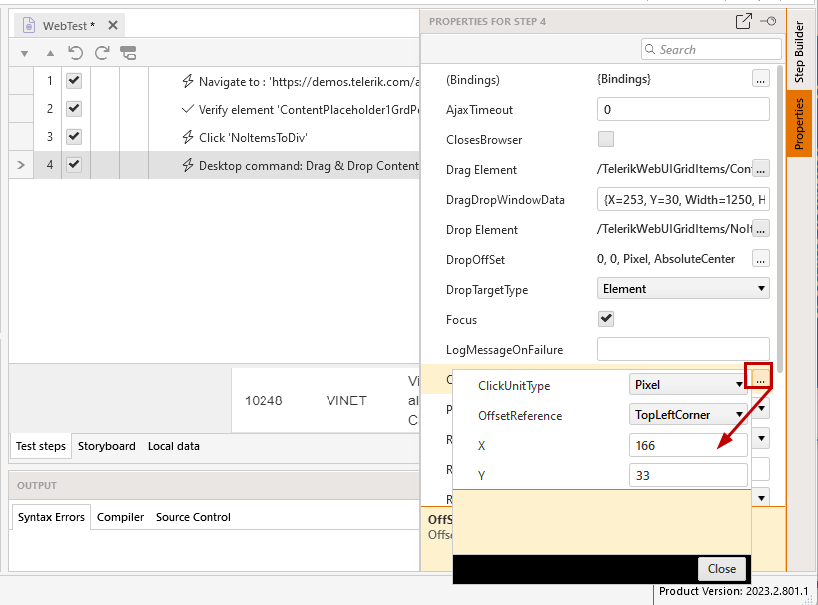
* The click point **Offset** for the dragged element can be modified precisely.
### Drop Element Properties
The step properties related to the dropped element are named *Drop Element*, *DropOffSet* and *DropTargetType*. These define the target element to choose on page and the click point to drop the dragged element.
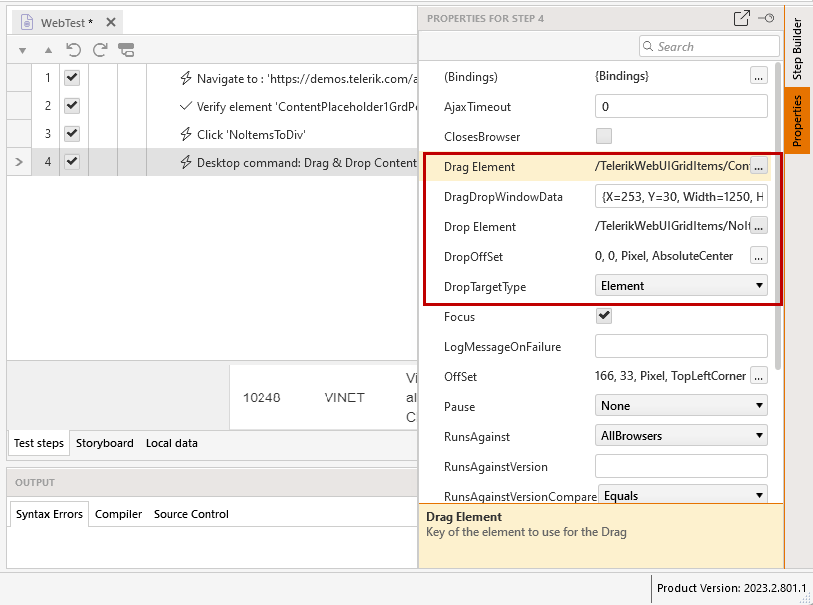
* The **Drop element** can be changed with any existing element from the Elements Explorer.
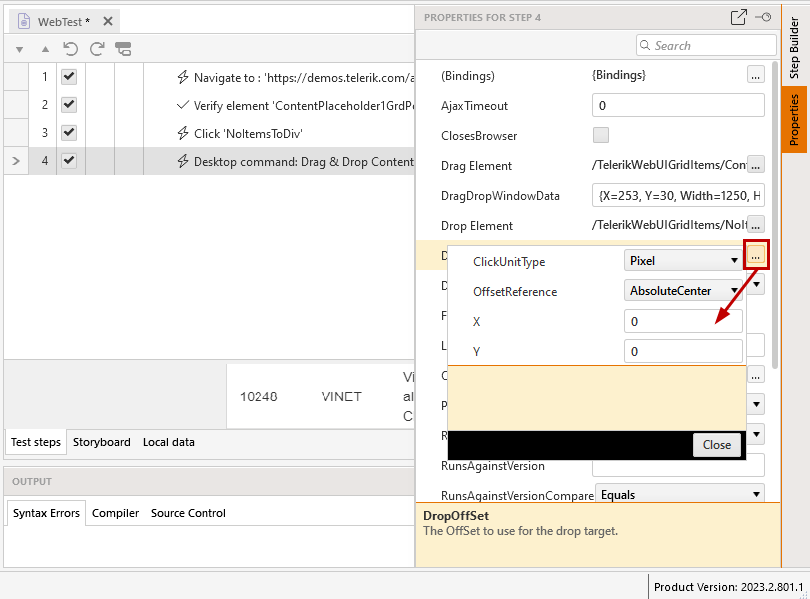
* The click point **DropOffset** for the target element can be modified precisely.
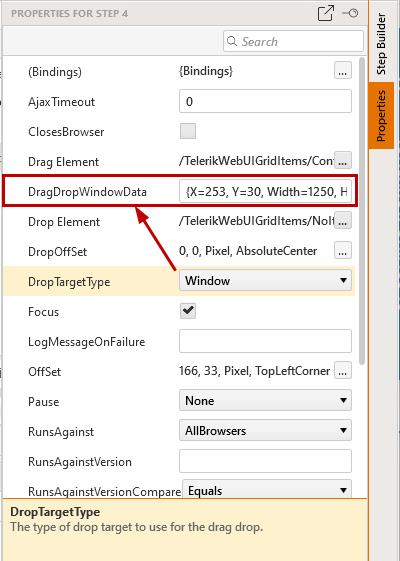
* The **DropTargetType** can be *Element* or *Window*. The more precise option is to use an element as this independent of the size of screen, window, etc.
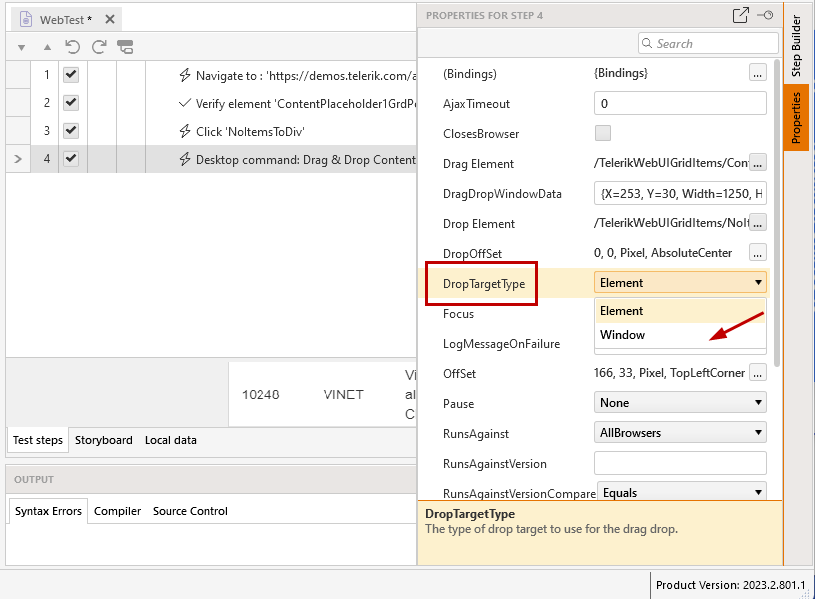
If you choose the *Window* option, you need to consider the size and position of the browser window, which are used to correlate the drop offset location.