# Navigate To Step
The **Navigate To** step allows you to insert a step which navigates to specified URL.
This article demonstrates how to add this type of step into the test and the specifics of its properties.
* [Add Navigate To Step](https://www.telerik.com/teststudio/documentation/features/custom-steps/web-test-common/navigate-to#add-navigate-to-step)
* [Using BaseURL on Project Level](https://www.telerik.com/teststudio/documentation/features/custom-steps/web-test-common/navigate-to#using-baseurl-on-project-level)
## Add Navigate To Step
Choose the **Navigate To** option from the **Step Builder** and click on the **Add Step** button in the lower right corner of the pane.
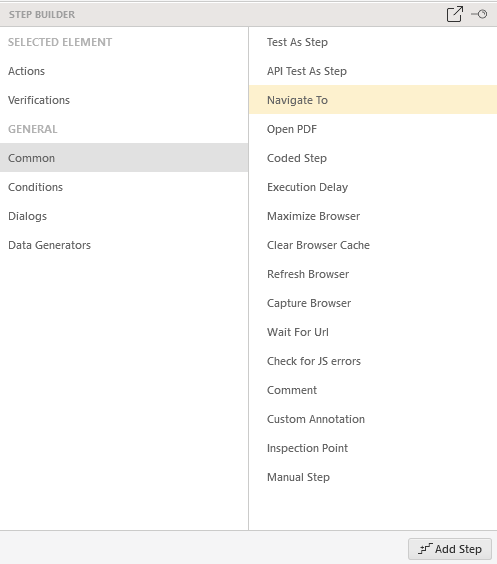
The **Navigate To** accepts a valid URL. The step gets automatically recorded when you begin recording a test. You can insert such step at any point of the test from the **Step Builder** or record one from the **Browsers tab** in the **Advanced Recording Tools**.
Other useful properties of the step are:
* **NavigateUrl** - defines the navigate URL, or the part of the URL which is different from the BaseUrl.
* **BaseUrl** - defines the BaseUrl itself.
## Using BaseURL on Project Level
Test Studio allows setting up a project for running tests against multiple environments. If using such setup there are few important notes about the **Navigate To** steps across the tests.
1. The **Navigate To** step has two properties related to the URL to be used - the **NavigateUrl**, which defines the part of the URL which is different from the BaseUrl, and the **BaseUrl**, which defines the BaseUrl itself.
**Example**: If using the `https://docs.telerik.com/teststudio/system-requirements` for testing, it can be split to **BaseUrl**: `https://docs.telerik.com/teststudio` and **NavigateUrl**: `/system-requirements`.
> **Note!**
>
>
> When the **BaseUrl** property of the **Navigate To** step is set, it is always used upon execution, or in other words it overwrite the project and test list settings for the multiple environments setup of the project.
2. If the project setting **BaseUrl** is set, it is used in the following manner: Upon execution the **Navigate To** step property *NavigateUrl* is appended to the project set *BaserUrl* (assuming the step's *BaseUrl* property is empty).
3. If the test list setting **BaseUrl** is set, it is used in the following manner: Upon execution the **Navigate To** step property *NavigateUrl* is appended to the test list set *BaserUrl* (assuming the step's *BaseUrl* property is empty).
4. The step property BaseUrl allows you to use relative Url with the the tilde sign (\~).
**Example**: Possible setup described below
* Project BaseUrl set to `https://docs.telerik.com/teststudio`
* Step property *NavigateUrl* is set to `/first-test`
* Step property *BaseUrl* is set to `~/getting-started`
* The final URL to navigate to is `https://docs.telerik.com/teststudio/getting-started/first-test`