# WPF Tests in Test Studio
Test Studio recording feature supports WPF applications built with .Net 4.5+ or .Net Core 3.1, and .Net 5 and above. To initiate recording session against specific application, you need to list its executable file in the WPF test.
This article guides you through the WPF test configuration process.
* [Configure WPF Test to Automate Specific App](https://www.telerik.com/teststudio/documentation/automated-tests/wpf/wpf-test#configure-wpf-test-to-record-specific-application)
* [Choose the Application to Automate](https://www.telerik.com/teststudio/documentation/automated-tests/wpf/wpf-test#choose-the-application-to-automate)
* [Record Application Window State](https://www.telerik.com/teststudio/documentation/automated-tests/wpf/wpf-test#record-application-window-state)
* [Finish WPF Test Configuration](https://www.telerik.com/teststudio/documentation/automated-tests/wpf/wpf-test#finish-wpf-test-configuration)
> **Tip**
>
>
> Check this video tutorial for recording an end-to-end WPF test scenario.
## Configure WPF Test to Record Specific Application
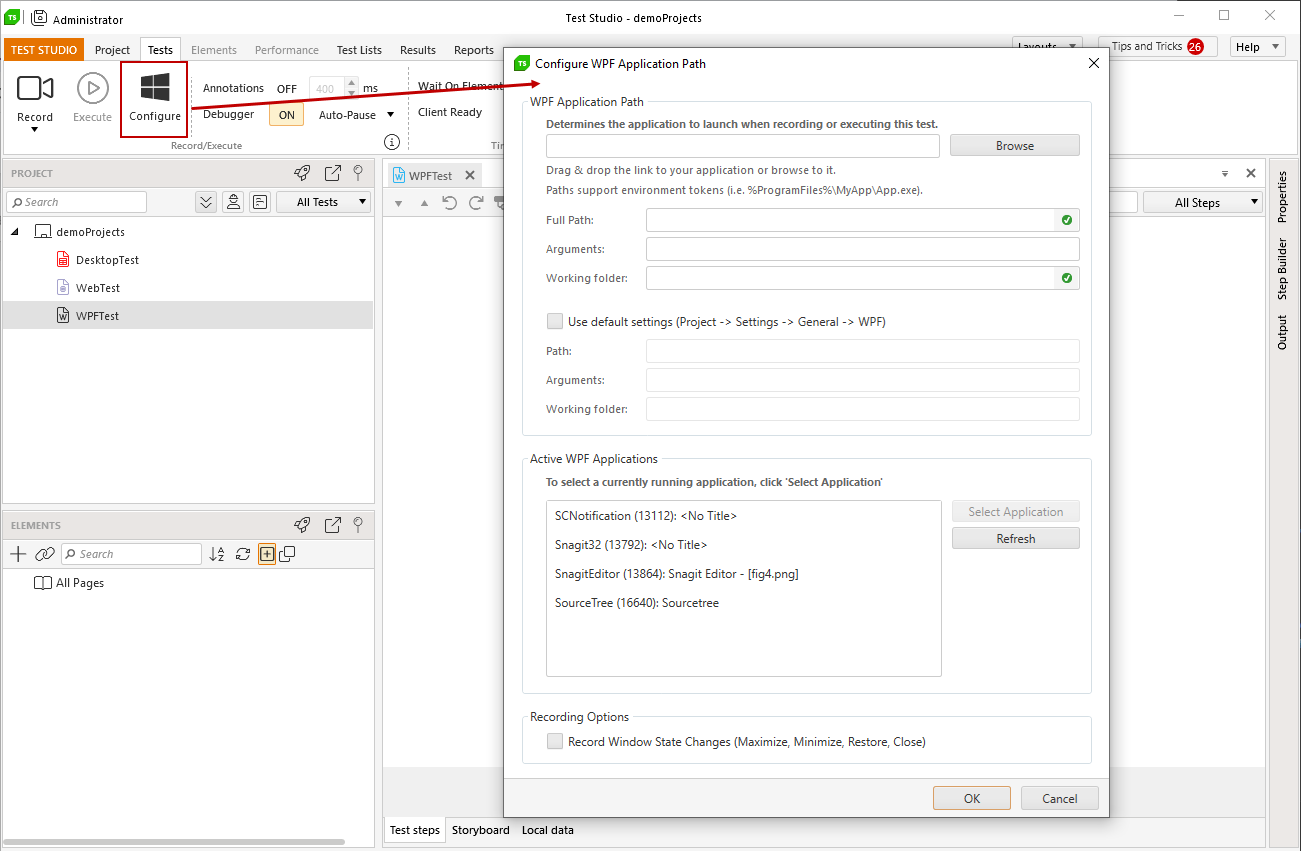
The **configuration of the WPF test requires an executable file of a valid WPF app to be specified** and, thus, used for recording and execution. When you open a WPF test in Test Studio, you can see the **Configure** button in the **Test** tools ribbon. Click the **Configure** button to open the **WPF Config Wizard**.
> **Tip**
>
>
> If you attempt to initiate a recording session in WPF test, before it is configured, the **WPF Config Wizard** pops up and lets you provide the necessary details.
## Choose the Application to Automate
Test Studio provides different options to define the application to automate:
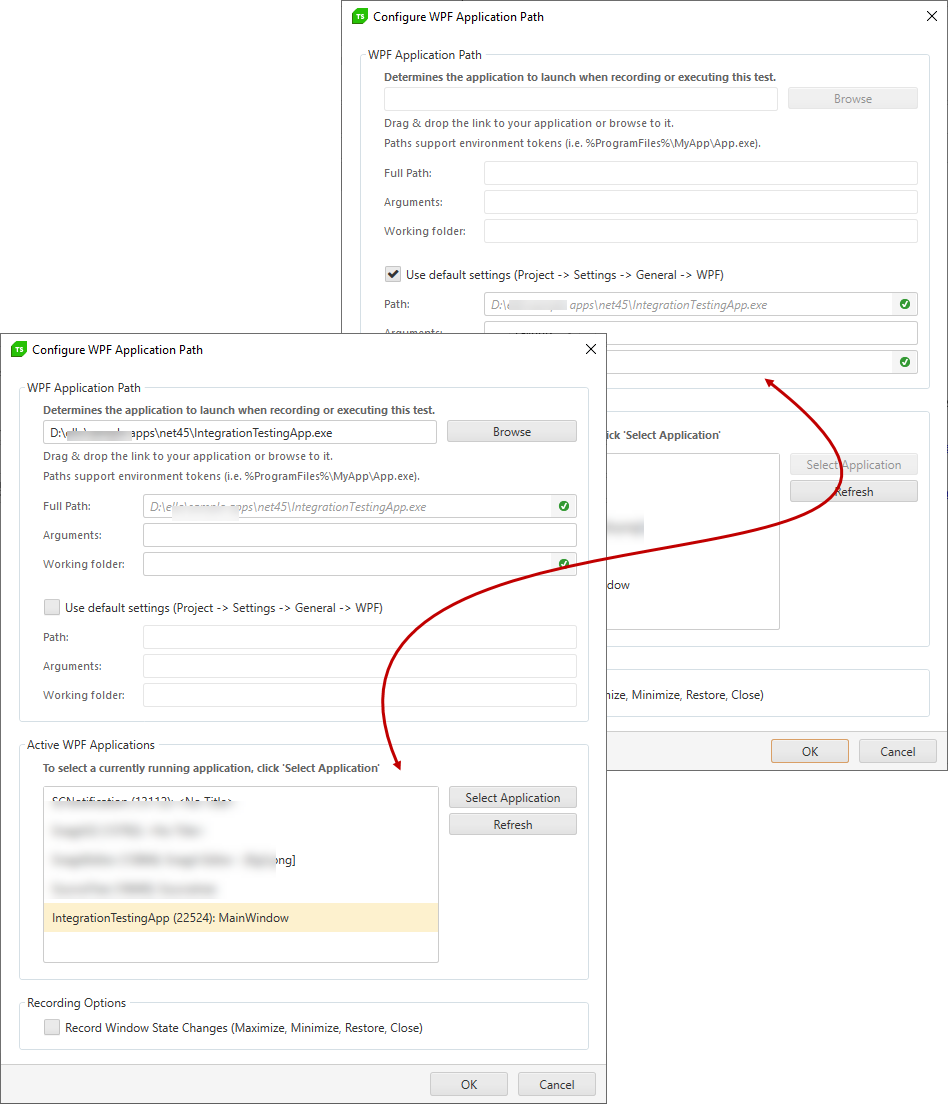
* [Specify an executable file](https://www.telerik.com/teststudio/documentation/automated-tests/wpf/wpf-test#configure-application-path-in-wpf-test);
* [Use a default path](https://www.telerik.com/teststudio/documentation/automated-tests/wpf/wpf-test#set-default-wpf-application-path);
* [Select application from the list of active apps](https://www.telerik.com/teststudio/documentation/automated-tests/wpf/wpf-test#select-running-wpf-application);
* [Define startup arguments and working directory](https://www.telerik.com/teststudio/documentation/automated-tests/wpf/wpf-test#startup-arguments-and-working-folder-for-wpf-application)
## Configure Application Path in WPF Test
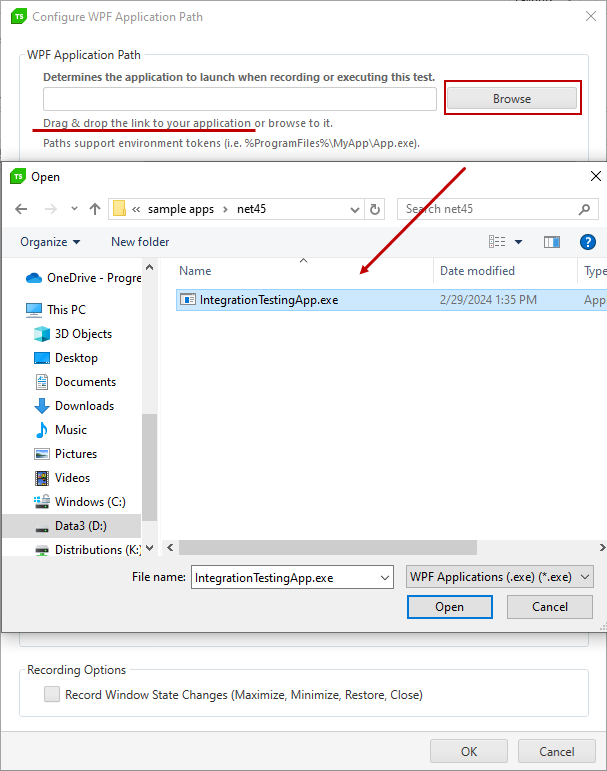
The **WPF Application Path** field accepts drag and drop of the application's shortcut icon; Or use the **Browse** button to locate the executable file manually in a File Explorer.
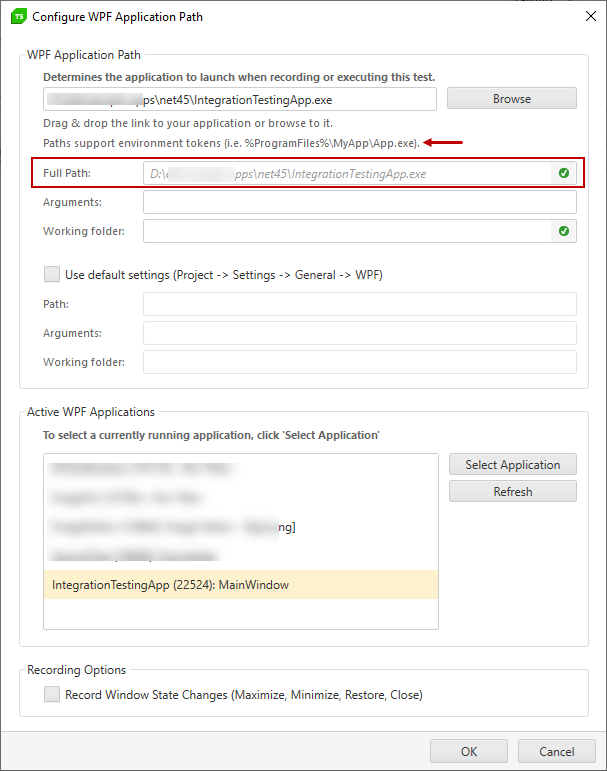
**WPF Application Path** field supports using environment tokens (such as `%Program Files%\MyApp\App.exe`). When using environment tokens, the **Current Path Expanded** field displays the full path to the executable file.
## Set Default WPF Application Path
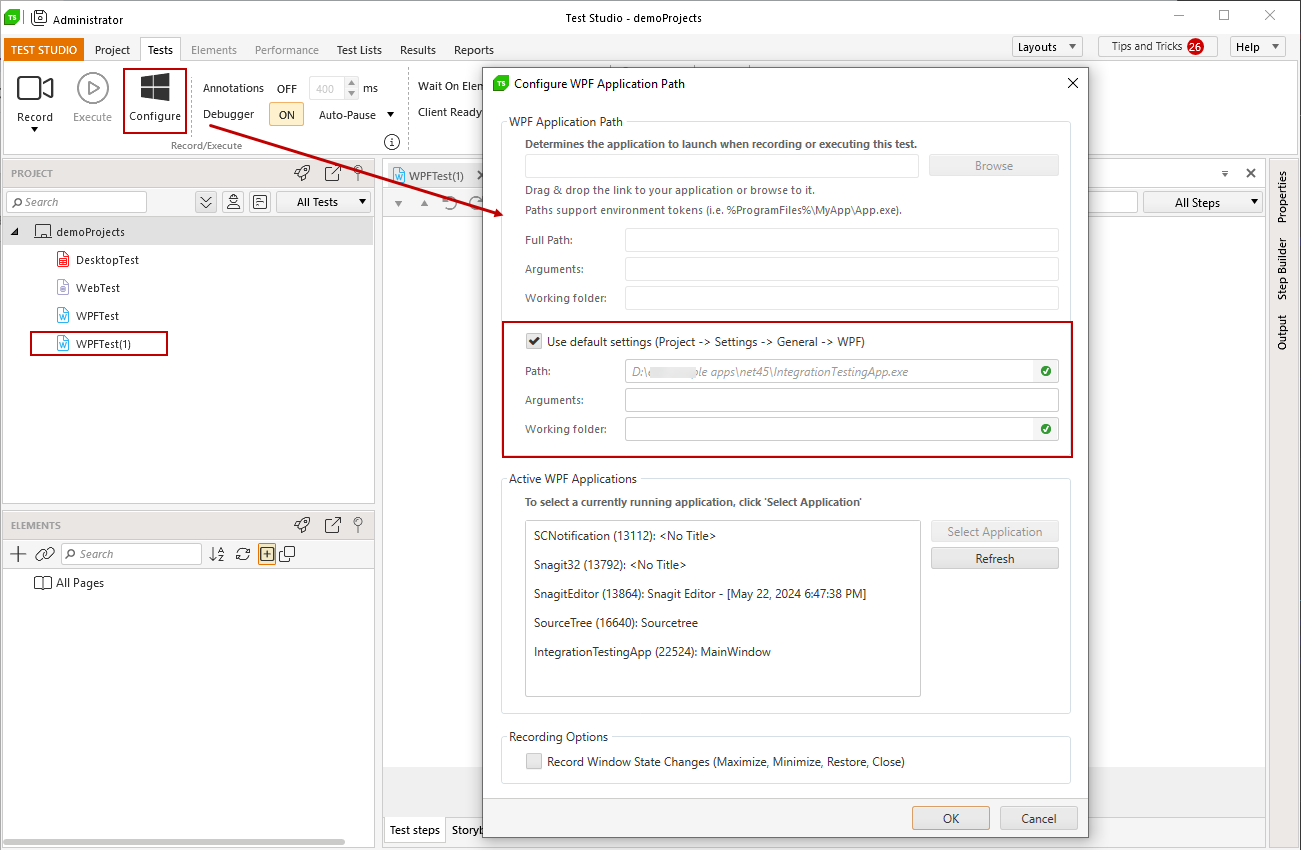
The automation process requires multiple tests to be created for a single application. In such case configuring each created test will be a tedious task. The solution offered by Test Studio is to **set a default WPF app path on project level** and use this for all WPF tests.
The option is available in Project Settings -> General and once a **Default Path is set** each new WPF test in the project is configured to use it.
## Select Running WPF Application
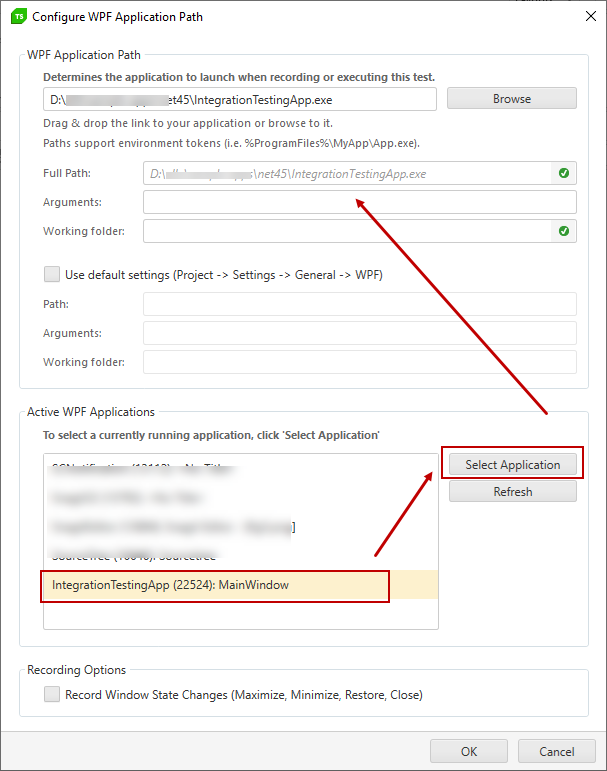
The **Active WPF Applications** list displays all currently running WPF apps detected by Test Studio. Click on the desired one and hit the **Select Application** button and the path to the executable file in the **WPF Application Path** field gets automatically populated.
## Startup Arguments and Working Folder for WPF Application
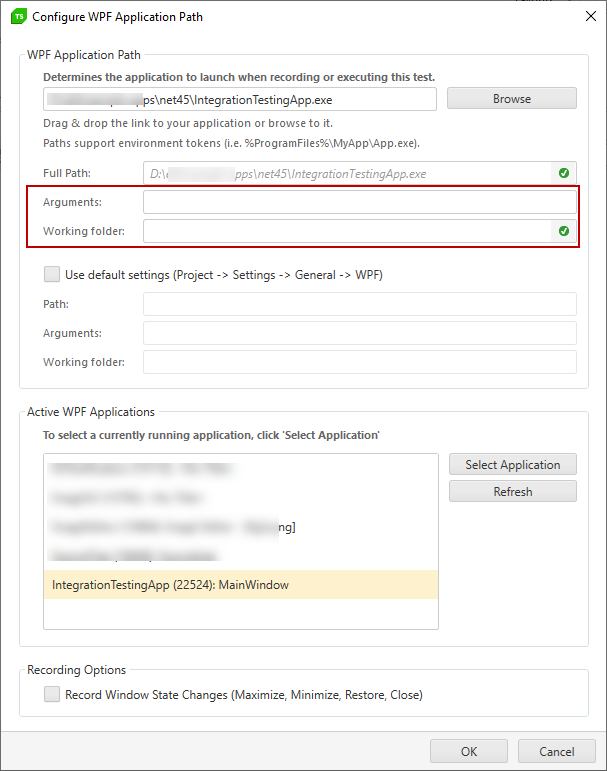
The configuration of a WPF application lets you set startup **Arguments** and a **Working folder** if these are required for the proper functioning of the tested WPF app.
## Record Application Window State
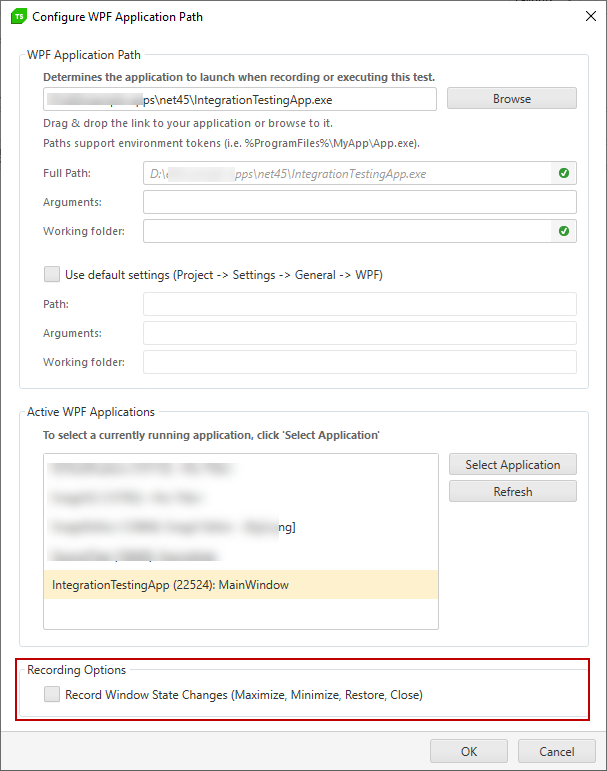
Test Studio lets you record the changes in the application window state - **Minimize, Maximize, Restore** and **Close** actions can be captured automatically while in the recording process. If the automation scenarios require to interact with the window state, enable the checkbox under the **Recording Options** section in the **Config Wizard**.
> **Note**
>
>
> **Recording the changes in the application window state is a setting on project level**. So, once you enable it for one WPF test in the project, it is applied for all existing and newly created WPF tests in the current project.
## Finish WPF Test Configuration
Once you applied all necessary settings, **confirm the configuration** by pressing the **OK** button. Then, when you hit the **Record** button, the configured WPF application is launched and the Test Studio recorder gets attached to it, so you can proceed with recording the test scenario.
> **Tip**
>
>
> In any case, when you need to change the applied settings, hit the **Configure** button to access the wizard again.
## See Also:
* WPF Test Recording Video Tutorial.