# Desktop Tests in Test Studio
Test Studio recording feature supports various desktop applications. To initiate recording session against specific application, you need to define which app to use in the desktop test.
This article guides you through the desktop test configuration process.
* [Configure Desktop Test to Record Specific Application](https://www.telerik.com/teststudio/documentation/automated-tests/desktop-testing/desktop-test#configure-desktop-test-to-record-specific-application)
* [Choose the Desktop Application to Automate](https://www.telerik.com/teststudio/documentation/automated-tests/desktop-testing/desktop-test#choose-the-desktop-application-to-automate)
* [Finish Desktop Test Configuration](https://www.telerik.com/teststudio/documentation/automated-tests/desktop-testing/desktop-test#finish-desktop-test-configuration)
> **Tip**
>
>
> Check this video tutorial for recording an end-to-end Desktop test scenario.
## Configure Desktop Test to Record Specific Application
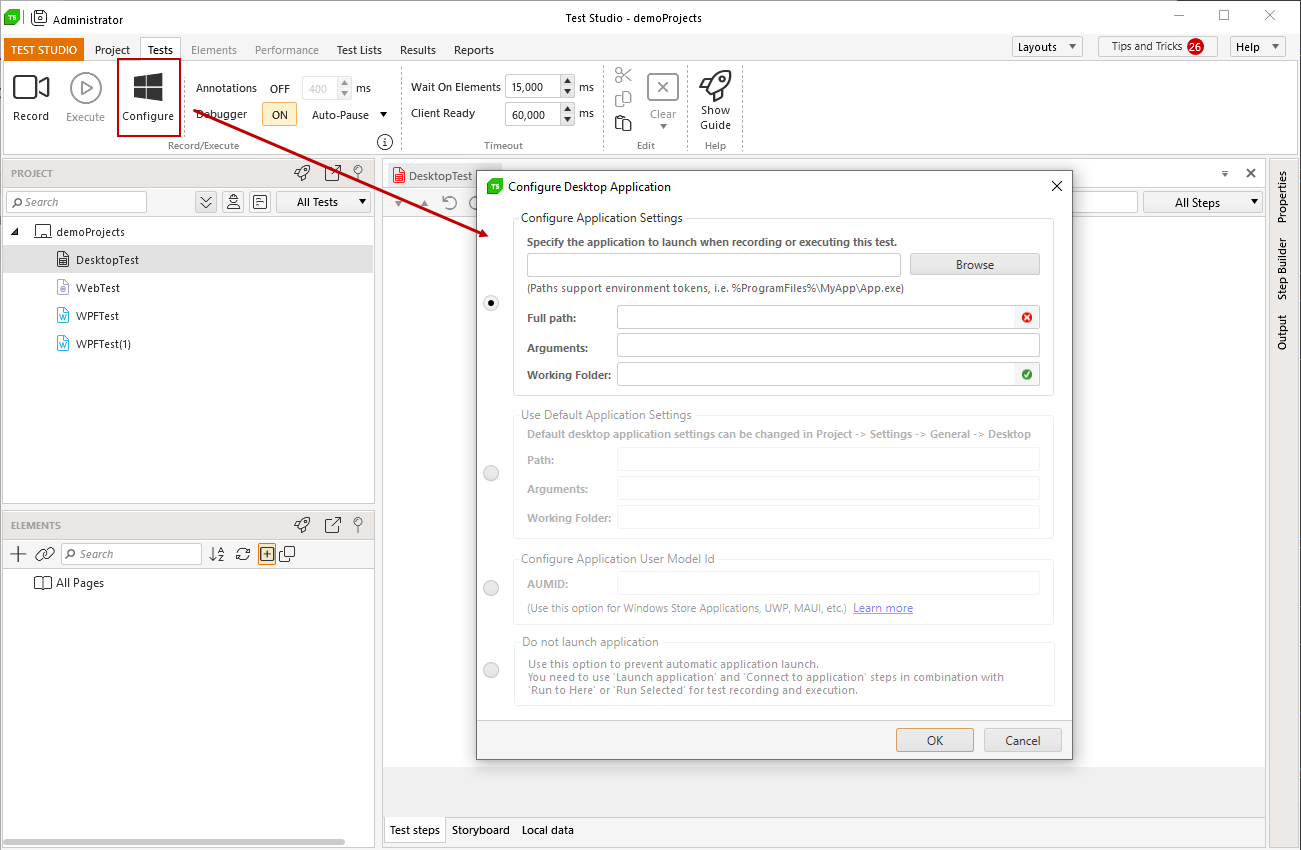
The **configuration of the desktop test requires a desktop app to be specified** and, thus, used for recording and execution. Open a Desktop test in Test Studio and find the **Configure** button in the **Test** tools ribbon. Click the **Configure** button to open the **Desktop App Config Wizard**.
> **Tip**
>
>
> If you try to initiate a recording session in a desktop test, before this is configured, the **Desktop Config Wizard** pops up and lets you choose the application to automate.
## Choose the Desktop Application to Automate
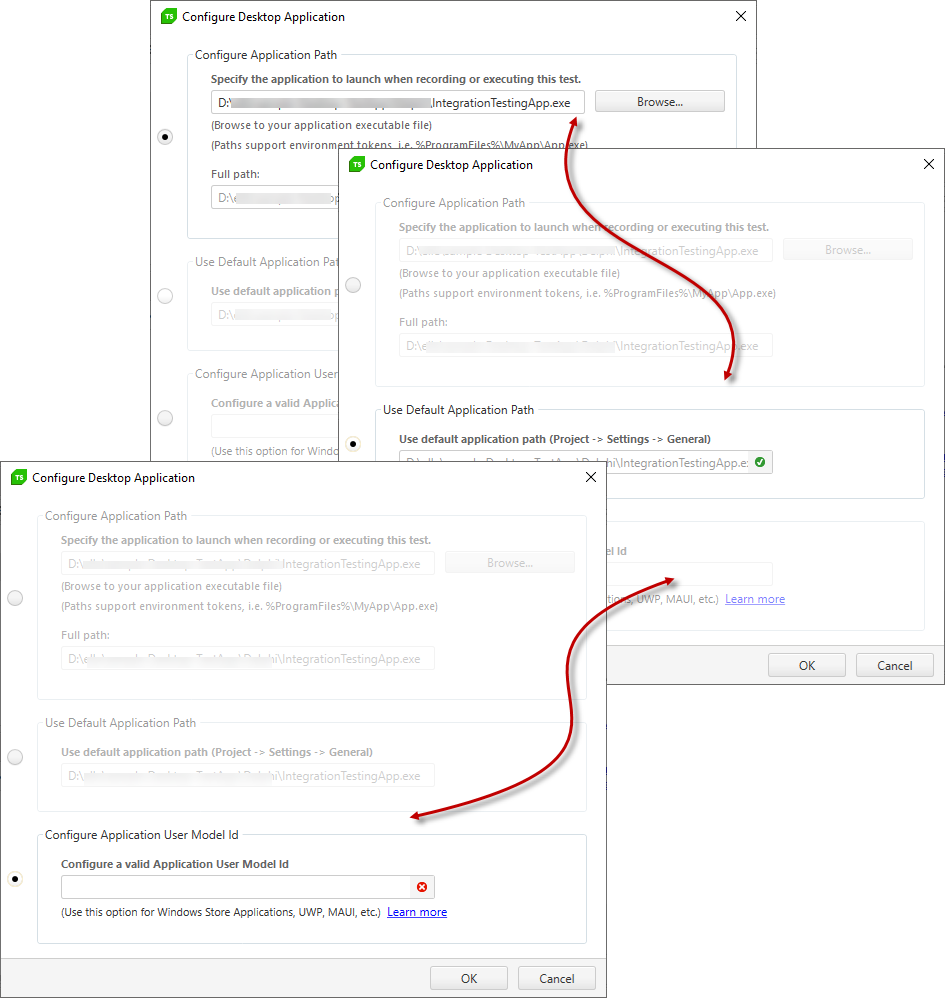
Test Studio provides different options to define the application to automate:
* [Specify an executable file](https://www.telerik.com/teststudio/documentation/automated-tests/desktop-testing/desktop-test#configure-application-path-in-desktop-test) for this test;
* [Use a default path](https://www.telerik.com/teststudio/documentation/automated-tests/desktop-testing/desktop-test#use-default-desktop-application-path) to the executable file set on project level;
* [Define startup arguments and working directory](https://www.telerik.com/teststudio/documentation/automated-tests/desktop-testing/desktop-test#startup-arguments-and-working-folder-for-desktop-application)
* [Specify an Application User Model ID](https://www.telerik.com/teststudio/documentation/automated-tests/desktop-testing/desktop-test#configure-application-user-model-id);
* [Choose to not launch an application](https://www.telerik.com/teststudio/documentation/automated-tests/desktop-testing/desktop-test#do-not-launch-desktop-application)
## Configure Application Path in Desktop Test
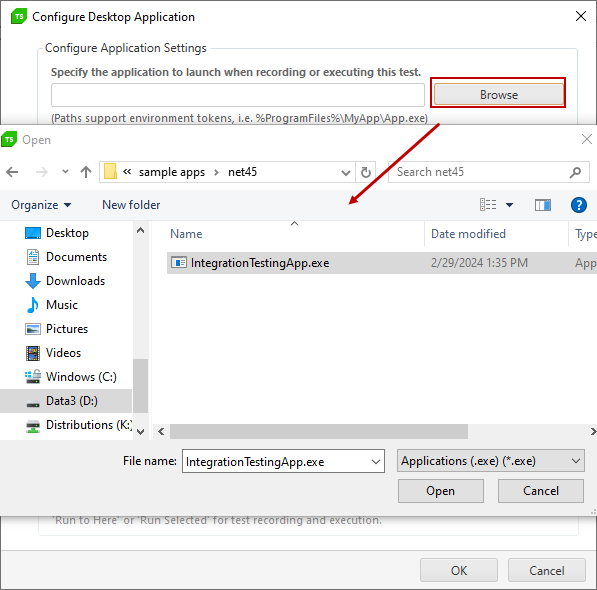
Click the **Browse** button to open File Explorer and browse to the folder with the executable file and select it.
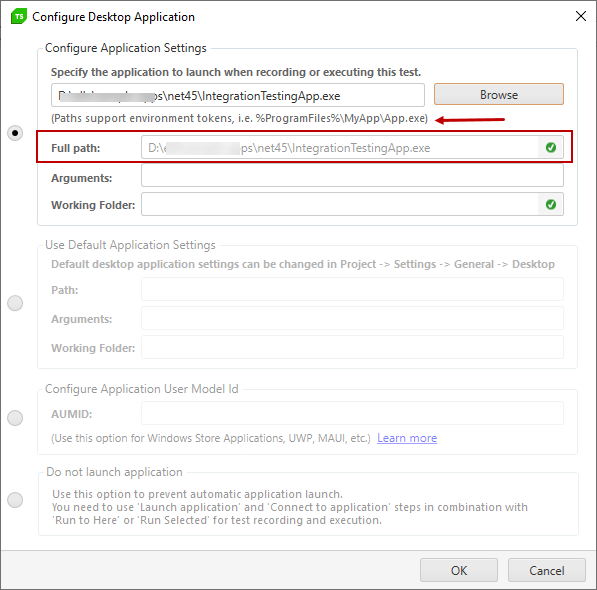
The **Desktop Application Path** field supports using environment tokens (such as `%Program Files%\MyApp\App.exe`). When using environment tokens, the **Full Path** field displays the full path to the executable file.
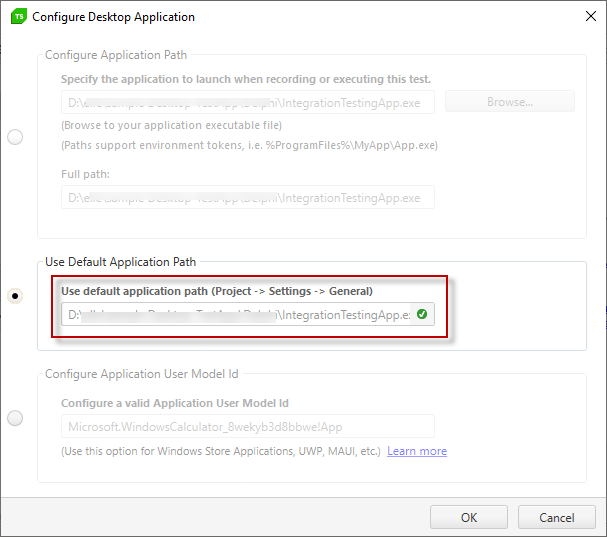
## Use Default Desktop Application Path
The automation process requires multiple tests to be created for a single application. In such case configuring each created test will be a tedious task. Thus Test Studio allows you to **set a default desktop app path on project level** and use this for all desktop tests.
The option is available in Project Settings -> General and once a **Default Desktop App is set** each new Desktop test in the project is configured to use it.
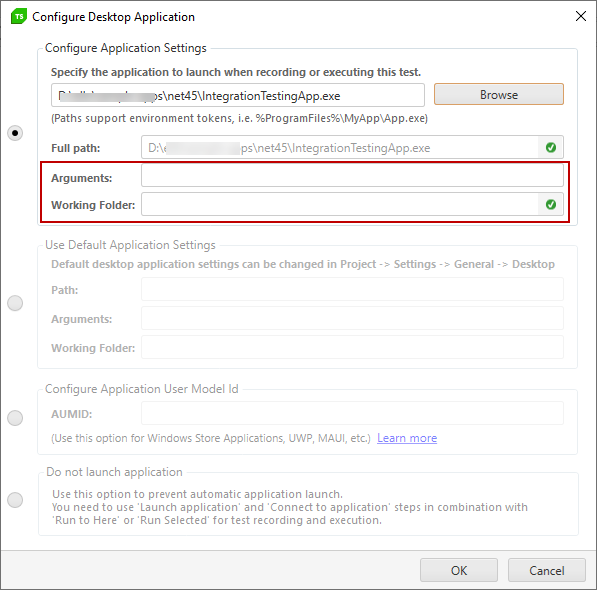
## Startup Arguments and Working Folder for Desktop Application
The configuration of a desktop application lets you set startup **Arguments** and a **Working folder** if these are required for the proper functioning of the tested app.
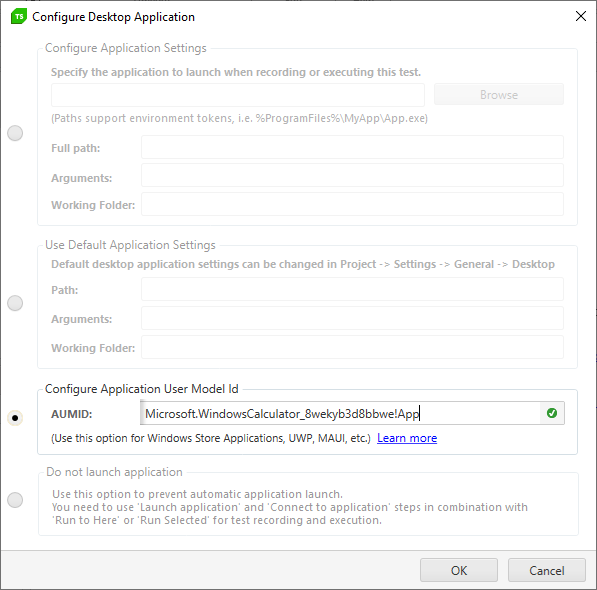
## Configure Application User Model ID
Modern desktop applications are not always started with an executable file. Example of such apps are all applications from the Windows store, UWP or Maui-based apps. To enable this type of automation Test Studio Desktop tests support configuring a test using the Application User Model ID.
> **Tip**
>
>
> **Not sure what is the Applications ID for the tested app?** Follow few simple steps to find the User Model Id and use it in the Test Studio desktop test configuration.
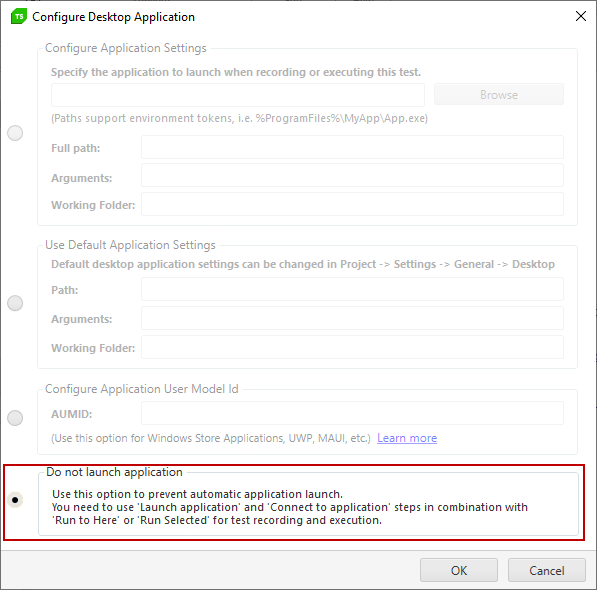
## Do Not Launch Desktop Application
This option lets you prevent the automatic start of an application on test startup. If you select it **use the steps to launch an application and connect the Test Studio process** to it:
* Launch application step
* Connect to application step
> **Tip**
>
>
> **Initiate the recording session** using the partial test run option Run->To Here.
## Finish Desktop Test Configuration
Once you choose the path to the desktop application executable file, you can **confirm the configuration** by pressing the **OK** button. Then, use the **Record** button to launch the specified app in Test Studio recording mode.
> **Tip**
>
>
> In any case, when you need to change the applied settings, hit the **Configure** button to access the wizard again.
## See Also:
* Desktop Test Recording Video Tutorial.