# Welcome Screen
Once you successfully activate a Test Studio license and launch the app, it takes you to the **Welcome Screen**. In this view you can create or open an existing project and access useful samples and tutorials resources.
This article guides you through the different tabs of the **Welcome Screen**:
* [Welcome Screen](https://www.telerik.com/teststudio/documentation/automated-tests/customize-project/welcome-screen#welcome-screen)
* [Project Section](https://www.telerik.com/teststudio/documentation/automated-tests/customize-project/welcome-screen#project-section)
* [Create a New Project](https://www.telerik.com/teststudio/documentation/automated-tests/customize-project/welcome-screen#create-a-new-project)
* [Open an Existing Project](https://www.telerik.com/teststudio/documentation/automated-tests/customize-project/welcome-screen#open-an-existing-project)
* [Open Source Control](https://www.telerik.com/teststudio/documentation/automated-tests/customize-project/welcome-screen#open-source-control)
* [Get Started Section](https://www.telerik.com/teststudio/documentation/automated-tests/customize-project/welcome-screen#get-started-section)
* [News Feed Section](https://www.telerik.com/teststudio/documentation/automated-tests/customize-project/welcome-screen#news-feed-section)
## Project Section
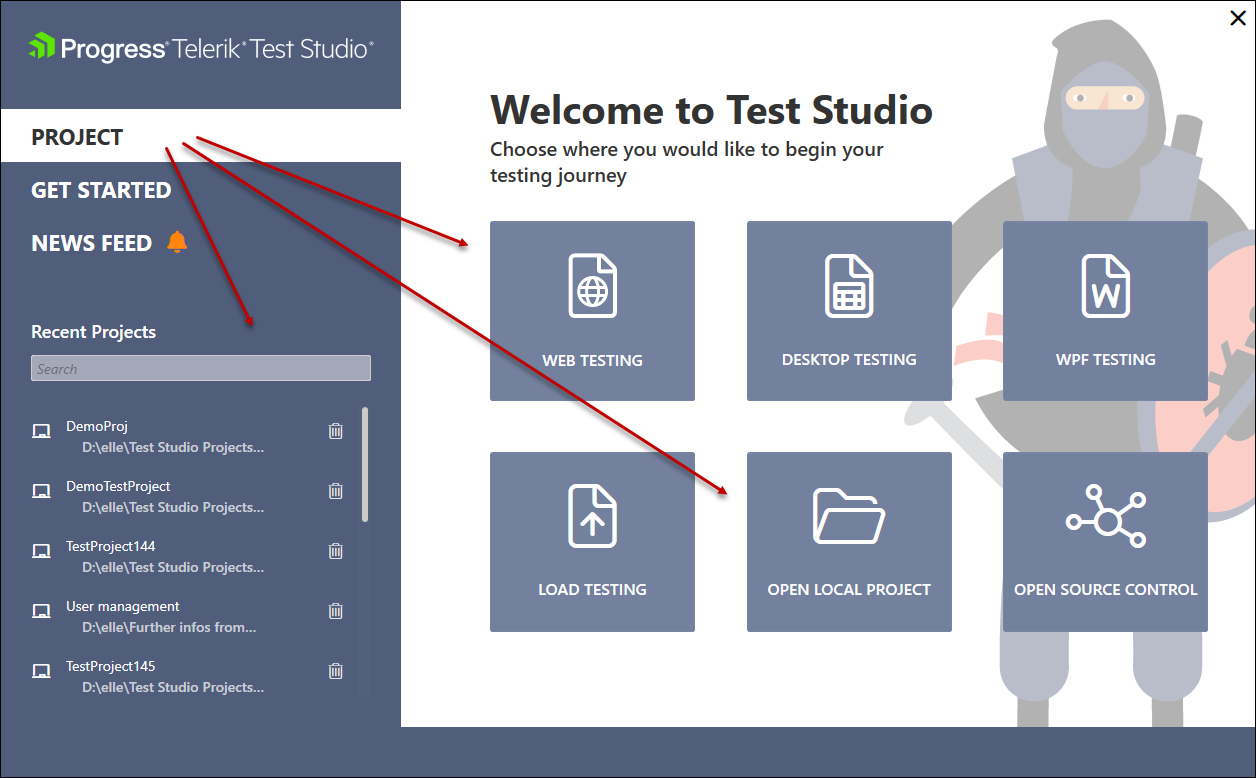
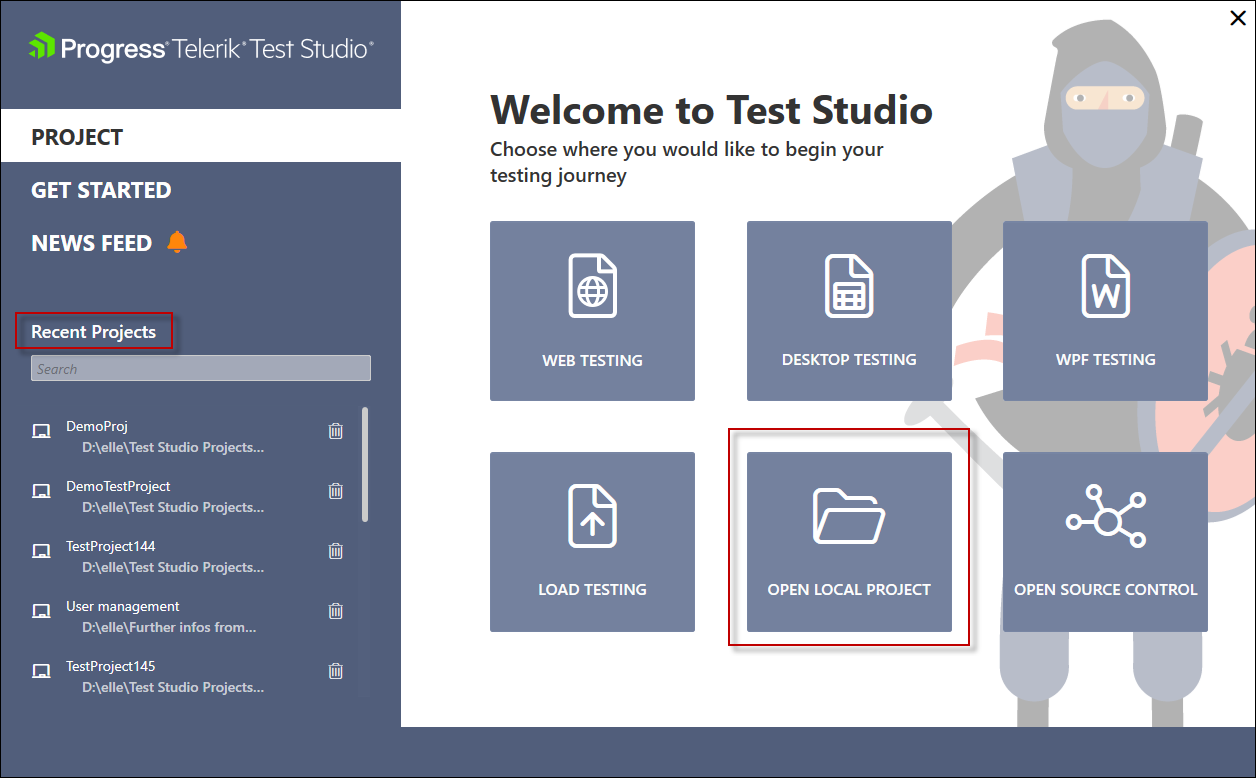
In the **Project** section of the **Welcome screen**, you can choose between creating a [new project](https://www.telerik.com/teststudio/documentation/automated-tests/customize-project/welcome-screen#create-a-new-project) or [opening an existing one](https://www.telerik.com/teststudio/documentation/automated-tests/customize-project/welcome-screen#open-an-existing-project). You can pick from a list of recently used projects on the left, or browse your local folders through the **Open Local** button. You can also [open a remote project from a source control repository](https://www.telerik.com/teststudio/documentation/automated-tests/customize-project/welcome-screen#open-source-control) (Git or TFS).
> **Tip**
>
>
> Once you open the test project, you can adjust the Test Studio layout and make it fit your environment and needs.
### Create a New Project
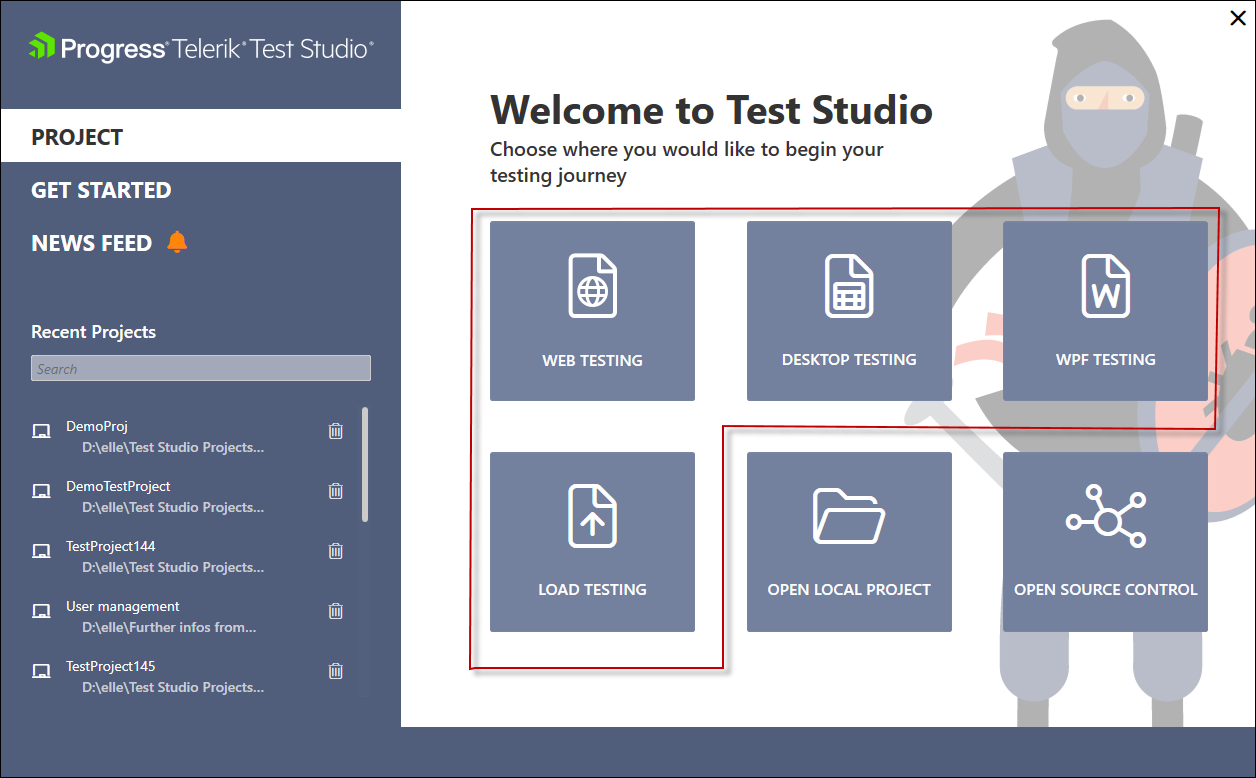
To create a new project you can choose between a couple types of testing
* **Web Testing**,
* **Desktop Testing**,
* **WPF Testing**, or
* **Load Testing** (Load testing is only available in Test Studio Ultimate).
Depending on your choice the newly created project contains a test of the selected type. The initial test type selected in the beginning does not limit the project to only this type of tests. Any Test Studio test can be added at any time in the project.
To create a new project:
1. Choose the type of testing to start with.
2. Set the project name and, optionally, change the location folder where Test Studio projects are stored.
3. Confirm the creation with pressing the **OK** button. The **Cancel** button returns you to the previous screen.
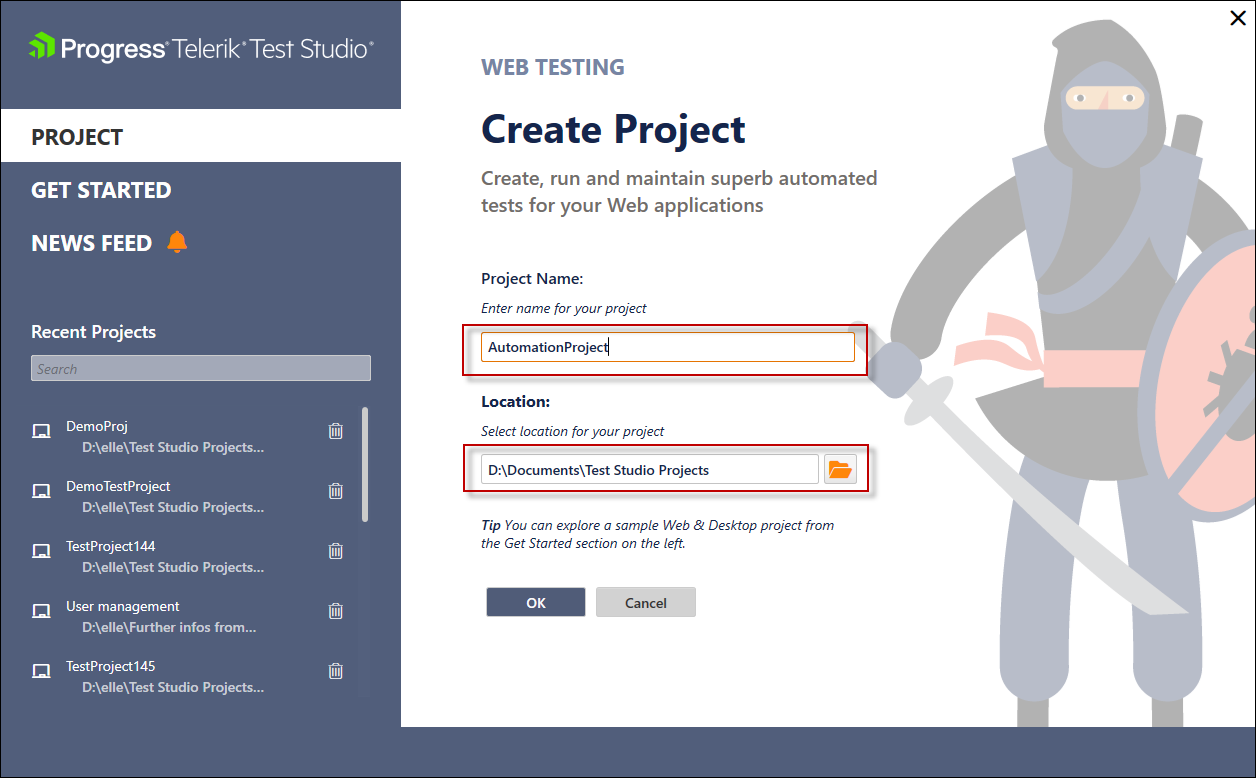
The default location where Test Studio creates projects is **C:\Users\\\\Documents\Test Studio Projects**. The **Browse Folder** button allows you to change this location by choosing another folder.
> **Note**
>
>
> The **user needs to have read/write permissions for the folder** in which the project is created.
### Open an Existing Project
The **Recent projects** section on the left shows a list of the projects you worked on lately - these are listed with their name and folder location. The *Delete* icon removes the project from the list (it does not remove the actual project files from the disc).
The **Open Local Project** option let's you browse to a local folder which contains a Test Studio project to load.
> **Note**
>
>
> The **user needs to have read/write permissions for the folder** in which the existing projects are stored.
### Open Source Control
Test Studio provides built-in integration for TFVC and Git based repositories. The **Open Source Control** option let's you specify a remote repository to clone locally - you can choose from Git or TFS.
> **Note**
>
>
> The **user needs to have read/write permissions for the folder** in which the project gets cloned.
## Get Started Section
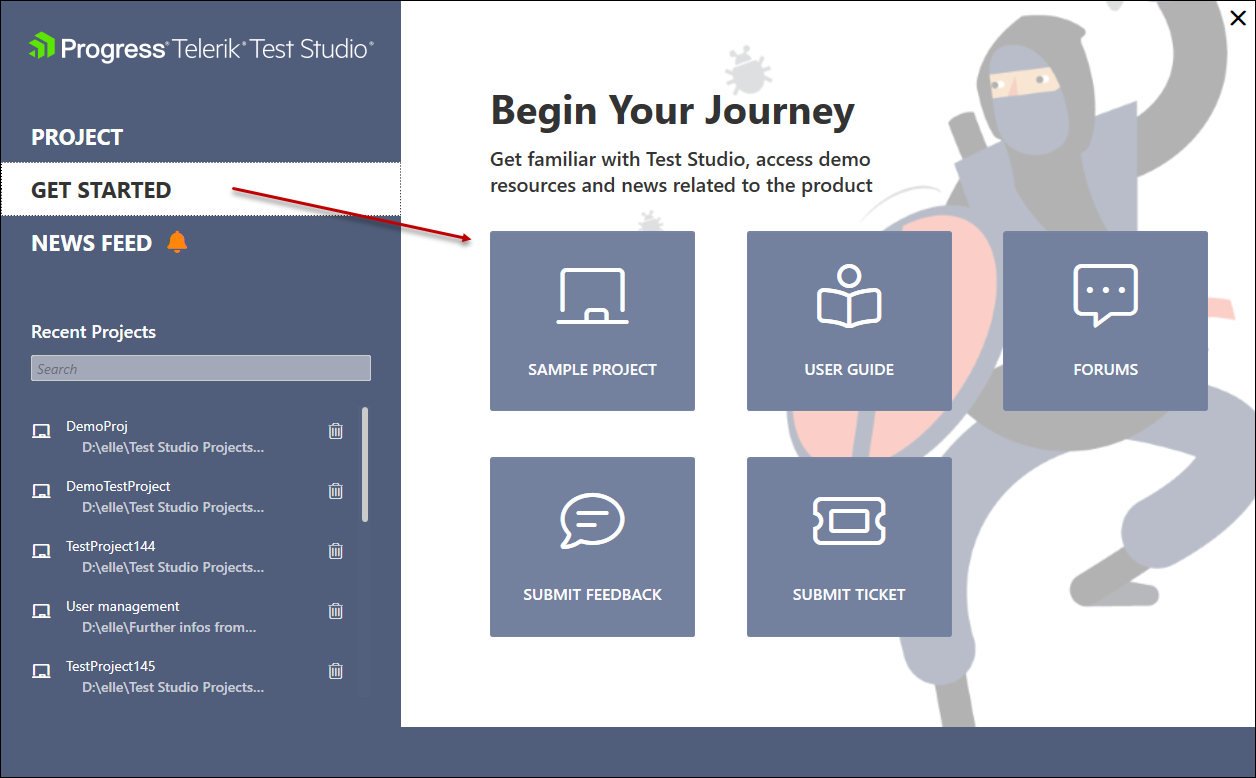
The **Get Started** section lets you create the demo project, open the online help documentation and public Telerik forums, and submit your feedback or tickets to the Support team.
## News Feed Section
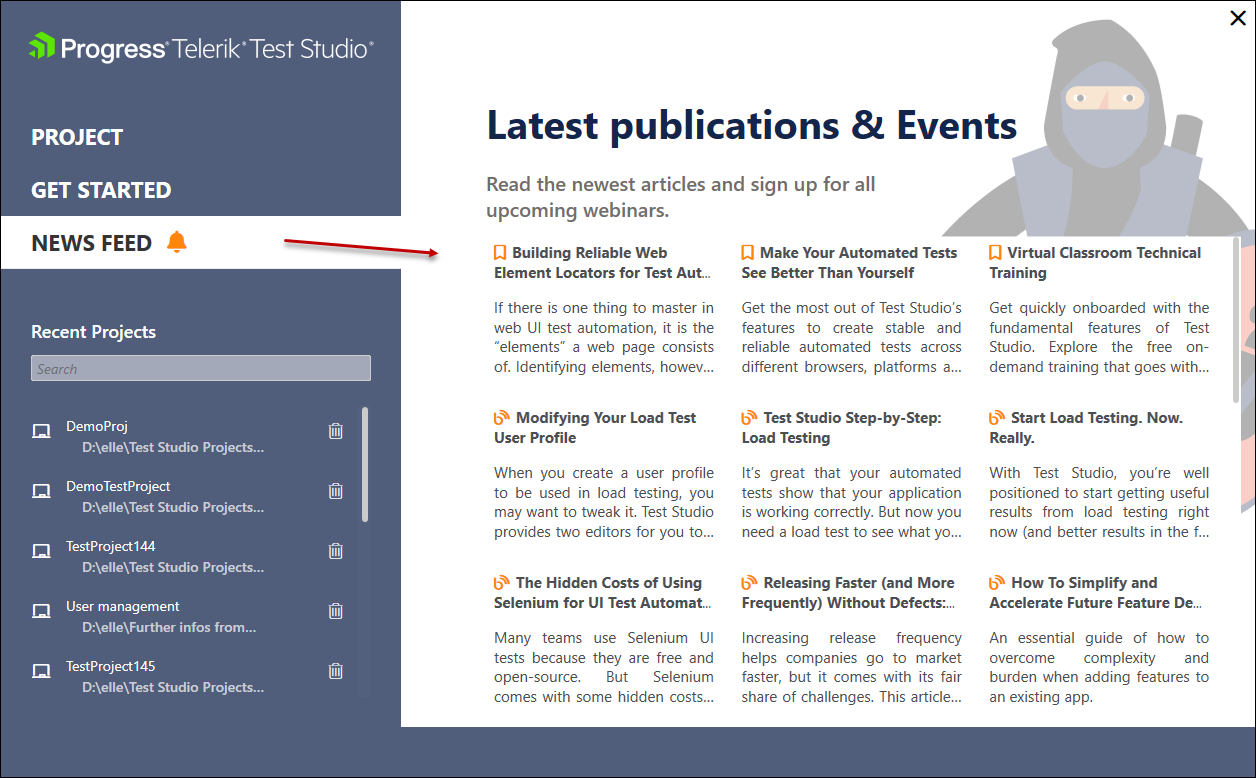
The **News Feed** section lists important news related to the product, links to new Test Studio blog posts on the Telerik site. The content is updated live and requires Internet connection.