# Styling RadGridView
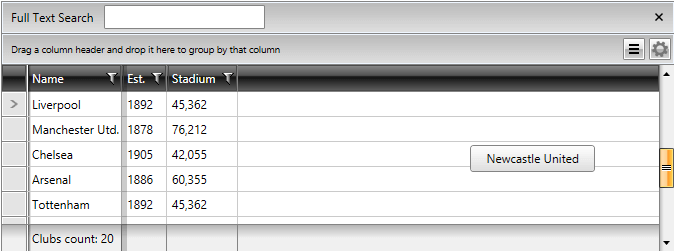
> caption The default RadGridView control
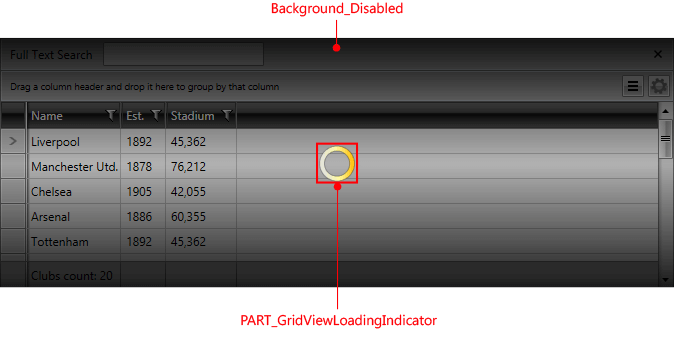
> caption RadGridView template structure

## Targeting the RadGridView Element
In order to style all instances of **RadGridView** in your application, you should create an appropriate style targeting the **RadGridView** control.
You have two options:
* To create an empty style and set it up on your own.
* To copy the default style of the control and modify it.
> To learn how to modify the default **RadGridView** style, please refer to the [Modifying Default Styles](https://www.telerik.com/products/wpf/documentation/controls/radgridview/styles-and-templates/modifying-default-styles) article.
**Example 1: Styling all instances of RadGridView in an application**
```XAML
```
> If you're using [Implicit Styles](https://www.telerik.com/products/wpf/documentation/styling-and-appearance/styling-apperance-setting-a-theme-overview), you should base your style on the **RadGridViewStyle**.
## Setting RadGridView's Style Property
**RadGridView** exposes a **Style** property that allows you to apply a style to a specific **RadGridView** control.
**Example 1: Setting RadGridView Style**
```XAML
```
## Controlling RadGridView Appearance through Properties
**RadGridView** also exposes a number of properties with which you can easily customize the control without the need of modifying its default style. They can be separated into the following categories:
* [General](https://www.telerik.com/products/wpf/documentation/controls/radgridview/styles-and-templates/styling-radgridview#general)
* [Columns](https://www.telerik.com/products/wpf/documentation/controls/radgridview/styles-and-templates/styling-radgridview#columns)
* [Rows](https://www.telerik.com/products/wpf/documentation/controls/radgridview/styles-and-templates/styling-radgridview#rows)
* [Groups](https://www.telerik.com/products/wpf/documentation/controls/radgridview/styles-and-templates/styling-radgridview#groups)
### General
This section covers the following properties:
* **GridLinesVisibility**: Control the way by which the grid lines are visualized. You can choose one of the four possible values defined in the **GridLinesVisibility** enumeration - **Both**, **Horizontal**, **Vertical** and **None**.
* **ShowColumnHeaders**: Shows\hides the column headers.
* **ShowColumnFooters**: Shows\hides the column footers.
* **ColumnBackground**: Defines the default background color for all columns.
* **VerticalGridLinesBrush**: Defines the default color for all vertical grid lines.
* **HorizontalGridLinesBrush**: Defines the default color for all horizontal grid lines.
Here is a small sample, demonstrating the usage of some of the above properties.
**Example 2: Usage of General properties**
```XAML
```
The final result should be similar to this:
> caption The result of the modified general properties
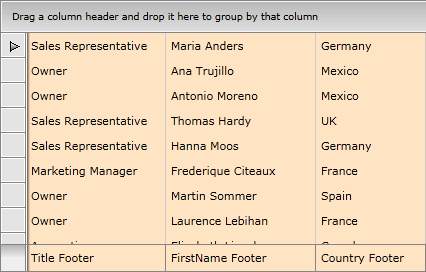
You can see that the columns headers are not visible while the column footers are; moreover, there are only vertical gridlines and the **background** of all columns is set to Bisque.
### Columns
This section covers the following properties:
* **MinColumnWidth**: Gets or sets the **minimum** width constraint of a **GridViewColumn**. The minimum width of the object, in pixels. This value can be any value equal to or greater than 0. However, **System.Double.PositiveInfinity** is **not** valid.
* **MaxColumnWidth**: Gets or sets the **maximum** width constraint of a **GridViewColumn**. The maximum width of the object, in pixels. The default is **System.Double.PositiveInfinity**. This value can be any value equal to or greater than 0. **System.Double.PositiveInfinity** is **also valid**.
* **ColumnWidth**: Gets or sets the width of a **GridViewColumn**.
Here is a small example that demonstrates the usage of some of the above properties.
**Example 3: Usage of Columns properties**
```XAML
```
### Rows
This section covers the following properties:
* **RowIndicatorVisibility**: Shows\hides the row indicators, located on the left of each row.
* **RowDetailsVisibilityMode**: Controls the way by which row details are visualized. You can choose from one of the three possible values defined in the **GridViewRowDetailsVisibilityMode** enumeration: **Collapsed**, **Visible** and **VisibleWhenSelected**.
* **AlternationCount**: Controls the alternate rows count. For example, when set to 2, every second row will have alternating style applied.
* **RowStyle**: Specifies a style for the rows. [Read more](https://www.telerik.com/products/wpf/documentation/controls/radgridview/styles-and-templates/styling-a-row)
* **AlternateRowStyle**: Specifies a style for the alternate rows. [Read more](https://www.telerik.com/products/wpf/documentation/controls/radgridview/styles-and-templates/styling-a-row)
* **RowDetailsStyle**: Specifies a style for the row details. [Read more](https://www.telerik.com/products/wpf/documentation/controls/radgridview/styles-and-templates/styling-row-details)
* **HeaderRowStyle**: Specifies a style for the header row. [Read more](https://www.telerik.com/products/wpf/documentation/controls/radgridview/styles-and-templates/styling-header-row)
Here is a small example that demonstrates the usage of some of the above properties.
**Example 4: Usage of Rows properties**
```XAML
```
> caption The result of the modified rows properties
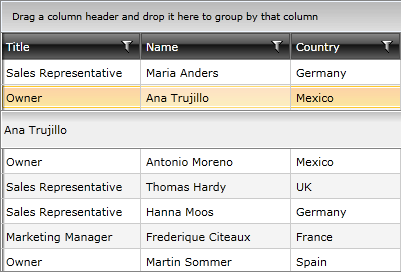
You can see that the row indicators are missing and the row details are displayed only for the selected row. Moreover, each even row has different styling because of the **AlternationCount** property.
### Groups
This section covers the following properties:
* **ShowGroupFooters**: Shows\hides the group footers, located at the bottom of each group.
* **ShowGroupPanel**: Shows\hides the group panel, located at the top of the **RadGridView** control.
* **GroupRowStyle**: Specifies a style for the group row. [Read more](https://www.telerik.com/products/wpf/documentation/controls/radgridview/styles-and-templates/styling-group-row)
* **GroupFooterRowStyle**: Specifies a style for the footer group row. [Read more](https://www.telerik.com/products/wpf/documentation/controls/radgridview/styles-and-templates/styling-group-footers)
Here is a small example that demonstrates the usage of some of the above properties.
**Example 5: Usage of Groups properties**
```XAML
```
> caption The result of the modified groups properties
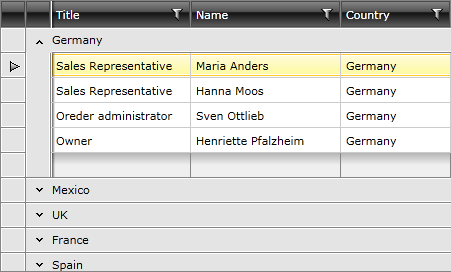
You can see that the group footers are shown while the group panel (located at the top of the **RadGridView**) is no longer visible, thus making any changes in the grouping impossible.