# Styling the StripLine
The axis strip lines are part of the chart axis and are represented by the **Rectangle** control. There are two types of strip lines - Horizontal and Vertical. Each of them contains alternating Lines - one with Gray color by default (called **AlternateStripLine** ) and the other is Transparent (called just **StripLine**).
To create a style for them in Expression Blend use a dummy control and after modifying it,
it to the **AxisStyles** complex property of the **Axis**.
Open your **RadChart** project in Expression Blend. To add the dummy **Rectangle** control you have to go to the XAML view. To do that select *View -> Active Document View -> XAML View* from the menu. Declare a **Rectangle** control in your XAML.
```XAML
```
To go back to the design view select *View -> Active Document View -> Design View* from the menu. In the 'Objects and Timeline' pane select the newly created **Rectangle** control. And select *Object -> Edit Style -> Create Empty* from the menu\*. \*You will be prompted for the name of the style and where to be placed within your application.
> tip If you choose to define the style in Application, it would be available for the entire application. This allows you to define a style only once and then reuse it where needed.
After clicking the OK button, a style with target type **Rectangle** will be created and the properties for this type will be loaded in the 'Properties' pane. Modify them until you get the desired appearance.
After finishing with the changes it is time to set the style. It can be set only through the procedural code, which means that you have to go to the Visual Studio and modify the code-behind file of your UserControl.
```C#
RadChart1.DefaultView.ChartArea.AxisY.AxisStyles.AlternateStripLineStyle = this.Resources["HorizontalAlternateStripLineStyle"] as Style;
RadChart1.DefaultView.ChartArea.AxisY.AxisStyles.StripLineStyle = this.Resources["HorizontalStripLineStyle"] as Style;
```
```VB.NET
RadChart1.DefaultView.ChartArea.AxisY.AxisStyles.AlternateStripLineStyle = TryCast(Me.Resources("HorizontalAlternateStripLineStyle"), Style)
RadChart1.DefaultView.ChartArea.AxisY.AxisStyles.StripLineStyle = TryCast(Me.Resources("HorizontalStripLineStyle"), Style)
```
> tip To show the strip lines for a particular axis you have to set its **StripLinesVisibility** property to **Visible**. Read more about strip lines [here](https://www.telerik.com/products/wpf/documentation/controls/radchart/features/axes/striplines-and-gridlines).
Here is a snapshot of the sample result:
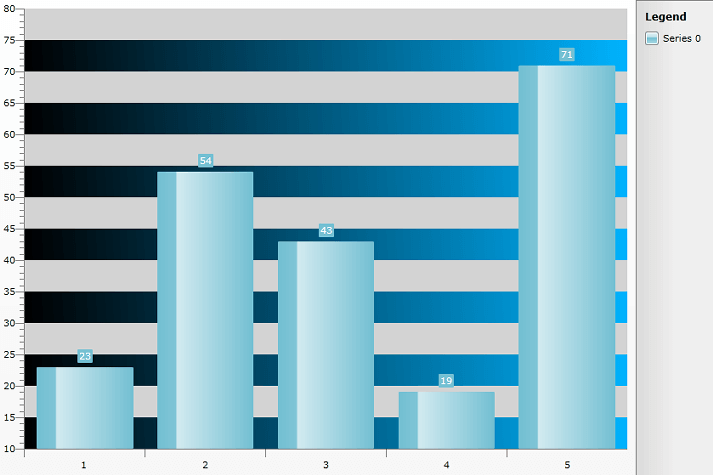
Here is the final XAML for the **Styles** used:
```XAML
```
```XAML
```