# CommandItem Overview
The **CommandItem** is a placeholder for commands that can perform an action on selected or all items. See the [RadGrid command reference](https://www.telerik.com/help/aspnet-ajax/grid-command-reference.html) for details about the available commands.
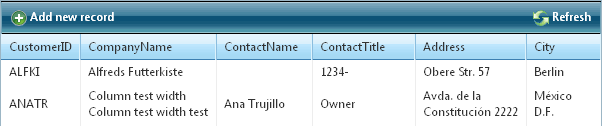
The \[Add new record] and \[Refresh] buttons will be automatically placed in a command item (**GridCommandItem**). If you need to access them server-side you have to know their IDs:
* \*\*AddNewRecordButton -\*\*Add new record image button
* \*\*InitInsertButton -\*\*Add new record link button
* \*\*RefreshButton -\*\*Refresh image button
* **RebindGridButton -** Refresh link button
Additionally, you have the option of exposing buttons for exporting RadGrid data to the four supported export types: Word, Excel, PDF and CSV. This functionality is available through the
**ShowExportTo\[Excel/Word/Pdf/Csv]Button** properties in the **CommandItemSettings**.
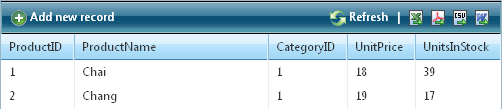
The four export buttons have the following server-side IDs:
* **ExportToExcelButton**
* **ExportToWordButton**
* **ExportToPdfButton**
* **ExportToCsvButton**
You need to know the IDs of the export buttons if you are exporting through an AJAX-ified RadGrid, as described in the [following help topic](https://www.telerik.com/products/aspnet-ajax/documentation/controls/grid/how-to/exporting/export-from-ajaxified-grid).
The \[***Save Changes***] and \[***Cancel Changes***] buttons must be used only with **Batch Editing**:
* \*\*SaveChanges -\*\*Initiates saving for the changes made on a **RadGrid** in **Batch** edit mode
* \*\*CancelChanges -\*\*Cancels the changes made on a **RadGrid** in **Batch** edit mode
The **CommandItem** is availableas a property (**CommandItemDisplay**) ofthe MasterTableView tag of RadGrid.
To enable the **CommandItem**, you need to use the **CommandItemDisplay** property of the **MasterTableView** of RadGrid, choosing an appropriate position for the command item-(**Top** / **Bottom** / **TopAndBottom** / **None**).
Basically, there are two groups of properties, pertaining to the Command Item. One of them is set in the tag of the **MasterTableView**, and the other one, as properties for the **RadGrid** control. Additionally, there is a group of style settings, which can be set through the **CommandItemStyle** tag of the RadGrid control (and which are also available as properties of **RadGrid**, and the **MasterTableView**). This is demonstrated in the code snippet below:
```ASP.NET
```
The same settings are available as properties of the grid control:
```ASP.NET
...
```
There is one additional tag, the **CommandItemSettings**, which includes settings for the commandItem’s image paths, button text and the options to show or hide the default command buttons (Add New Record, Refresh and the four export buttons).
```ASP.NET
```
These settings can also be included directly as settings of the **MasterTableView** declaration of **RadGrid**:
```ASP.NET
```
The **RadGrid.ItemCommand** event will be fired when a custom command bubbles from the **CommandItem**, which lets you define any functionality you can think of. A great benefit is that all the buttons residing in the **CommandItem**, will automatically take advantage of the RadGrid AJAX mechanism, without writing any extra code.
## See Also
* [Command Reference ](https://www.telerik.com/products/aspnet-ajax/documentation/controls/grid/control-lifecycle/command-reference-)
* [Command Item Template](https://www.telerik.com/products/aspnet-ajax/documentation/controls/grid/data-editing/commanditem/command-item-template)
* [Styling the CommandItem](https://www.telerik.com/products/aspnet-ajax/documentation/controls/grid/appearance-and-styling/styling-the-commanditem)