# Getting Started with the .NET MAUI SegmentedControl
This guide provides the information you need to start using the Telerik UI for .NET MAUI SegmentedControl by adding the control to your project.
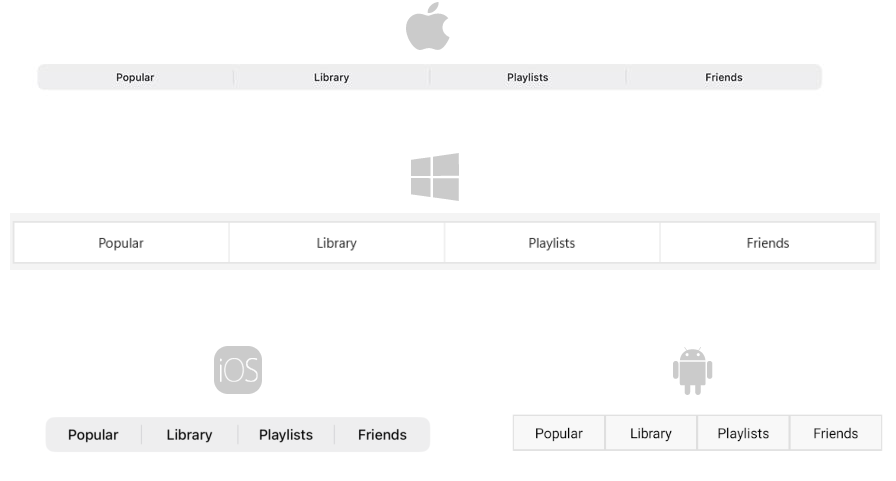
At the end, you will achieve the following result.
## Prerequisites
Before adding the SegmentedControl, you need to:
1. [Set up your .NET MAUI application](https://www.telerik.com/maui-ui/documentation/get-started/quickstart#prerequisites).
2. [Set Up Telerik Development Environment](https://www.telerik.com/maui-ui/documentation/get-started/quickstart#set-up-telerik-development-environment)
## Define the Control
**1.** When your .NET MAUI application is set up, you are ready to add a SegmentedControl to your page. Define the control and populate it by using the `ItemsSource` property:
```XAML
Popular
Library
Playlists
Friends
```
**2.** Alternatively, you can display custom content in each segment through the `ItemTemplate` property. The example below renders an image in each segment:
```XAML
available.png
away.png
busy.png
```
**3.** Add the following namespace:
```XAML
xmlns:telerik="http://schemas.telerik.com/2022/xaml/maui"
```
**4.** Register the Telerik controls through the `Telerik.Maui.Controls.Compatibility.UseTelerik` extension method called inside the `CreateMauiApp` method of the `MauiProgram.cs` file of your project:
```C#
using Telerik.Maui.Controls.Compatibility;
public static class MauiProgram
{
public static MauiApp CreateMauiApp()
{
var builder = MauiApp.CreateBuilder();
builder
.UseTelerik()
.UseMauiApp()
.ConfigureFonts(fonts =>
{
fonts.AddFont("OpenSans-Regular.ttf", "OpenSansRegular");
});
return builder.Build();
}
}
```
> tip For a runnable example demonstrating the SegmentedControl Getting Started scenario, see the [SDKBrowser Demo Application](https://www.telerik.com/maui-ui/documentation/demos-and-sample-apps/sdkbrowser-app) and go to the **SegmentedControl > Getting Started** category.
## Additional Resources
* [.NET MAUI SegmentedControl Product Page](https://www.telerik.com/maui-ui/segmented-control)
* [.NET MAUI SegmentedControl Forum Page](https://www.telerik.com/forums/maui?tagId=1785)
* [Telerik .NET MAUI Blogs](https://www.telerik.com/blogs/mobile-net-maui)
* [Telerik .NET MAUI Roadmap](https://www.telerik.com/support/whats-new/maui-ui/roadmap)
## See Also
* [Data Binding](https://www.telerik.com/maui-ui/documentation/controls/segmentedcontrol/data-binding)
* [Size Mode](https://www.telerik.com/maui-ui/documentation/controls/segmentedcontrol/size-mode)
* [Selection](https://www.telerik.com/maui-ui/documentation/controls/segmentedcontrol/selection)
* [Disabled Segments](https://www.telerik.com/maui-ui/documentation/controls/segmentedcontrol/disable-segment)
* [Styling](https://www.telerik.com/maui-ui/documentation/controls/segmentedcontrol/styling)