
Building Reliable Web Element Locators for Test Automation

If there is one thing to master in web UI test automation, it is the “elements” a web page consists of. The biggest chunk of your time, especially when you start with test automation, will go into trying to find elements on a page, such as buttons, inputs, dropdowns, divs, etc.
Identifying elements, however, is as dire as it is daunting, especially when they lack unique IDs or class names. This blog post will walk you through everything important you need to be able to identify web elements and become as pro as it gets in test automation.
The Importance of Elements in Web Testing
Elements play a significant role in web application testing. Everything that the user sees in a webpage’s UI is made up of elements. If you are tasked with developing web UI test automation, regardless of if you are using Selenium WebDriver or a commercial automated qa tool, you will probably spend a significant amount of time understanding the application under test.
You need to know how the application is structured, how each element is defined and how to best enable your testing tool to discover the elements in the DOM (Document Object Model) tree. Finding elements on a page is a common challenge for automation QAs, especially if the elements lack unique ID or name attribute. Webpages consist of different types of elements such as:
- Buttons
- Links
- Images
- Inputs
- Radio buttons
- Checkboxes
- Dropdown lists
- Text areas
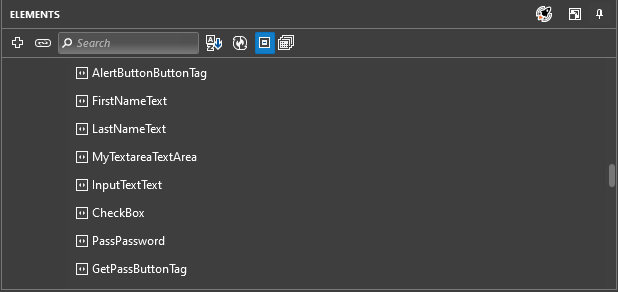
These elements are specified in the HTML by tag name, attributes and content. They may also have child elements, such as an item in a dropdown list. CSS may be applied to elements to style them with colors, sizes, position, etc. In Test Studio, during test recording, elements are added to a centralized location called Elements Explorer and serving as a visual representation of all recorded elements.
As elements are added to the Elements Explorer, Test Studio uses an intelligent element identification logic to autogenerate unique find expressions for each element. When an element is ready to be added to the Elements Explorer, Test Studio tries to
use the first item in the list (usually ID). Based on this criterion, if the item is unique for the entire page, the element gets added to the repository of elements, followed by the creation of a find expression for that element.
However, finding the right element on a page can be tricky, especially when elements lack unique attributes such as ID. Modern web applications often generate dynamic IDs for elements. In that case, ID is not a reliable attribute to be used for enhancing your element find logic. Luckily, you can easily configure Test Studio to skip dynamic IDs when creating find expressions.
Sample Scenario To Enhance Test Studio’s Elements Find Logic
Here is a simple scenario to navigate the process of enhancing Test Studio’s element find logic. For the purpose of the demo, I am using a sample application and the following scenario:
- Record button click
- Execute your test to make sure that ID is not used for button identification
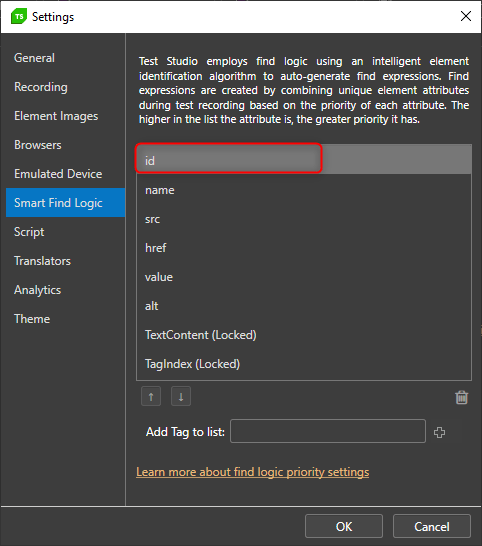
You can easily achieve that in Test Studio because you can add custom attributes by going to Settings > Smart Find Logic. Type class in the “Add tag” input and once added make sure you move it to the top of the list. By doing that, you enhance Test Studio’s find logic by instructing Test Studio to use the class attribute prior to the ID when building find expressions for elements.
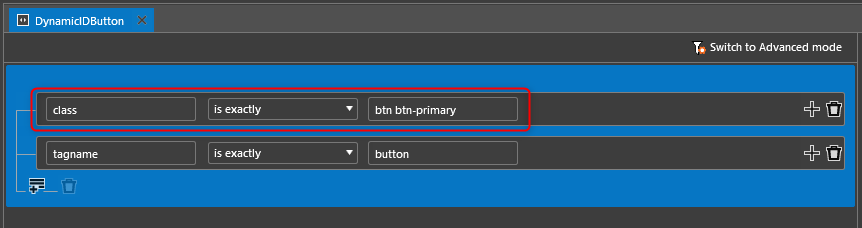
Once amended, your find expression should look like the one in the image below.
When you run the recorded test, its expected behavior is to pass successfully because it uses the correct attribute in its find expression. What better news than seeing a green light next to all your test steps!
Find Logic Back-Up Mechanism
If you did not tweak Test Studio’s find logic as described, your elements will be recorded with ID instead of class. Your test will still pass but with a warning to edit the element’s find logic. If you wonder why the test passes even if the element is using dynamic ID, the answer lies with Test Studio’s back-up mechanism.
During test recording, Test Studio also records images for each element. When the original ID-based find logic fails, Test Studio immediately tries to find the respective image, then identify the element related to that image. Following that action, Test Studio executes the test step successfully, regardless if it is a simple click, type-in, button toggle or a more complex grid filtering change. The test will pass green with just a warning letting you know that the original find logic failed. Here is a blog post with a lot of details around the image-based element identification.
Summary
Web UI testing doesn’t have a stellar reputation and is often unduly criticized for being “flaky” because of randomly failing tests for unexpected/unknown reasons. However, much of the “test flakiness” automation QAs experience with web testing is caused by the lack of deep understanding of how an application is built and what unique attributes its elements provide to enhance the work of test automation tools, including Selenium WebDriver. Doing all the work related to identifying unique element attributes in the beginning, will save you a lot of trouble in the long term.

Ivaylo Todorov
Ivaylo is a QA Engineer on the Progress Test Studio team, where he helps build a better and more reliable product. Before starting as a QA Engineer, Ivaylo spent three years as a Technical Support Engineer in Test Studio doing his best to guide customers in their automation endeavours. Ivaylo enjoys skiing, cooking and portrait photography.
Related Posts
Comments
All articles
Topics

Latest Stories
in Your Inbox
Subscribe to be the first to get our expert-written articles and tutorials for developers!
All fields are required