# Getting Started with the MultiViewCalendar
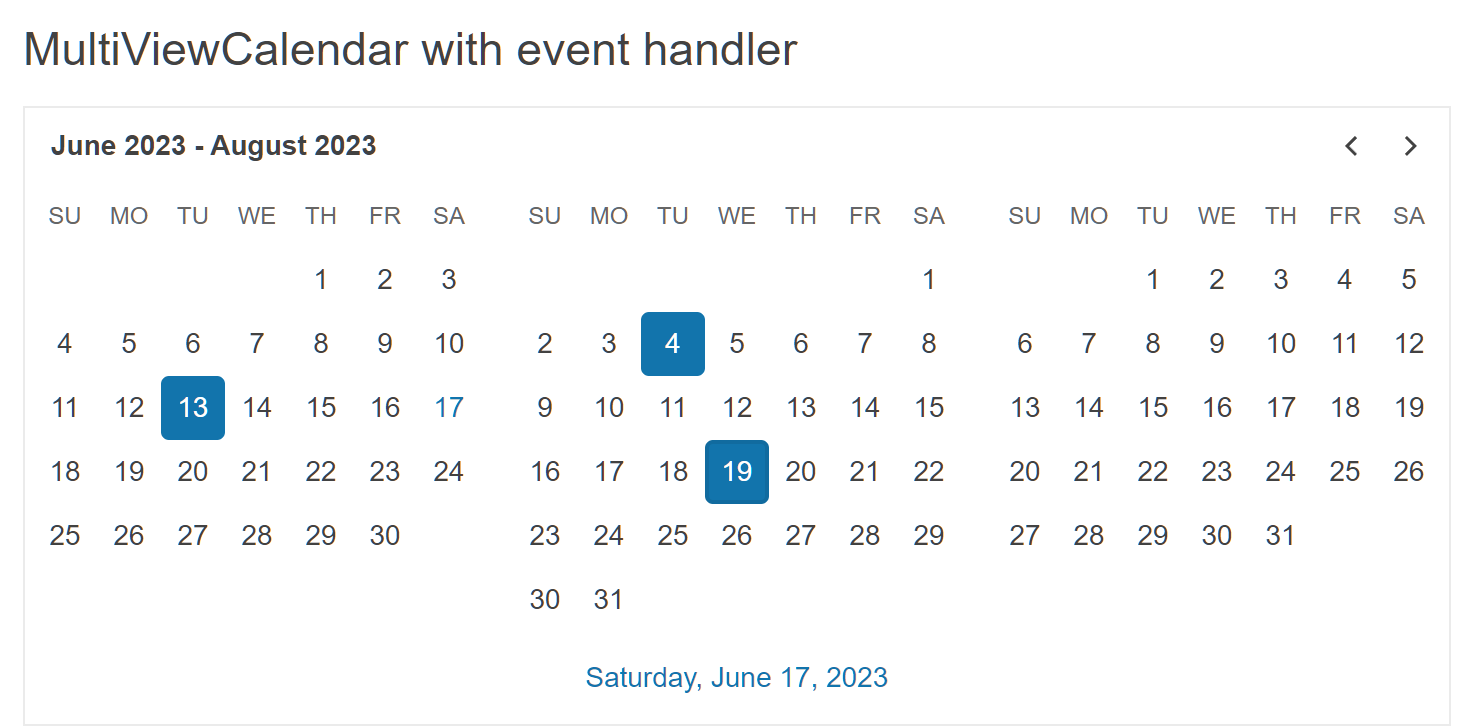
This tutorial explains how to set up a basic Telerik UI for ASP.NET Core MultiViewCalendar and highlights the major steps in the configuration of the component.
You will initialize a MultiViewCalendar and learn how to disable the selection of every Thursday from the week. Then, you will see how to attach an event handler to the component. Finally, you can run the sample code in [Telerik REPL](https://netcorerepl.telerik.com/) and continue exploring the component.
## Prerequisites
To successfully complete the tutorial, you need a project that is already configured to use the Telerik UI for ASP.NET Core components:
* You can use the [Telerik REPL](https://netcorerepl.telerik.com/) playground and skip installing the components on your system and configuring a project.
* You can prepare a Visual Studio project by following the following guide:
* Creating a new pre-configured project for the Telerik UI for ASP.NET Core components from [a project template](https://www.telerik.com/aspnet-core-ui/documentation/vs-integration/new-project-wizard).
## 1. Prepare the CSHTML File
The first step is to add the required directives at the top of the `.cshtml` document:
* To use the Telerik UI for ASP.NET Core HtmlHelpers:
```cshtml
@using Kendo.Mvc.UI
```
* To use the Telerik UI for ASP.NET Core TagHelpers:
```cshtml
@addTagHelper *, Kendo.Mvc
```
Optionally, you can structure the document by adding the desired HTML elements like headings, divs, paragraphs, and others.
```Razor HtmlHelper
@using Kendo.Mvc.UI
MultiViewCalendar with event handler
```
```Razor TagHelper
@addTagHelper *, Kendo.Mvc
MultiViewCalendar with event handler
```
## 2. Initialize the MultiViewCalendar
Use the MultiViewCalendar HtmlHelper or TagHelper to add the component to a page:
* The `Name()` configuration method is mandatory as its value is used for the `id` and the `name` attributes of the MultiViewCalendar element.
* The `Views()` configuration controls how many months will show at same time. By default, the value is two months.
* The `Selectable()` configuration allows multiple or single selection of dates. By default, single selection is enabled.
```Razor HtmlHelper
@using Kendo.Mvc.UI
MultiViewCalendar with event handler
@(Html.Kendo().MultiViewCalendar()
.Name("multiViewCalendar")
.Views(3)
)
```
```Razor TagHelper
@addTagHelper *, Kendo.Mvc
MultiViewCalendar with event handler
```
## 3. Enable Selection of Multiple Days
The next step is to configure the MultiViewCalendar to allow multiple selection. You can do that by using the `Selectable()` configuration.
```Razor HtmlHelper
@using Kendo.Mvc.UI
MultiViewCalendar with event handler
@(Html.Kendo().MultiViewCalendar()
.Name("multiViewCalendar")
.Views(3)
.Selectable("multiple")
)
```
```Razor TagHelper
@addTagHelper *, Kendo.Mvc
MultiViewCalendar with event handler
```
## 4. Handle a MultiViewCalendar Event
The MultiViewCalendar exposes a `Change()` event that you can handle and assign specific functions to the component. In this tutorial, you will use the `Change()` event to display a message when the user modifies the selected date.
```Razor HtmlHelper
@using Kendo.Mvc.UI
MultiViewCalendar with event handler
@(Html.Kendo().MultiViewCalendar()
.Name("multiViewCalendar")
.Views(3)
.Selectable("multiple")
.Events(e => e.Change("onChange"))
)
```
```Razor TagHelper
@addTagHelper *, Kendo.Mvc
MultiViewCalendar with event handler
```
## 5. (Optional) Reference Existing MultiViewCalendar Instances
You can reference the MultiViewCalendar instances that you have created and build on top of their existing configuration:
1. Use the `id` attribute of the component instance to establish a reference.
```JS script
```
2. Use the [MultiViewCalendar client-side API](https://docs.telerik.com/kendo-ui/api/ui/multiviewcalendar#methods) to control the behavior of the widget. In this example, you will use the `enable` method to disable the multiviewcalendar.
```JS script
```
For more information on referencing specific helper instances, see the [Methods and Events](https://www.telerik.com/aspnet-core-ui/documentation/html-helpers/helper-basics/events-and-methods) article.
## Explore this Tutorial in REPL
You can continue experimenting with the code sample above by running it in the Telerik REPL server playground:
* [Sample code with the MultiViewCalendar HtmlHelper](https://netcorerepl.telerik.com/QxuUbVay17tcipG514)
* [Sample code with the MultiViewCalendar TagHelper](https://netcorerepl.telerik.com/mxEgPhao17C5ECa224)
## Next Steps
* [Customize the Day Template of the MultiViewCalendar](https://www.telerik.com/aspnet-core-ui/documentation/html-helpers/scheduling/multiviewcalendar/day-template)
* [Configure the MultiViewCalendar's Multiple Views](https://www.telerik.com/aspnet-core-ui/documentation/html-helpers/scheduling/multiviewcalendar/multiple-views)
## See Also
* [Using the API of the MultiViewCalendar for ASP.NET Core (Demo)](https://demos.telerik.com/aspnet-core/multiviewcalendar/api)
* [Client-Side API of the MultiViewCalendar](https://docs.telerik.com/kendo-ui/api/ui/multiviewcalendar)
* [Server-Side API of the MultiViewCalendar](https://www.telerik.com/aspnet-core-ui/documentation/api/multiviewcalendar)
* [Knowledge Base Section](https://www.telerik.com/aspnet-core-ui/documentation/knowledge-base)