# Getting Started with the Map
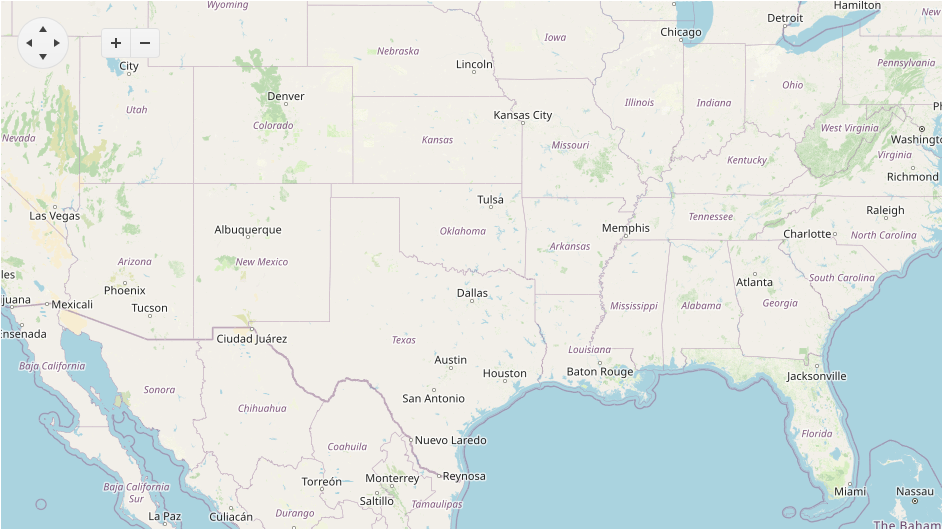
This tutorial explains how to set up a basic Telerik UI for ASP.NET Core Map and highlights the major steps in the configuration of the component.
You will initialize a Map and learn how to zoom in it. Then, you will see how to attach an event handler to the component.
Finally, you can run the sample code in [Telerik REPL](https://netcorerepl.telerik.com/) and continue exploring the component.
## Prerequisites
To successfully complete the tutorial, you need a project that is already configured to use the Telerik UI for ASP.NET Core components:
* You can use the [Telerik REPL](https://netcorerepl.telerik.com/) playground and skip installing the components on your system and configuring a project.
* You can prepare a Visual Studio project by following the following guide:
* Creating a new pre-configured project for the Telerik UI for ASP.NET Core components from [a project template](https://www.telerik.com/aspnet-core-ui/documentation/vs-integration/new-project-wizard).
## 1. Prepare the CSHTML File
The first step is to add the required directives at the top of the `.cshtml` document:
* To use the Telerik UI for ASP.NET Core HtmlHelpers:
```cshtml
@using Kendo.Mvc.UI
```
* To use the Telerik UI for ASP.NET Core TagHelpers:
```cshtml
@addTagHelper *, Kendo.Mvc
```
Optionally, you can structure the document by adding the desired HTML elements like headings, divs, paragraphs, and others.
```Razor HtmlHelper
@using Kendo.Mvc.UI
Map with event handler
```
```Razor TagHelper
@addTagHelper *, Kendo.Mvc
Map with event handler
```
## 2. Initialize the Map
Use the Map HtmlHelper or TagHelper to add the component to a page:
* The `Name()` configuration method is mandatory as its value is used for the `id` and the `name` attributes of the Map element.
* The `Layers()` configuration method determines of the type of the layer.
* The `Center()` configuration method sets the center of the map. Coordinates are listed as \[Latitude, Longitude].
* The `Markers()` configuration method sets the static markers to display on the map.
```Razor HtmlHelper
@using Kendo.Mvc.UI
Map with event handler
@(Html.Kendo().Map()
.Name("map")
.Center(30.268107, -97.744821)
.Layers(layers =>
{
layers.Add()
.Type(MapLayerType.Tile)
.UrlTemplate("https://#= subdomain #.tile.openstreetmap.org/#= zoom #/#= x #/#= y #.png")
.Subdomains("a", "b", "c")
.Attribution("\u00A9 OpenStreetMap contributors");
})
.Markers(markers =>
{
markers.Add()
.Location(30.268107, -97.744821)
.Shape(MapMarkersShape.PinTarget)
.Tooltip(tooltip => tooltip.Content("Austin, TX"));
})
)
```
```Razor TagHelper
@addTagHelper *, Kendo.Mvc
Map with event handler
@{
var coordinates = new double[] { 30.268107, -97.744821 };
var subdomains = new string[] { "a", "b", "c" };
}
```
## 3. Use the Zoom Configuration of the Map
The next step is to configure Zoom configuration. Typical web maps use zoom levels from 0 (whole world) to 19 (sub-meter features). You can do that by using the `Zoom()` configuration.
```Razor HtmlHelper
@using Kendo.Mvc.UI
Map with event handler
@(Html.Kendo().Map()
.Name("map")
.Zoom(5)
.Center(30.268107, -97.744821)
.Layers(layers =>
{
layers.Add()
.Type(MapLayerType.Tile)
.UrlTemplate("https://#= subdomain #.tile.openstreetmap.org/#= zoom #/#= x #/#= y #.png")
.Subdomains("a", "b", "c")
.Attribution("\u00A9 OpenStreetMap contributors");
})
.Markers(markers =>
{
markers.Add()
.Location(30.268107, -97.744821)
.Shape(MapMarkersShape.PinTarget)
.Tooltip(tooltip => tooltip.Content("Austin, TX"));
})
)
```
```Razor TagHelper
@addTagHelper *, Kendo.Mvc
Map with event handler
@{
var coordinates = new double[] { 30.268107, -97.744821 };
var subdomains = new string[] { "a", "b", "c" };
}
```
## 4. Handle a Map Event
The Map exposes a `ZoomStart()` event that you can handle and assign specific functions to the component. In this tutorial, you will use the `ZoomStart()` event to display a message when the user start zooming of in the Map.
```Razor HtmlHelper
@using Kendo.Mvc.UI
Map with event handler
@(Html.Kendo().Map()
.Name("map")
.Zoom(5)
.Center(30.268107, -97.744821)
.Layers(layers =>
{
layers.Add()
.Type(MapLayerType.Tile)
.UrlTemplate("https://#= subdomain #.tile.openstreetmap.org/#= zoom #/#= x #/#= y #.png")
.Subdomains("a", "b", "c")
.Attribution("\u00A9 OpenStreetMap contributors");
})
.Markers(markers =>
{
markers.Add()
.Location(30.268107, -97.744821)
.Shape(MapMarkersShape.PinTarget)
.Tooltip(tooltip => tooltip.Content("Austin, TX"));
})
.Events(e => e.ZoomStart("onZoomStart"))
)
```
```Razor TagHelper
@addTagHelper *, Kendo.Mvc
Map with event handler
@{
var coordinates = new double[] { 30.268107, -97.744821 };
var subdomains = new string[] { "a", "b", "c" };
}
```
For more examples, refer to the [demo on using the events of the Map](https://demos.telerik.com/aspnet-core/map/events).
## 5. (Optional) Reference Existing Map Instances
You can reference the Map instances that you have created and build on top of their existing configuration:
1. Use the `id` attribute of the component instance to establish a reference.
```JS script
```
2. Use the [Map client-side API](https://docs.telerik.com/kendo-ui/api/ui/map#methods) to control the behavior of the widget. In this example, you will use the `center` method to access center the view of the Map
```JS script
```
For more information on referencing specific helper instances, see the [Methods and Events](https://www.telerik.com/aspnet-core-ui/documentation/html-helpers/helper-basics/events-and-methods) article.
## Explore this Tutorial in REPL
You can continue experimenting with the code sample above by running it in the Telerik REPL server playground:
* [Sample code with the Map HtmlHelper](https://netcorerepl.telerik.com/mRlmEblS02CGTQVj42)
* [Sample code with the Map TagHelper](https://netcorerepl.telerik.com/QHbmaFby03r7DXvx18)
## Next Steps
* [Export the Map in PDF, SVG or PNG format](https://www.telerik.com/aspnet-core-ui/documentation/html-helpers/diagrams-and-maps/map/export)
* [Use Remote Binding for the markers of the Map](https://www.telerik.com/aspnet-core-ui/documentation/html-helpers/diagrams-and-maps/map/remote-binding-markers)
## See Also
* [Using the API of the Map for ASP.NET Core (Demo)](https://demos.telerik.com/aspnet-core/map/api)
* [Client-Side API of the Map](https://www.telerik.com/kendo-jquery-ui/documentation/api/dataviz/ui/map)
* [Server-Side API of the Map](https://www.telerik.com/aspnet-core-ui/documentation/api/map)
* [Knowledge Base Section](https://www.telerik.com/aspnet-core-ui/documentation/knowledge-base)