Save Time with NuGet Packages for UI for Xamarin
With our new server hosting Telerik NuGet packages, you can now save time and get all the benefits of package management while developing with UI for Xamarin.
Today, package managers are undoubtedly the preferred way to get third party libraries added to your project. This saves you time and effort, avoiding the manual steps of downloading the library from a website and then adding it to your project.
NPM, NuGet and CocoaPods are a few of the most popular package managers, usually oriented to serve specific audiences and environments. The package manager for developers working with Microsoft technologies is NuGet.
Because of the benefits such a distribution model brings, we recently created a server which hosts all available Telerik NuGet packages. This allows you to easily add the required package(s) into an existing solution. The server greatly improves the getting started experience for both new and experienced customers.
Adding or updating the Telerik references is now just a few clicks away. Below you will find out what is needed in order to get the UI for Xamarin libraries from our NuGet server.
Using Telerik NuGet Server on a Mac with Xamarin Studio
Here are few steps describing how you can easily take advantage of the server while working on a Mac:
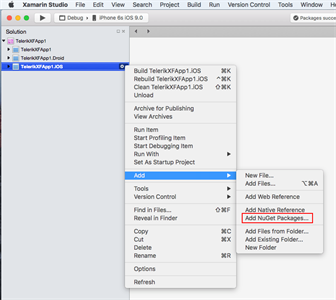
- Open the existing Package Manager
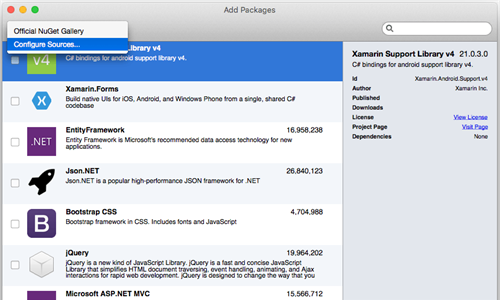
- Go to “Configure Sources…”
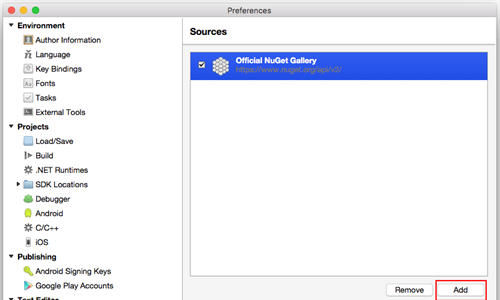
- The next dialog will list all servers that the Package Manager can connect to. You can include the Telerik NuGet Server by clicking Add.
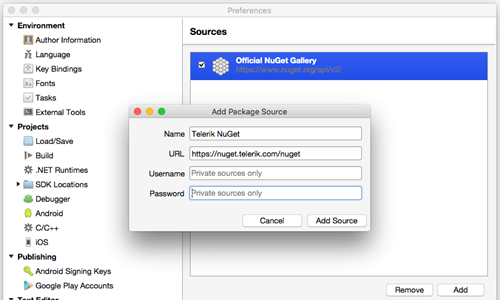
- In the Add Package Source dialog fill in the information of the Telerik server (URL: https://nuget.telerik.com/nuget) as well as your private Telerik credentials. An authentication procedure is required in order to allow downloading any of the existing packages.
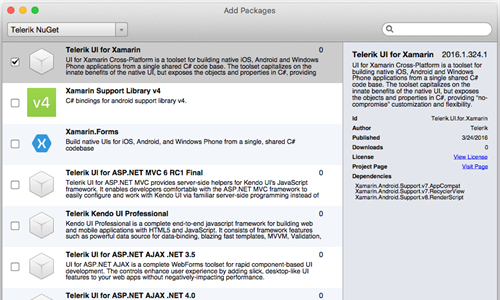
- Once the server is added you can easily add to your projects all Telerik NuGet packages available for your license
Using Telerik NuGet Server on Windows with Visual Studio
Here are some simple steps describing how you can use Windows and Visual Studio to utilize the server:
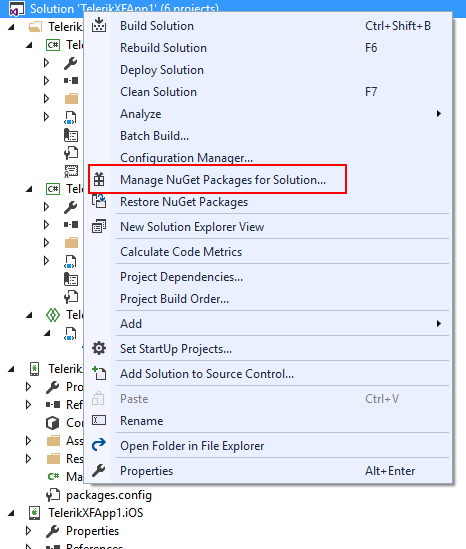
- Open the solution NuGet Package manager
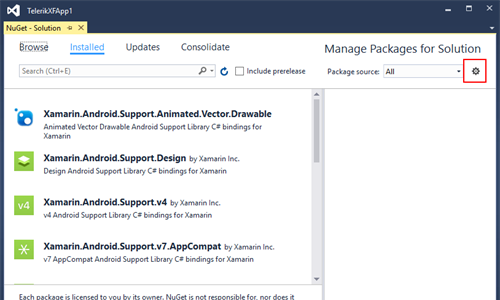
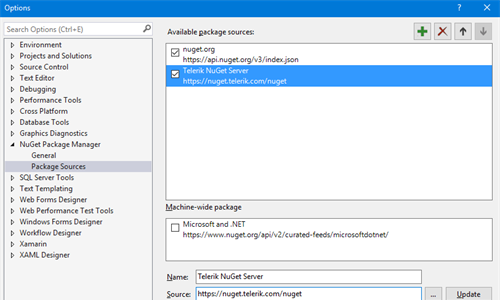
- Open the Package Sources settings window
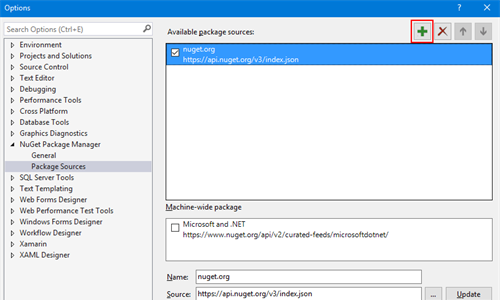
- In the settings window click the “+” button to add a new package source
- When a new package source is added, specify a Name and a URL to the source itself. The address of the Telerik NuGet Server is: https://nuget.telerik.com/nuget
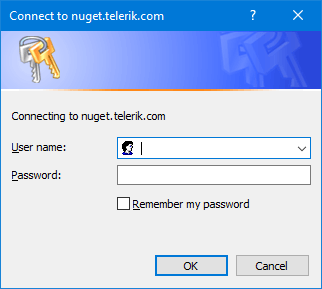
- When you try to connect to the server, your private Telerik credentials will be required. When the authentication procedure completes, you will be able to see and add all packages available for their license.
Happy coding!


